1.3 Core concepts: animation blending
Tutorial
Beginner
+10XP
40 mins
781
Unity Technologies
In this tutorial, you will:
- Review the core concepts for 3D animations systems in Unity
- Explore and configure a simple animation in Unity Editor
When you’ve finished, you’ll be ready to complete the rest of the Beginner 3D Animation course.
Languages available:
1. Overview
In this tutorial, you’ll explore the second of the two core concepts for creating an animation in Unity: animation blending. When you understand both core concepts, you’ll be able to apply your knowledge to all of Unity’s different animation features.
2. Before you begin
This tutorial uses the Introduction to 3D Animation Systems Unity project. If you haven't already done so, download this before continuing.
When you’ve downloaded the project:
1. Open the project in Unity Editor.
2. In the Project window, go to Assets > 1.3 - Core Concepts Animation Blending.
All the assets you need for this tutorial are located in this folder.
3. Introduction to animation blending
In 1.2: Animation systems core concepts: Animation data, you learned that the two parts of animation data (bindings and values) are stored on an Animation Clip. When you play more than one Animation Clip at the same time, Unity blends them together. The result of the blend is then applied to the bindings.
To blend Animation Clips, each animation has a relative weight. These weights are used to calculate how much influence each individual Animation Clip has on the final animation. This calculation can be done using various algorithms, the most common of which is a weighted average. This algorithm multiplies each of the values by their weight and adds them all together.
4. Adjust the weight of a sample animation
To understand how weighting applies to animation blending, let’s adjust the weight of a sample animation.
Open the CoreConcepts Scene
First, you need to open the CoreConcepts Scene. To do this:
1. In the Project window, go to Assets > 1.3 - Core Concepts Animation Blending > Scenes.
2. Double-click the CoreConcepts Scene to load it.
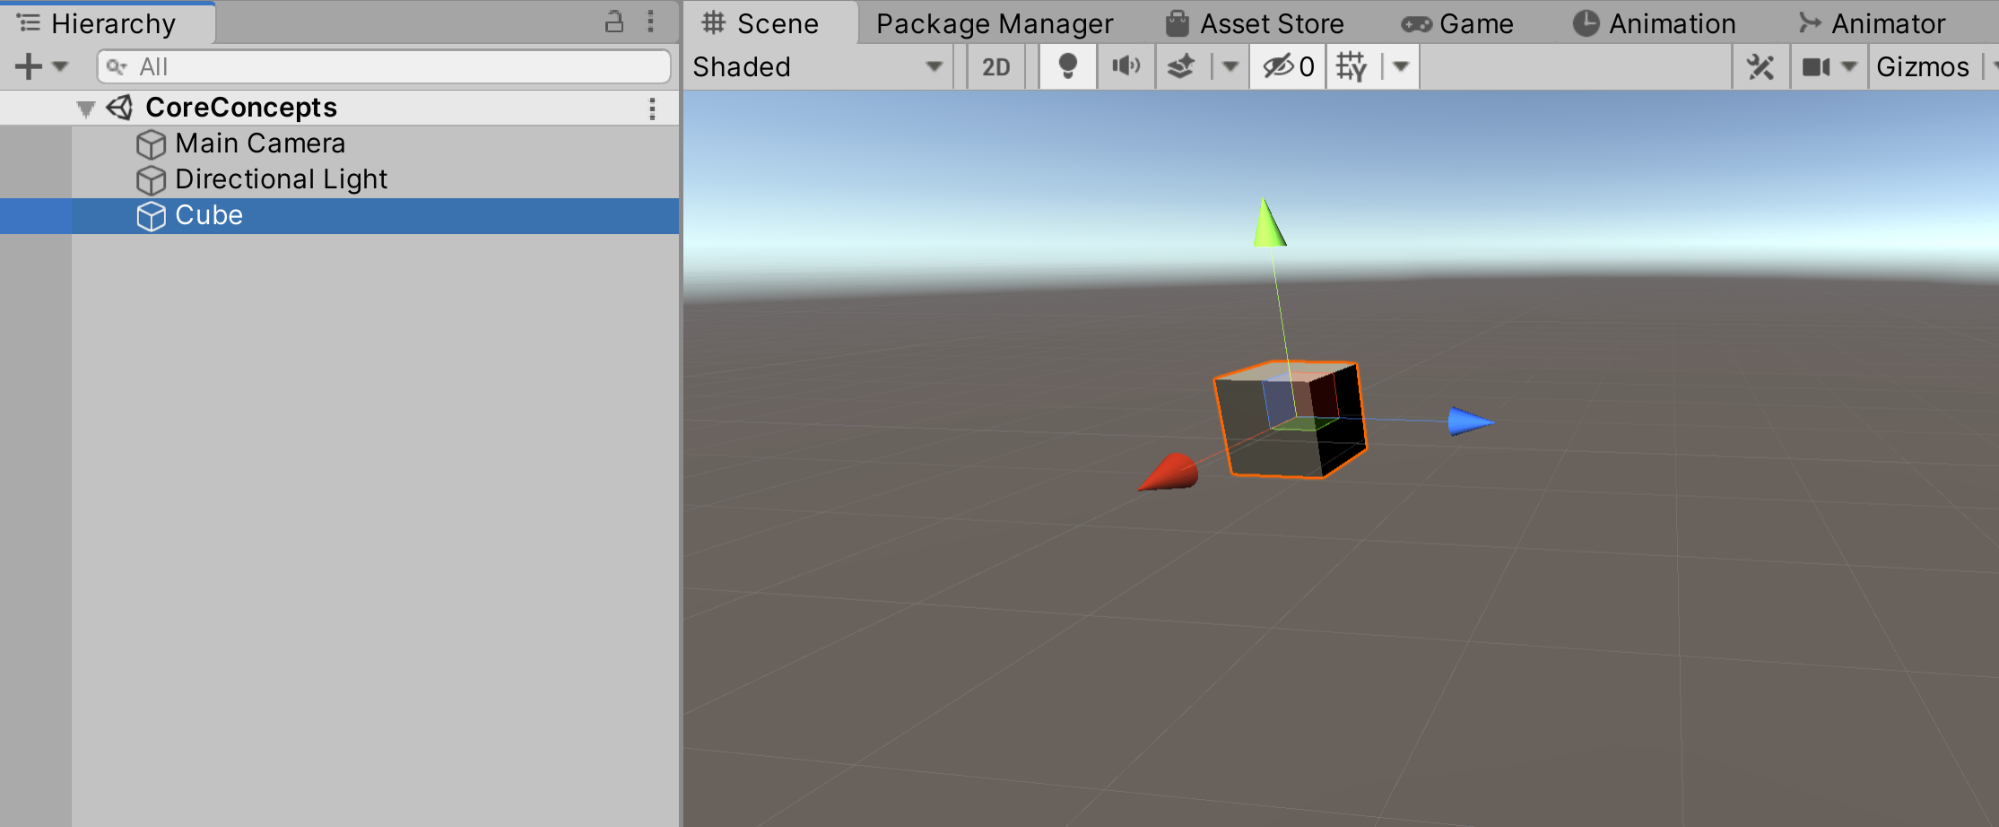
In this Scene, there’s an example animation where the Cube GameObject has two Animation Clips that move simultaneously. There is also a script that allows you to adjust the weight of these two Animation Clips.
Adjust the weights of the Animation Clips
To adjust the weight of the two Animation Clips:
1. Click on the Cube GameObject to select it.
2. In the Inspector, find the Blending Example component. The weight of the Circle animation is currently set to 1. The weight of the Square animation is set to 0.
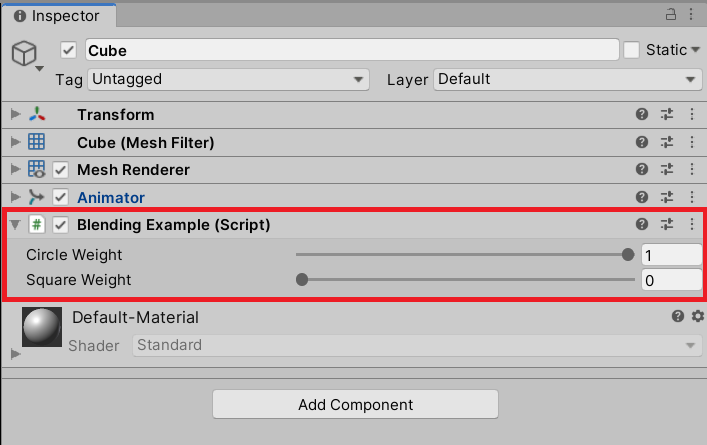
This means that when you play the Scene, the Cube will move in a circle in the Game view.
3. Press the Play button to enter Play Mode and play the animation in the Game view.
4. In the Inspector, adjust the Circle Weight to 0.
You’ll notice that as you change the weight of the Circle Animation Clip to 0, the weight of the Square Animation Clip changes to 1. You’ll also notice that the Cube GameObject starts moving in a square pattern instead of in a circle in the Game view, as the weight changes from the Circle animation to the Square.
5. Press the Play button again to exit Play Mode when you’ve finished.
Now that you’ve reviewed how Animation Clips are played through a GameObject, let’s explore how you can control animation blending using the Animator Controller.
5. The role of the Animator Controller
An Animator Controller is a way of controlling when an Animation Clip starts playing and how it’s blended with other Animation Clips. It’s an asset that combines all the Animation Clips that are played by a particular GameObject hierarchy, and assigns logic to control the animation playback.
For an Animation Clip to play, it must be referenced by an Animator Controller. The Animator Controller that references it must also be referenced by an Animator component in the Scene.
6. Explore an Animator Controller
In the example Scene, there’s an Animator component on the Cube GameObject. That Animator component is referencing the CubeController Animator Controller.
To open the example Animator Controller:
1. In the Project window, go to 1.3 - Core Concepts Animation Blending > AnimatorControllers and double-click on the CubeController.

2. Double-click the orange Blend Tree node, inside the CubeController.
The Blend Tree will open and you should see that it references both the Circle and Square Animation Clips. A Blend Tree is a state that combines multiple Animation Clips. You’ll explore these in more detail in 3.4: Creating and Configuring Blend Trees.
The Blend Tree controls how the weight you entered in the Hierarchy is assigned to the Animation Clips and how they are blended.
Animator Controllers: key information
The key things you need to know about Animator Controllers are:
- They are a collection of logical States, containing one or more Animation Clips.
- The Animator Controller takes a path between these States, evaluating the Animation Clip(s) in the State currently being played.
- The States are connected by Transitions, which blend the Animation Clips of the States they connect together.
7. Create an Animator Controller
Now you’ve seen how an Animator Controller looks in Unity, it’s time to make your own.
To create a new Animator Controller:
1. In the Project window, go to Assets > 1.3 - Core Concepts Animation Blending > AnimatorControllers.
2. Select Create > Animator Controller.
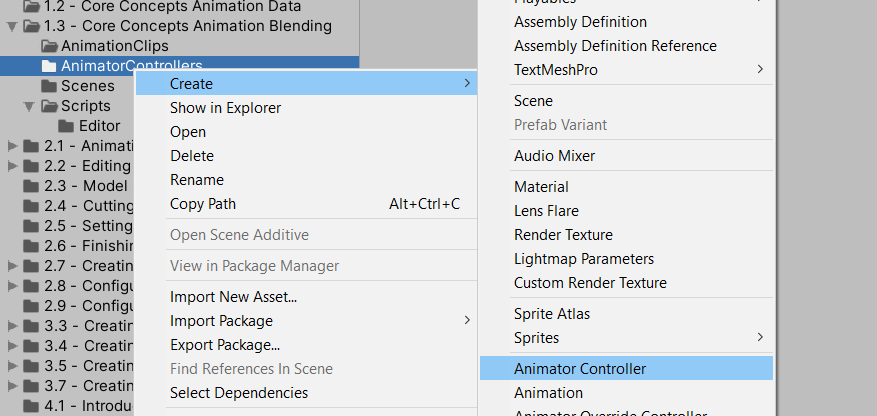
3. Name your new Animator Controller ExampleController. It will then automatically open in the Animator window.
You’ll notice there are default nodes in the new Animator Controller, but there aren’t any States yet. This means that ExampleController is currently unable to play any Animation Clips, as there are none available for it to play.
8. Add Animation Clips to ExampleController
For your new Animation Controller to play an animation, you first need to add Animation Clips. To do this:
1. In the Project window, go to 1.3 - Core Concepts Animation Blending > AnimationClips.

2. Drag and drop the Circle Animation Clip from the Project window onto the grid background of the Animator window.
3. Drag and drop the Square Animation Clip from the Project window onto the grid background of the Animator window.
You have now created two nodes in ExampleController, one for each of the example Animation Clips. These nodes are animation States, and contain the Animation Clips you added to the Animator Controller.
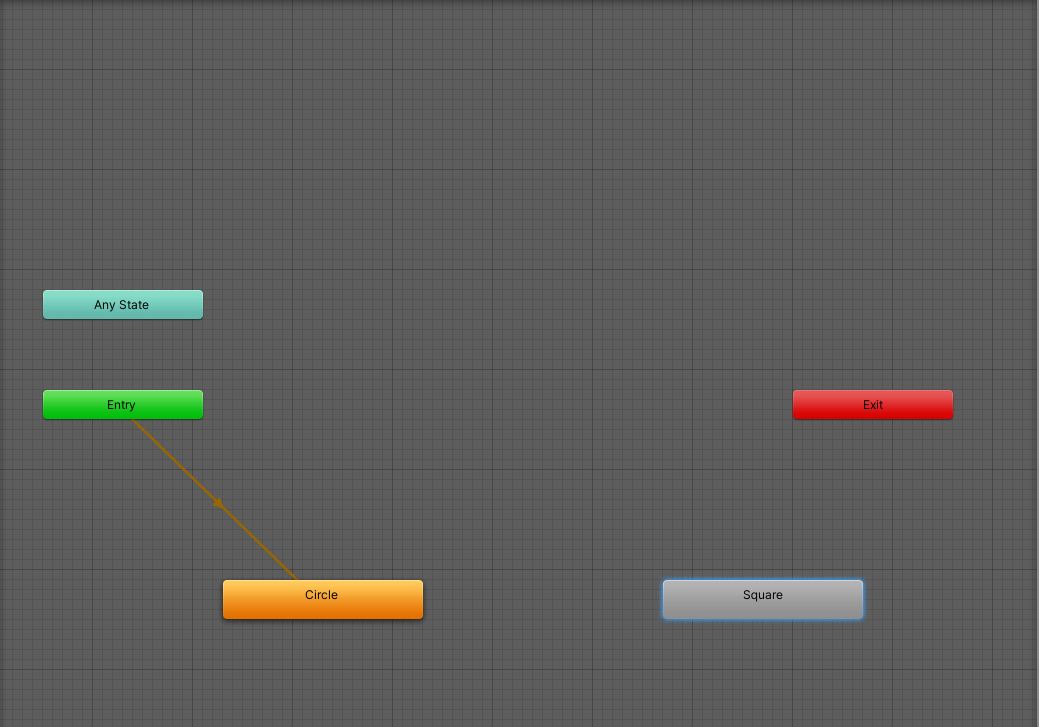
Notice that the Circle node is orange and the Square is grey. The orange node represents the default State and is connected to the node labelled Entry. This will be the first one to play when the Scene starts.
9. Create a new Transition
Now you’ve created an Animator Controller and added two Animation Clips, you need to create a Transition from one State to the other.
Introduction to Transitions
As it’s the default node, the Circle animation will play on any GameObject that uses this Animator Controller as soon as the Scene starts. However, as it is currently configured, there’s no way for the Animator Controller to play the Square animation. This is because there is no Transition between the two States containing the Animation Clips.
As with so many of the animation tools and systems, Transitions are used to blend two animations together. They blend the animation they start from into the animation they end with.
Create a Transition
To create a new Transition:
1. Right-click on the Circle State to bring up the context menu.
2. Select Make Transition.
3. Select the Square State to assign the Transition to that animation.
You will now see an arrow pointing from the Circle State to the Square State. This means that the animation execution can move from playing the Circle Animation Clip to the Square Animation Clip.
10. Configure the Transition settings
Now that you’ve linked the Circle and Square animations with a Transition, you need to configure when in the animation the Transition will happen.
To do this, you need to change some settings.
Exit Time
To set the Exit time:
1. In the Animator window, select the Transition you created. Its settings will appear in the Inspector.
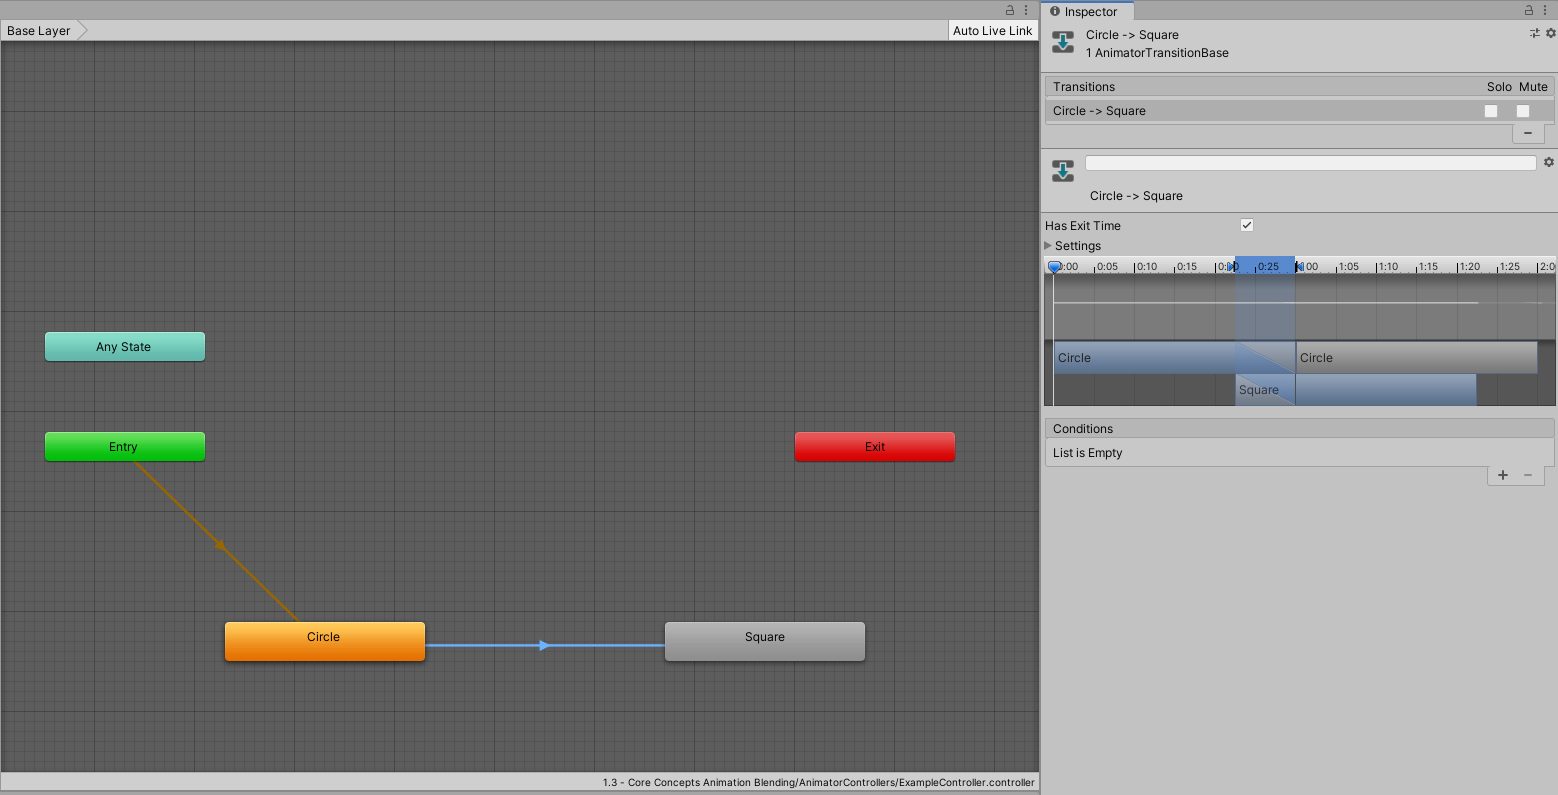
2. Expand the Settings foldout.
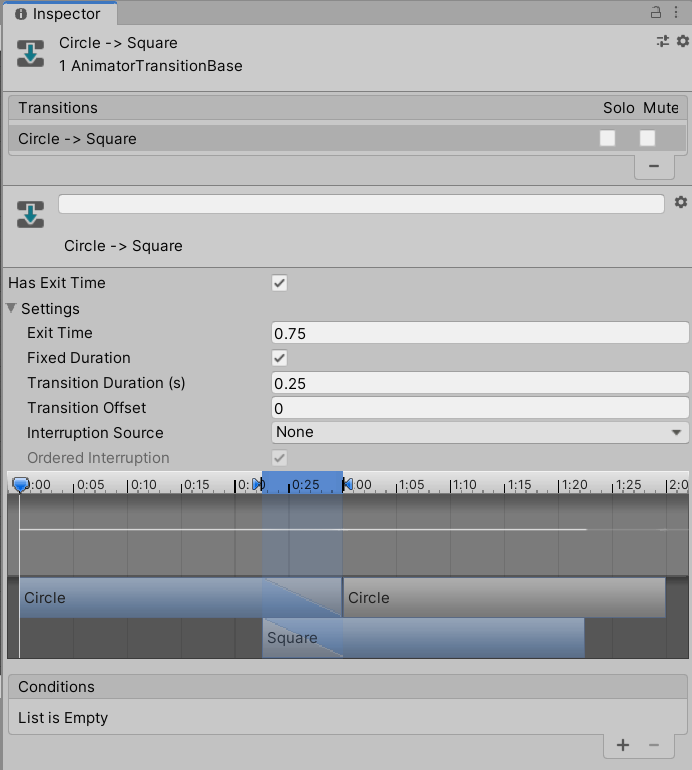
You should be able to see that the Exit Time is currently set to 0.75. This means that the Transition will start when the Circle State has played 75% of the Circle Animation Clip.
It would be more satisfying to see at least one revolution before the Transition starts. To do this, you need to change it to any value over 1.
3. Change Exit Time to 1.5.
Now the Circle Animation Clip will play one and a half times before the Transition starts.
Transition timings
You want the animations you’re blending to do so smoothly, so it’s important for the animations to be in phase like they were when you were manually adjusting the weights of the Circle and Square Animation Clips.
When a Transition starts, the State that is being transitioned to will begin playing its Animation Clip. In this case, the Circle Animation Clip will be halfway through when the Transition starts. To ensure that the Animation Clips are in phase, the Square Animation Clip should begin at its halfway point too.
To configure the Transition timings:
1. Change the Transition Offset to 0.5. This will start the Square Animation Clip at its halfway point.
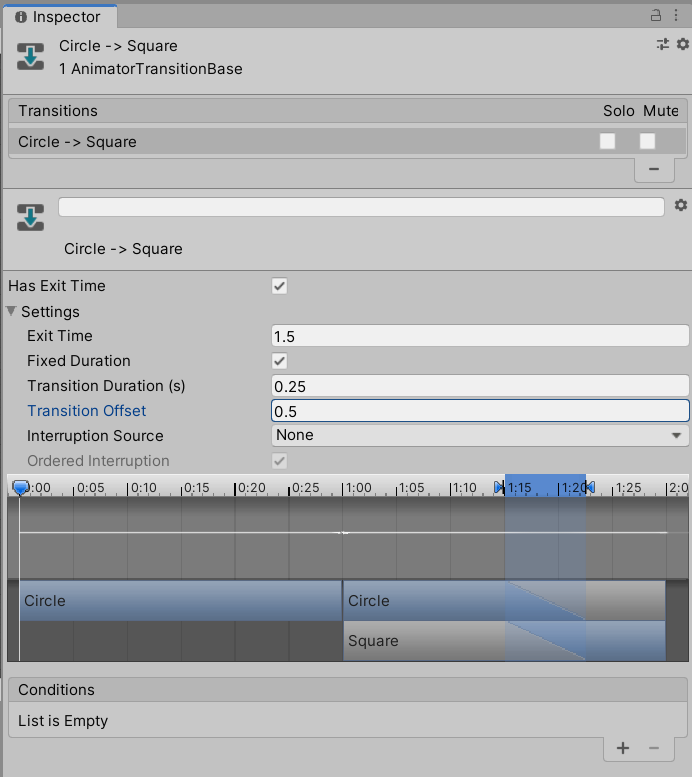
2. Change the Transition Duration to 2. This will make the Transition blend more gradual.
Now, the Transition will take two seconds to complete. Your final Transition settings should look like this:
11. Review your adjusted animation
Before you can see the final result, you need to make sure the Cube GameObject is playing the Animator Controller you’ve just created.
To do this:
1. In the Hierarchy, select the Cube GameObject.
2. In the Project window, make sure you’re in 1.3 - Core Concepts Animation Blending > AnimatorControllers.
3. Drag and drop the ExampleController onto the Controller property of the Animator component in the Inspector.
4. Find the Blending Example component. Click on the context menu and select Remove Component.
5. Press the Play button to see your new Animator Controller working in the Game view.
12. Summary
In this introduction, you’ve learned about some of the basic core concepts of animation systems in Unity. You explored how animation data is structured, played through a GameObject and blended.
Many of the topics required to fully understand animation systems in Unity are interlinked. The important thing to remember is that almost every tool and system is a way of getting, setting or manipulating animation data, or controlling how animations are blended together.
In the next learning project, you’ll explore the Animation window in more detail and learn how it can be used to examine and edit Animation Clips.
You’ll learn more about Animator Controllers, Blend Trees and the Animator component as you progress through this course.