
2.2 Editing Animation Clips
Tutorial
Beginner
+10XP
50 mins
(464)
Unity Technologies
In this tutorial, you will create and edit simple Animation Clips in Unity Editor
Languages available:
1. Overview
In 2.1: Animation window: features and settings, you reviewed the various functions and features of the Animation window. In this tutorial, you will create and edit Animation Clips in the window yourself.
2. Before you begin
This tutorial uses the Introduction to 3D Animation Systems Unity project. If you haven't already done so, download this before continuing.
When you’ve downloaded the project:
1. Open the project in Unity Editor.
2. In the Project window, go to Assets > 2.2 - Editing Animation Clips > Scenes and double-click StreetLampExample to open the Scene.
3. Recap: Data on Animation Clips
The Animation data stored on Animation Clips exists in two parts: bindings and values.
Before you begin this tutorial, let’s recap the key information about this data:
- Bindings indicate which field of a GameObject or Component should be changed during the animation playback.
- Values indicate what the field should be changed to at a given time. Typically, these values are a float (fractional value) that changes over time and are represented as a curve.
The Animation window (which is not the same as the Animator window) shows the bindings and values associated with an Animation Clip. You can use the Animation window to edit both the bindings and values of an Animation Clip.
4. Add a binding to the LightFlicker Animation Clip
You can use a binding to make a wide range of changes to an Animation Clip. Let’s explore this process by changing the color of the Light in the LightFlicker Animation Clip.
To add a new binding to the LightFlicker Animation Clip:
1. In the top menu, go to Window > Animation > Animation and dock it next to the Asset Store window.
2. In the Hierarchy, select the StreetLamp GameObject. You will see the LightFlicker Animation Clip in the Animation window.
3. In the Animation window, click the Add Property button to add a new binding.
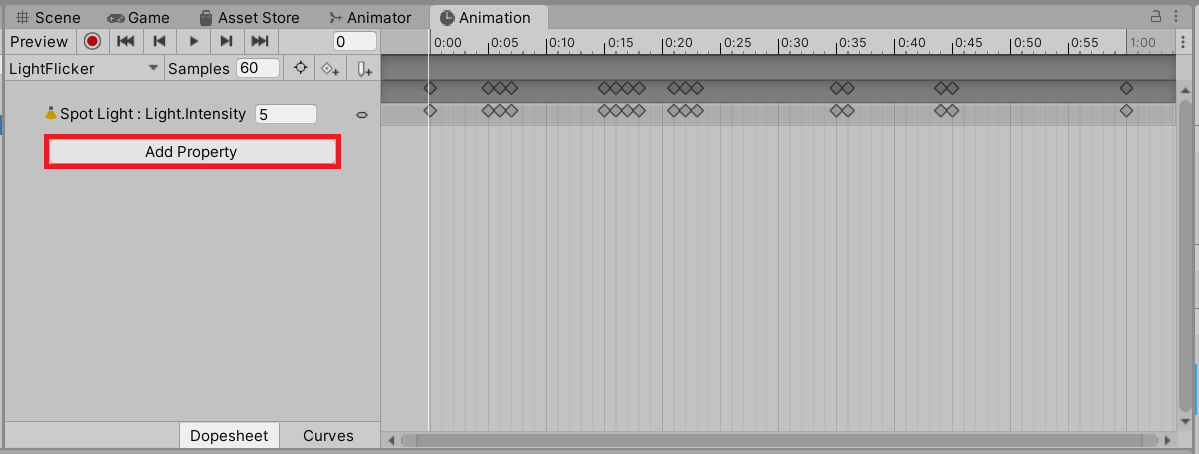
This will bring up a selection popup with a range of foldouts you can expand.
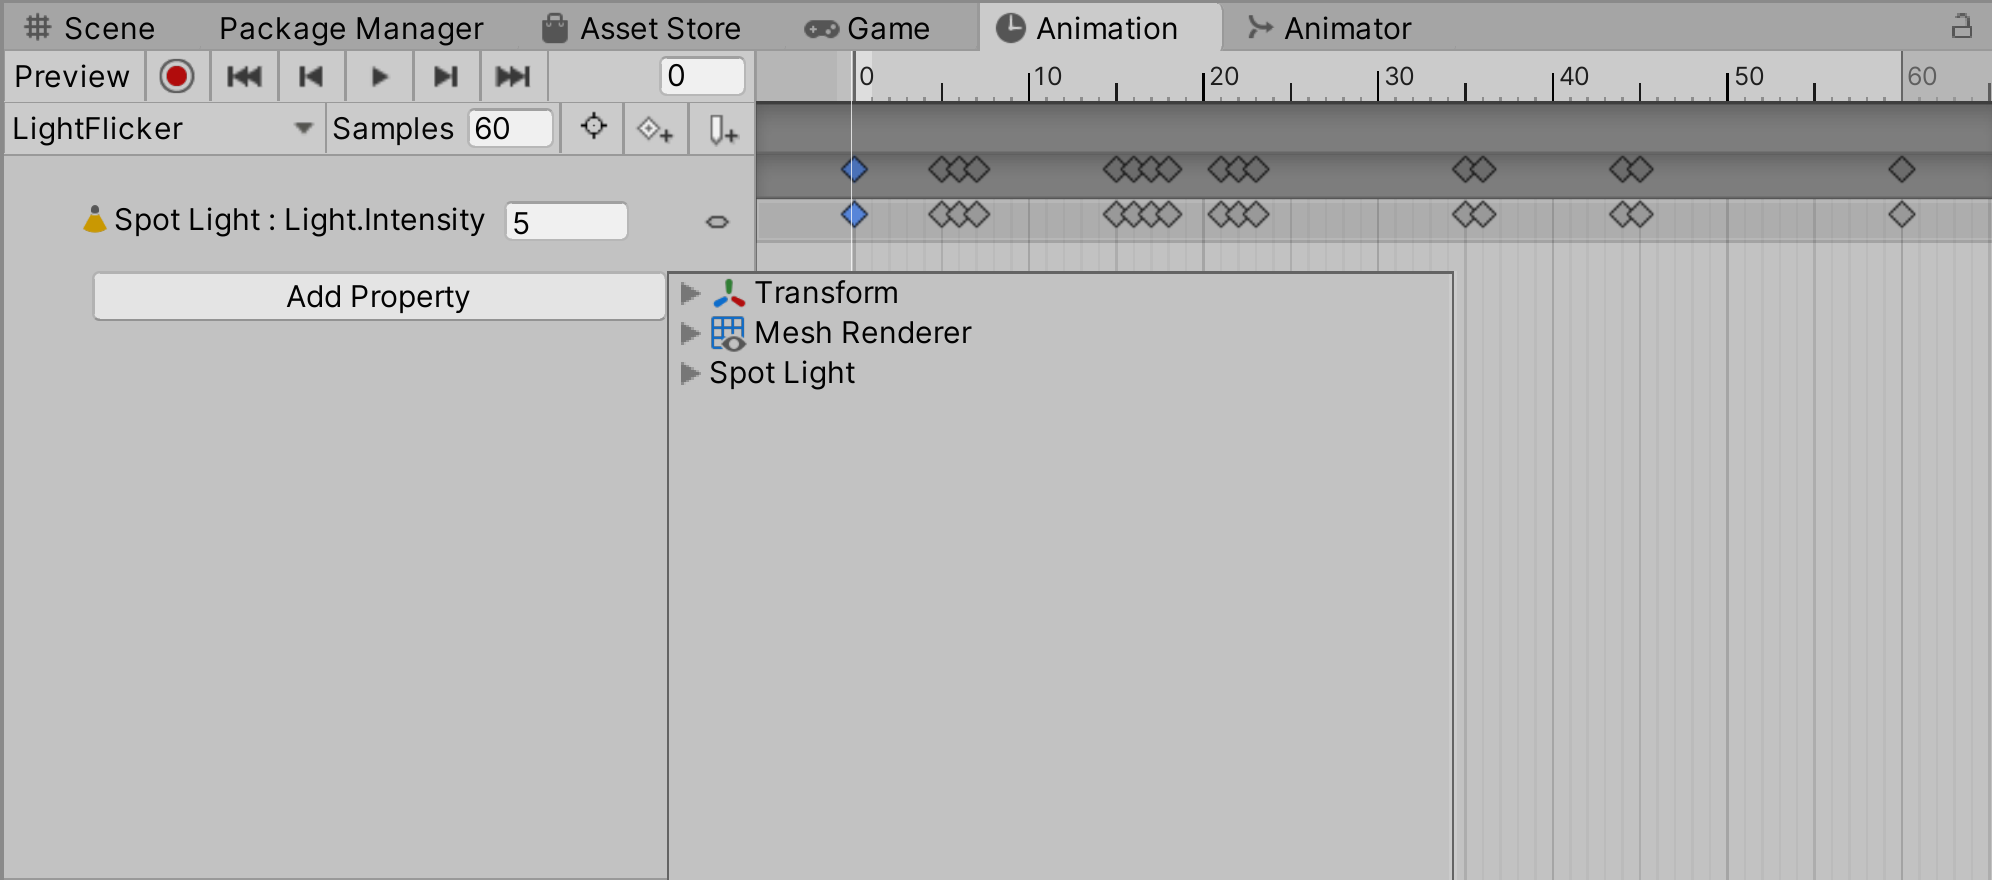
There is one foldout for each component on the GameObject. Below that, there is a foldout for each child GameObject.
4. Expand the Spot Light child GameObject foldout, and then the Light foldout. This will reveal the properties of the Light component that you can add as a binding to the Animation Clip.
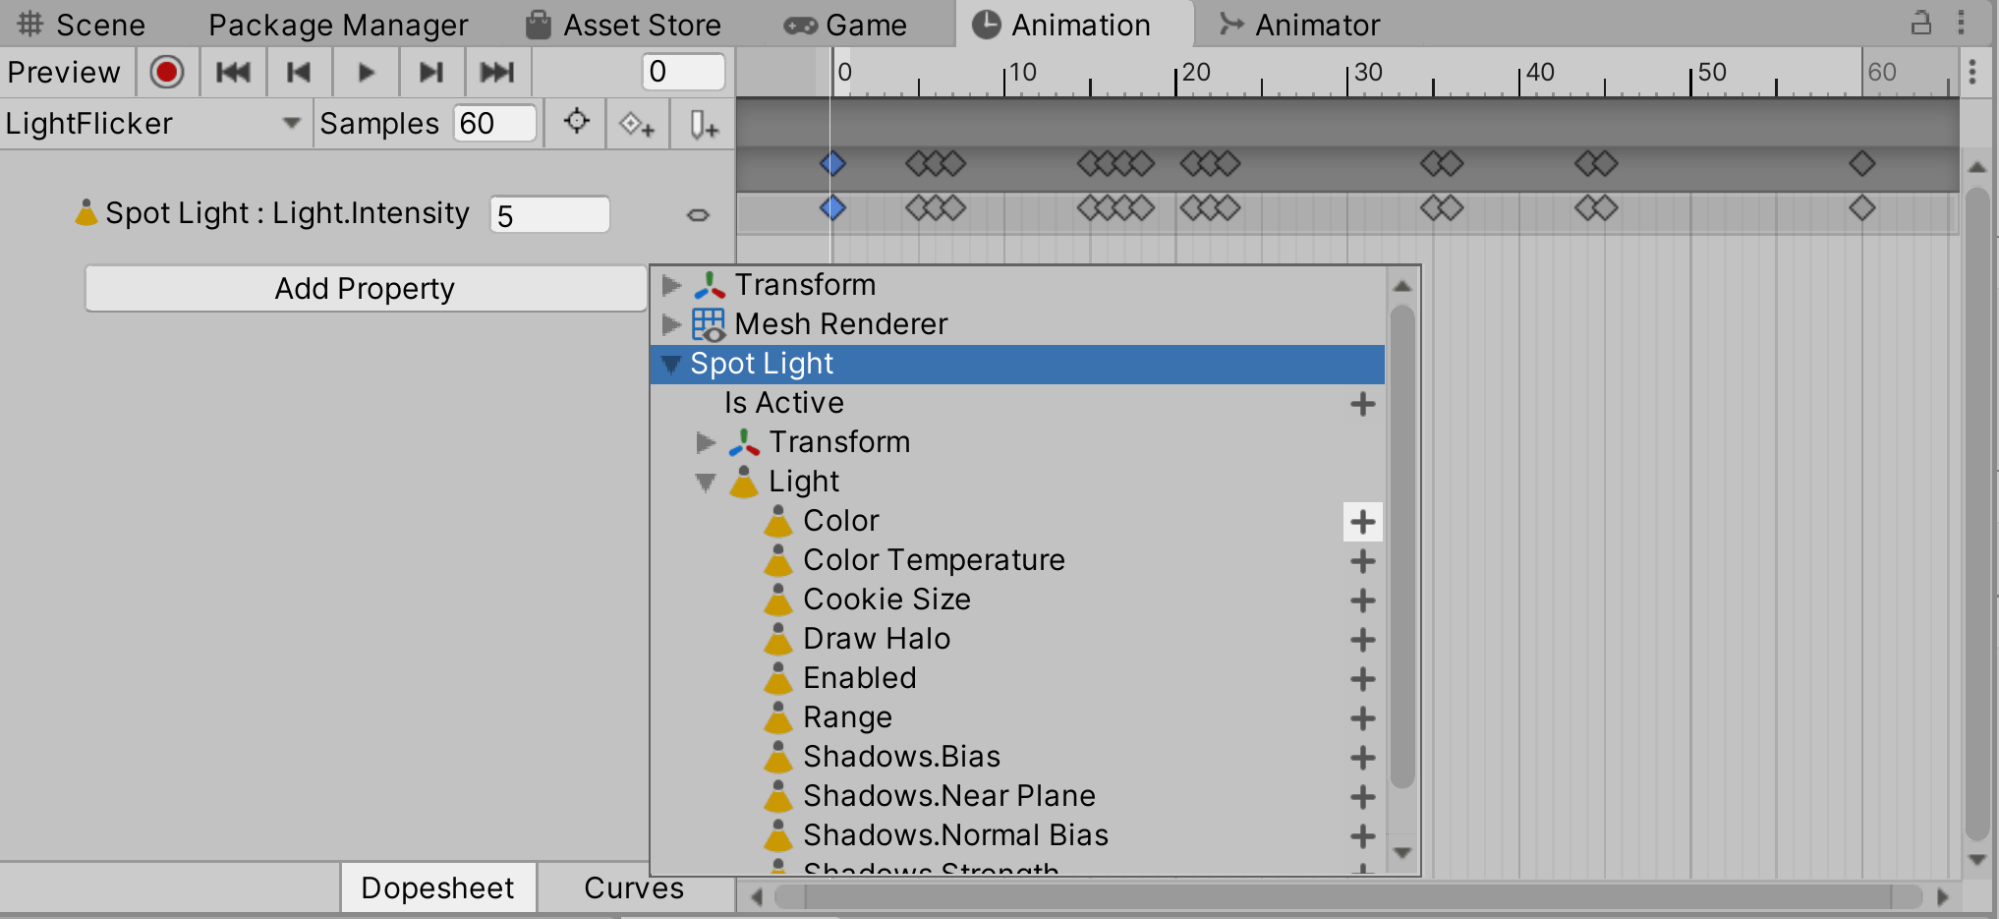
5. Select the Add (+) button to the right of the Color property to add it as a binding.
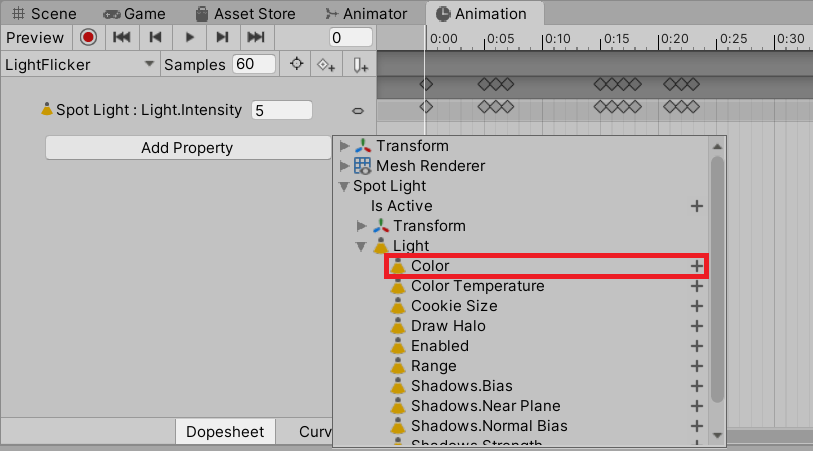
Inside each of the child GameObject foldouts, there are foldouts for each attached component (just like parent GameObjects). However, in the foldouts for child GameObjects there’s an Is Active property, which is not found in the root GameObject. This is to stop the root GameObject being disabled, as doing this would disable the Animator component and cause a range of problems.
5. Editing the values of Animation Curves
Once you’ve added a binding, it will have an Animation Curve with two keyframes on it: one at the beginning of the Animation Clip and one at the end.
When you added color to the Light in the previous step, this added four Animation Curves, each with their own binding. There is one Animation Curve and binding each for the R, G, B, and A channels.
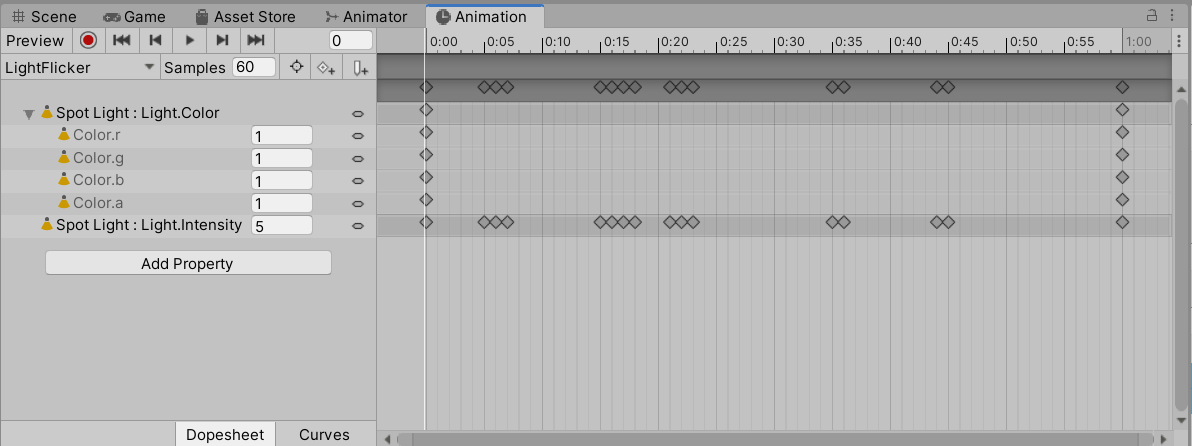
Dopesheet mode shows all of the keyframes for all of the Animation Clip’s curves.
Curves mode shows Animation Curves for each of the bindings. However, since all the newly created Animation Curves have a value of 1 throughout, they will appear to be just a single line.
Both of the keyframes for each of the new bindings will have the same value. This value relates to the value the property currently has in the Scene.
This step outlines the process for editing the values of Animation Curves. In the next step, you’ll have the opportunity to edit the Animation Curves you added to the Light in the previous step.
To manually change the value of an Animation Curve:
1. Find the value of a Curve at the Playhead’s current time, located to the right of its Binding (before the colour indicating the Curve that represents the binding).
2. Change this number to the value you want. When you change this number, the value of the current keyframe will change.
If there’s no keyframe at the Playhead’s current time, a new one will be created and given that value.
Alternatively, while in Curves mode you can edit keyframe values directly on the Animation Curves using one of the following techniques:
- Click and drag a keyframe to change its time and value.
- Right-click on a keyframe and select Edit Key.
6. Edit the values of your new Animation Curves
Now that you know how to edit Animation Curves, it’s time to make some changes to the Animation Curves you created for the Light’s color. Play around with the values and evaluate how the changes you make affect the animation.
Here are some guidelines for the changes you should make:
- You don’t need to edit all four of the color Animation Curves.
- You should edit at least one of the color Animation Curves.
- The Animation Curves you edit should have at least three Keyframes.
- There should be Keyframes for all four of the color Animation Curves, at 0:00 and 1:00.
- You shouldn’t change any other part of the Animation Clip (such as its duration, for example).
7. Review the keyframe settings
Next, let’s review keyframes settings. This is best done with your Animation window in Curves mode.
The value of an Animation Curve at any given time is the interpolation between the previous and next Keyframe. The exact value of this interpolation is calculated using the tangents of the Keyframes.
Each Keyframe has two tangents:
- An in-tangent (on the left)
- An out-tangent (on the right)
The exceptions to this are the first and last keyframes: the in- and out-tangents of the first and last Keyframes are connected to each other for the purposes of editing looped animation. You can set the tangents at any angle and can adjust them by dragging the handles.
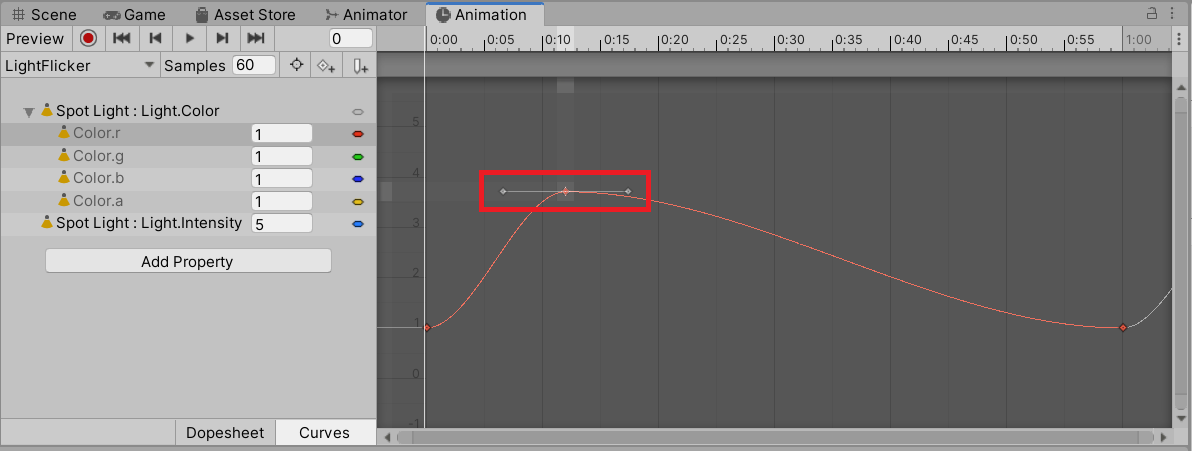
Keyframe preset settings
There are a number of presets in Unity that make getting the Animation Curve you want a little easier. To view the preset options, right-click on a keyframe you want to edit. You will see the following options which you can toggle on or off:
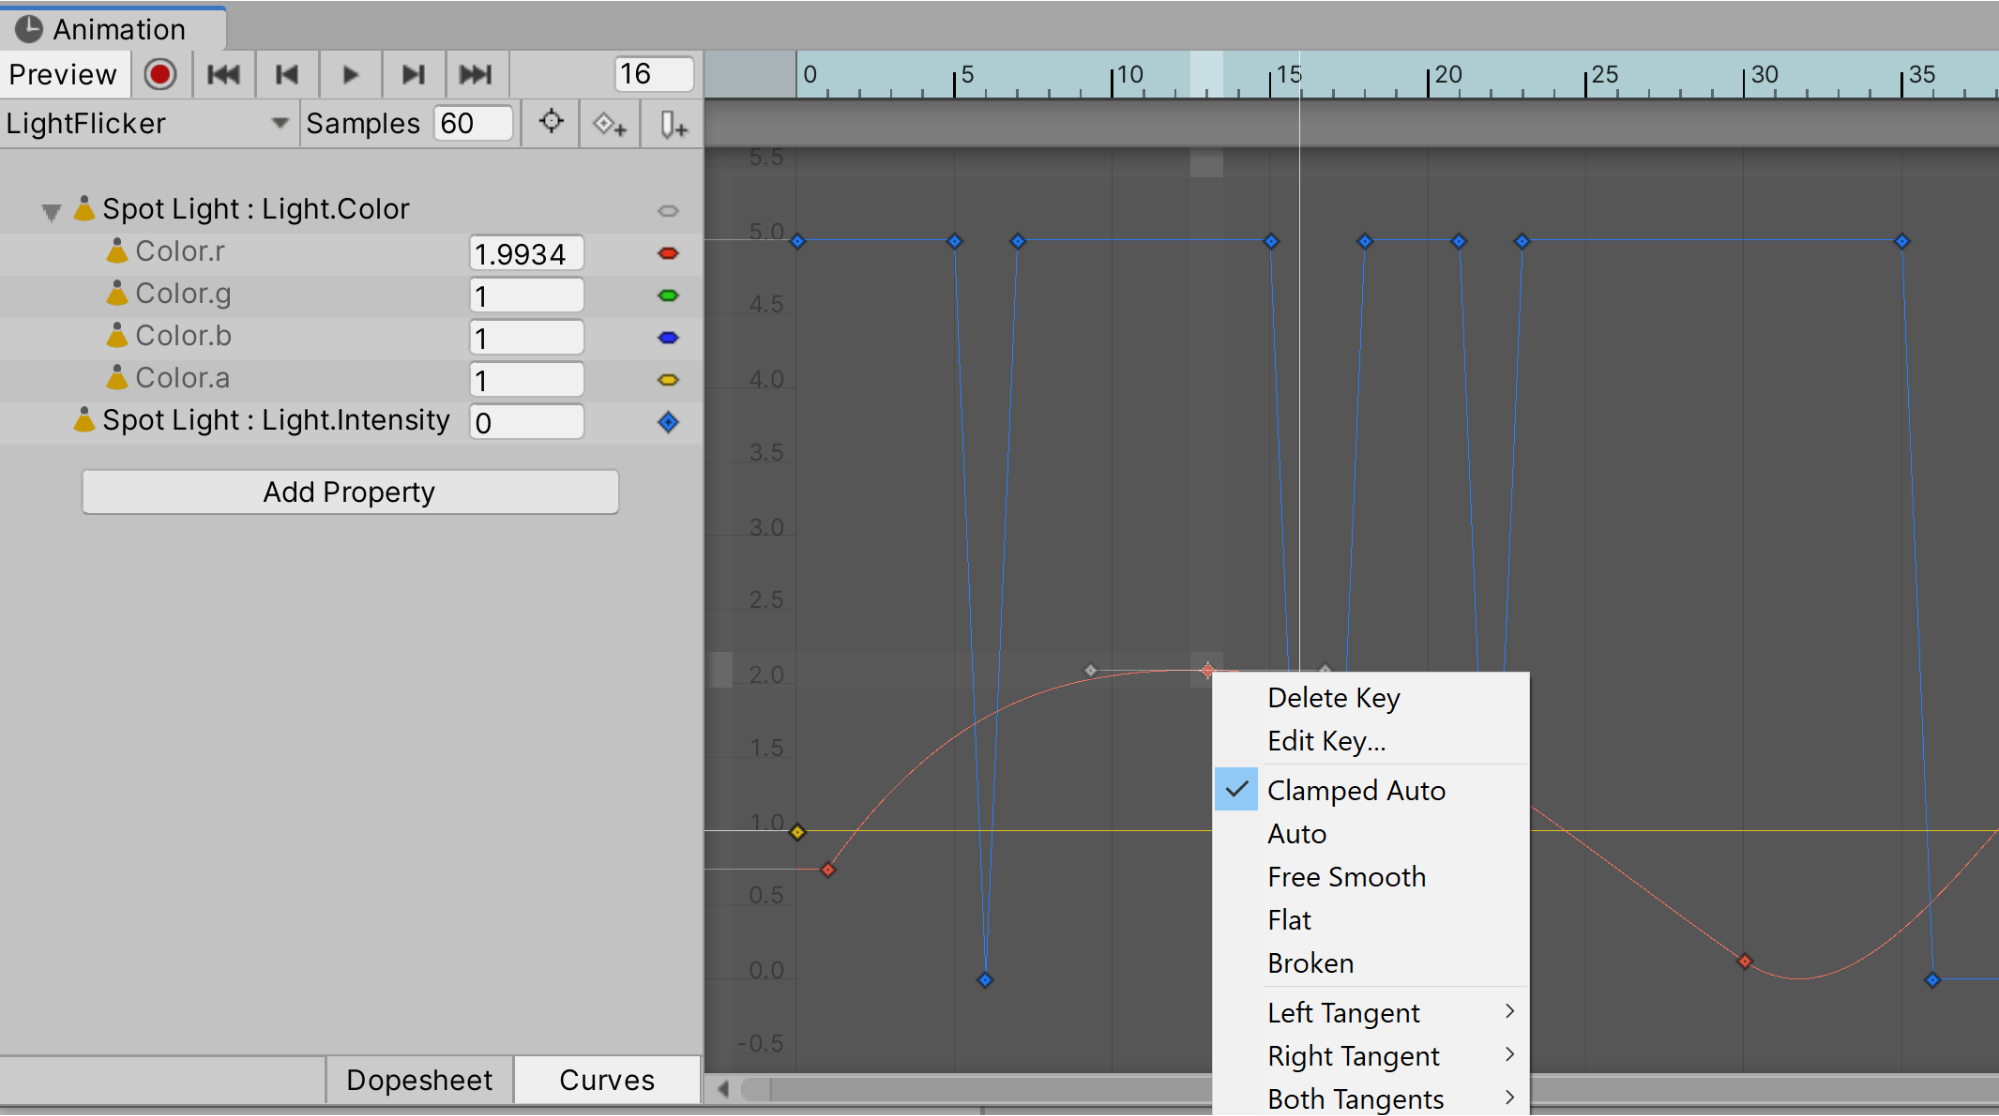
- Clamped Auto: This means the Animation Curve will not go beyond the value of the keyframe and will smoothly approach it.
- Auto: This is a legacy setting. Unless you’re dealing with Animation Clips created in Unity 3.x, use Clamped Auto instead.
- Free Smooth: This setting is the best way to get a smooth Curve.
- Flat: This is a variation of Free Smooth where the tangents are exactly horizontal.
- Broken: This means the left and right tangents are not parallel and point in independent directions.
- Free: This is the usual option for Broken tangents.
- Linear: This is a variation of Broken that means the tangents will attempt to create a straight line as the Animation Curve approaches the keyframe. If neighbouring tangents are both linear, the Animation Curve will be a straight line between the keyframes.
- Constant: This is a variation of Broken where the Animation Curve has a value equal to the previous keyframe until the next keyframe, at which point it takes the value of that keyframe.
- Weighted: You can apply this setting in addition to any other setting. It allows the length of the tangents to be adjusted, giving you more control over the Animation Curves. This is an advanced level setting.
By default, most newly created keyframes are set to either Clamped Auto or Free Smooth. A new keyframe will be set to Clamped Auto if it’s on a flat Animation Curve, and Free Smooth if it’s on a gradient.
For more details on the keyframe settings, review the Unity Manual.
8. Creating animations using Record Mode
A potentially more intuitive way to create animations is to use Record Mode.
When Record Mode is on, any changes you make to any part of the hierarchy of the animated GameObject will be recorded in the Animation window at the Playhead’s current time.
This allows you to work like a stop-motion animator by changing some values at a given time, then moving the Playhead on slightly and changing those values. You can repeat this to create a full animation.
In the rest of this tutorial, you’ll practice more advanced animation editing techniques on a bouncing ball animation, but you can also try this method to make small changes if you like.
9. Manipulating multiple keyframes at once
Sometimes, when you’re editing Keyframes, you’ll need to move multiple Keyframes at once. This can be done in a number of different ways depending on what you want to do to the Keyframes.
Keyframe selection is the same whether you’re in Dopesheet or Curves mode, but manipulating the selection is different in each mode.
Dopesheet mode
In Dopesheet mode, the vertical axis doesn’t represent a change in value. Clicking and dragging the selection box will only move the Keyframes in time along the horizontal axis.
You can also drag the blue bar either side of the selection box to ‘scale’ the selection box horizontally, moving the Keyframes closer together or further apart.
Be careful, though. Moving keyframes in this way raises the problem of how the keyframes will change after the selection. Should they stay where they are or move with the change in the selected keyframes?
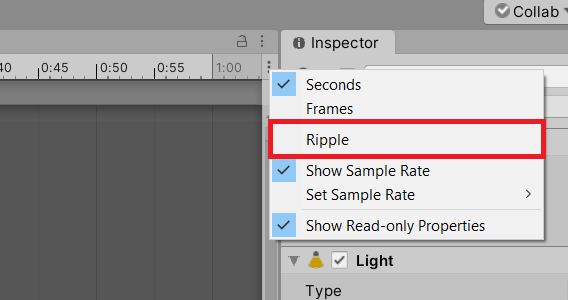
Ripple editing
If the keyframes should move with the change, then this is a ripple edit. This is because the change you make has a ripple effect.
To turn on ripple editing temporarily, hold the R key. To enable it for longer periods of time , go to the contextual menu and select Ripple.
Curves mode
These advanced features for editing keyframes in Dopesheet mode are also available in Curves mode.
In Curves mode, the vertical axis represents value, so vertical movement and scaling is also supported (unlike in Dopesheet mode).
Since the selection box can be manipulated on both axes, it can be difficult to move the selected keyframes on just one axis.
To make this easier, there are manipulation bars to the top and the right of the selection box so you can allow drag along one axis.
10. Edit a bouncing ball animation
Now, try applying your understanding of the principles of editing Animation Clips to change the bouncing ball animation.
Your challenge is to use the techniques you have just learned to add another bounce to the ball. To do this:
1. In the Project window, go to 2.2 - Editing Animation Clips > Scenes and double-click BallExample to open the Scene.
2. In the Hierarchy, select the Ball GameObject.
3. In the Animation window, select either Dopesheet or Curves mode.
4. Click and drag a selection box over the keyframes you want to select.
5. If you want to add or remove keyframes, hold Shift and click on the keyframe you want to add or remove. This will either select it (if it is currently unselected) or remove it from your selected keyframes.
6. Press Ctrl + C (Windows) or Cmd + C (macOS) to copy your selection.
7. Move the playhead to the time you want to move your keyframes to.
8. Press Ctrl + V (Windows) or Cmd + V (macOS) to paste them at the new time.
Note that the video below only shows you the technique. You will need to decide on the keyframes to copy and paste to get the desired result.
9. Save your changes and test in Play Mode.
11. Summary
In this tutorial, you have:
- Added new bindings to an Animation Clips
- Edited the values of Animation Curves.
- Explored the difference between doing so in Dopesheet and Curves mode
- Manipulated the values of an existing Animation Clip, to understand how all this affects your resulting animation.
In the next tutorial, you’ll learn about model-specific animation and review the animation import settings.