2.3 Model-specific animation import settings
Tutorial
Beginner
+10XP
20 mins
416
Unity Technologies
In this tutorial, you’ll:
- Explore the basics of model-specific animation
- Review a range of animation import settings
When you’ve finished, you’ll be ready to cut an imported Animation Clip.
Languages available:
1. Overview
In this tutorial, you’ll learn about the basics of model-specific animation and review a range of animation import settings.
When models are imported from digital content creation (DCC) programs, they have animation settings that are split into two sections:
- Model-specific settings, which affect all animations imported with that model.
- Animation-specific settings, which affect individual animations imported with that model.
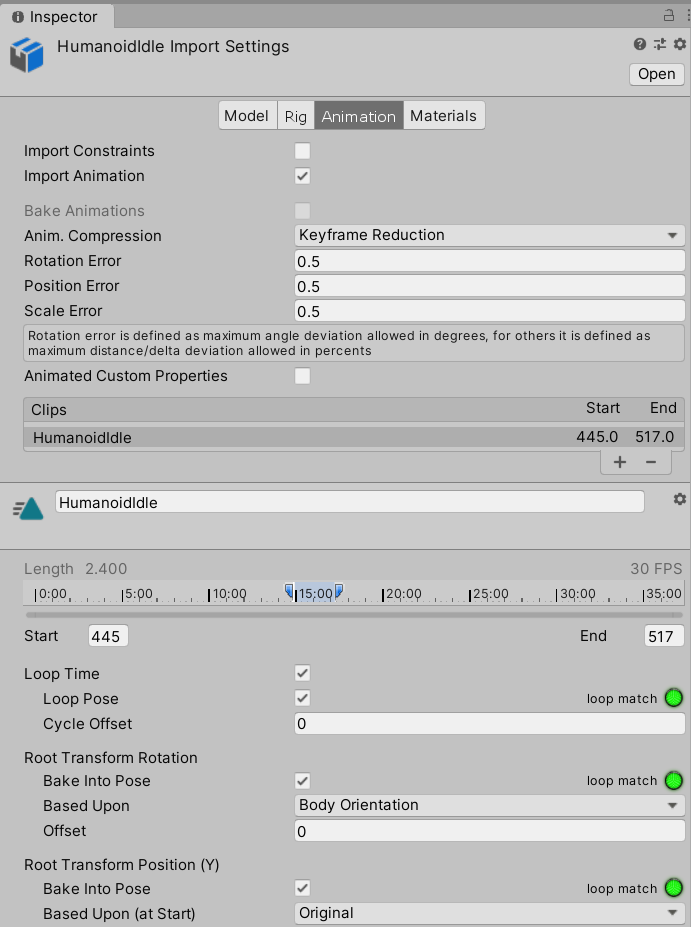
You can find all the settings reviewed in this tutorial in the Animation tab in the Inspector when a model is selected.
2. Before you begin
This tutorial uses the Introduction to 3D Animation Systems Unity project. If you haven't already done so, download this before continuing.
When you’ve downloaded the project:
1. Open the project in Unity Editor.
2. In the Project window, go to Assets > 2.3 Model specific animation import settings.
3. Select the HumanoidIdle model.
You’ll be able to review the settings in the Animation tab in the Inspector.
3. The fundamentals of model animation
Models in Unity are represented by a Mesh of triangles. When you want to animate a model, the Mesh must be deformed so that its triangles change position and shape.
Models can contain too many triangles for each of them to be moved individually. The higher the definition of a model, the greater the number of triangles. Instead of moving each triangle individually during animation, models are skinned before they are animated.
Skinning gives each of the vertices making up the triangles a dependence on a ‘bone’. This bone is then moved using animation data and the associated vertices work out where they should be based on the bone’s position and rotation.
Bone hierarchies and the way they affect meshes are part of Rigs. For more information about Rigs, review 2.8 Configuring Generic Rigs.
In Unity, bones are represented by Transforms. You’ll learn about two types of Transforms in this tutorial:
- Forward kinematics
- Inverse kinematics
Forward kinematics
Transforms have a hierarchical structure. This means that child Transforms move relative to their parents. The same is true of bones.
For example, a hand bone’s position would depend on a lower arm bone’s position. That, in turn, would depend on an upper arm bone’s position, and so on.
This dependency is known as forward kinematics (FK), and is commonly used for animation as you can set the position and rotation properties as you wish, in order to get the desired overall animation.
Inverse kinematics
Another technique for animation is called inverse kinematics (IK). This is where the end of a chain of bones has its position or rotation set, and then the positions and rotations of bones further up the chain are set via an algorithm to accommodate the end bone’s position and rotation.
Inverse kinematics can be used to author animations in DCC software, which can then be imported into Unity. It can also be used for runtime animation in Unity.
Understanding these fundamentals will help you understand the different settings available when you import model animations into Unity.
4. Importing constraints and animations
The first two settings in the Animation tab are:
- Import Constraints
- Import Animation
These settings determine whether constraints and animations associated with the model should be imported or not.
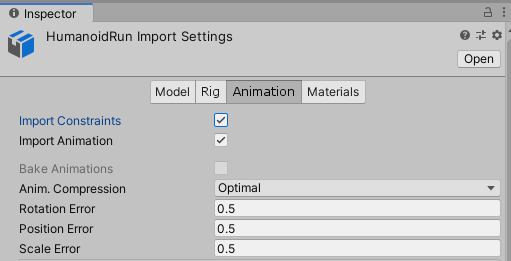
Constraints are limits on the motion of joints. If you choose to import them, they can be part of instantiated models. If you choose not to import animations, there will be no more settings to configure and no Animation Clips will be generated.
5. Baking animations
The next setting in the Animation tab is Bake Animations. This determines whether animations imported as inverse kinematics (IK) or simulation data should be converted into forward kinematics (FK) through a process called baking.
Animation Clips store their data in an FK format, which means that models that are imported with IK data should be baked to convert the data from IK to FK.
You can enable the Bake Animations setting if two criteria are met:
- The imported animation was created in either Maya, 3DS Max or Cinema 4D.
- The animation is imported as IK or simulation data.
6. Resampling Animation Curves
The next setting is Resample Curves. This option is only available for models with generic rigs, as humanoid rigs are automatically resampled.
This setting determines whether animations imported with euler angles for their rotations should have these converted to quaternion angles instead.
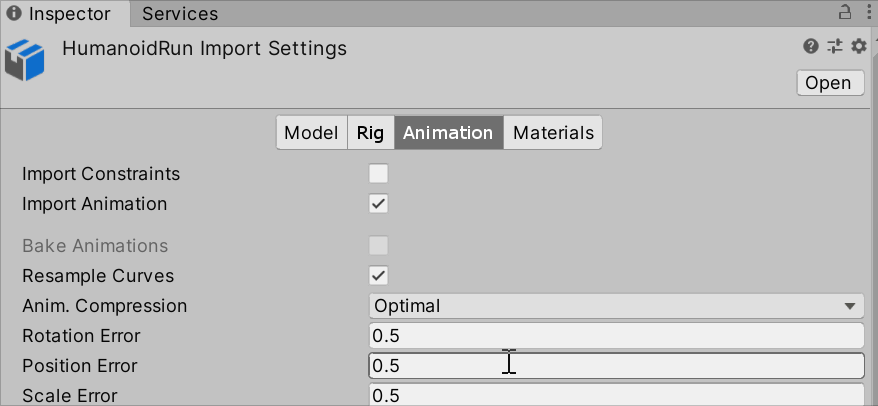
As a general rule, you should resample all animations that are imported with euler angles. The only exception is if you’re having trouble with the conversion, for example if an animation makes a rotation greater than 180 degrees between frames.
7. Optimizing the animation size
The Animation Compression setting refers to how the animation’s size, both on disk and in memory, can be reduced by making approximations from the original imported file. You can select from the following options:
- Off: Displays the animation exactly as it was created with no approximations.
- Keyframe Reduction: Some Keyframes with similar values will be removed to reduce the amount of memory the Animation Clip takes up at runtime. This will also affect the resulting animation. If you select this setting, you’ll get additional options for the amount of error allowed in the reduction.
- Optimal: This will make the animation size as small as possible given the chosen settings for error.
Optimal setting
If you choose the Optimal setting, Unity will first attempt to use Keyframe Reduction. If there is a high frequency of changes in Animation Curve values, then Keyframe Reduction won’t reduce the size by much.
In this case, a simplified representation of the Animation Clip is used with linear interpolation between the value at each frame. This will result in the smallest Animation Clip size and will affect the appearance of the animation.
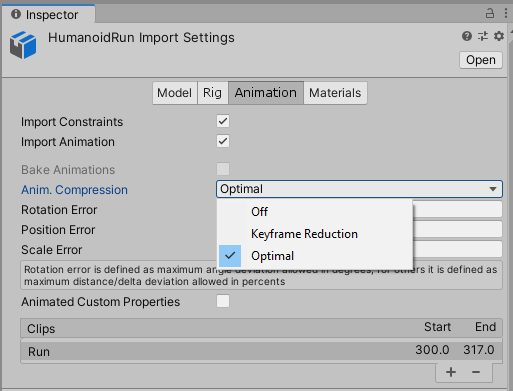
When deciding whether or not to remove a Keyframe as part of the Keyframe Reduction setting, Unity assesses the position and scale values at the time of a particular Keyframe. It does this to find out whether the removal of the Keyframe will impact the Animation Curve within a particular margin of error. If the Keyframe is outside of the margin of error, it will not be removed.
The default margin of error is 0.5%. This means that the evaluation of the position and scale values at the Keyframe’s time must be between 100.5% and 99.5% of the surrounding Keyframe values for it to be removed by the compression process.
If there are very large values for positions and scales, Keyframes are more likely to be removed.
The process is similar for rotation curves using the Rotation Error, but instead a quaternion is evaluated.
8. Configuring custom properties
The final general setting is Animated Custom Properties. This is an advanced setting for importing additional properties that were animated in the DCC package used to create the model.
9. Summary
In this tutorial, you have explored:
- The fundamentals of model animation, including skinning.
- The two different types of Transform used for model animation: forward kinematics (FK) and inverse kinematics (IK).
- The model-specific settings required to import animations from digital content creation (DCC) software into Unity.
In the next tutorial, you’ll explore the animation-specific settings used to cut an imported Animation Clip.