
2.5 Setting the Root Motion of imported Animation Clips
Tutorial
Beginner
+10XP
45 mins
(361)
Unity Technologies
In this tutorial, you’ll:
- Explore the basic principles of Root Motion and when to use it for your animation.
- Review the Root Motion settings, to understand how they affect the resulting animation.
- Configure the Root Rotation of an animation.
- Identify when to bake the Vertical and Lateral Root Motion.
Languages available:
1. Overview
In Cutting imported Animation Clips, you created a looping run animation with a standardized starting pose. You can blend this with other Locomotion animations to create a more complex animation.
In this tutorial, you’ll build on this and explore the role of Root Motion in creating engaging, realistic animations.
2. Before you begin
This tutorial uses the Introduction to 3D Animation Systems Unity project. If you haven't already done so, download this before continuing.
When you’ve downloaded the project:
1. Open the project in Unity Editor.
2. In the Project window, go to Assets > 2.5 Setting Root Motion of Imported Animation Clips.
All the assets you need for this tutorial are contained in this folder.
3. Introduction to Root Motion
Root nodes are used to define Root Motion in animations. Root Motion is when an animation causes GameObjects to offset from their previous position, rather than just moving in absolute terms. This means you can make movements look a lot more realistic, as they can be based on the animation itself and not simply scripted.
However, there is a drawback to this: animated movement is less consistent than scripted movement.
You’ll need to decide on a case by case basis whether or not you want to use Root Motion. The animation that you’ll work on in this tutorial (and may have cut yourself in Cutting Imported Animation Clips) will use Root Motion.
4. Check the current Root Motion
Before making changes, you need to check the current Root Motion. In this tutorial, you’re going to be focussing on Root Motion for humanoid animations.
To find the Root Motion information:
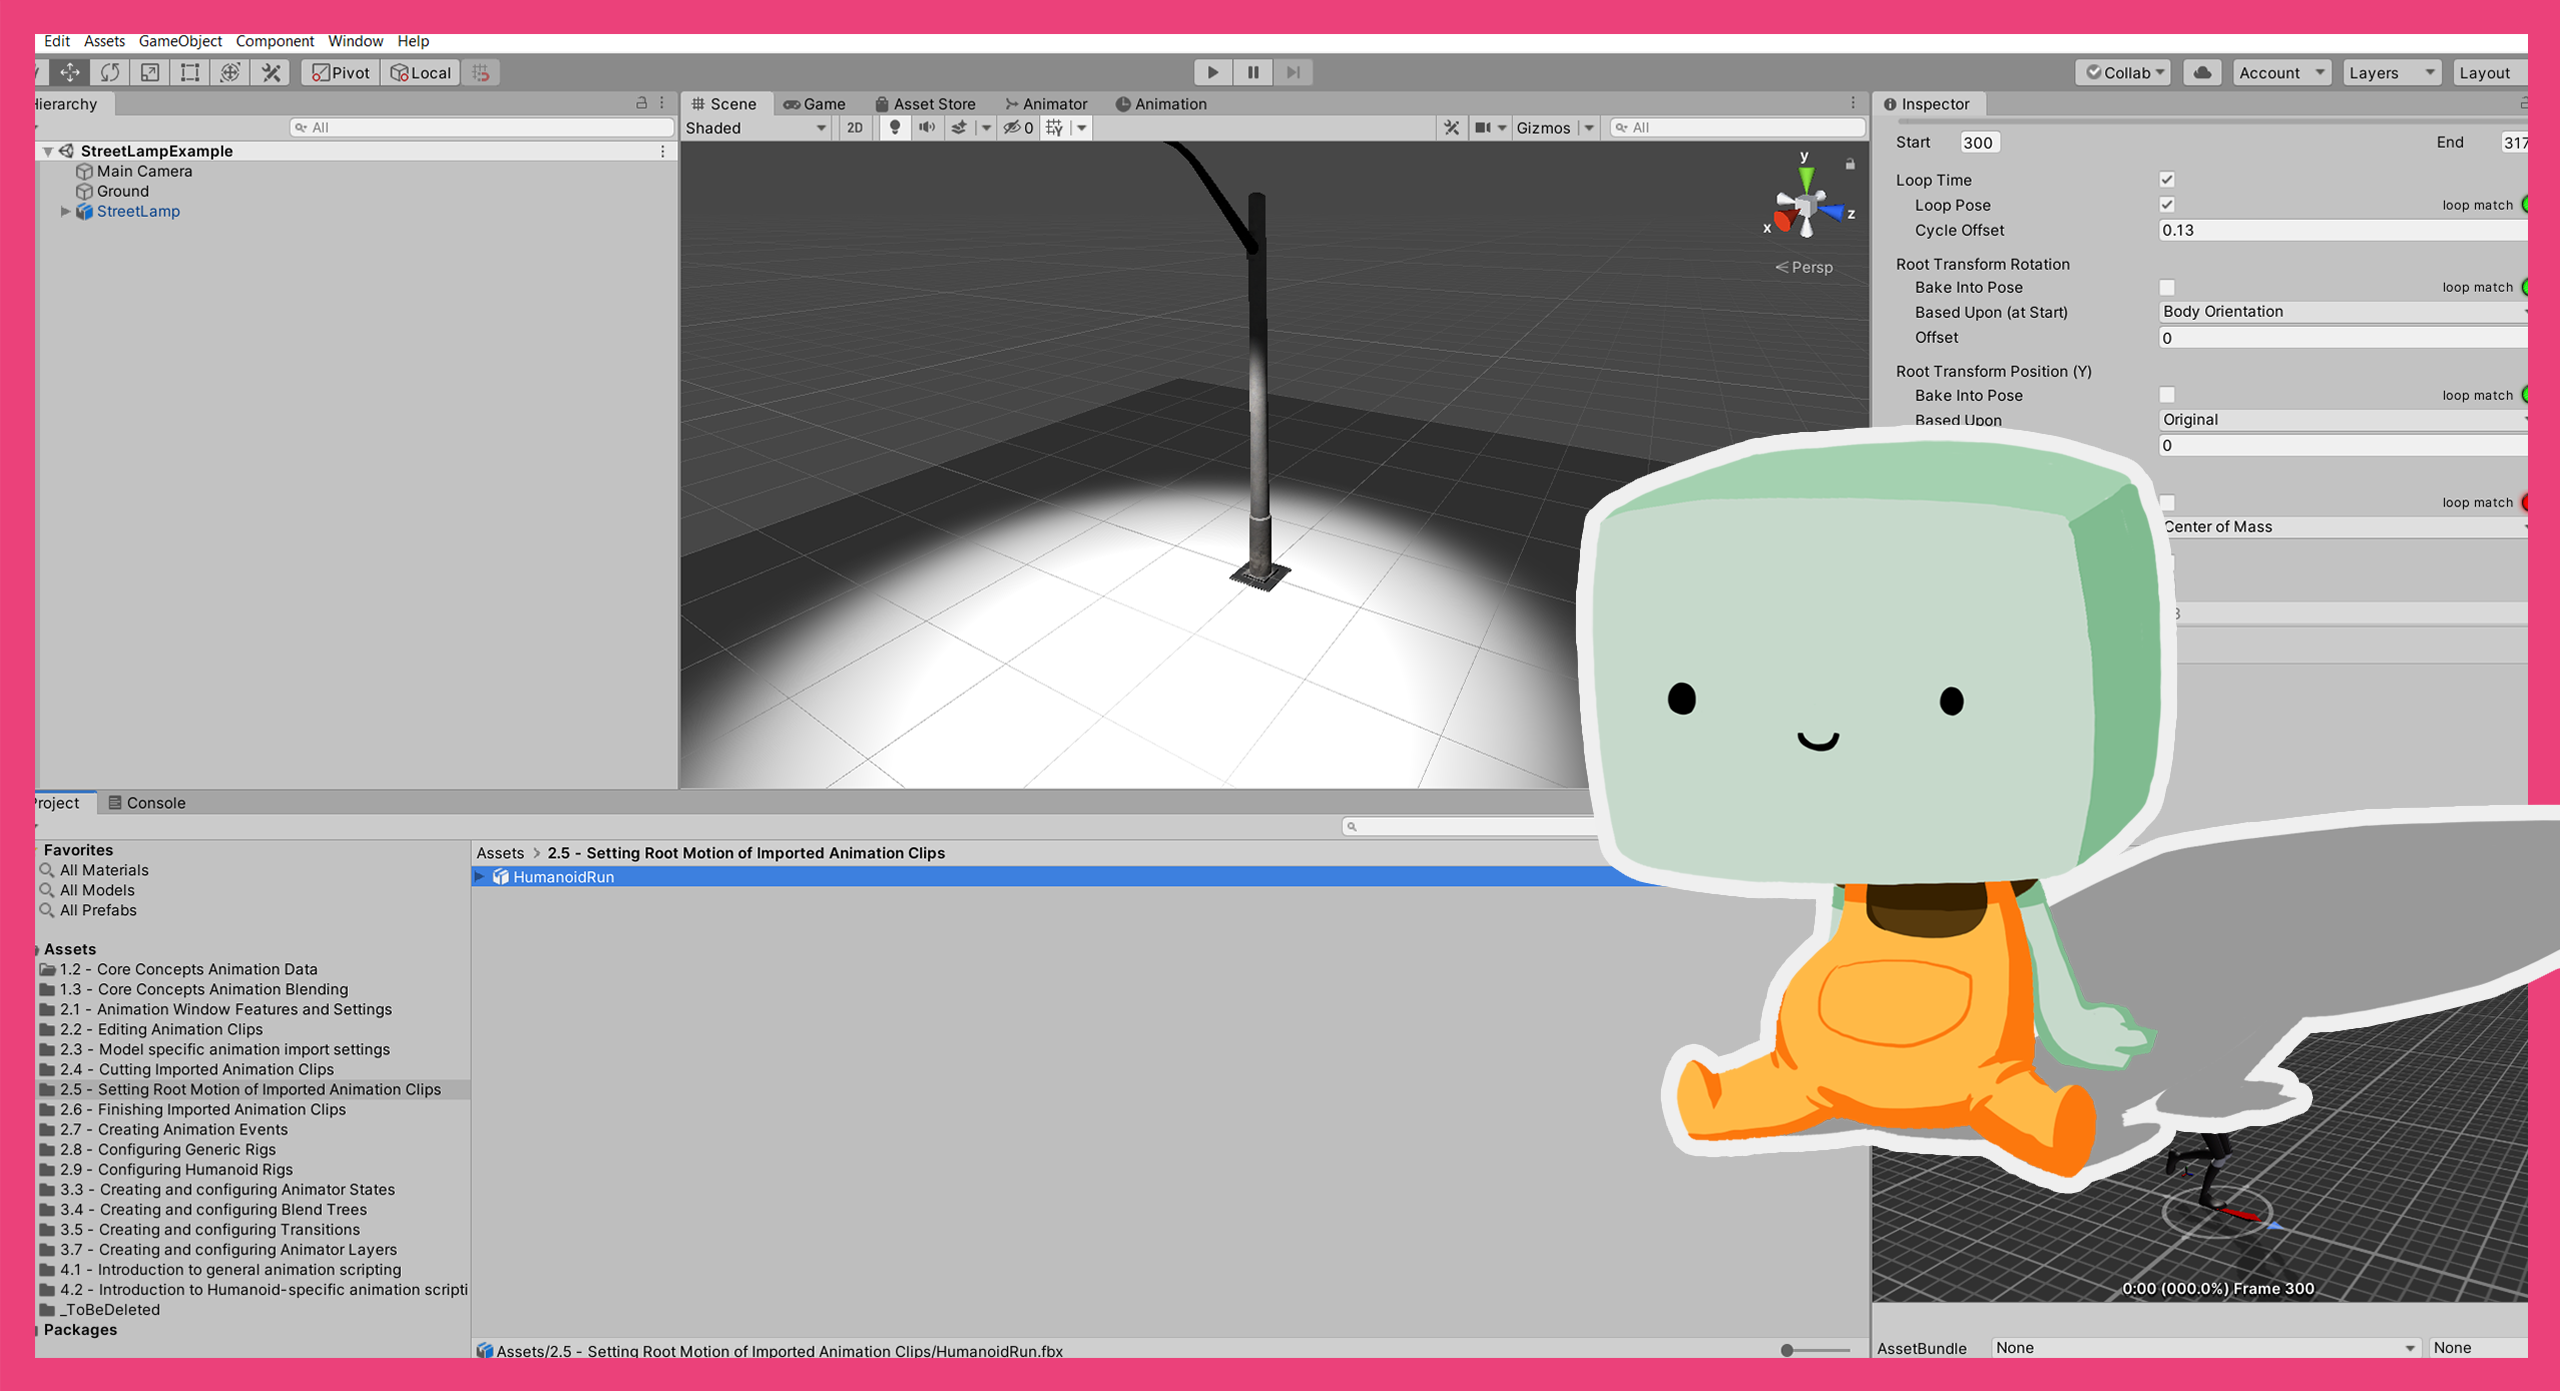
1. In the Project window, select the HumanoidRun Animation Clip.
2. In the Inspector, select the Animation tab if it is not already selected.
3. Find the information box directly above the additional settings foldouts.
Note: This information is only available for humanoid animations.
Review the example
In this example animation, you should see that the average velocity is (0.341, 0.034, 5.259) and that the angular velocity is 3.1 deg/s.
This means that this animation is doing three things that are unsuitable for a run animation:
- Veering to the right at a rate of 0.341 m/s.
- Rising above the ground at a rate of 0.034 m/s.
- Turning right at a rate of 3.1 deg/s.
This is not ideal. If this was being used in a game, it would make the character turn in a big circle and actually leave the ground.
You can fix these things by baking some elements of the Root Motion into the pose. This means they won’t affect the Root Motion at all.
5. Configure the Root Rotation
Now you’ve identified that the Root Motion isn’t set up properly, it’s time to configure it correctly.
The first issue to address is Root Rotation. A run animation should move a character in a straight line, so the Root Rotation is something that should be baked into the pose.
To do this:
1. In the Inspector, find the Root Transform Rotation settings.
2. Enable Bake Into Pose.
You should now see that the Average Angular Y Speed is 0.0 deg/s.
This will also change the Average Velocity, because the animation is no longer turning.
6. Review the source for the Root Rotation
Currently, the source of the Root Rotation is Body Orientation. This means that the Root Rotation is based on the direction the character’s torso is facing.
You could change the source to Original. This would base the Root Rotation on the original rotation in the imported animation. In this case, however, Body Orientation is fine since you’ll be cancelling it out anyway.
If the animation you’d imported was generic instead of humanoid, you would have had the option to use the Root Node’s Orientation instead of Body Orientation. This is because a generic rig has no concept of a body.
7. Adjust the offset
The Root Rotation Offset is the amount the Root is rotated from the pose at the start of the Animation Clip.
Now that you’ve reviewed the source of the Root Motion, you can adjust the Offset so that the animation will run forwards rather than in a circle. To do this:
1. In the Inspector, find the Root Rotation Offset setting.
2. Click on the Root Transform Rotation - Offset property name and drag right until the Average Velocity X value reaches 0.
If you’ve used the example run animation for this tutorial, this should make the Offset value 1.51.
The Average Velocity will now be (0.000, 0.034, 5.277).
The animation will now run forwards perfectly, rather than in a circle.
8. Bake the Vertical Root Motion
You’re almost there, but you still need to cancel out the vertical movement to stop the animation moving off the ground. To do this, you need to bake the Vertical Root Motion into the pose:
1. In the Inspector, find the Root Transform Position (Y) setting.
2. Enable Bake Into Pose. You should now see that the Average Velocity is 0.
You can also select the source for the Vertical Root Motion. As before, selecting Original means it’s based on the Root position as it was imported.
Humanoid rigs have the option to base the Vertical Root Motion on either the feet or centre of mass as well, but generic rigs do not have these options. Instead, generic rigs have the option to base it on the Root Node’s position.
You may want to use options like basing the vertical position on the feet or centre of mass for animations that are mainly vertical movement. If this is the case, you can also offset this motion so it matches the rest of your animation.
9. Review the Lateral Root Motion
The last set of Root Motion options are the Lateral Root Motion settings. These control the animation’s movement in the XZ plane.
You should bake Lateral Root Motion into the pose for animations that only move vertically or do not move at all (for example, a character turning on the spot, which would be rotating rather than moving). As before, this can be based on the originally imported animation, the Root Node position for generic rigs, or the centre of mass for humanoid rigs.
If you want to nullify all Root Motion from your run animation and simply control it using scripting, you can bake the Lateral Root Motion into the pose. For this example run animation, Lateral Root Motion should not be baked as you are working on a running animation.
10. Summary
In this tutorial, you have:
- Explored the basic principles of Root Motion and when to use it for your animation.
- Reviewed the Root Motion settings to understand how they affect the resulting animation.
- Configured the Root Rotation of an animation.
- Identified when to bake the Vertical and Lateral Root Motion.
In the next tutorial, you’ll explore the final settings to complete your Animation Clip and create a fully-functioning animation.