3.6 Creating a State Machine
Tutorial
Beginner
+10XP
30 mins
227
Unity Technologies

In this tutorial, you’ll explore State Machines and learn how to create them. State Machines are one of the core structures of an Animator Controller.
Languages available:
1. Overview
In this tutorial, you’ll explore State Machines and learn how to create them. State Machines are one of the core structures of an Animator Controller.
2. Before you begin
You do not need to use the Unity project for Introduction to 3D Animation Systems to complete this tutorial.
3. Introduction to State Machines
Each Animator Controller has one or more Animator Layers (or Layers), and each Animator Layer contains a State Machine. However, any State Machine may also have additional State Machines nested within it.
This nesting capability means that they are excellent organisational tools for keeping related States together.
4. Creating a State Machine
Unlike most animation features, State Machines are purely an organisational tool. State Machines allow you to group States and Transitions together in a way that makes sense to whoever is creating the Animator Controller, which in this case is you.
Unless you have a lot of states to organize, it may be more efficient not to create a State Machine. This will depend on your particular project and circumstances. The animation examples included throughout this course do not have State Machines due to their relative simplicity.
If you want to try creating a State Machine, use the following process:
1. Right-click on the background of an Animator Controller and select Create Sub-State Machine.
The reason this is a Sub-State Machine is because each layer contains a State Machine by default. Any State Machine you create will already be nested within the Layer’s default State Machine.
2. Double-click on the newly created Sub-State Machine to open it.
3. Double-click the (Up) node to return to the parent State Machine.

You can add States to a State Machine in two main ways:
- Double-click on the State Machine to open it and create the State as normal.
- If you’ve already created the State, you can click and drag the State over the State Machine’s node to add it to the State Machine.
5. Review State Machine Transitions
One of the more complicated things you need to understand about State Machines is their Transitions. You can Transition to a State Machine, and also to whatever is nested inside of it. This leads to a huge variety of different Transitions, but you can narrow them down.
Let’s review how this works at a high level. Imagine a State Machine as a box around the states it contains.

Transitioning from inside the State Machine
When you want to transition from something within the box to something outside the box, you have two different options to choose from:
1. You can transition directly from inside the box to outside the box.

2. Alternatively, you can transition from inside the box to the box itself, and then transition from the box to outside the box.

Transitioning from outside the State Machine
Likewise, when you want to transition from something outside the box, you have two different options to choose from:
1. You can transition directly from outside the box to inside the box.

2. Alternatively, you can transition from outside the box to the box itself, and then transition from the box to inside the box.

6. Review the State Machine nodes
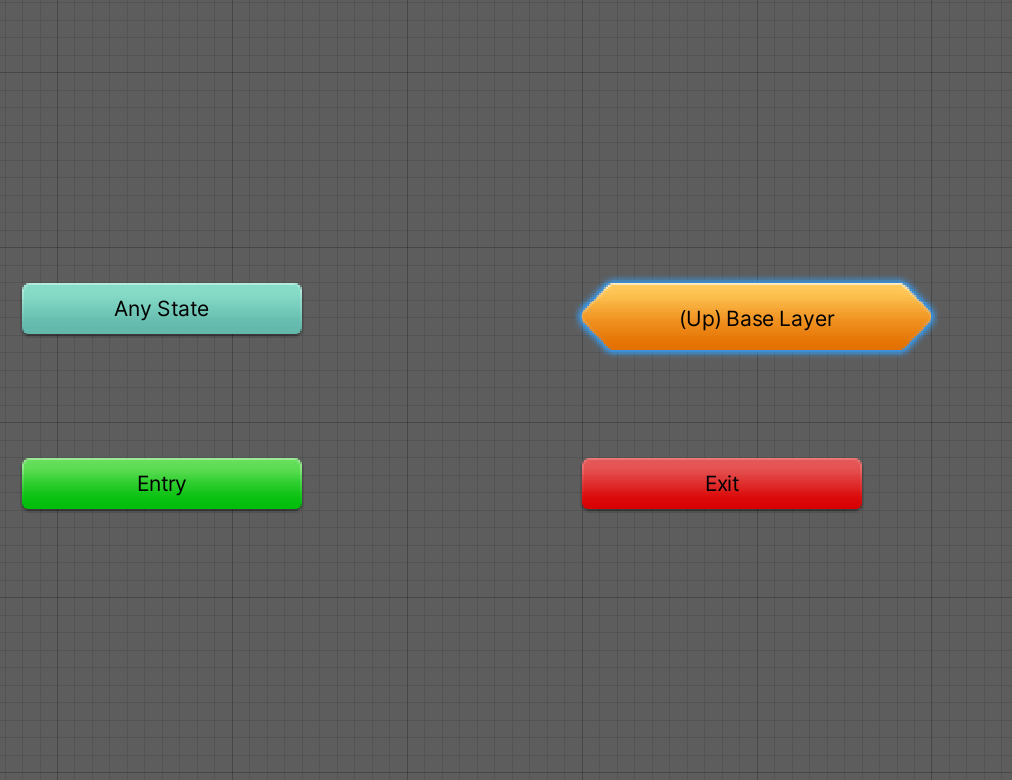
When you’re constructing a State Machine, you can use the Up node or Entry and Exit nodes to:
- Transition to/from [standalone] States or State Machines
- Transition to/from States or State Machines nested inside other State Machines
The Up node represents a direct Transition between the internal and external nodes.
The Entry and Exit nodes are used for Transitions to/from the State Machine itself. These must then be combined with one or more Transitions to/from the State Machine.
Transitioning using Entry and Exit nodes
Animation blending is the result of transitioning from the current State to the next State. As you’ve explored in this tutorial, State Machines can make that process considerably more complicated (though they can also enable you to do complex things).
Transitions are a combination of:
- Logic, which determines when the Transition happens
- Blending, which determines how the current and next States are blended
When you transition to or from a State Machine (rather than a State), the logic and blending are split into several Transitions. Some parts of the Transition are purely responsible for logic, and some are responsible for both logic and blending.
Transitions from a State are the ones that contain the blending information.
7. Summary
In this tutorial, you have reviewed how and when to use State Machines in Unity. You’ve learned that:
- State Machines are a purely organisational tool.
- They can be useful when you’re working with complex animations with many States.
- They can also make things more complicated if you’re working on a relatively simple animation.
In the next tutorial, you’ll explore the role of Animation Layers. You’ll learn how to create them, review their settings and consider how to use them to control the animations you want to blend together.