
Explore meshes and rendering
Tutorial
Beginner
+10XP
20m
(600)
Unity Technologies
In technical terms, shaders and materials operate on meshes, which are the surfaces of GameObjects. They instruct Unity’s renderer how to render each mesh. In this tutorial, you’ll learn about meshes and rendering.
By the end of this tutorial, you'll be able to:
- Define a mesh, its characteristics, and its use in rendering a 3D GameObject
- Explain the role of shaders in the rendering process
- Assign a material to a GameObject
Languages available:
1. Overview
Shaders and materials define how meshes are rendered. Here, you’ll get a close-up view of meshes, learn more about rendering, and apply a material to see how to apply all these concepts in the Unity Editor.
2. Look closely at meshes
Every rendered 3D GameObject in this gallery, and any other Unity project, has a geometric shape called a mesh. Let’s look closely at meshes in the Unity Editor.
1. In Scene view, locate the four circles with different shadings located at the top of the window. By default, it is set to Shaded Draw mode.
2. Select the circle with two lines inside it to change the Unlit Draw mode to Wireframe Draw mode.
This is how a 3D scene looks all by itself — without shaders and materials:
3. Explore the Gallery in Wireframe view. Compare the mesh of a cube to the mesh of a round object, like an apple or lemon.
3. What exactly is a mesh?
The mesh is the 3D skeleton of your GameObject. Every GameObject in Unity has a mesh. It is the geometric element of the object.
Shaders and materials tell Unity how you want the meshes of your 3D GameObjects to be rendered from your 3D scene to the 2D image on your screen.
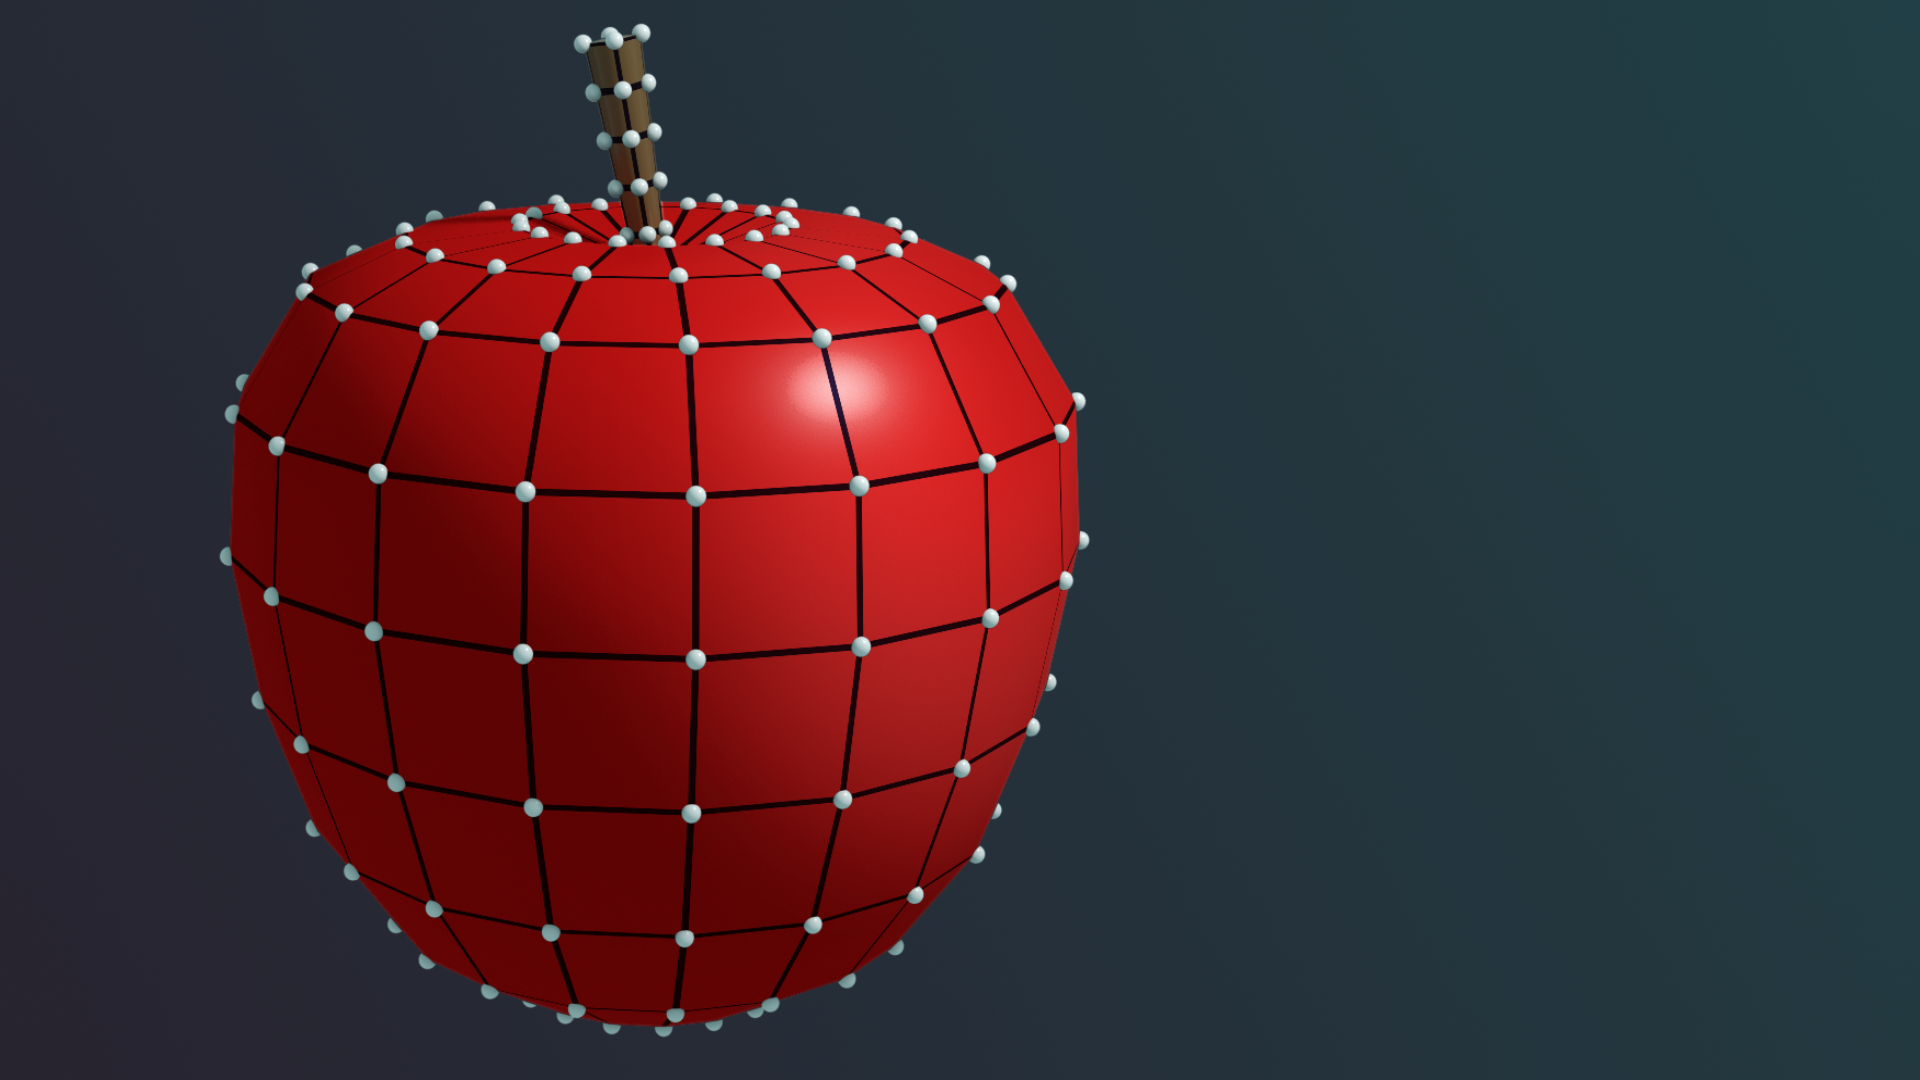
To work with meshes and understand how they are rendered, it will help to know how they are structured. Look closely at one of the apples on your workbench in Wireframe view.
A mesh is a series of flat 2D polygons defined by vertices (singular: vertex), which are points in 3D space that are stored as XYZ coordinates.
If a 3D object were made only with 2D polygons, it would be faceted like a diamond or other gemstone. 3D meshes need additional information to make them appear smooth or curved in some places.
Mesh data also includes normals, which are additional values that define the direction the surface is facing. When all normals are perpendicular to the edges then the shapes appear flat and faceted, like the image above.
Normals indicate the shape of a polygon; for example, that it is curved instead of flat, and exactly how it is curved. The shader renders the mesh as curved, according to the normals, without actually changing the mesh. A sphere is actually a mesh made of many flat surfaces, but its normals make the surface appear smooth.
It’s the shader’s job to take into account all the data from the vertices and the normals to accurately represent the mesh surface.
How are meshes made?
You can easily add simple primitive shapes, like cubes and spheres, into a Unity project. Anything more complex than that is created in a specialized application such as Blender®, Autodesk® 3ds Max® and Maya®, Adobe® Substance 3D Collection®, and Pixologic® ZBrush®.
4. Mesh filter and renderer components
When you select the apple, or any non-empty GameObject, and look at its components in the Inspector, the mesh is represented by the Mesh Filter component and the Mesh Renderer component.
1. On your workbench, select any apple.
2. In the Hierarchy, you’ll see that the apple is an empty GameObject with two child GameObjects. From the Hierarchy, select the child AppleBody.
3. In the Inspector, view the Apple Body (Mesh Filter) and Mesh Renderer components.
Mesh Filter component
The Mesh Filter component points to the mesh coordinate data in your project. You can even replace the mesh here if you wish by selecting the object selector (circle icon) and picking a mesh from any other object in the project, such as an apple. Sometimes this is useful if you do a lot of work on a GameObject in Unity (with shaders and materials or animation, for example) and then you want to change the mesh — you can re-import a new mesh and replace it.
Mesh Renderer component
The Mesh Renderer component is where you specify how the mesh will be rendered. There are several properties here, but the most important one is materials. You’ll return to the Mesh Renderer component often in these tutorials to apply materials to GameObjects.
5. Apply a material in the Mesh Renderer
A material is an asset that works with a shader to define how meshes will be rendered. One material can be applied to many meshes.
Let’s apply a material to the white apple on your workbench using the Mesh Renderer component:
1. Return to Shaded view if you haven’t already.
2. In the Hierarchy, select the GameObject named Apple, or, in the Scene view, select the white apple. Move it to a place you can see it, if necessary. (This GameObject has child GameObjects; be sure to select the parent object when moving.)
3. In the Hierarchy, select the AppleBody child object.
4. In the Inspector, locate the Mesh Renderer component. Here, you’ll see a section titled Materials containing one item labeled Element 0. (If Element 0 isn’t visible, you might need to select the foldout (triangle icon) on the left side to expand this section.)
This is where you will apply the material.
(The plus (+) and minus (-) buttons allow you to add and remove materials from a list of those applied to the object. Although it is possible to apply multiple materials to one GameObject, that’s outside the scope of this project.)
5. Let’s make this apple look more like an apple by replacing its material. In the Mesh Renderer component, select the object selector (⊙) to the right of the material’s name. The Select Material dialog window will appear. Search for AppleRed and select it.
You just applied a material!
In the Inspector, notice the section at or near the bottom of the window (the Material Inspector) that lists the properties of the material. This section will be titled with the name of the material you just applied. (You might need to select the foldout (triangle icon) on the left side to expand this section.) This is where you will create and configure materials.
6. Next steps
Now that you know about meshes and rendering, you’re ready to learn about shaders and render pipelines, which compute the 2D images you see on your screen. Once you know these concepts, you’ll be able to make sense of many of the terms you’ll encounter as you continue learning about shaders, materials, lighting, and other art concepts in Unity.