Enhance your prototype with Terrain
Tutorial
Beginner
+10XP
20 mins
80
Unity Technologies

Terrain is the landscape of an interactive experience. Unity 2021.3 LTS includes a series of Terrain features that you can use to create a custom landscape that’s right for your prototype.
By the end of this tutorial, you'll be able to:
- Explain how Terrain can support prototype development.
- Create a new Terrain.
- Customize Terrain for your prototype.
Languages available:
1. Overview
Terrain is the landscape of an interactive experience. Unity 2021.3 LTS includes a series of Terrain features that you can use to create a custom landscape that’s right for your prototype as well as more advanced features for you to explore as you progress on your creator journey.
In this tutorial, you’ll:
- Make a landscape using Terrain.
- Sculpt and smooth an area of hills.
- Learn about additional features that you can use to customize your Terrain.
You can then apply what you’ve learned to your personal prototype, if it’s relevant to you.
2. Create a Terrain tile
Landscapes are made from large, flat plane GameObjects called Terrain tiles.
First, create a single Terrain GameObject:
1. In the Project window, go to Assets > CreativeCore_Prototyping > Scenes. Create and open a new scene.
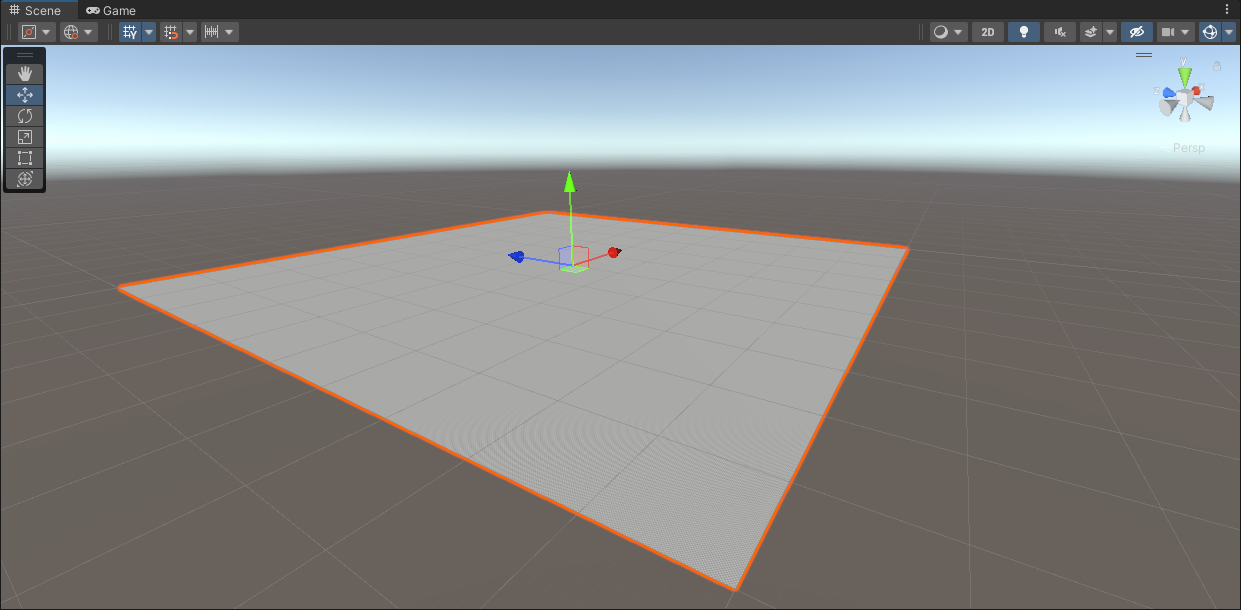
2. In the Hierarchy, select Add (+) > 3D Object > Terrain. A new Terrain GameObject will appear in the Scene view — notice how this large, flat plane snaps to the grid.
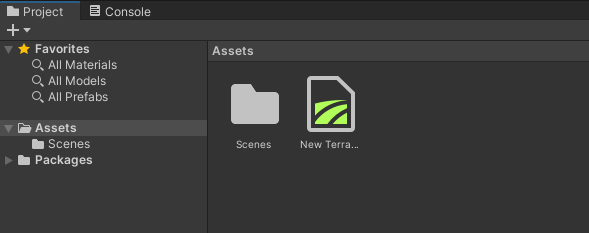
3. In the Project window, navigate up a level to the Assets folder. When you create a Terrain tile, a corresponding Terrain asset is added in this folder.
3. Expand your landscape
Your Terrain’s default size has a square mesh resolution where the length and width are both 1000 meters. However, that’s not necessarily enough to make a whole landscape. You can expand your terrain by creating adjacent tiles to the one you’ve already made using the tiled grid system.
To add another Terrain tile to your landscape:
1. In the Hierarchy or the Scene view, select the Terrain GameObject.
2. In the Inspector, find the Terrain editing tools.
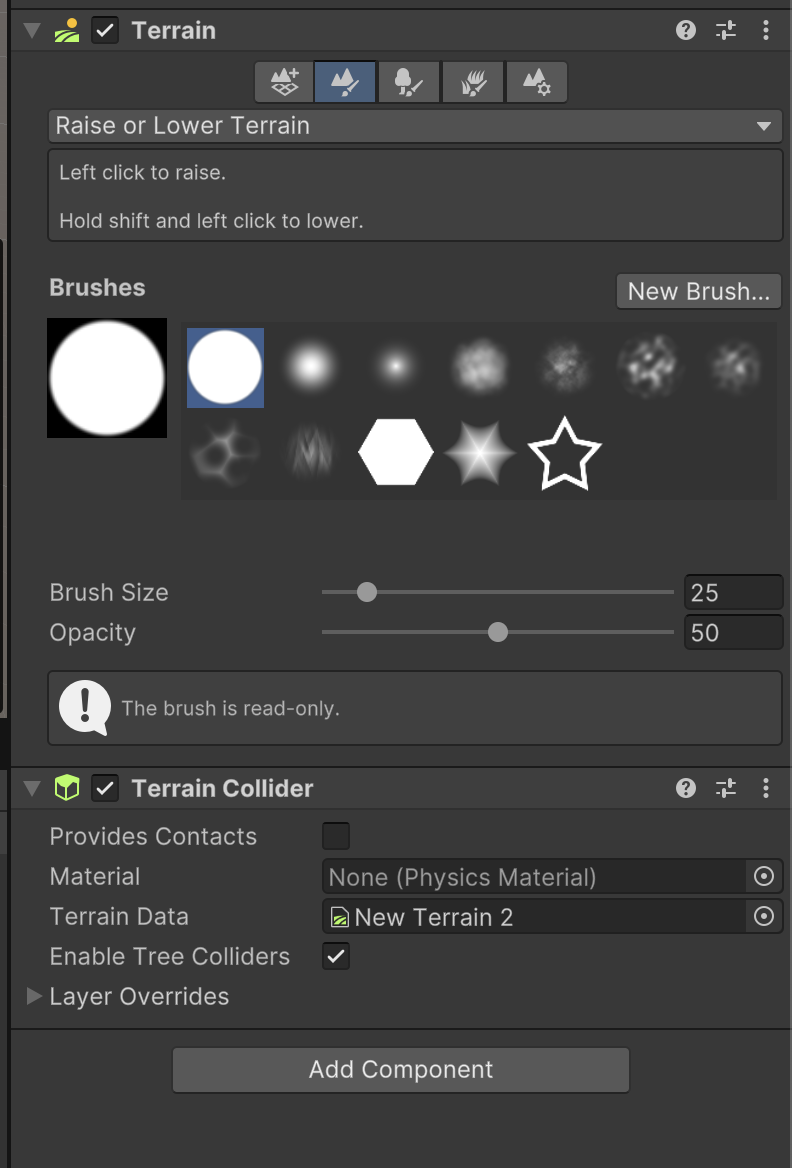
3. Select Create Neighbor Terrains.

4. Hover your mouse in the Scene view. You’ll see a new grid appear that shows four adjacent tiles connected to each of the tile edges.
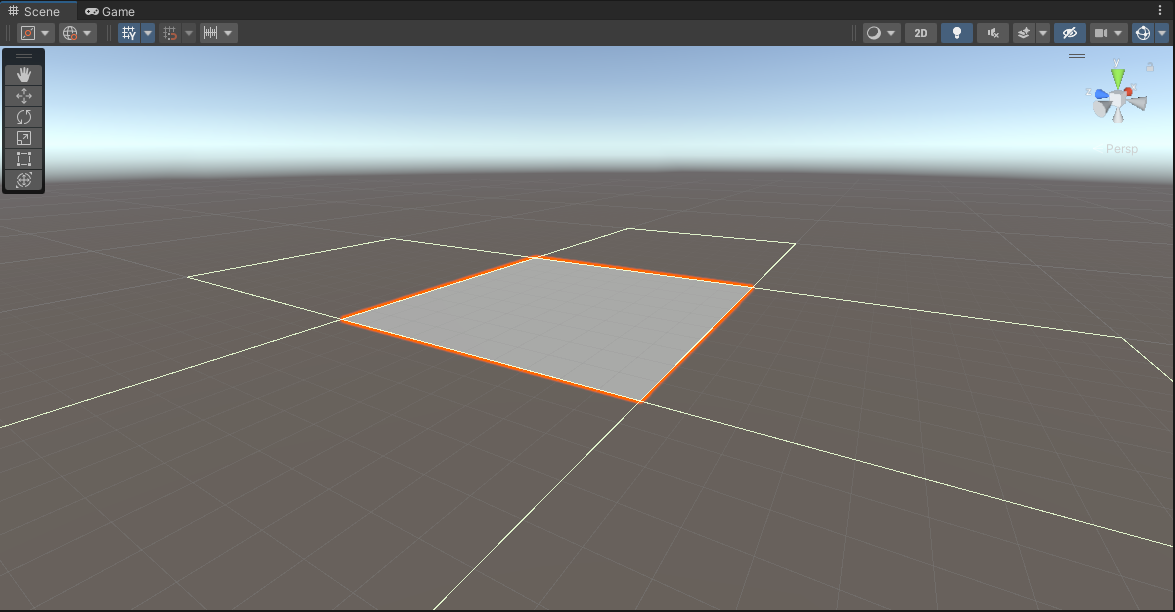
5. Select one of those new tiles to create a new Neighbor Terrain. Each time you do this, the grid will respond.
6. When you create a Neighbor Terrain, a GameObject will be added to the Hierarchy with its position included in the name.
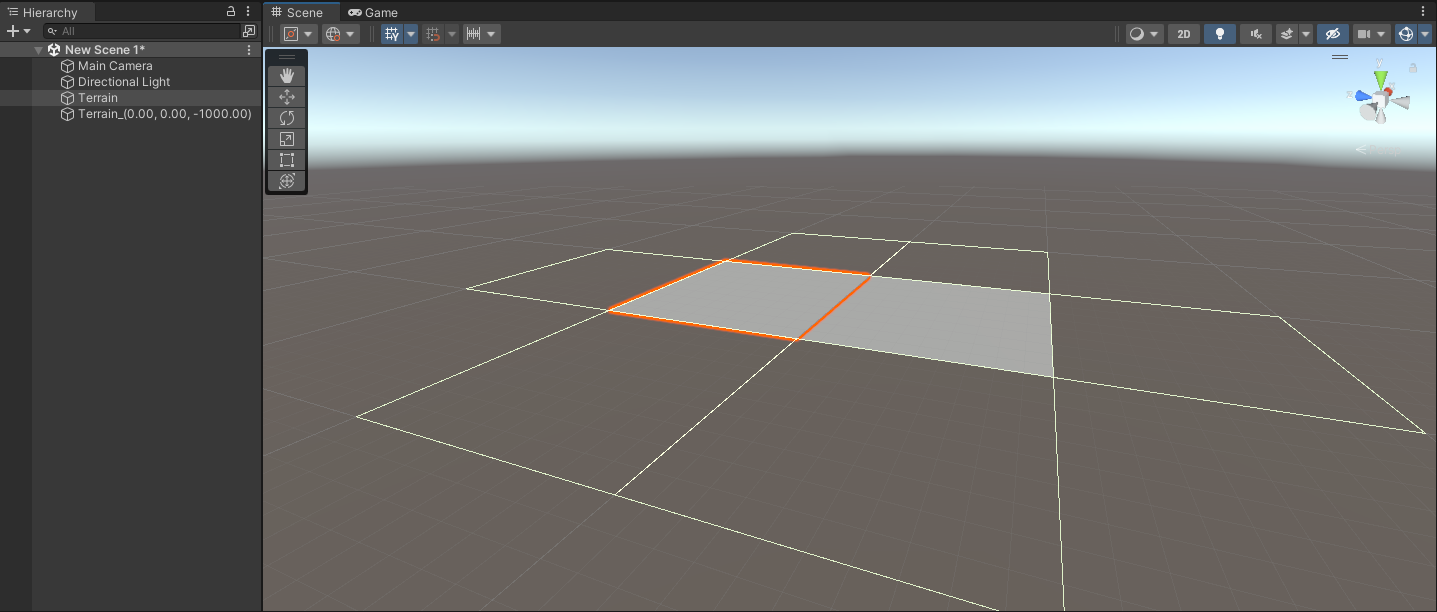
7. Continue to create a larger landscape to work on in this tutorial. The exact area is up to you, but make sure it includes a grid of three tiles by three tiles (3000 meters x 3000 meters) to give you enough space to work and experiment.
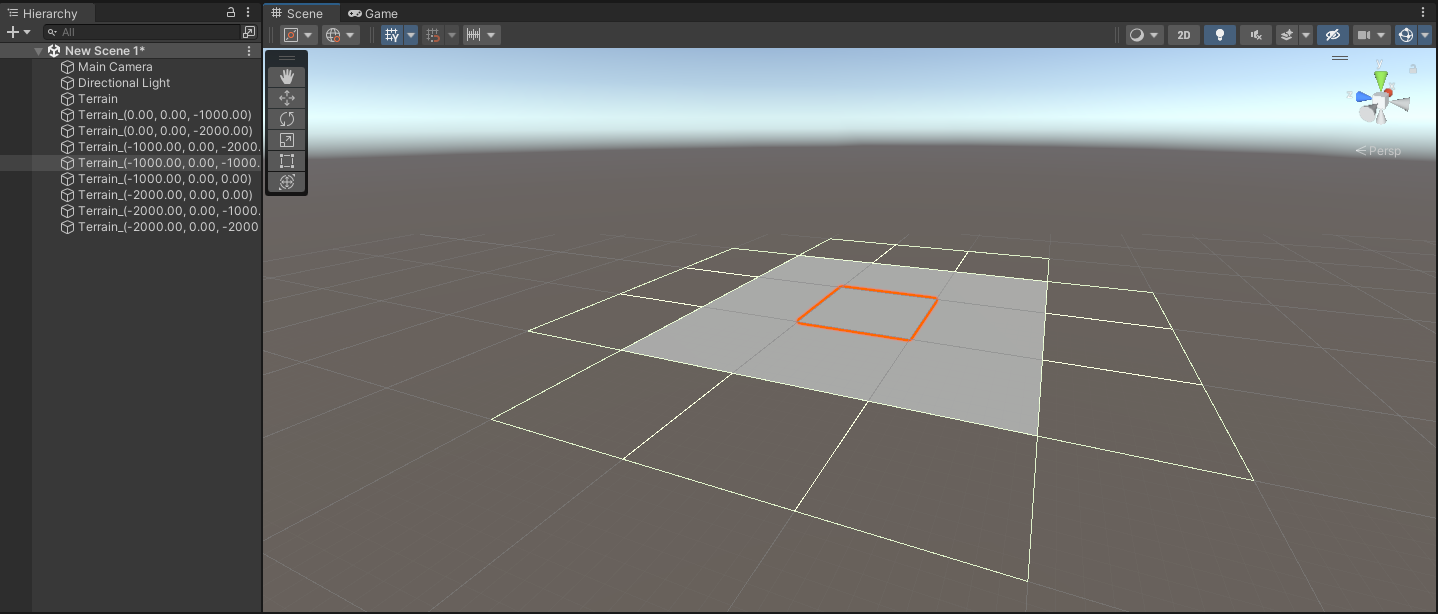
With the Create Neighbor Terrain tool you can create a landscape area to fit the exact needs of your project.
4. Create some hills
Now you have a landscape to work with, but it’s just a flat plane. Next, you’ll raise and lower part of that landscape to create some hills:
1. In the Hierarchy or Scene view, select one of the Terrain tiles in your landscape.
2. In the Inspector, go to the Terrain tools.
3. Select Paint Terrain. This will be set to Raise or Lower Terrain by default, but if it isn’t, use the dropdown to select this from the menu of tools available.
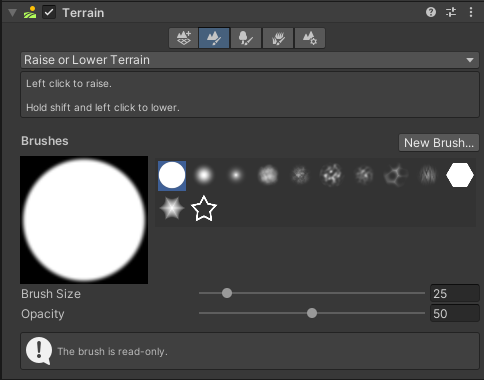
4. Select the first circular brush from the available brushes (builtin_brush_1).
5. Set its:
- Brush Size to around 300.
- Opacity to around 40.
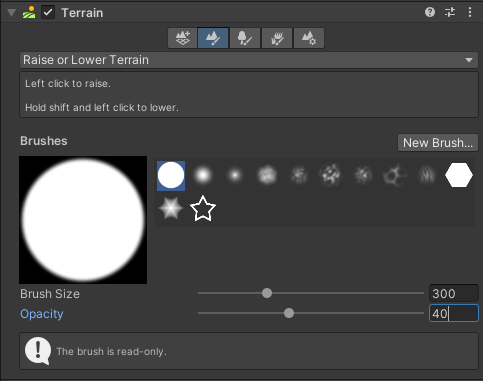
Brush Size is how big the brush will be, which determines how much area you can change with it in one go. Opacity is the strength of the effect applied to the landscape.
6. Hover your cursor over the Terrain tiles in the Scene view. You’ll see the brush appear on top of the landscape.
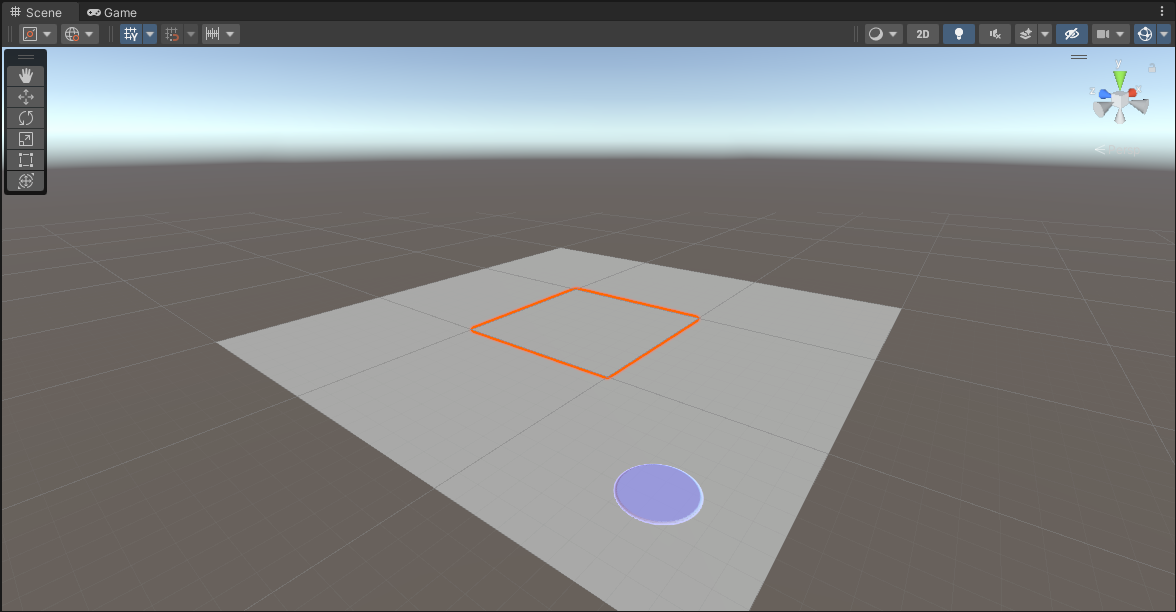
7. Start to create a hilly area on your landscape. Use:
- Left-click to raise the Terrain.
- Shift + left-click to lower the Terrain.
- Hold and drag to apply the effect across the landscape.
Move your brush over the area where you want to create the hills, raising and lowering the Terrain until you’re generally happy with the shape of it. Feel free to experiment with the different brushes available!
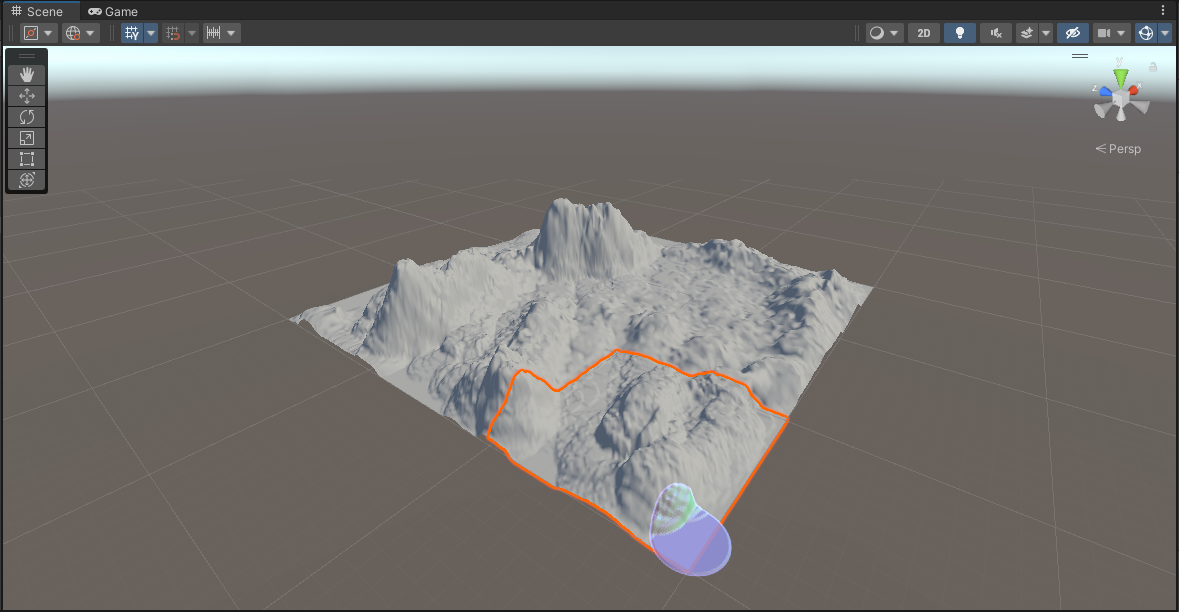
Tip: You can use the square open and closed bracket keys on the keyboard ( [ ] ) to increase and decrease the Brush Size while sculpting.
Don’t worry if your hills look rough or need polish — you’ll fix that next.
5. Smooth your hills
Now that you’ve sculpted the basic shape, it’s time to refine the hills you created:
1. In the Inspector, go to the Terrain tools. Select the Smooth Height tool using the dropdown.
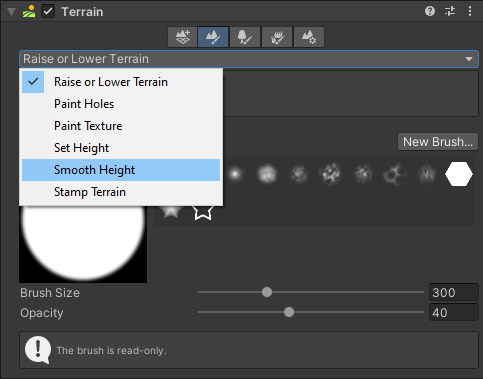
2. Select the circular brush (builtin_brush_1), if you changed your brush in the previous step.
3. Set its:
- Brush Size to around 200.
- Opacity to around 30.
The greater the Opacity value, the smoother the brush will make your Terrain each time you apply the brush.
4. Take some time to smooth your hills. Use:
- Left-click to apply the brush.
- Hold and drag to apply the effect across the landscape.
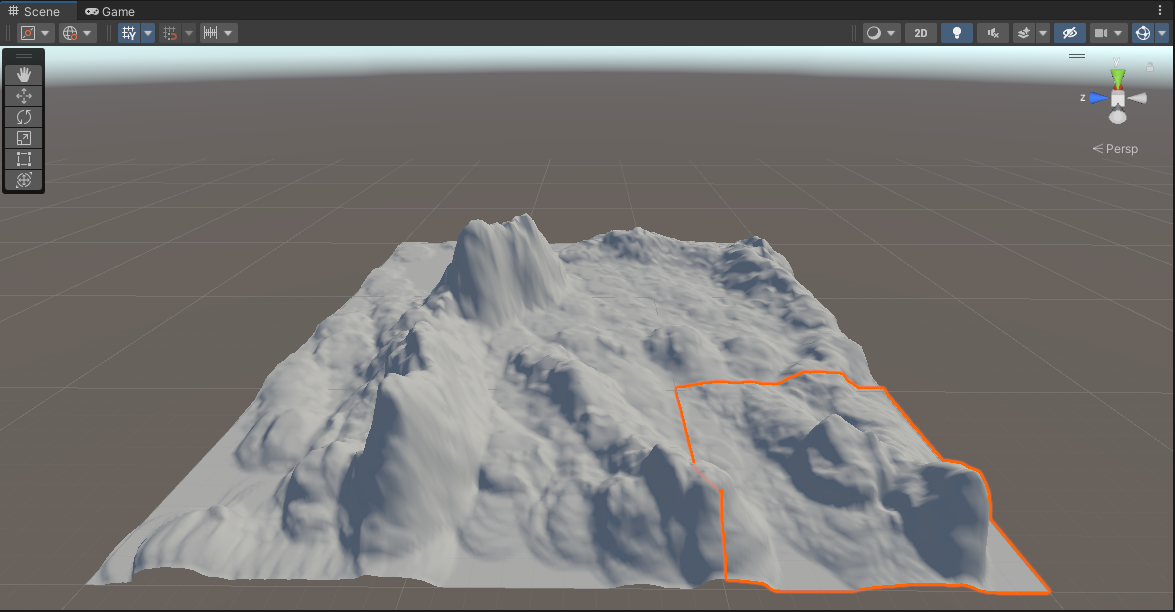
6. Refine and enhance your landscape
As you progress beyond an enhanced prototype and begin to polish your prototype, you may want to further decorate and customize your landscape.
Terrain tools will help you enhance your landscape in a variety of different ways.
Refine the landscape features
You can:
- Use the Set Height tool to create flat, level areas, such as plateaus and roads.
- Stamp brushes onto Terrain to create specific geological features.
- Paint holes into your landscape to hide parts of your Terrain and create openings for caves and cliffs.
Add aesthetic polish
You can:
- Create Terrain Layers to hold textures and other properties for your landscape.
- Add textures to your Terrain to customize how it is rendered.
- Paint Trees onto your landscape (you’ll need tree assets to do this).
Extend your landscape
You can:
- Add grass and other small details to make your landscape feel more realistic.
- Use Wind Zones to imitate the effect of wind on your Terrain and Particle Systems
7. Next steps
Now that you’ve practiced the Terrain basics in the example project, you’re ready to use Terrain to enhance your prototype. Remember, if you want to explore Unity’s Terrain features in more detail, the documentation is a great place to start.