Improve your lighting with Light Probes
Tutorial
·
Beginner
·
+10XP
·
35 mins
·
(194)
Unity Technologies
You’ve almost finished working on the outdoor scene! In this tutorial, you’ll learn about the role of Light Probes in making lighting in your scene more realistic.
By the end of this tutorial, you'll be able to:
- Explain how Light Probes improve the realism of lighting in a scene.
- Place Light Probes appropriately within a scene.
- Evaluate the impact of Light Probes using a diagnostic view.
Languages available:
1. Overview
You’ve almost finished working on the outdoor scene! In this tutorial, you’ll learn about the role of Light Probes in making lighting in your scene more realistic. You’ll also have the opportunity to customize your lightmap further before you switch focus to the indoor scene.
By the end of this tutorial, you'll be able to:
- Explain how Light Probes improve the realism of lighting in a scene.
- Place Light Probes appropriately within a scene.
- Evaluate the impact of Light Probes using a diagnostic view.
2. What about dynamic objects?
You’ve done a lot of work developing the lighting in this outdoor scene, but so far you may have been considering it like a still life: nothing moves in the project at the moment. Now it’s time to think about your lighting in the context of an interactive experience.
In an interactive experience, there are normally at least some dynamic elements at play. These might be props, vehicles or characters — they’ll all be illuminated by your lighting too.
Test how effectively your lights do this now:
1. In the Hierarchy, select Add (+) > 3D Object > Sphere.
2. Make the sphere a little larger so you have a reasonable size of surface area to work with.
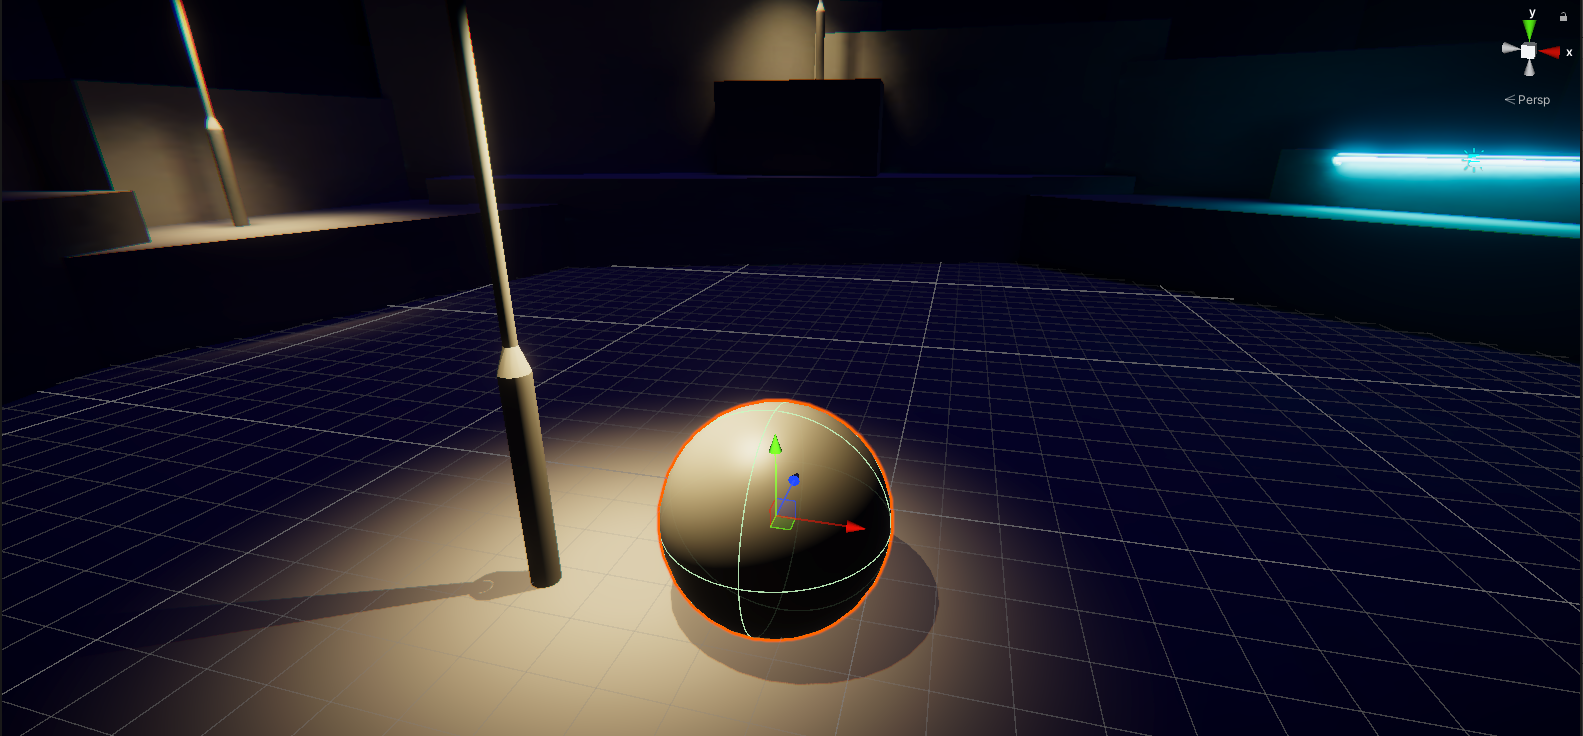
3. Move your sphere beneath the non-static street lamp in the center of the amphitheater. You should notice that the top of it is brightly illuminated by light.
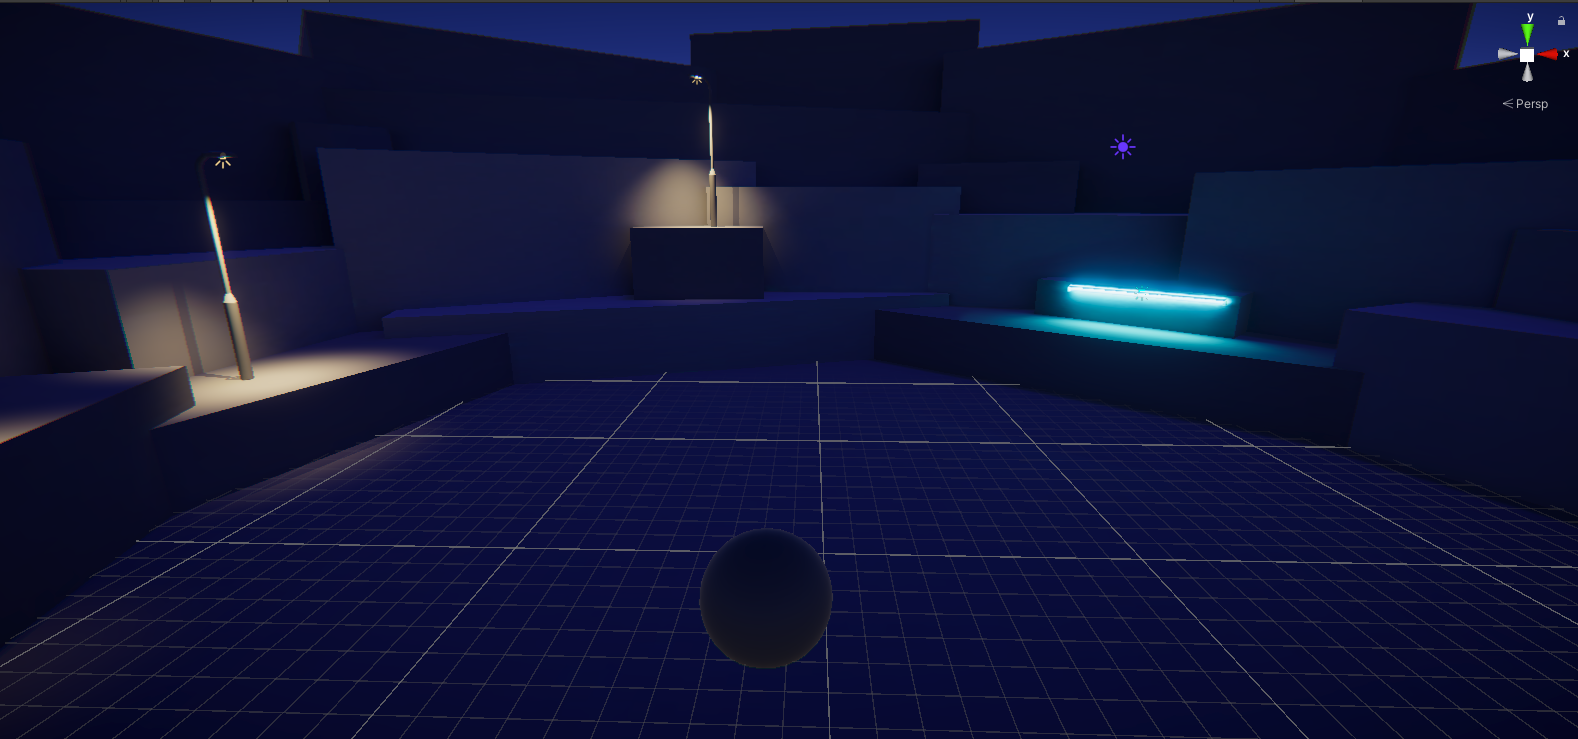
4. Now move your sphere beneath the static baked light. What difference do you notice?
The baked light from the street lamp doesn’t seem to be impacting your dynamic (moving) sphere at all. That’s not ideal!
So what’s happening here? When you bake a lightmap, you store a snapshot of the lit static surfaces in your scene. The lights in your scene don't continue to cast more light on those surfaces — if they did, they would have double the light. When a dynamic object, like your sphere, passes through baked light, the renderer needs information about the light that passes through the empty spaces where the dynamic object travels to be able to light it properly.
3. What are Light Probes?
Unity has a tool to address this issue: Light Probes.
What are Light Probes?
You’re already storing data about how light hits the different surfaces in your scene in a lightmap. You can use Light Probes to measure (or probe) data about the light that passes through the empty spaces in your scene. At runtime, data from the nearest Light Probe is used to estimate the light that should hit any moving GameObjects in your scene.
Why are they useful?
You can use Light Probes to make your baked lighting much more realistic. They are also relatively efficient to use at runtime compared to real-time lights, if you place them with care.
Although Light Probes are generally useful to address issues with baked lighting that you might encounter when lighting dynamic objects, they are also very useful for areas in a scene where there are significant changes in the lighting. If users don’t see dynamic objects respond to lighting in the way that they expect in these areas, it can negatively impact their immersion in an experience.
4. How do I know where to place them?
You’re going to place them in your amphitheater, but it can be helpful to understand a little about approaches to placing Light Probes first.
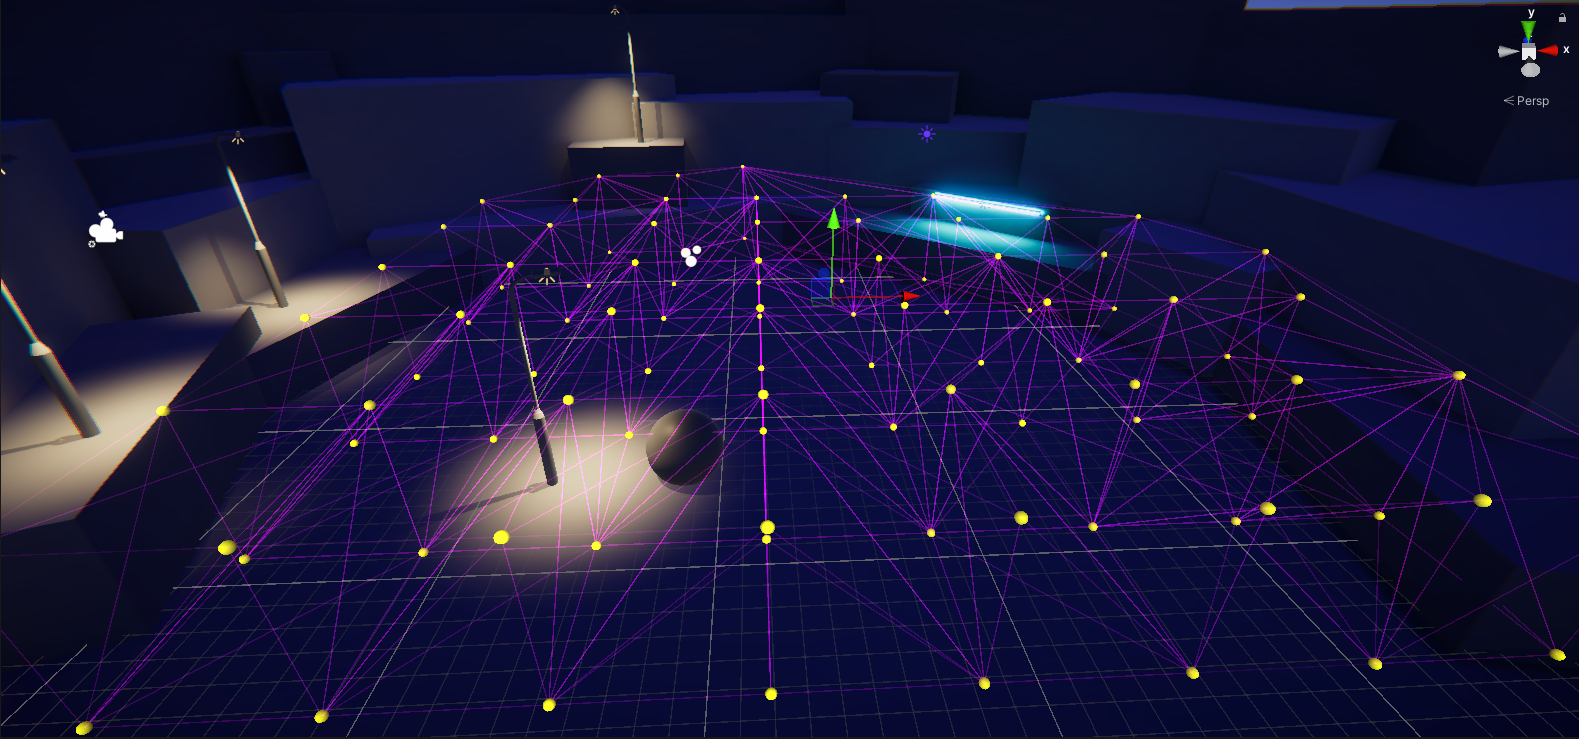
Light Probes are organized in Light Probe Groups. Each Light Probe in a Light Probe Group measures the light in the space between itself and the other Light Probes around it. The simplest way to arrange a Light Probe Group is to place the individual probes in a regular grid where you want them to measure (probe) the light. This grid should have at least two vertical layers — because of this, it is called a 3D volume.
Here you can see a Light Probe Group of eight arranged in a cube-shaped 3D volume:
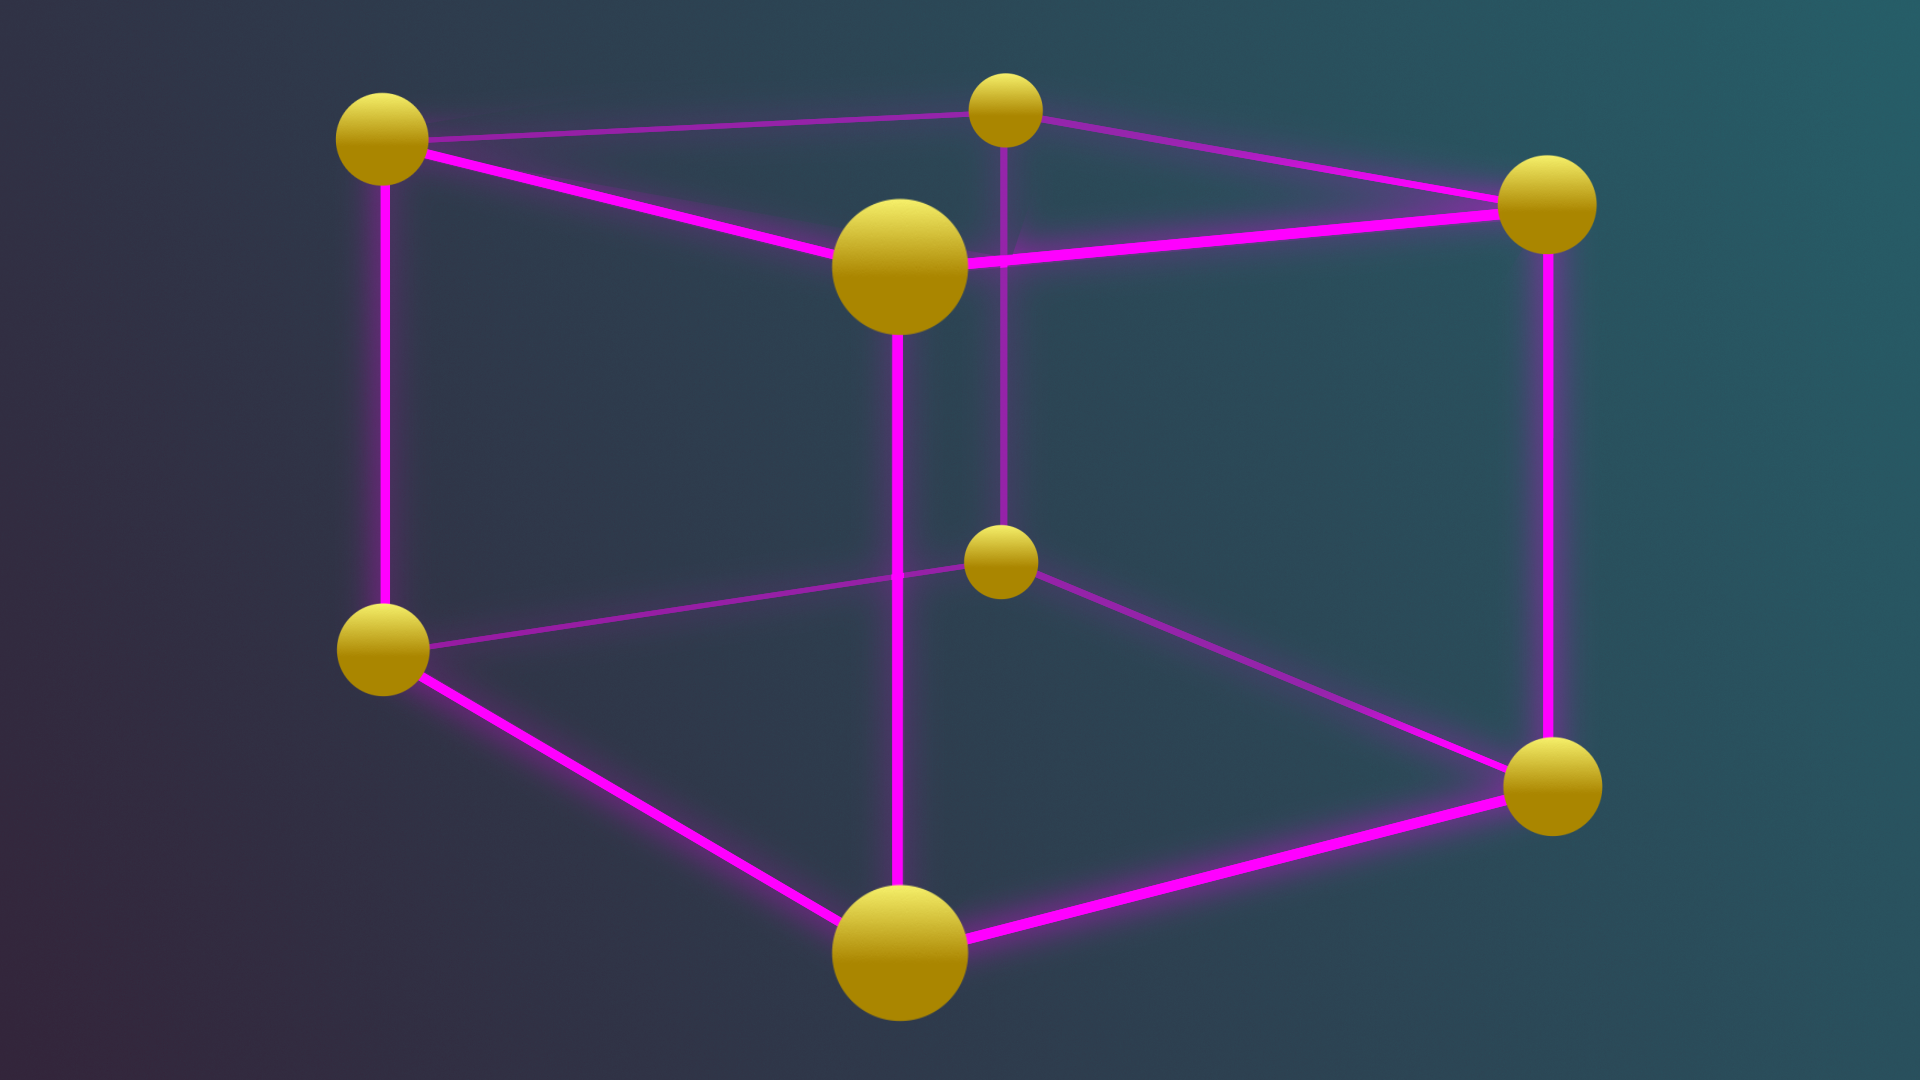
When you create a Light Probe Group, it contains eight individual Light Probes already arranged in a 3D volume. You can duplicate and position the Light Probes groups to create the grid pattern, maintaining the 3D grid.
You can also place Light Probes in the grid individually to make sure that they are more densely grouped in areas with significant lighting changes or other focus points. This is potentially more complex, but it can improve the optimization of your scene’s lighting.
Improving Light Probe placement
Light Probes can be very useful tools, but the best exact placement locations for them will depend on what’s in your scene and how you’ve configured the rest of the lighting. Sometimes Light Probe placement can need a few iterations of fine-tuning to get the placement just right for your project.
5. Place Light Probes in your scene
Now you’re ready to place Light Probes around the amphitheater space:
1. First, move the StreetLamp GameObjects for testing out of the center of the amphitheater so you have a clear space to work in.
2. In the Hierarchy, select Add (+) > Light > Light Probe Group.
3. Select the newly created Light Probe Group. Scale it so that the probes are larger, and then move it into the center of the open amphitheater space, above the ground. Check that the top layer of Light Probes have enough height to cover the street lamps when they are placed on the ground.
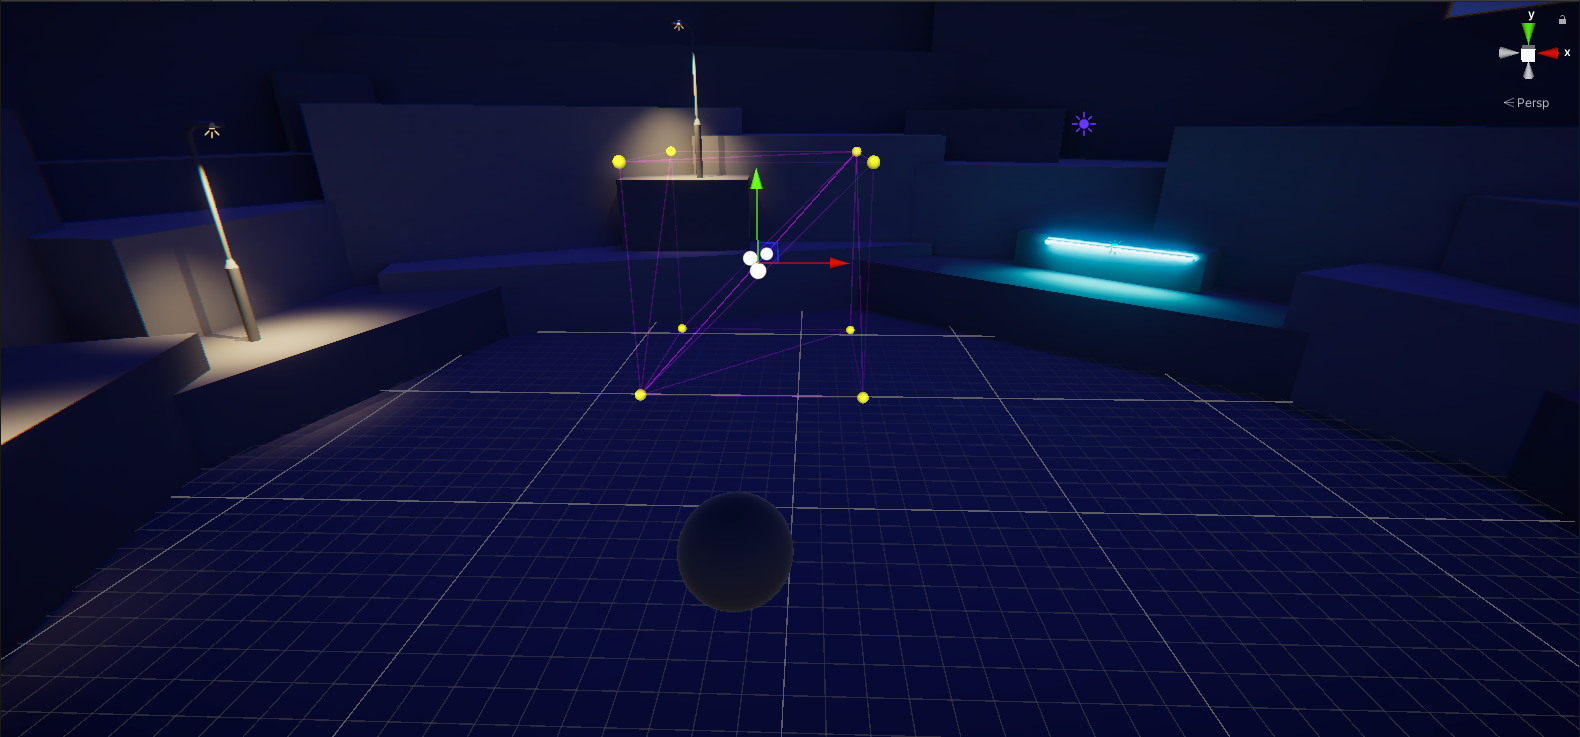
Important: Double check that the bottom layer of Light Probes are above the ground of the amphitheater before you continue to the next instruction. If the bottom layer of Light Probes are positioned below the ground they won’t capture the lighting data from above the ground and so will give incorrect results.
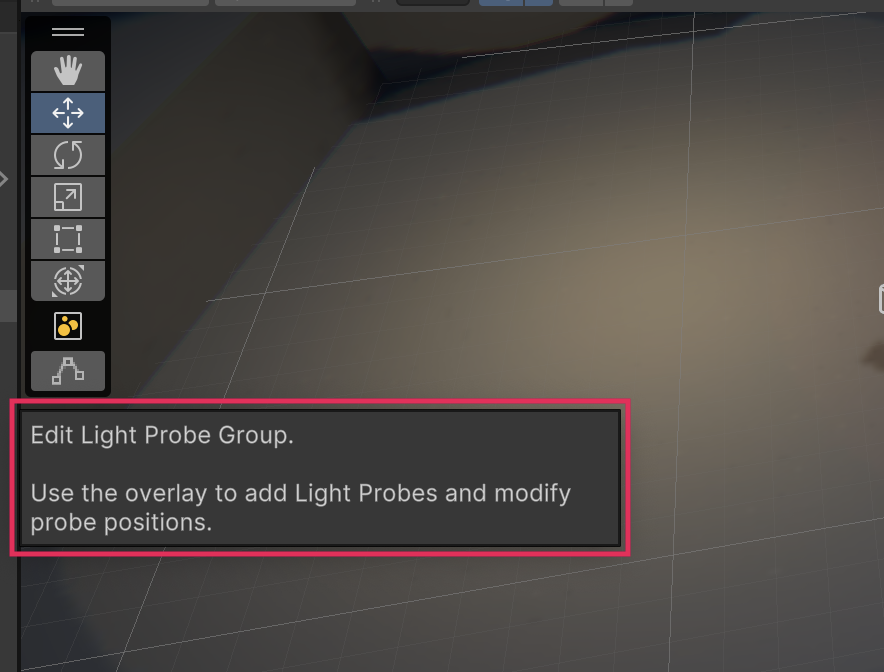
Use the Edit Light Probe Group Tool in Scene Tools Overlay to edit Light Probe positions.

5. In the Inspector, select Select All and then Duplicate Selected.
6. Move the duplicated Light Probes in the group to the right to extend the grid pattern.
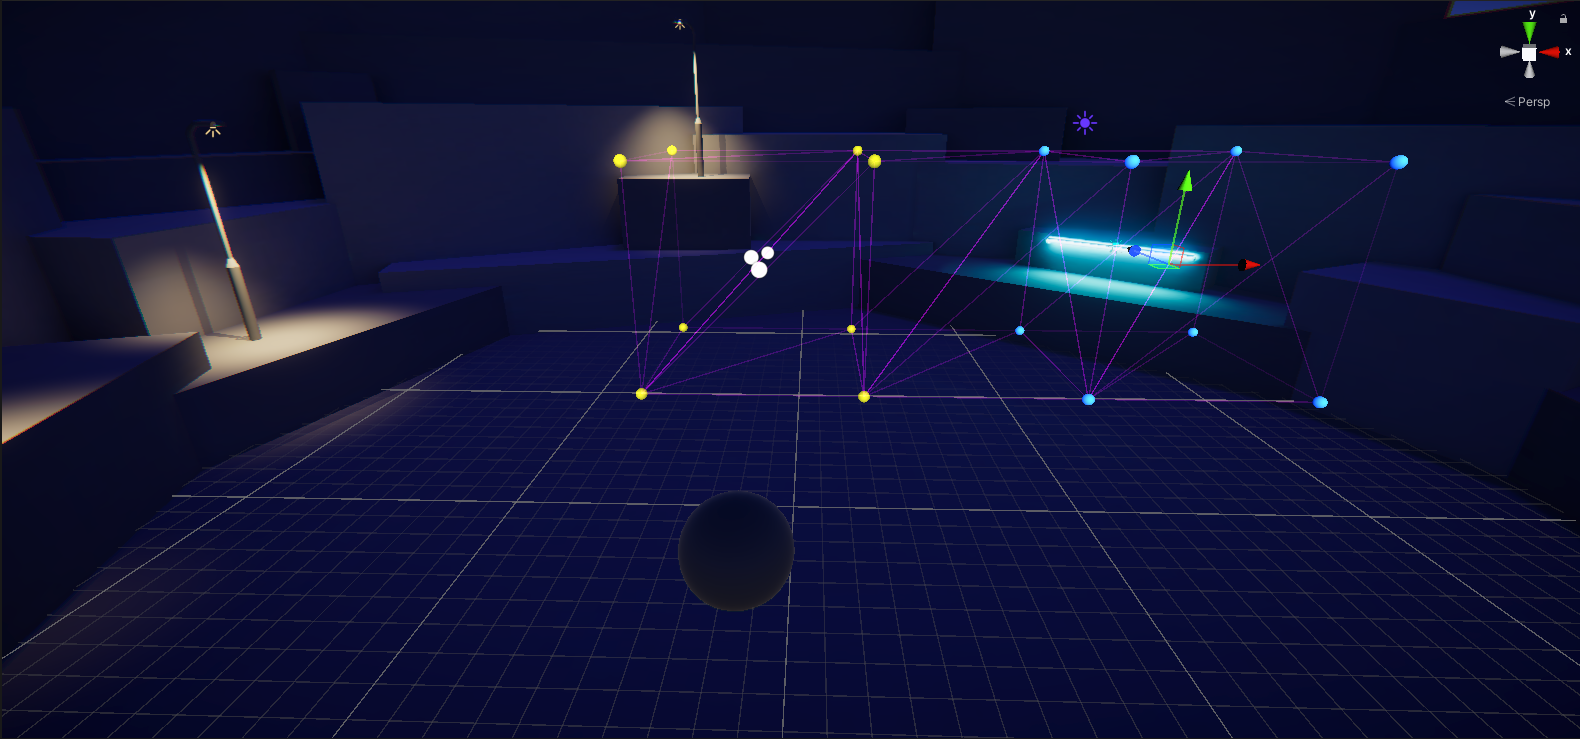
7. Extend your grid to fill the central space of the amphitheater where the street lamps were placed. As you do so, try selecting smaller groups or individual Light Probes as well as the whole Light Probe Group to practice placing them in different ways.
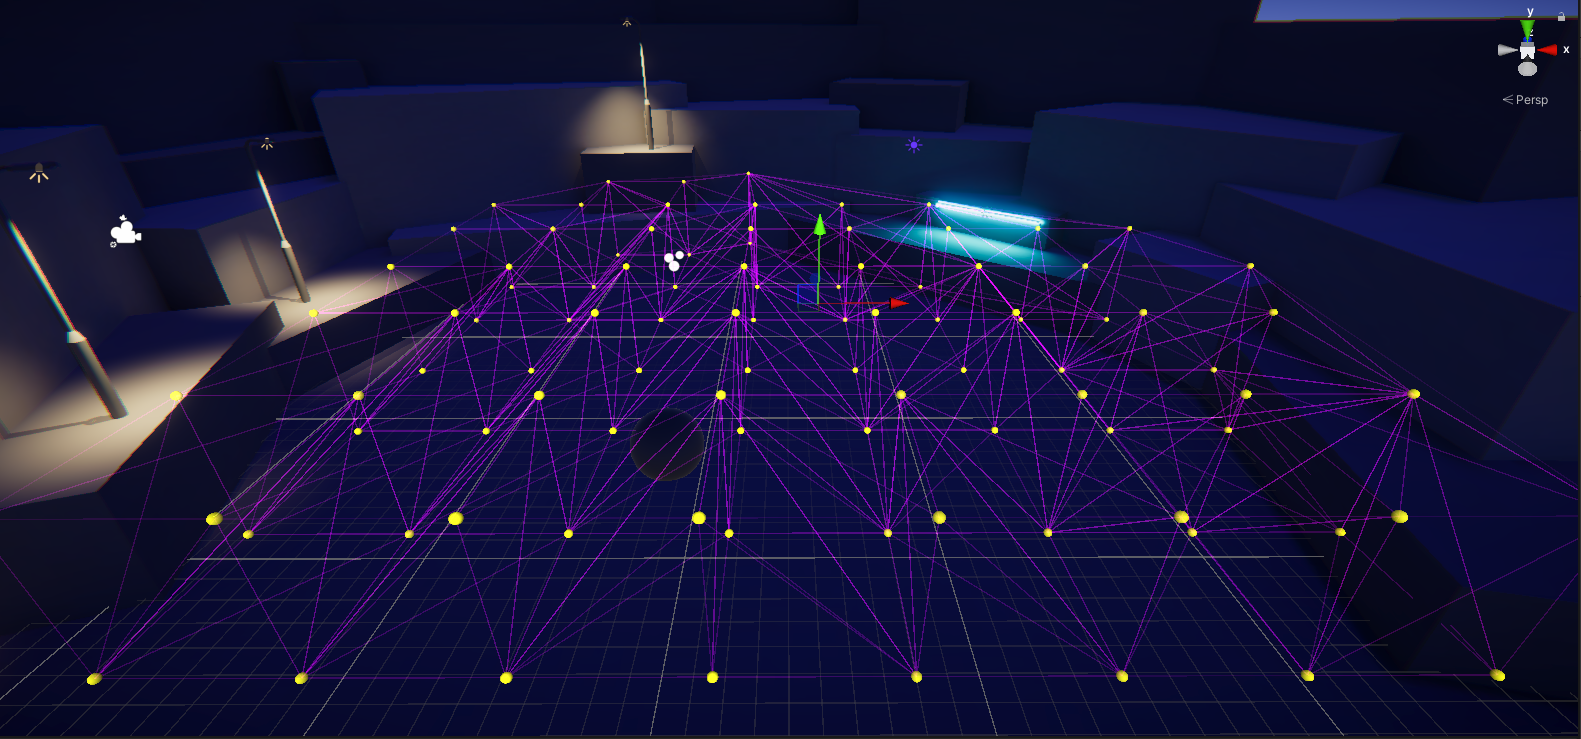
Tip: Feel free to experiment, but you don’t need to cluster the Light Probes too densely in this area.
8. When you’re done, return the street lamps to their previous placement. Make sure that the Light Probe Group covers the light cast by the street lamps — if it doesn’t, you can raise the top row of Light Probes or create a new layer for the 3D volume.
6. Test your changes
Now you’re ready to test the impact of your changes:
1. In the Lighting window, select Generate Lighting. Remember, you need to rebake your lightmap any time you make changes to baked lighting if you want to see them in the Scene view.
2. Move your sphere into the light of the baked street lamp. What happens this time?
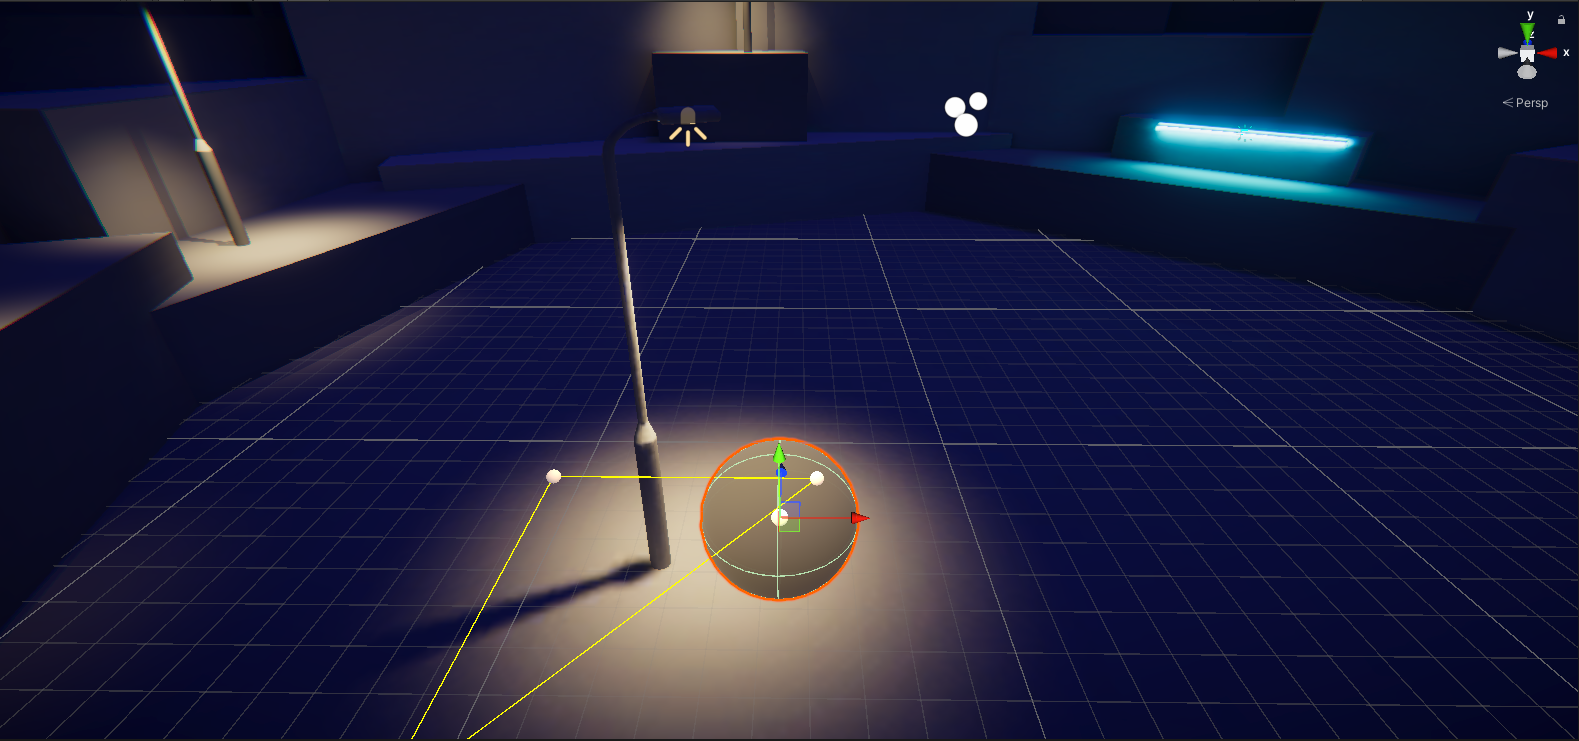
Now the sphere should be brightly lit when you move it beneath the baked street lamp. That’s much better!
Additional help with Light Probe placement
If you need to adjust Light Probe placement in your project and would like additional guidance, try High quality lighting using Light Probes by Brackeys (YouTube).
Extend your learning
If you want to explore using Light Probes in your outdoor scene further, why not try:
- Extending the grid out to cover the upper levels of the amphitheater?
- Arranging the Light Probes in your grid more densely in an area of interest of your scene and spreading them out further in other areas?
7. Try some tools for reviewing your scene
It can be relatively quick to test the effectiveness of your Light Probe setup with the sphere, but that’s not always practical or helpful. The Unity Editor has a range of diagnostic views and tools that you can use to review and assess the status of the lighting for your scene.
Check your Light Probes in both the Light Explorer window and a diagnostic view:
1. Go to where you docked the Light Explorer window or open it again (top menu: Window > Rendering > Light Explorer).
In this window there are a number of tabs you can use to review, select and edit the properties of light sources in your scene. The default Light tab shows the light sources in the scene, and you can edit them directly in the window.
2. Select the Light Probes tab. You can use this to check the status of Light Probes in a scene.

3. In the Scene view control bar, use the Debug Draw Mode dropdown (top middle) to select Contributors / Receivers (in the Global Illumination section).

4. You’ll notice that a colored overlay has appeared in the Scene view.

In this Draw Mode, the Mesh Renderers for GameObjects in the scene are drawn in different colors depending on whether they contribute to Global Illumination and if/how they receive it.
Here is a high-level overview of what each color in this diagnostic view indicates:
- Orange: The GameObject is not set as static and does not contribute anything (color or light) to the lightmap calculations. It still receives lighting data from the scene’s Light Probes. In your scene, the sphere should be orange.
- Green: The GameObject is included in lightmap calculations and it receives lighting data from the scene’s lightmaps. This is the standard status for a fully baked GameObject. The environment and props in your scene should be green.
- Blue: The GameObject is included in lightmap calculations and it receives lighting data from the scene’s Light Probes. For it to be blue, your sphere would need to be flagged as static and contribute to lightmaps in the scene.
This diagnostic view can be very helpful if you need to check that you’ve configured the GameObjects and lighting in your scene correctly.
Tip: You can customize the colors for this Draw Mode in the Preferences window.
5. In the Scene view control bar, click the Shaded Draw Mode when you’re done.
Extend your learning
You can review Scene View Draw Modes for lighting in the Unity documentation if you want to learn more about the Contributors / Receivers Draw Mode.
8. Explore: Customize your lightmap
You’ve created a basic lightmap for your scene in this tutorial, but there’s plenty more to explore.
Spend some time in the Scene tab of the Lighting window experimenting with the different settings. Think about the atmosphere you’re trying to develop in your scene. Do you want to make it brighter or darker? Do you want to make it seem relaxing (in which case a naturalistic approach may be best) or otherworldly?
The following properties are a great place to start experimenting:
- Lightmap Resolution: This controls the quality of your lightmap. Reducing the resolution will lower the quality of your baked lighting, but it should also reduce the bake time. Try increasing the value of this property to see the effect on quality and bake times.
The below image on the left has a low lightmap resolution (5), while the image on the right has a high lightmap resolution (60).

- Albedo Boost: This controls the amount of light Unity bounces between surfaces in your scene. Increasing the value will intensify the albedo of materials in your scene.
- Max Bounces: The maximum number of light bounces included in your indirect lighting.
- Indirect Intensity: This controls the brightness of the indirect light in your lightmaps.
Albedo Boost, Max Bounces, and Indirect Intensity work together to affect the amount of light in the scene. Try increasing the value of these properties and see what happens! The below image on the left has low values for these properties, while the image on the right has high values.

- Ambient Occlusion: This simulates the subtle shadowing effect caused by nearby objects blocking indirect light, enhancing the realism of the scene. It’s most often seen as darkened areas in corners where walls meet. The below image on the left has ambient occlusion disabled, while the image on the right has it enabled.

- Ambient Occlusion - Max Distance: This property determines the maximum range within which the ambient occlusion is applied. With a higher Max Distance value, the shadowing will cover a larger area on a given surface. Try increasing the value of this property to explore the effect in your scene. The below image on the left has Max Distance set to 1, while the image on the right has it set to 3.

Tips:
- Remember that some of these settings may improve the realism or quality of the lighting in your project, but they can also considerably increase the memory and processing required to deliver it. Your bake times may well increase.
- Remember to save your changes regularly as you experiment!
Experimenting is a great way to develop your understanding of how different properties can impact the overall lighting in your scene.
Bring it all together
Refer back to your vision for the late-night outdoor scene again. Considering what you’ve learned so far, how does the scene deliver on your vision? Before you move on to the indoor scene, take some time to experiment in the outdoor scene or refine it based on your vision and the skills you are developing.
9. Next steps
Now you’ve finished working in the outdoor scene! In the next few tutorials, you’ll switch to working in an indoor environment. You’ll have the opportunity to consolidate some of what you learned in the outdoor scene, but you’ll also address specific considerations for lighting an indoor scene.