Improve reflections in your scene
Tutorial
·
Beginner
·
+10XP
·
25 mins
·
(158)
Unity Technologies
You’ve almost completed your work on the indoor scene, but there’s a little more to do. Before you finish the indoor scene, you need to make the scene more realistic by addressing issues with reflection that are currently present.
By the end of this tutorial, you'll be able to:
- Explain how Reflection Probes improve the accuracy of reflections in a scene.
- Configure a Reflection Probe.
Languages available:
1. Overview
You’ve almost completed your work on the indoor scene, but there’s a little more to do. Before you finish the indoor scene, you need to make the scene more realistic by addressing issues with reflection that are currently present.
By the end of this tutorial, you'll be able to:
- Explain how Reflection Probes improve the accuracy of reflections in a scene.
- Configure a Reflection Probe.
2. How does reflection work in Unity?
You might have noticed that the apple on the corner plinth is made of a shiny, reflective material, but the reflections being shown on it are currently very strange. It is reflecting the two colored Spot Lights positioned over it in the gallery, but it is also reflecting the skybox outside of the indoor space. That’s definitely not right!
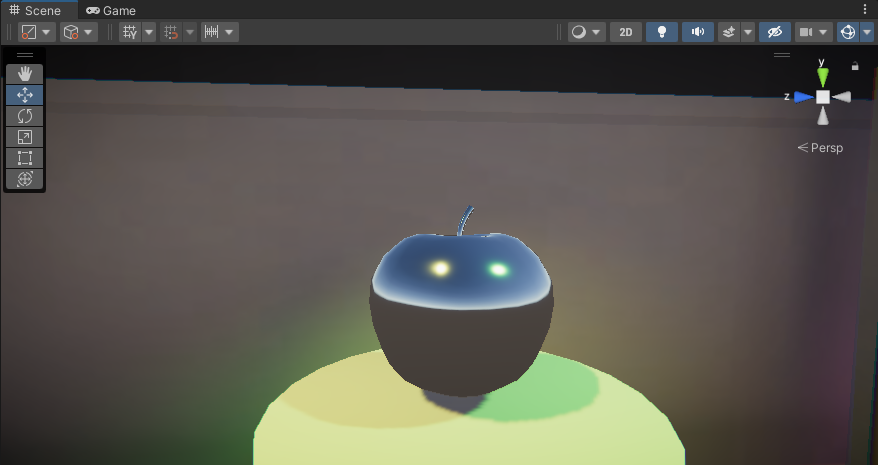
Before you address this issue, you need to learn a little about how reflection works in Unity.
Reflections in Unity
In games and similar interactive real-time experiences, reflection mapping is an approach that simulates reflections by assuming that all reflective objects in a scene can see or receive (and so reflect) the same surroundings. This can work well in a simple open space like your outdoor scene. It works less well for indoor scenes or in other spaces with a more complex environment (where there are increased variables that could impact the reflections).
For example, imagine a driving game where part of the road is covered by a tunnel. It would break immersion for the player if the cars in the tunnel still have the sky reflected in their windows.
In Unity, you can use Reflection Probes to improve the quality of the reflections in a scene by sampling the environment at critical points in the scene where a reflection would noticeably change.
3. How do Reflection Probes work?
Reflection Probes record the visual environment and lighting from a given point in a scene as a cubemap — you can think of this as a cube with six textures that record the reflections from a particular point in a scene on its inner surfaces. You’ve encountered something like this before: you can use a cubemap to generate a skybox!
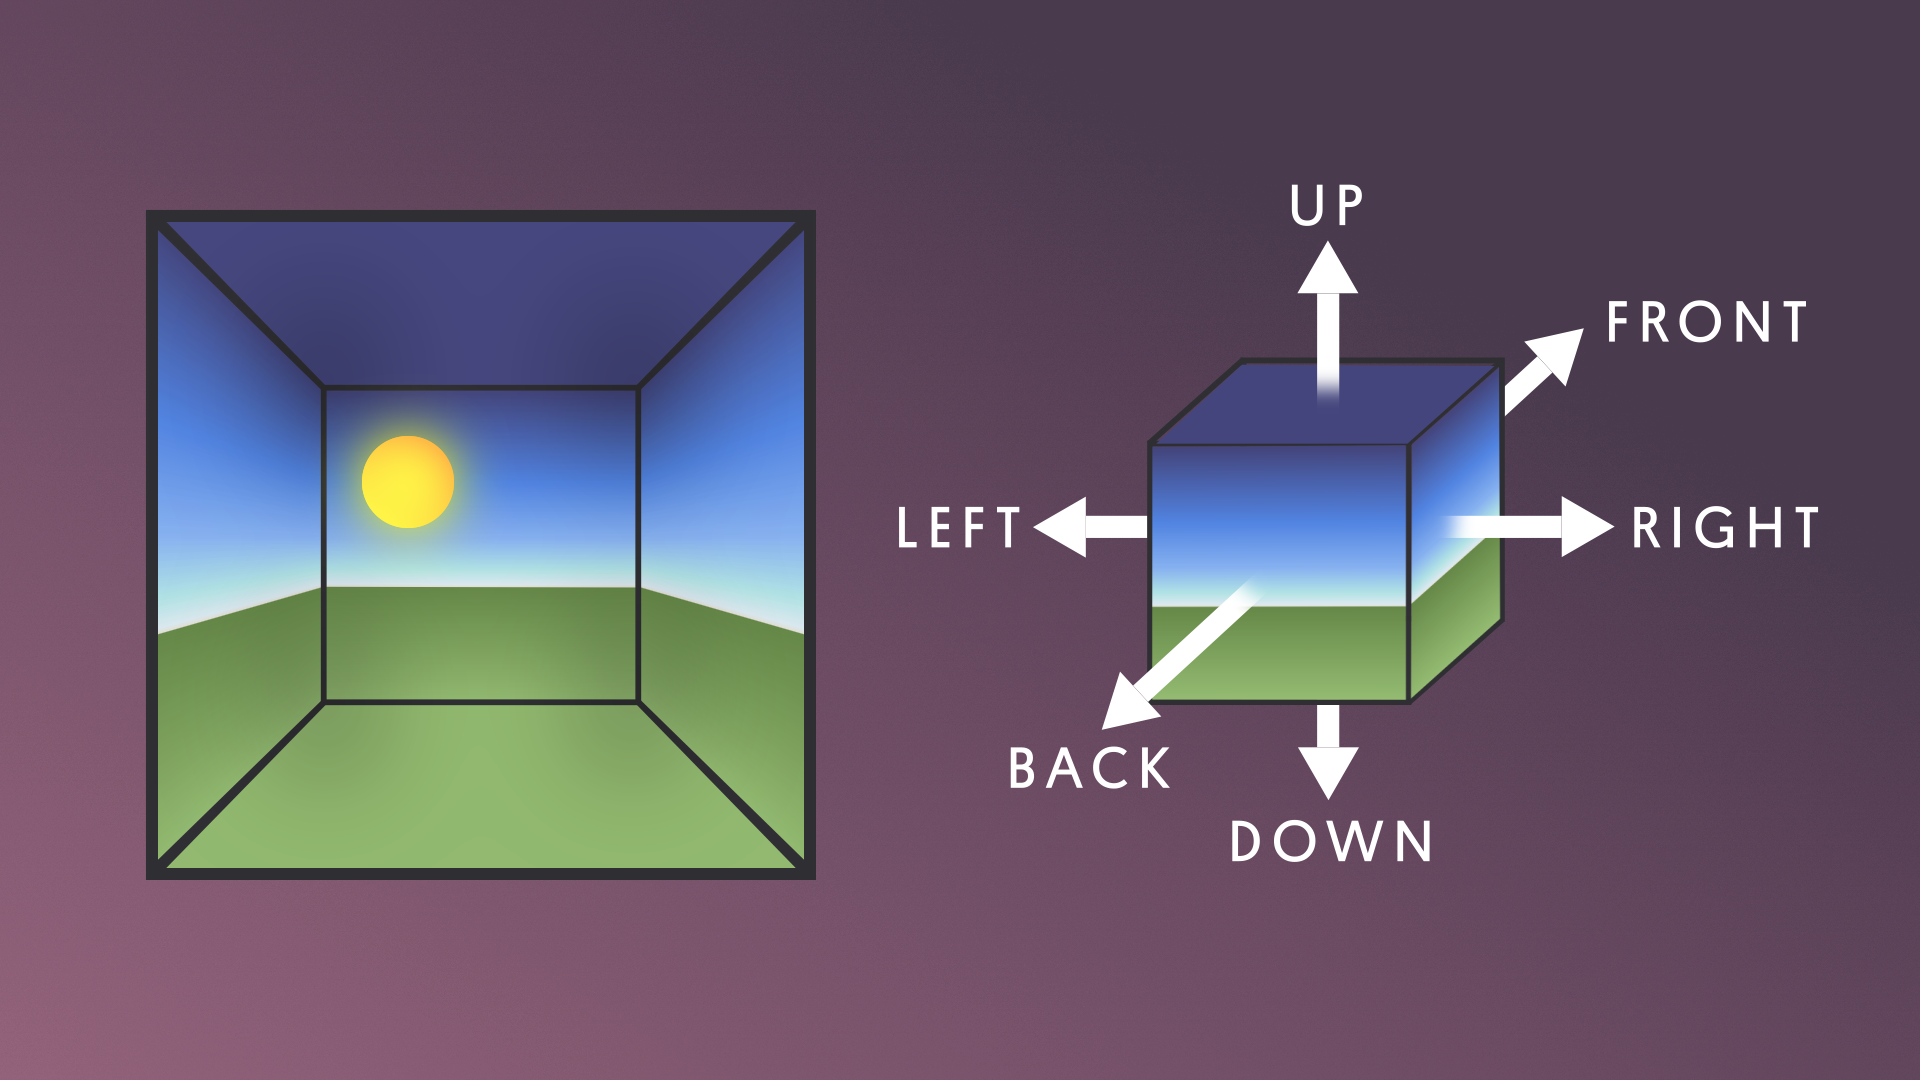
How do Reflection Probes work?
When a GameObject’s shader has access to the Reflection Probe’s cubemap, each point of the object’s surface will be able to see a small area of the cubemap in the direction the surface faces. The shader uses the colour of the cubemap at this point in calculating what color the GameObject’s surface should be. For example, a mirror would reflect the scene around it almost exactly, but a shiny car might tint and fade the reflection.
Every scene in Unity actually has a secret Reflection Probe to sample the skybox. This is what provides the basic reflections in a scene — and this is what is currently providing the reflection on the metallic apple.
Zone of effect (box)
Reflection Probes also have an invisible box around them in the scene that acts as a zone of effect. You can configure the size of this box.
A reflective object that passes within a Reflection Probe’s zone has its reflection cubemap supplied temporarily by that Reflection Probe. As the object moves from one zone to another, the cubemap changes accordingly. This is one way you could address the example in the previous step of the cars in a racing game entering and then exiting a tunnel. The tunnel could have its own Reflection Probe, and all cars within the tunnel would be in the zone of effect.
4. Place and configure a Reflection Probe
Fix the strange reflections on the metallic apple by placing a Reflection Probe in your scene:
1. In the Hierarchy, select Add (+), and choose Light > Reflection Probe. This will create a new GameObject with the Reflection Probe component added.
2. Place the Reflection Probe in front of the apple on its plinth. The closer it is to the actual position of the apple, the more accurate the reflections will be.
You’ll notice that aside from the spotlight reflections, the apple will appear to be black when you place the Reflection Probe here. This is because it is in the Reflection Probe’s zone of effect.
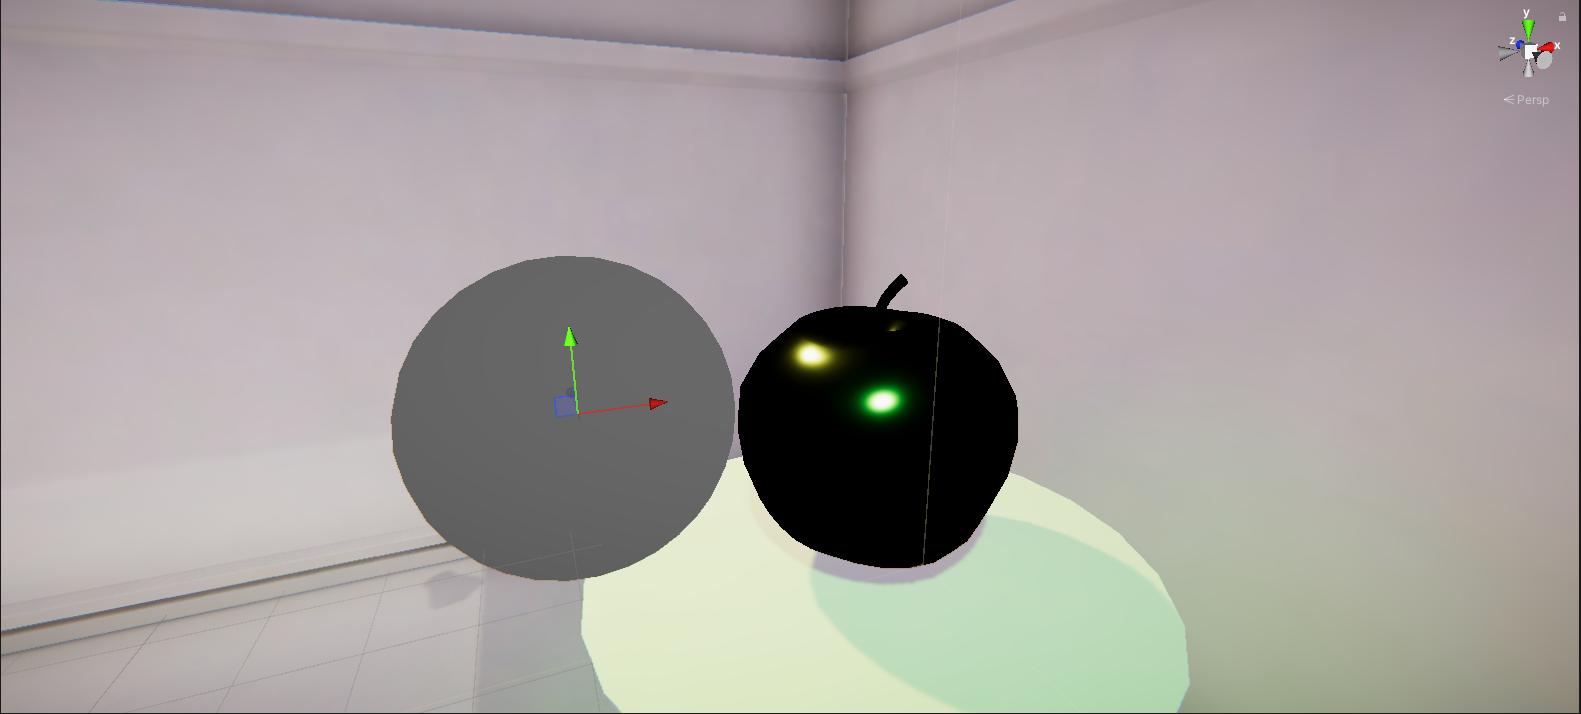
Tip: If you are struggling to move the Reflection Probe to the correct location, try setting the Position properties in its Transform component close to the Apple model’s as a first step.
3. In the Inspector, go to the Reflection Probe component and check that its Type is set to Baked.
4. In the Runtime Settings section, enable the Box Projection property.
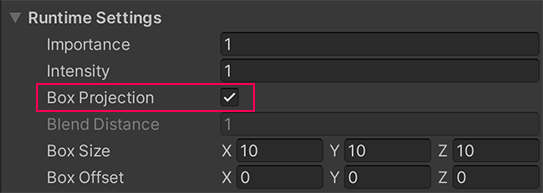
This means that reflections on the apple will be simulated based on where the apple is within the zone of effect for the Reflection Probe.
5. Adjust the Box Size axis values until the box that represents the zone of effect for the Reflection Probe fills most of the back half of the gallery where the apple is located.
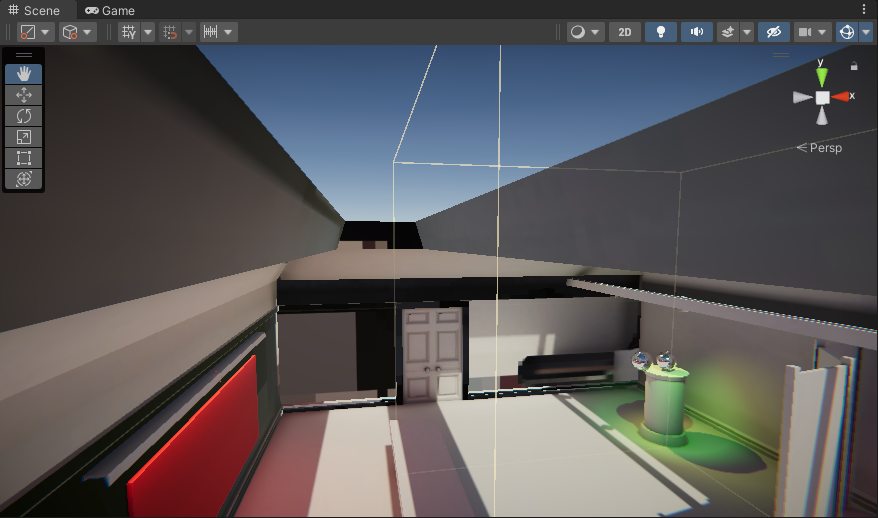
Tip: Open FinalScene_Lighting_Indoor and review the configuration and placement of Reflection Probe (1) if you’d like to examine an example more closely.
6. Select Bake to bake the Reflection Probe — this is at the bottom of the Reflection Probe component.

Important: Reflection Probes need to be baked separately from your lightmaps for the scene, unless you have auto-baking enabled (the Auto Generate setting in the Lighting window). This is because it can take quite some time to rebake if you’re making changes, especially in a more complex scene. If you make changes to a Reflection Probe, remember to bake it!
5. Test the Reflection Probe
After baking, you should immediately notice that the reflection in the apple has changed to show the room around it.
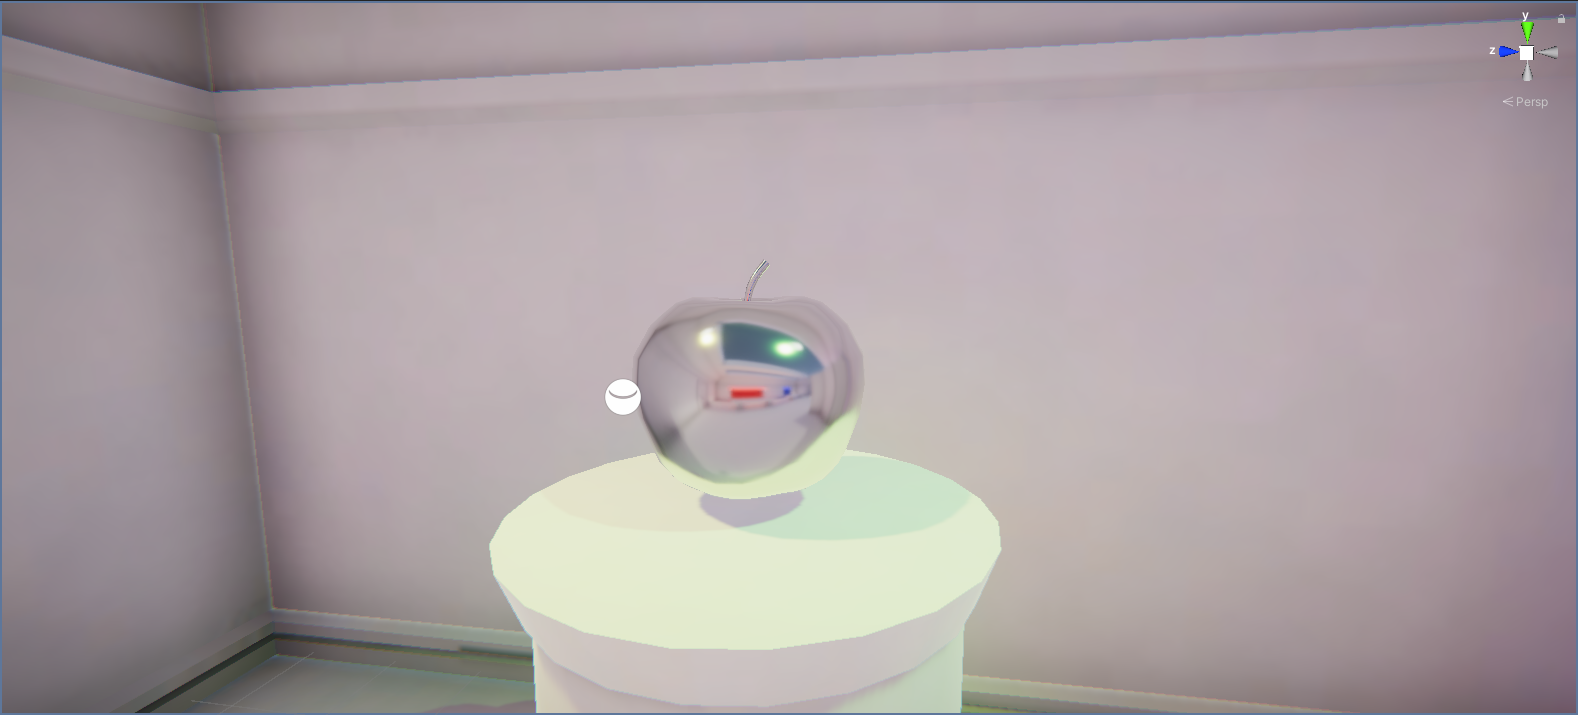
You can examine the accuracy of the reflections provided by the Reflection Probe in a little more detail though:
1. Select Play to enter Play mode.
2. You’ll notice that the apple is animated to move up and down — watch how the reflections on it change in accordance with its changing position as it does so.
3. When you’re done, remember to exit Play mode.
The metallic apple reflects the gallery space around it, and the reflection changes as the apple moves. That’s a big improvement!
6. Why take this approach to reflection?
Calculating accurate reflections can be very processing-intensive, which is why real-time experiences that are not aiming for high levels of realism often determine when and where to invest in more accurate reflection mapping. Different reflective objects in a scene will often share a carefully-placed Reflection Probe rather than each having their own, even though that would be the best way to achieve the most accurate simulations of reflection.
As in many other areas, you often have to decide on the right balance between optimization and realistic simulation for your project. The project for this learning experience is relatively small and undemanding in terms of processing, but if you add lots of reflective objects and Reflection Probes you may notice a negative impact on performance.
7. Explore: Establish a mysterious atmosphere in the gallery
When you worked on the outdoor scene you spent time customizing it to your own vision. So far in the indoor scene, you’ve completed and refined the lighting for the scene rather than customizing it.
If you want to, take some time now to consider how you could use lighting to develop a more mysterious atmosphere in this space.
Consider:
- Time of day and the use of the skylights
- Use of color
- The realism of shadows
- Changes to the environment that might have a significant impact on the lighting (for example, duplicating the partial room partition and placing them around the space)
You can keep this as a thought experiment or take the time to actually implement your changes in the scene. You can also come back to these scenes at any time and use them to practice or experiment with lighting.
Tip: Remember to save your changes regularly!
8. Next steps
Now you’ve finished working in the indoor scene and your exploration of the fundamentals of lighting in Unity in this learning experience!
In the final challenge tutorial, you’ll learn about a key artistic lighting approach to help you develop your craft and then apply what you’ve learned to create a lighting study in a new scene.