
Showcase your work with lighting
Tutorial
Beginner
+10XP
35 mins
(156)
Unity Technologies
In the previous tutorials in this learning experience, you lit an outdoor scene and an indoor scene, developing your understanding of lighting in Unity as you did so. Now it’s time to apply your understanding of lighting in Unity to a slightly different context: showcasing a product.
By the end of this tutorial, you'll be able to:
- Identify research topics and resources to develop your understanding of foundational lighting science and design principles.
- Configure Light components to showcase an object in Unity.
Languages available:
1. Overview
In the previous tutorials in this learning experience, you lit an outdoor scene and an indoor scene, developing your understanding of lighting in Unity as you did so.
Now it’s time to apply your understanding of lighting in Unity to a slightly different context. One use case for real-time experiences is to display products — for example, cars in a digital showroom or items in a gallery (like the indoor space example for this learning experience).
By the end of this tutorial, you'll be able to:
- Identify research topics and resources to develop your understanding of foundational lighting science and design principles.
- Configure Light components to showcase an object in Unity.
Even if you’re not working on a product-based real-time experience, showcasing your work for others via compelling images can be a great way to elevate your portfolio or to engage potential users.
2. Examine the example studio scene
In this tutorial, you’ll choose an object and light it for product images in a special scene that replicates a basic real-world studio space. First, take some time to explore the studio scene that we’ve created for this challenge:
1. Open the Creative Core: Lighting project in the Unity Editor, if you haven’t already done so.
2. In the project window, go to Assets > CreativeCore_Lighting > Scenes and open the FinalScene_Lighting_Studio scene.
3. In the Scene view control menu, set the Scene view to 3D view.

4. Examine the scene in the Scene view.
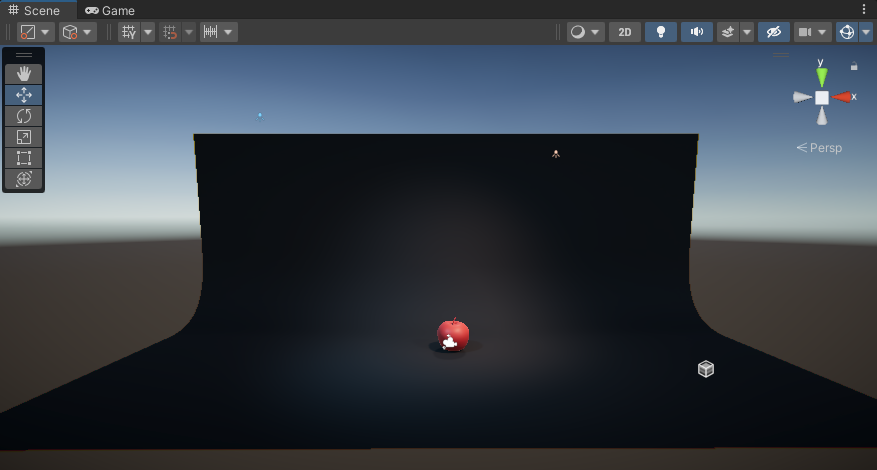
The studio backdrop will help you create focused product shots.
5. Select Play to enter Play mode and review the way that the apple is showcased by the lights. Consider the following questions:
- How is the object illuminated?
- What is the purpose of this lighting?
6. When you’re done, select Stop to exit Play mode.
Check your work
The apple model in the scene is being displayed in a product-style marketing shot. It’s brightly lit, but there are still interesting shadows present. The purpose of this lighting is to draw and retain attention, making it easy to see the object’s key features.
3. Three-point lighting
When you evaluated the example scene, you may have noticed that there were three light sources focused specifically on the red sphere. This is an adapted version of a specific and common lighting technique called three-point lighting.
If you want to know more about this technique in detail before you review the way we’ve configured the lights in the studio scene, you might find the following resources helpful:
- What is three-point lighting? (Vimeo)
- Three point lighting for 3D renderings (3DRender)
4. Review the studio lighting setup
Each of the three lights in the scene performs a specific role in the visual composition of the scene, adapted from the three-point lighting approach. To follow along with the explanation below:
1. In the Hierarchy, expand the Lighting GameObject.
2. Select each numbered light GameObject in turn to view its configuration and angle in the Scene view.
3. Enter Play mode to review the final lighting configuration. You can use the Light Explorer window to disable and enable the lights so you can examine the impact of each on the product shot.
4. Remember to exit Play mode when you’re done.
The orange and blue lights
Light1 (Blue) and Light2 (Orange) provide the main lighting on the object. They are placed on opposite sides of the object at the same angle. One is a cool blue and the other a warm orange. In traditional three-point lighting, one would be the key light (the most intense light) and the other would be the fill light (a less intense light to fill in shadows created by the first). In this setup, they are both of equal intensity.
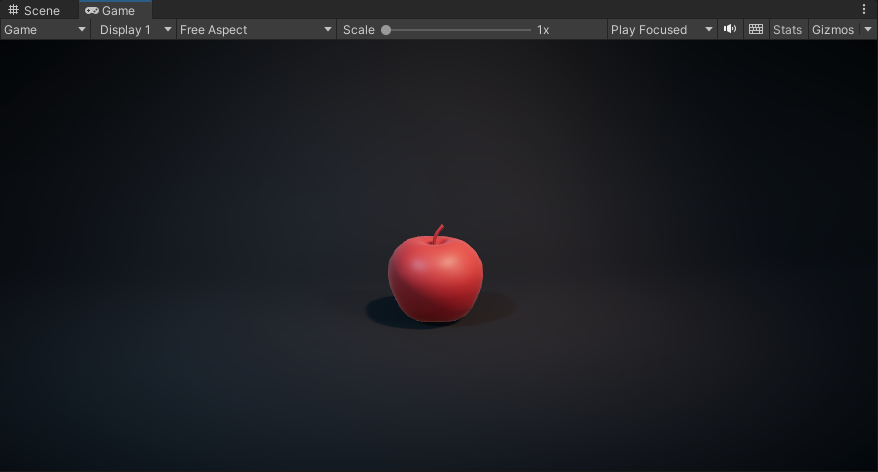
Turn each light on separately and then together to see the impact they have on lighting the apple.
The back light
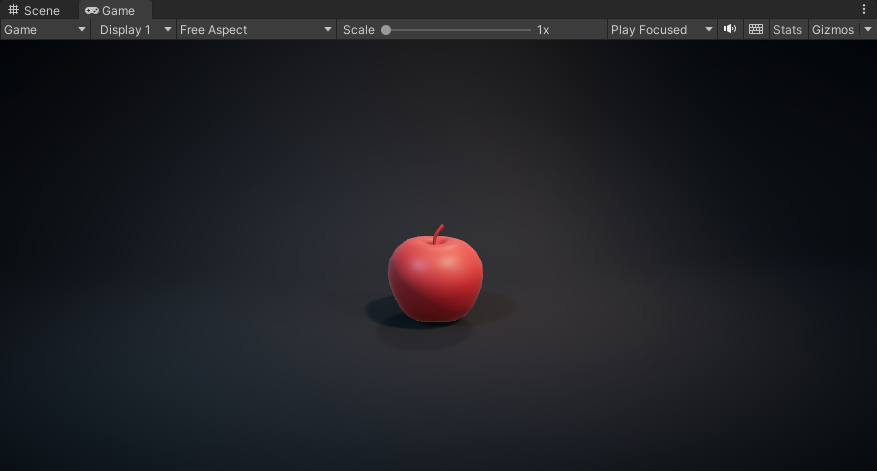
Light3 (White) is the back light (or rim light). It provides a rim of light around the apple that creates a sense of depth between the object and the background. This light helps add nuance to the composition of the scene or still image. This light in the scene more closely matches the traditional three-point lighting technique.
Bringing a scene together
When a scene is focused on a particular object, whether that’s a character in a film or an object on display on a plinth in a real-time gallery, three-point lighting aims to draw and hold the viewer’s attention. You can also adjust each of the lights and additional ambient lighting in the scene to realize your overall creative vision.
5. Establish mood with your lighting
In the previous tutorials in this learning experience, you’ve had the opportunity to customize the example scenes that we’ve provided. Some of that customization, particularly the color and intensity of lighting in your scene, has a significant impact on the mood of the overall experience.
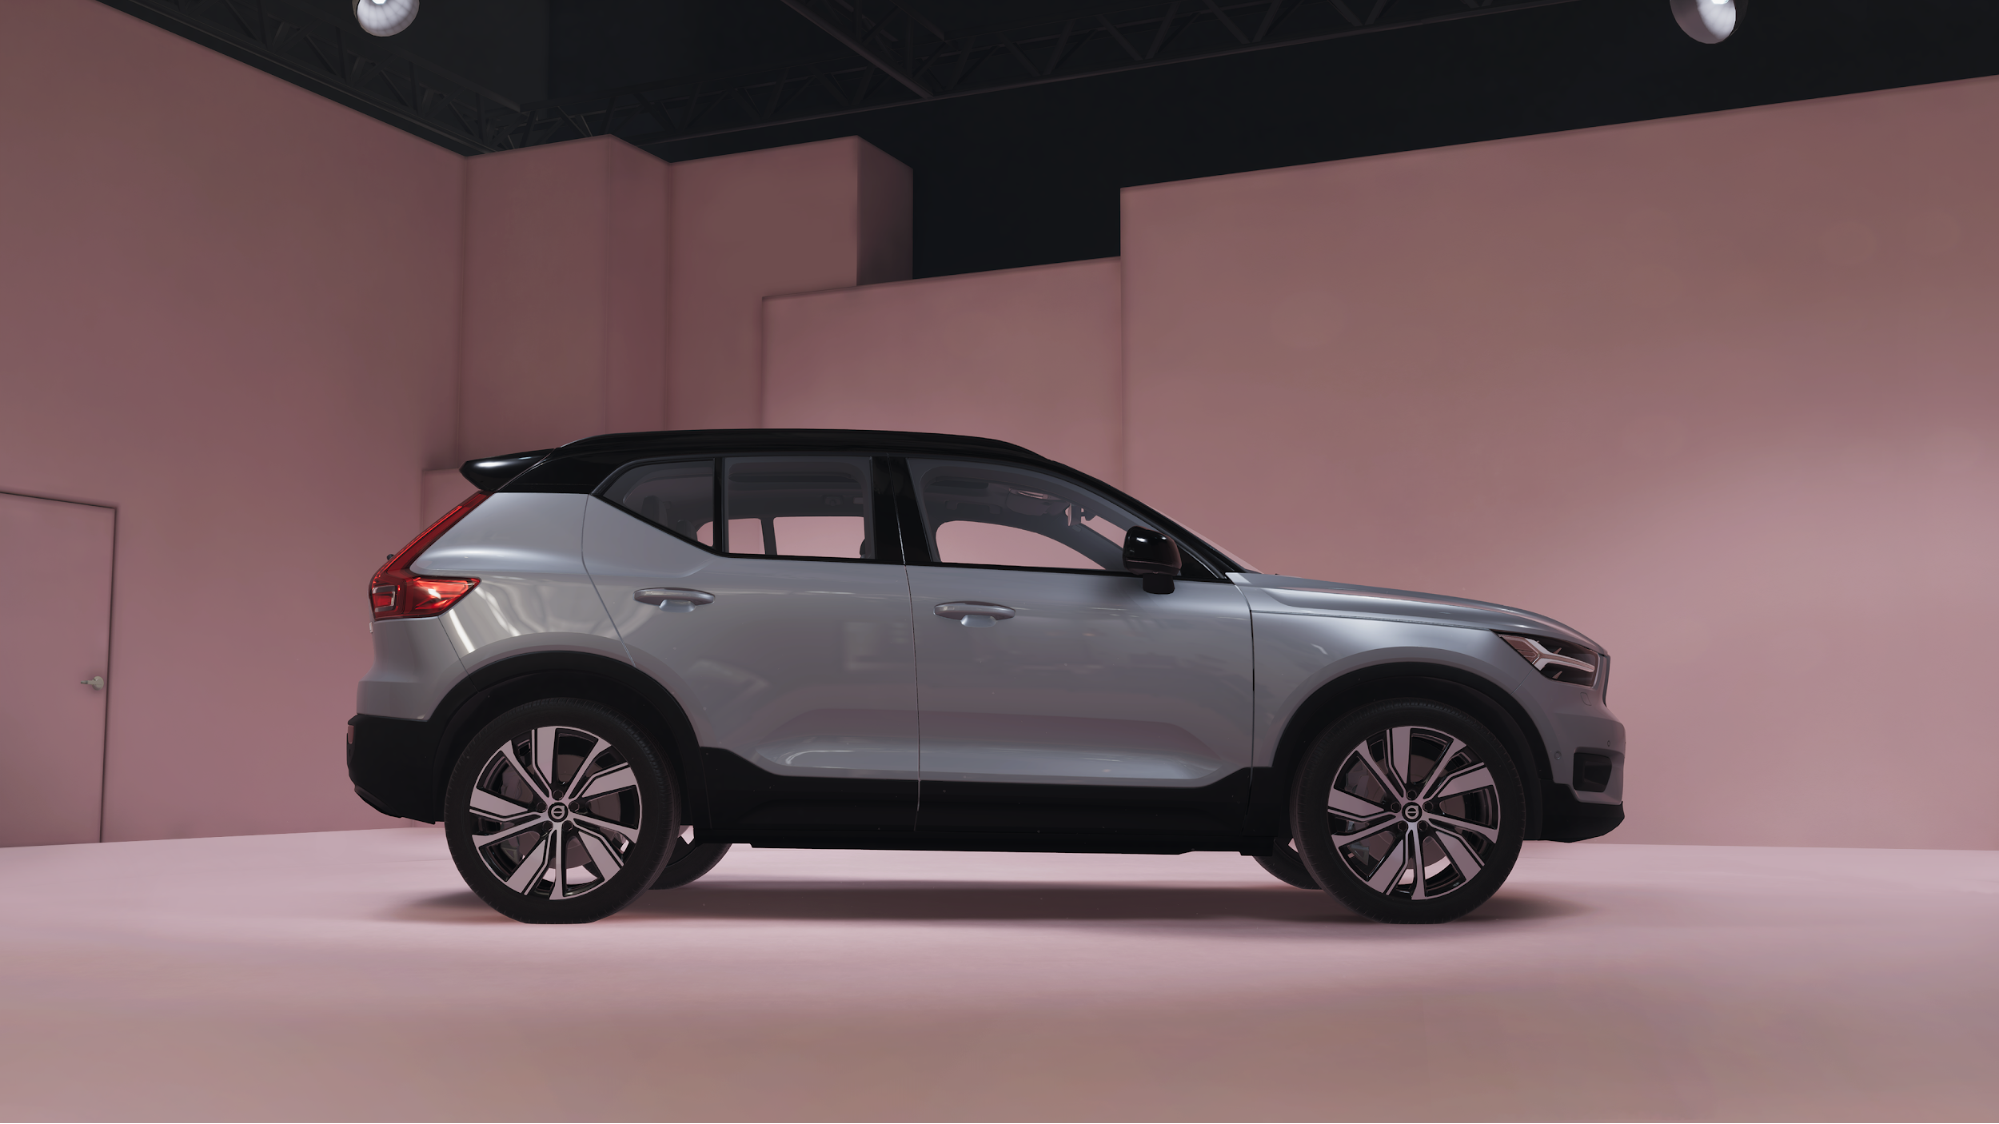
Consider this screenshot from the Auto Showroom Sample Template — how does the lighting impact the overall atmosphere of the piece? What thoughts or feelings do you think it could be intended to evoke?
Identify your target mood
In this tutorial, you’ll be lighting an object of focus in a studio space. There’s a key functional requirement for that lighting — the space must be illuminated sufficiently and the object that you choose must be highlighted with light. Mood is still an important element though!
Think of an advertisement for a product that you’ve seen recently; it could be a single image, a video or an interactive advert. What emotions do you think it was trying to make you feel?
Some examples are:
- A traditional photographic watch advert, in high resolution with bright focused lighting to emphasize the fine detail in the watch design and crafting.
- A cinematic car advert that relies heavily on enhanced motivated lighting, designed to create a sense of heightened realism as the car moves through dramatic scenery.
- A dramatically lit animation with high contrast advertising an RPG game, designed to make you feel excitement and emphasize the epic stakes of the game.
- A dreamily lit video advert for a dress on a social-media platform with a pastel color palette, bright enough that the clothing can be seen clearly but is not emphasized as the primary object of focus.
As you plan your approach to this study, consider the sort of mood and emotion you want to spark with your lighting.
6. Customize your own product lighting study
We created the basic scene for you to use for this lighting study, but you can customise it any way you like, either with additional assets or with ProBuilder. (If you haven’t used ProBuilder before, you’ll get started with it in Creative Core: Prototyping!)
To customize it for your own product lighting study:
1. Duplicate the FinalScene_Lighting_Studio scene and give it a new name.
2. Add your choice of focus object to the scene. This could be a prop we’ve already included, a different prop that you want to import, or even a character model!
Tip: If you sculpt your own models, you could use this as an opportunity to take some beauty shots for your portfolio.
3. Reconfigure the Spot Lights in the scene.
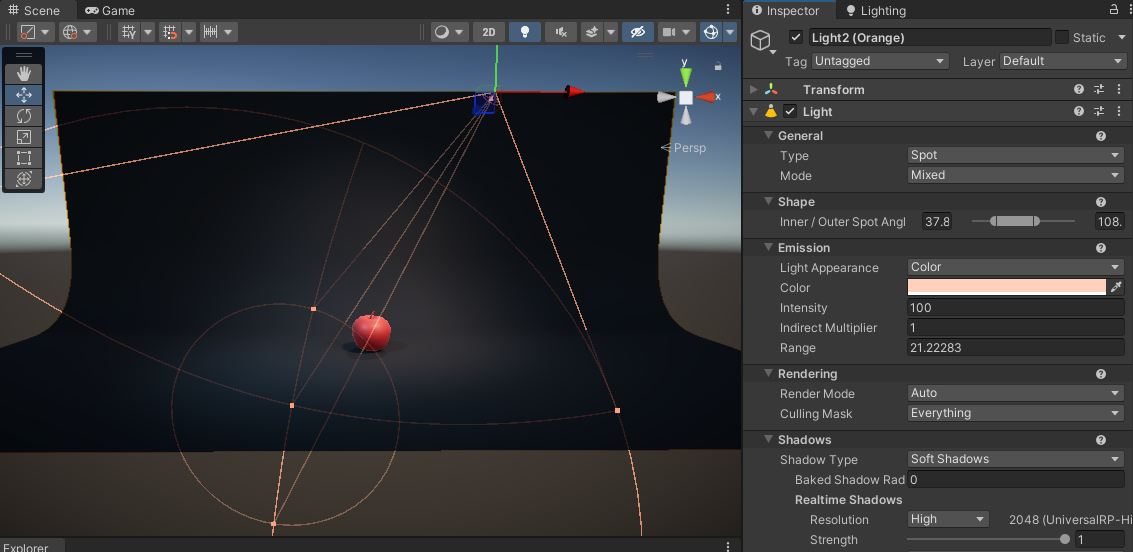
Experiment with the impact of:
- Adjusting the Range, Intensity, and Color of the lights.
- Changing the Inner / Outer Spot Angle values, which control the inner and outer angles in degrees from the base of a Spot Light’s cone.
- Changing the StudioBackdrop (child of the Environment GameObject). You can apply new materials or adjust the current material’s Color for more of a custom studio experience.
- Moving the lights closer or further away from their current positions.
- Adjusting the Directional Light.
Tip: Remember to save your changes regularly!
Take some polished shots
If you want to take more polished images than just using screen capture on your computer, you can use the Unity Recorder package to capture and save data when in Play mode. This is capable of recording videos, still images, GIFS and more.
Tips:
- Review the instructions on installing packages if you need to recap the process.
- Refer to the Recorder Package documentation for an overview or reminder of how to use it.
7. Explore: Set up traditional three-point lighting
If you want to explore the traditional three-point lighting technique, refer back to your extended reading and try to re-configure the three lights in the scene according to the technique. This is a great opportunity to test out lighting techniques in practice and to develop your confidence configuring light sources in Unity.
Tips:
- In traditional three-point lighting, your key light should be more intense than your fill light.
- Pay attention to angles advised for the lights and the impact that this has on the studio lighting.
8. Next steps
Although in this tutorial you’ve worked in an artificial studio environment, you can also apply these principles to lighting an important focus object in a scene in any sort of real-time experience.
Now that you’ve completed this final lighting tutorial, you’re ready for the final challenge in this learning experience: your own cinematic lighting study.
Extend your learning
If you’re interested in continuing your journey with lighting beyond this learning experience, you may find Choosing and configuring a render pipeline and lighting solution a useful reference resource. Happy creating!