Add animation to your game
Tutorial
·
foundational
·
+10XP
·
60 mins
·
(11)
Unity Technologies

Animation in games is vital for bringing characters, environments, and objects to life, and enhancing the overall visual appeal and immersion of a game.
In this tutorial, you’ll create an animated enemy character to replace the current primitive enemy shape.
Languages available:
1. Overview
Animation in games is vital for bringing characters, environments, and objects to life, and enhancing the overall visual appeal and immersion of a game.
In this tutorial, you’ll create an animated enemy character to replace the current primitive enemy shape.
2. Requirements
In order to successfully complete this challenge, your project must include the following elements, styled according to the theme outlined in your design document:
- An animated enemy character.
3. Review your design document
Your Game Design Document (GDD) is still a work in progress. Take a moment to open your GDD now and review it.
Now, think about your specific theme and the type and style of character that would make sense for your game.
4. Review the asset pack
Take some time to review the assets provided in the UCU Game Developer package that you downloaded and imported earlier in the Fill out a Game Design Document tutorial.
If you did not download and import those assets, you can do that now.
In the asset pack, you can browse the Prefabs > Characters folder, which contains a few character options for you to work with. Each character comes with at least a walk/run animation. Feel free to use any of these characters. You’ll have an opportunity to search for other characters in the Asset Store in a later tutorial.
5. Challenge guidance
Create an enemy character
We’ve provided a few sample characters to demonstrate how you can add animated enemies to your game. In the following steps you will learn how to do that.
We encourage you to repeat these steps with your own character once you understand the process.
To add the an enemy model to your game, follow these instructions:
1. Drag your selected character model from Prefabs > Characters to the Enemy GameObject to add it as a child GameObject.
The Enemy GameObject already controls the movement on the NavMesh, so any child GameObject will move along with it.
2. Change the scale and position of your selected character model as you see fit.
The Enemy GameObject still shows as a cube GameObject in the scene.
3. Select the Enemy GameObject, and in the Inspector window, disable the Mesh renderer to hide it.
4. Test the game.
You will notice that the new character is chasing the player as before, but the character stays in the default T-pose. Let’s add the provided animations to the character.
Adding Animations to the enemy character
To add animation to your selected character model mode, follow these instructions:
1. Navigate to Assets > Animations, right-click in the Animations folder, then select Create > Animation Controller. Name it “EnemyAnimation”.
2. Select your chosen character model in the Hierarchy window, then, in the Inspector window, drag the newly created Animation Controller to the Controller slot of the Animator component.
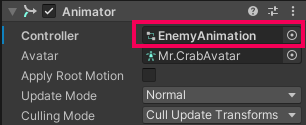
We’ve provided a few animations for your selected character model character, but they still need to be assembled and assigned to be used.
3. Select Window > Animation > Animator to open the Animator window.
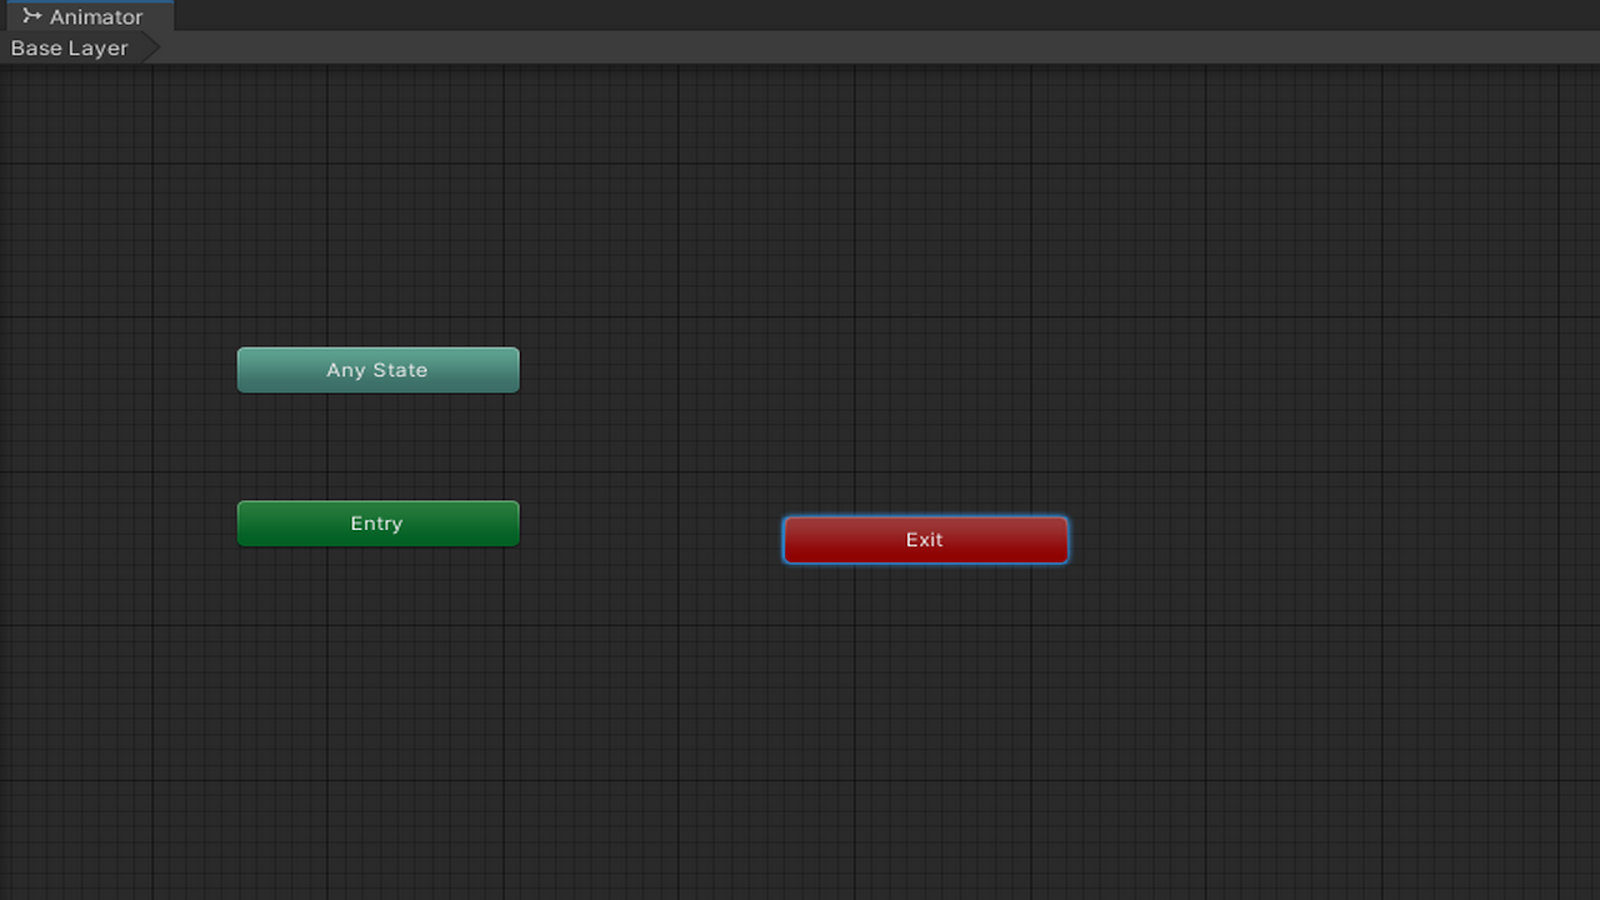
4. Navigate to Assets > Animations > AnimationClips, locate the idle animation for your character, in this case MrCrab@Idle animation, and drag it into the Animator window. If there is no Idle animation, select the walk or run animation instead.
This will set the idle animation as the default state. If you test the game now, you will see that the idle animation runs once, then stops.
5. In the Project window, select the animation clip again. In the Inspector window, select the Animation tab, and then enable Loop time.
This will ensure that the idle animation plays continuously. Unfortunately, the idle animation is the only animation that plays, even when the character is moving. Let’s fix that.
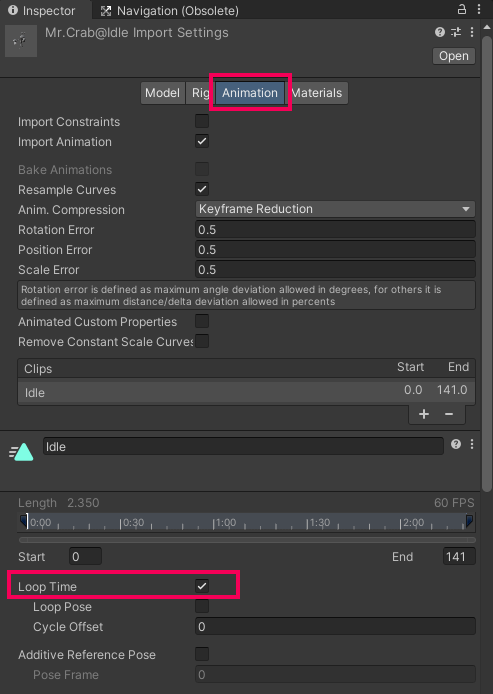
6. Navigate to Assets > Animations > AnimationClips, locate the walk animation, and drag it into the Animator window.
7. Right-click the Idle animation, select Make Transition, and select the Walk animation to link the two.
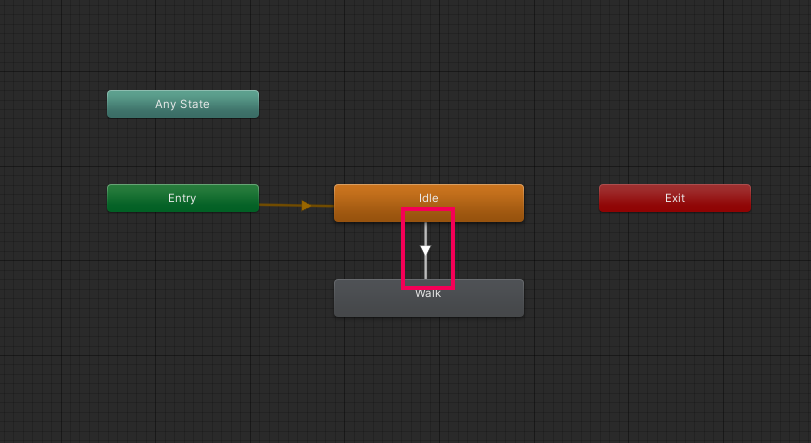
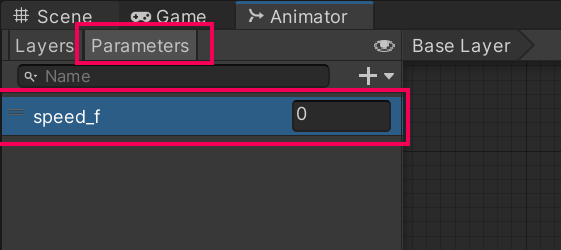
8. In the Animator window, switch to the Parameters tab and add a new float parameter. Name it “speed_f”.
You will use this parameter later in a script to toggle the transition between the idle and walk animations.
9. Select the transition line between the Idle and Walk animations and in the Inspector window, select the Add (+) button under Conditions to add a new condition.
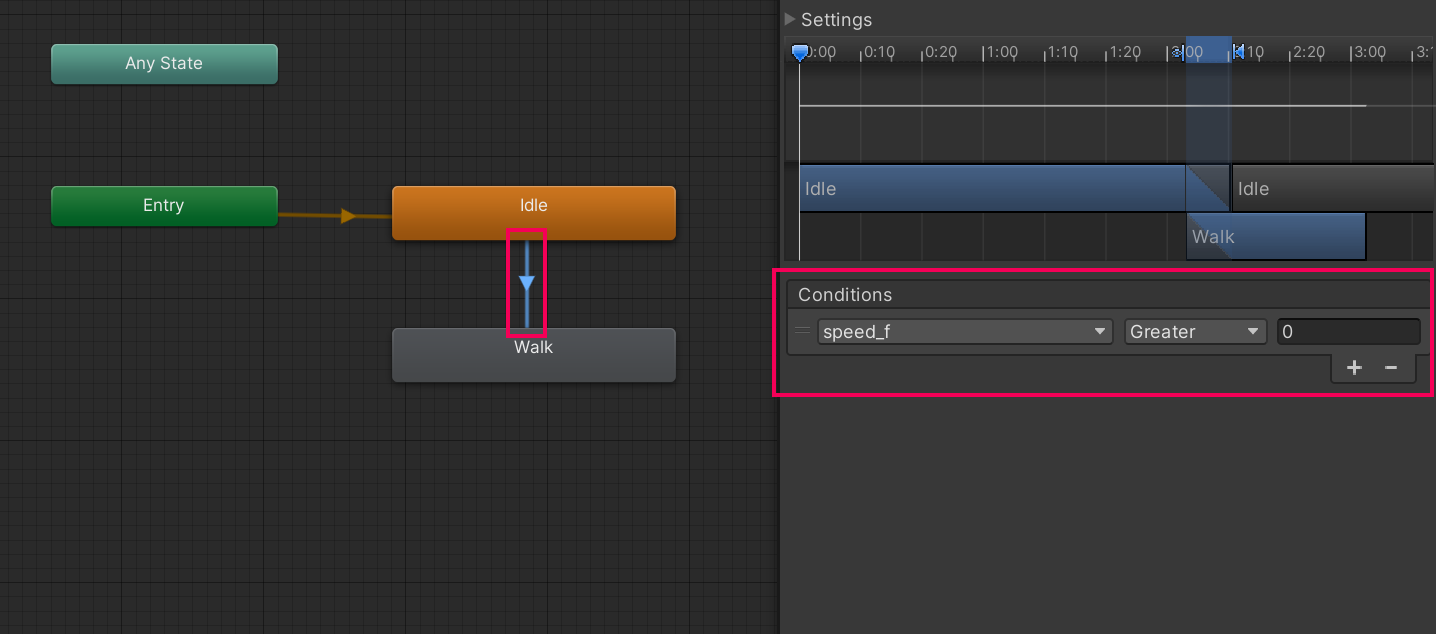
10. Ensure that the new condition is set to speef_f, Greater, and 0.
This means the transition will happen whenever the speed_f parameter is set to something bigger than 0.
11. Create another transition, this time from the Walk animation to the Idle animation.
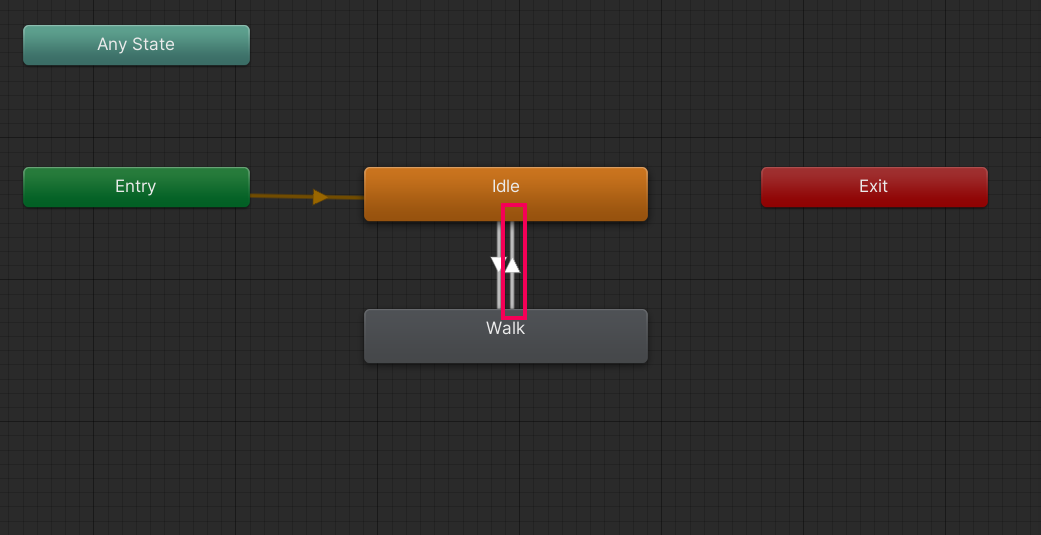
12. Select the new transition line, and in the Inspector window, add a condition set to speed_f, Less, and 0.05.
This will let the animation transition back to idle when the enemy is not moving.
Now you need to make sure that the transition will happen when the state of the enemy changes and not only when the animation has played all of its frames.
13. Select the transition line from Idle to Walk and disable Has Exit Time.
14. Select the transition line from Walk to Idle and disable Has Exit Time.
The Has Exit Time property determines if a transition from one animation state to another should wait for the first animation clip to finish or if it can transition at any point based on other conditions being met. In gameplay, responsiveness is critical. If a player provides input to make a character walk, they expect the action to be immediate. If Has Exit Time is enabled, the transition to the walk animation might have to wait for the idle animation to finish its current loop, leading to perceived input lag.
15. Navigate to Assets > Animations > Mr.Crab, Select the Walk animation, and just like you did for the Idle animation, set the animation to loop.
Update the EnemyMovement script
To update the EnemyMovement script to reflect the new animations you just added, follow these instructions:
1. Open your EnemyMovement script and add a new private Animator variable.
private Animator anim;2. Add the following code to the Start function.
private void Start()
    {
 //Get the nav mesh agent component
        navMeshAgent = GetComponent<NavMeshAgent>();

 //Get the animator component
  anim = GetComponentInChildren<Animator>();
 //Set the value of speed_f
 if (anim)
        {
            anim.SetFloat("speed_f", navMeshAgent.speed);
        }
    }
This code retrieves the Animator component from any child object. Then, if the Animator component exists, it sets the speed_f parameter to match the speed of the NavMeshAgent. This means that the animation clip’s speed will be proportional to the speed the enemy is moving, which is perfect.
Now, the enemy’s walking animation should play when it moves, but the enemy character will continue its walking cycle after it has stopped when it catches the player — this will look very strange.
To set the animation back to idle, you need to set the speed_f variable back to 0 when the lose condition is triggered.
3. Add the following line to your PlayerController script inside the if (collision.gameObject.CompareTag("Enemy")) section of the OnCollisionEnter function:
// Set the speed of the enemy's animation to 0
 collision.gameObject.GetComponentInChildren<Animator>().SetFloat("speed_f", 0);
The complete function should look like this:
private void OnCollisionEnter(Collision collision)
 {
  if (collision.gameObject.CompareTag("Enemy"))
  {
    // play explosion fx
    Instantiate(explosionFX, transform.position, Quaternion.identity);

    // Destroy the current object
    Destroy(gameObject);

    // Set the text to "You Lose!"
    winText.text = "You Lose!";
    AnimateText();


    // play explosion sound
    collision.gameObject.GetComponent<AudioSource>().Play();

    // Set the speed of the enemy to 0
    collision.gameObject.GetComponentInChildren<Animator>().SetFloat("speed_f", 0);

  }

}6. More things to try
If you want to develop your skills further, explore new concepts, or improve your project, check out some of the optional activities below. Each activity is identified as being either Easy, Medium, or Difficult, so you know what level of difficulty to expect.
These activities are entirely optional, so if you’re not interested, no problem – just skip this step. We do recommend attempting at least one of them in order to get the most out of this learning experience. Good luck!
Medium: Add additional animations to scene elements
Add additional animation to static objects in the scene to create moving obstacles or paths for the player.
7. Next steps
In this tutorial, you created animations to add some life and dynamics to the game. In the next tutorial, you will learn how to customize the look and feel of your game with materials and shaders.