Animate the model in Rigging Mode
Tutorial
intermediate
+10XP
35 mins
39
Unity Technologies
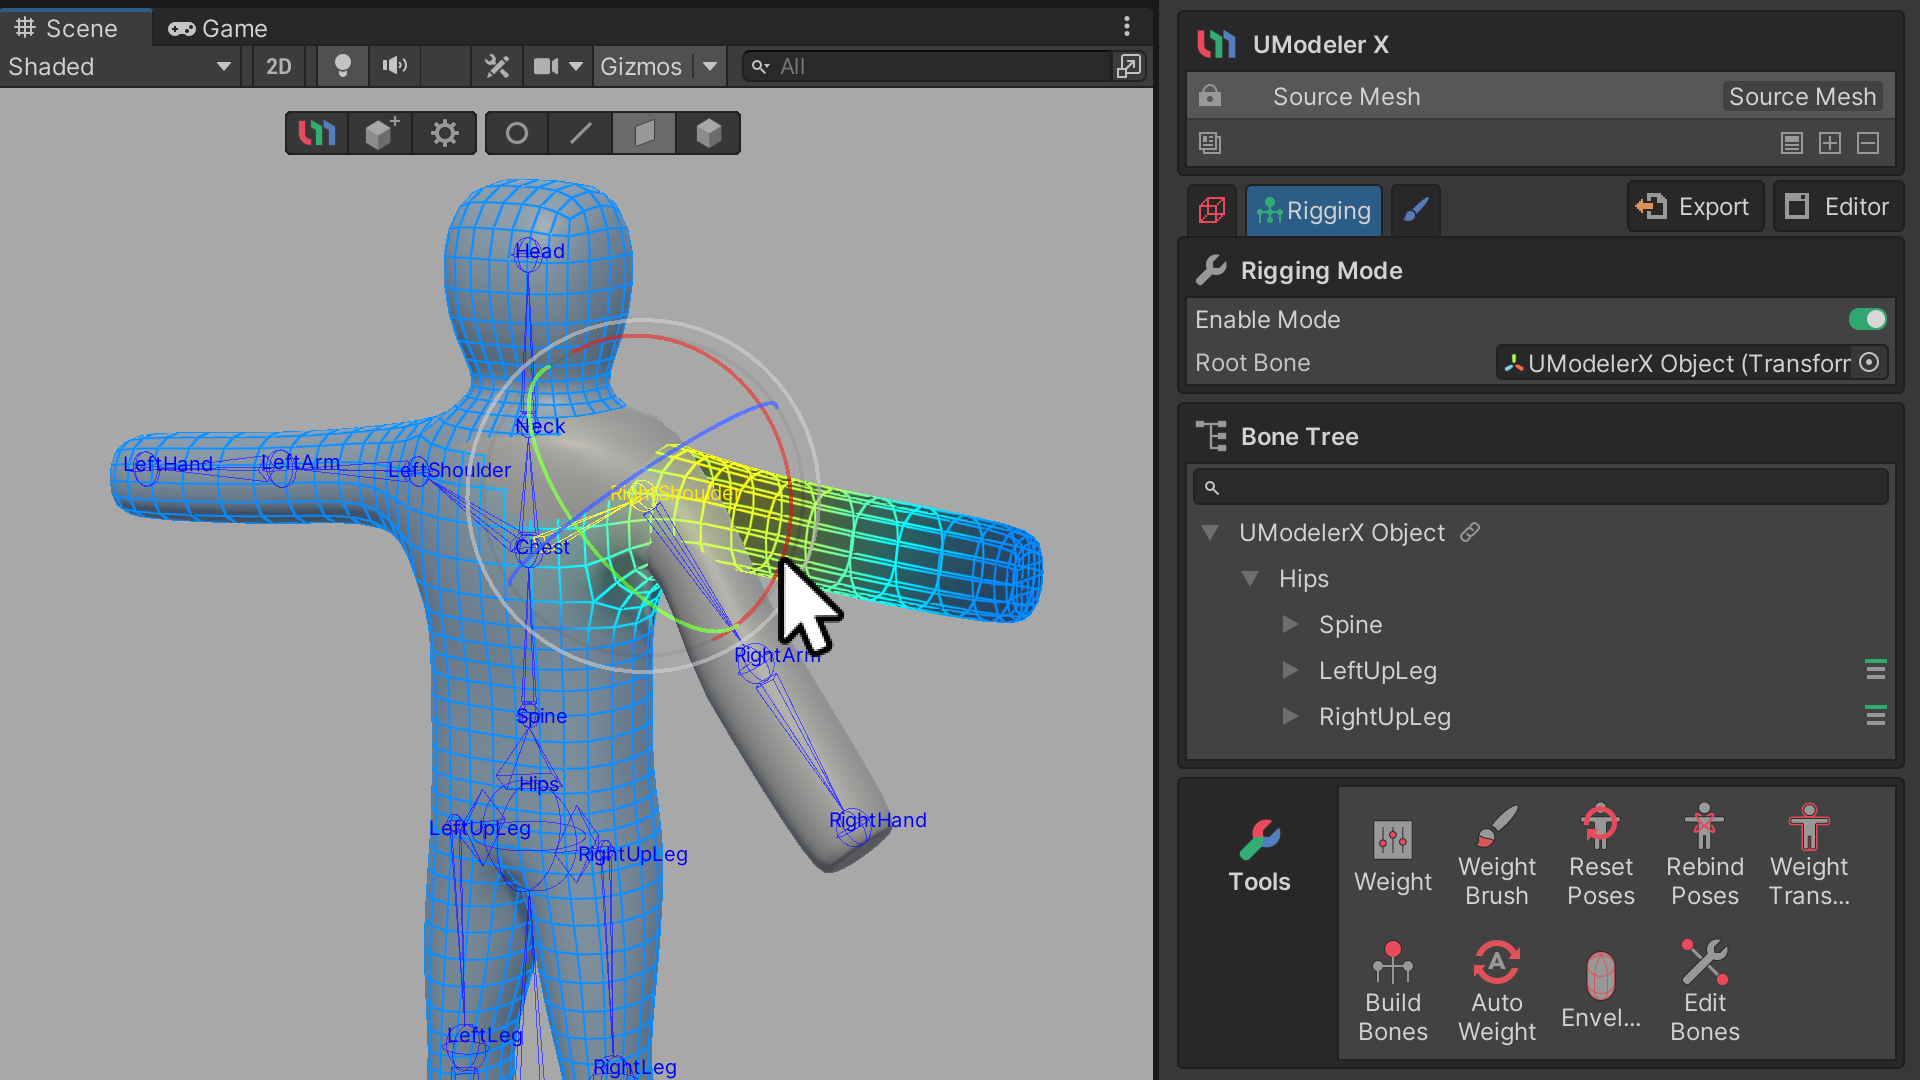
This tutorial will guide you through the process of rigging and animating in UModeler X. In Rigging Mode, you will learn how to animate your model by assigning and modifying weights on the meshes.
Languages available:
1. Overview
In this tutorial, you will learn how to apply rigging and animation in UModeler X. Rigging Mode is a mode used to animate your model, which allows you to assign weights to meshes and edit those weights.
2. Before you begin
New to Unity?
If you’re new to Unity, welcome! The Unity Essentials learning pathway has been designed to help you get set up and ready to create in the Unity Editor. We recommend you complete this pathway before continuing with this UModeler X tutorial.
Update the Unity Hub
Before you begin to set up your Unity project, consider updating your Unity Hub to the latest release. If you are using an older version of the Hub, there may be differences between the guidance provided and your experience.
Review the Unity Editor basics
If you need to refresh your memory of the Unity Editor basics, you can take a moment to review Explore the Unity Editor at any time.
3. Introduction to Rigging Mode
Rigging Mode is used to animate your model, which allows you to assign weights to meshes and edit those weights. If you want to move a model created in Modeling mode, you can set the model up and edit it to move in Rigging Mode, and then upgrade it to an animated model by working on the animation.
First, let's take a look at some of the terminology used in Rigging Mode.
- Rigging Mode: Rigging Mode allows you to assign weights to meshes and edit those weights.
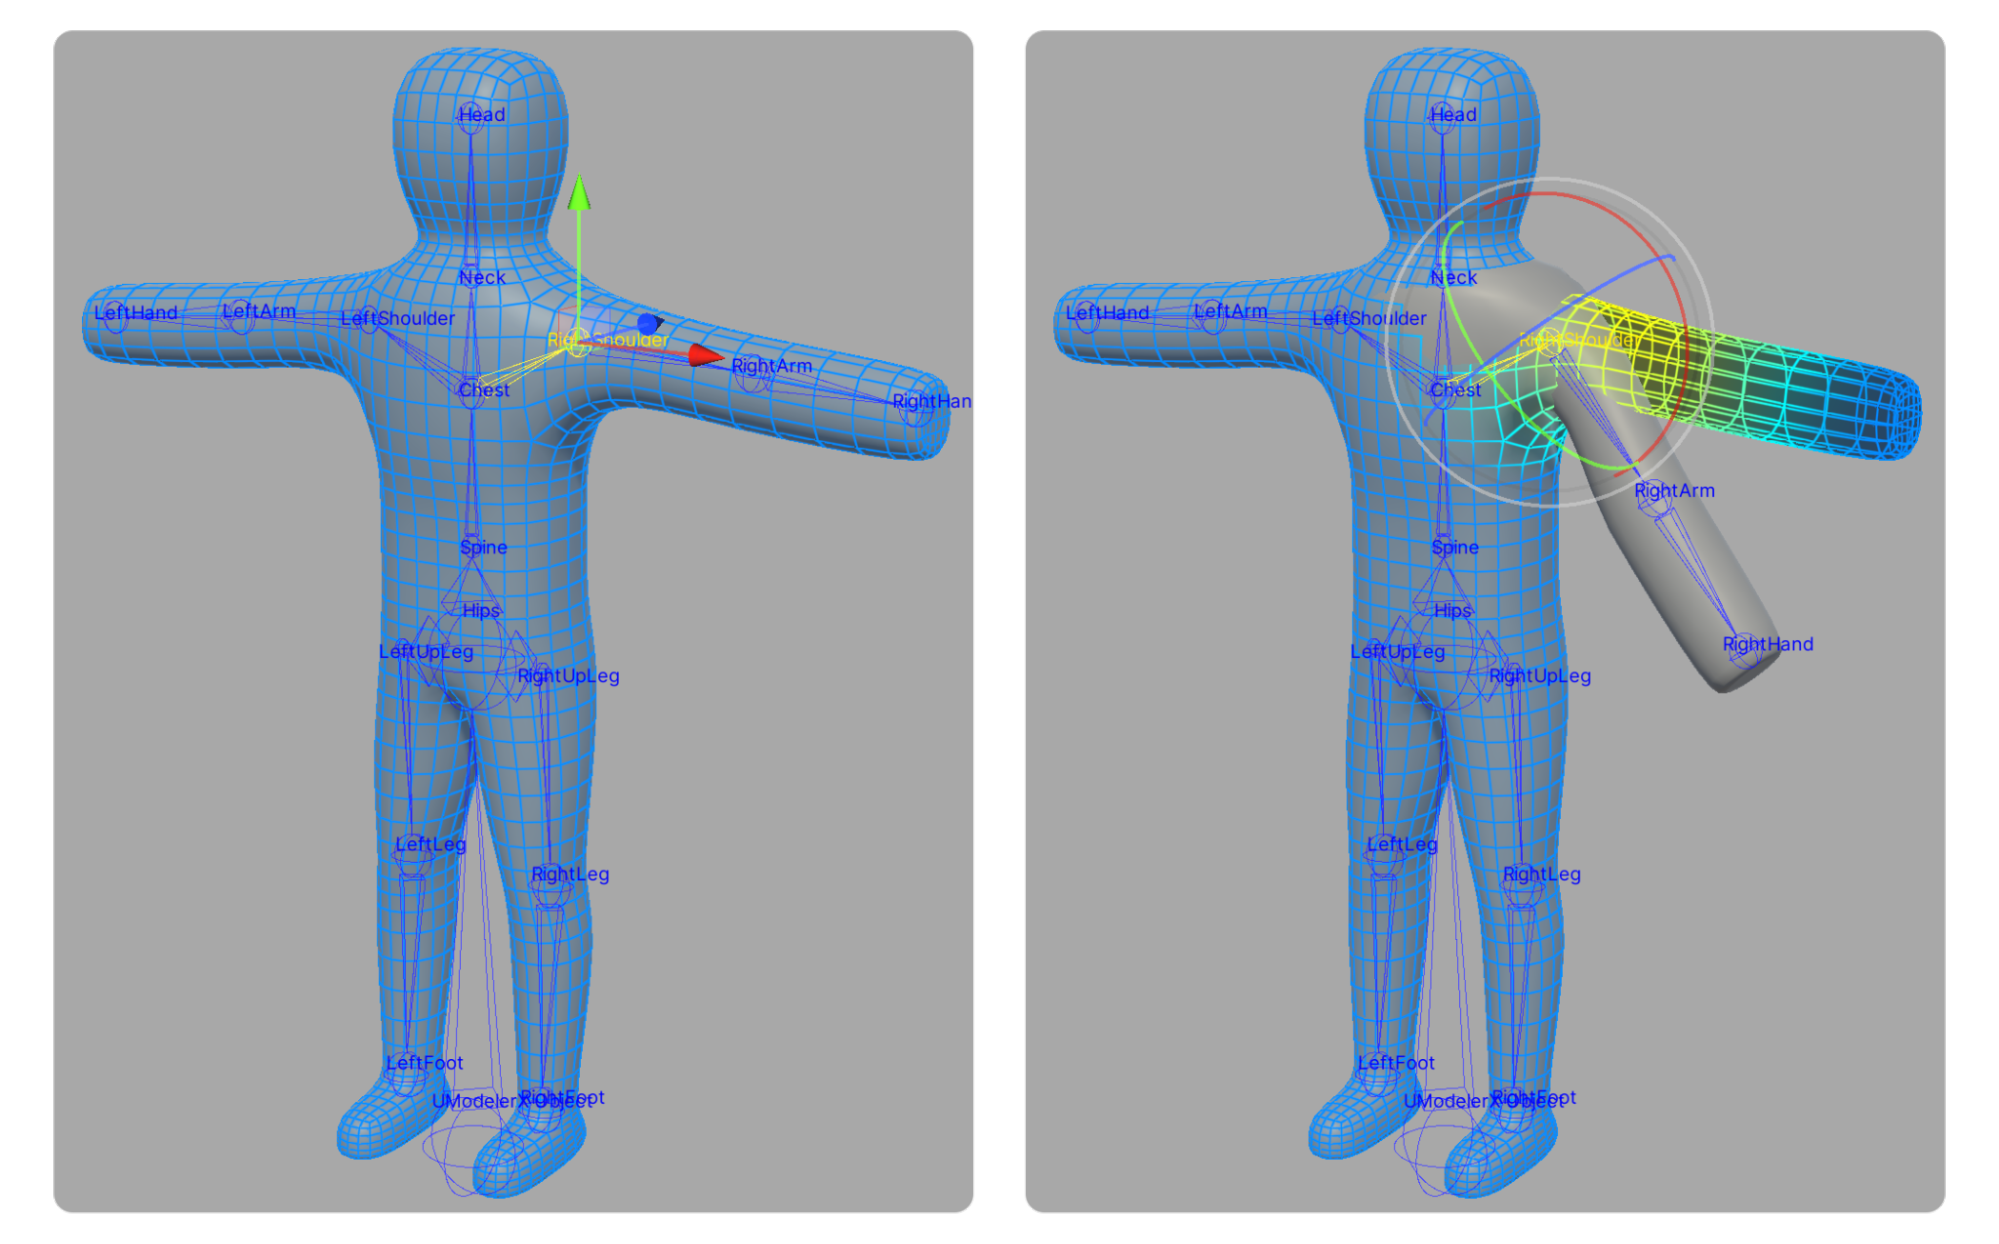
- Weight: Weight is the value that determines how much the movement of the Bones will be reflected in the vertices.
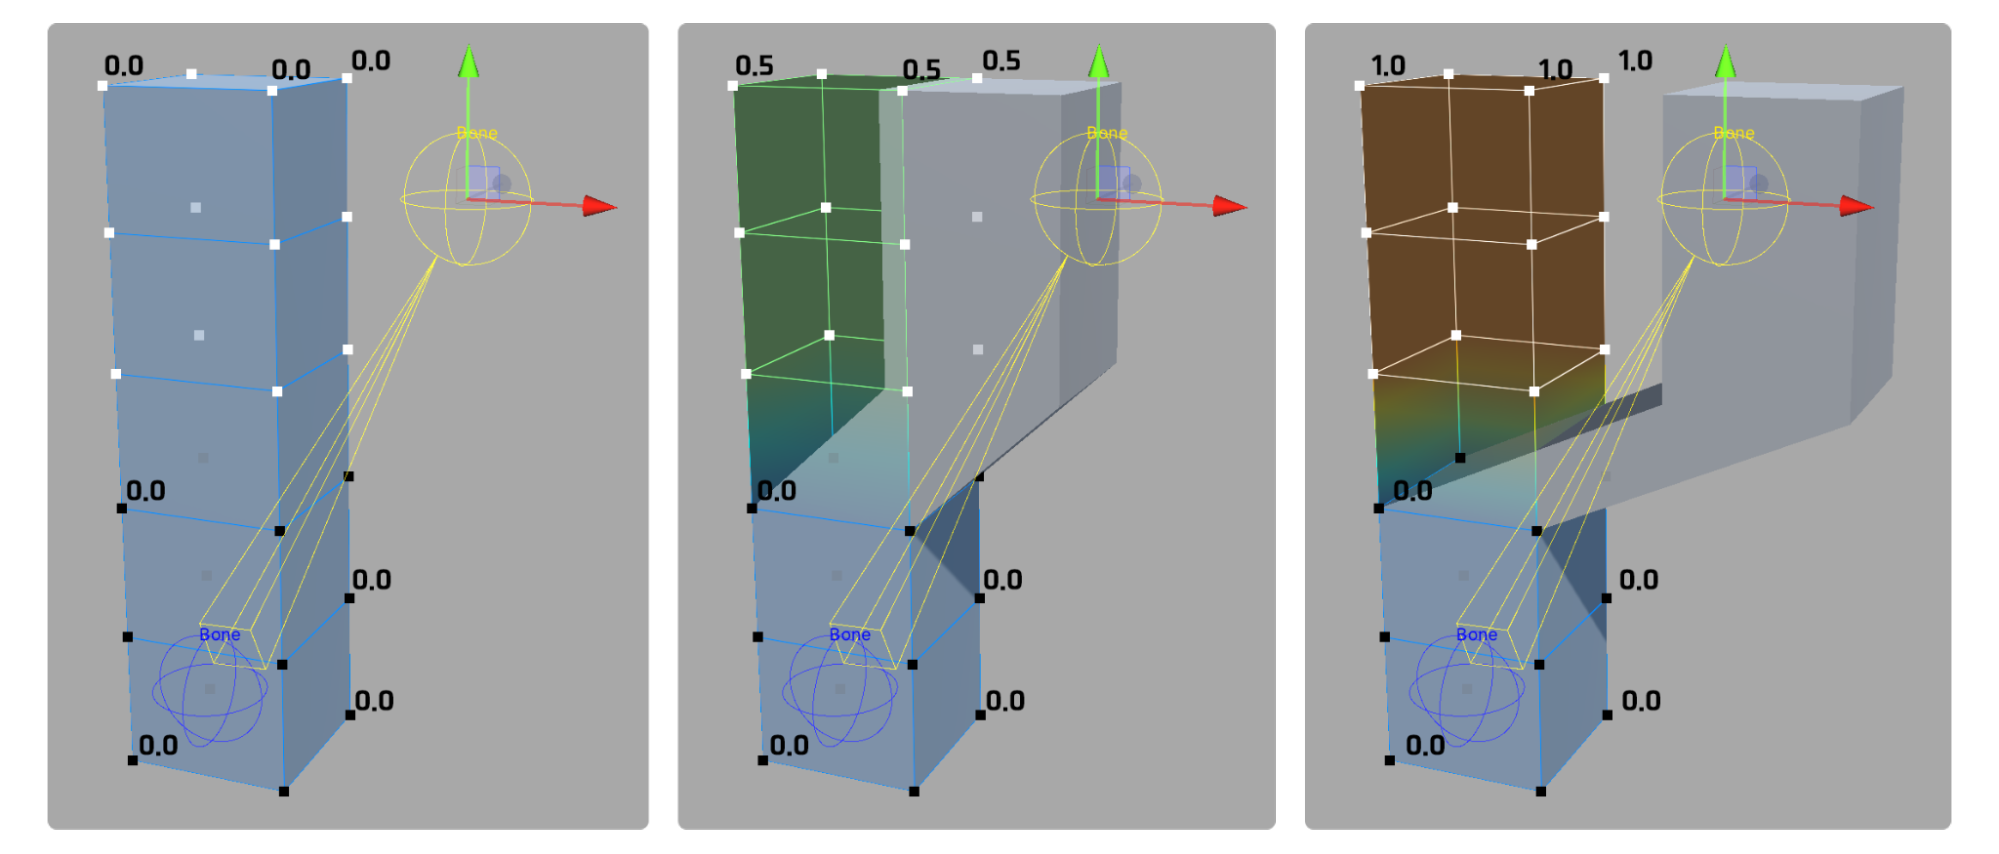
- Bone: A Bone is the element that determines the structure of the model, which moves the connected vertices based on the weight value. A weight value of 0.0 means that the Bone's movement is not reflected in the vertices, while a value of 1.0 means that it is fully reflected.
4. Procedure for rigging
The order in which you'll proceed with rigging is usually as follows. Once you know this basic sequence, the steps that follow shouldn't be too difficult to understand.
1. Prepare a UModeler X object that has been modeled and UV unwrapped.
2. Enter Rigging Mode.
3. Create a Bone.
4. Edit the influence of each bone on vertices using weight-related tools.
5. Move or animate the Bones to see the results.
A detailed description of each step will be covered in subsequent steps.
5. Prepare UModeler X objects
Modeling and UV unwrapping an object are essential steps to complete before rigging.
Modeling is the process of creating the shape of your 3D model, and UV unwrapping is the process of correctly mapping textures to the surface of your 3D model.
Only after these two processes are complete can the model be rigged.
6. Enter Rigging Mode
In order to enter Rigging Mode, the top-level self Root Bone must first be set. The Root Bone defines the reference point of the model and is responsible for determining the relative position of the other Bones. For this reason, it is common to set the Root Bone first and then enter Rigging Mode. However, it is also possible to enter Rigging Mode first and then set the Root Bone.
To set the Root Bone and enter Rigging Mode, follow these instructions:
1. In the UModeler X Editable Mesh (Script) component, select the Rigging Mode tab.
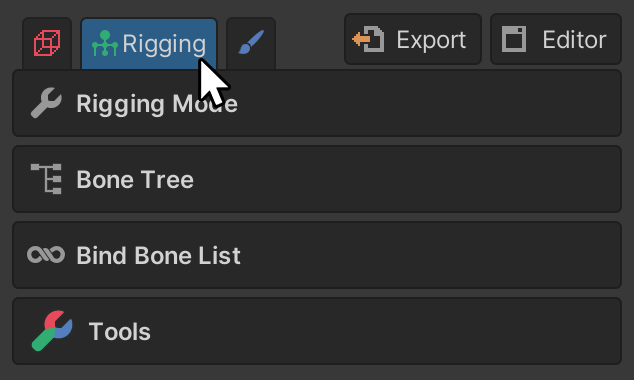

2. Set the Root Bone using the Root Bone picker.

The Root Bone property sets the top-level Bone to apply to the selected UModelerX object.
3. Select the Start Rigging button to enter Rigging Mode.

Rigging Mode interface
The Rigging Mode interface is slightly different to the Modeling Mode interface. However, aside from Bone manipulation, the tools, tool groups, and properties of the tools, the basic functions of the Rigging Mode interface are not too different from the Modeling Mode interface.
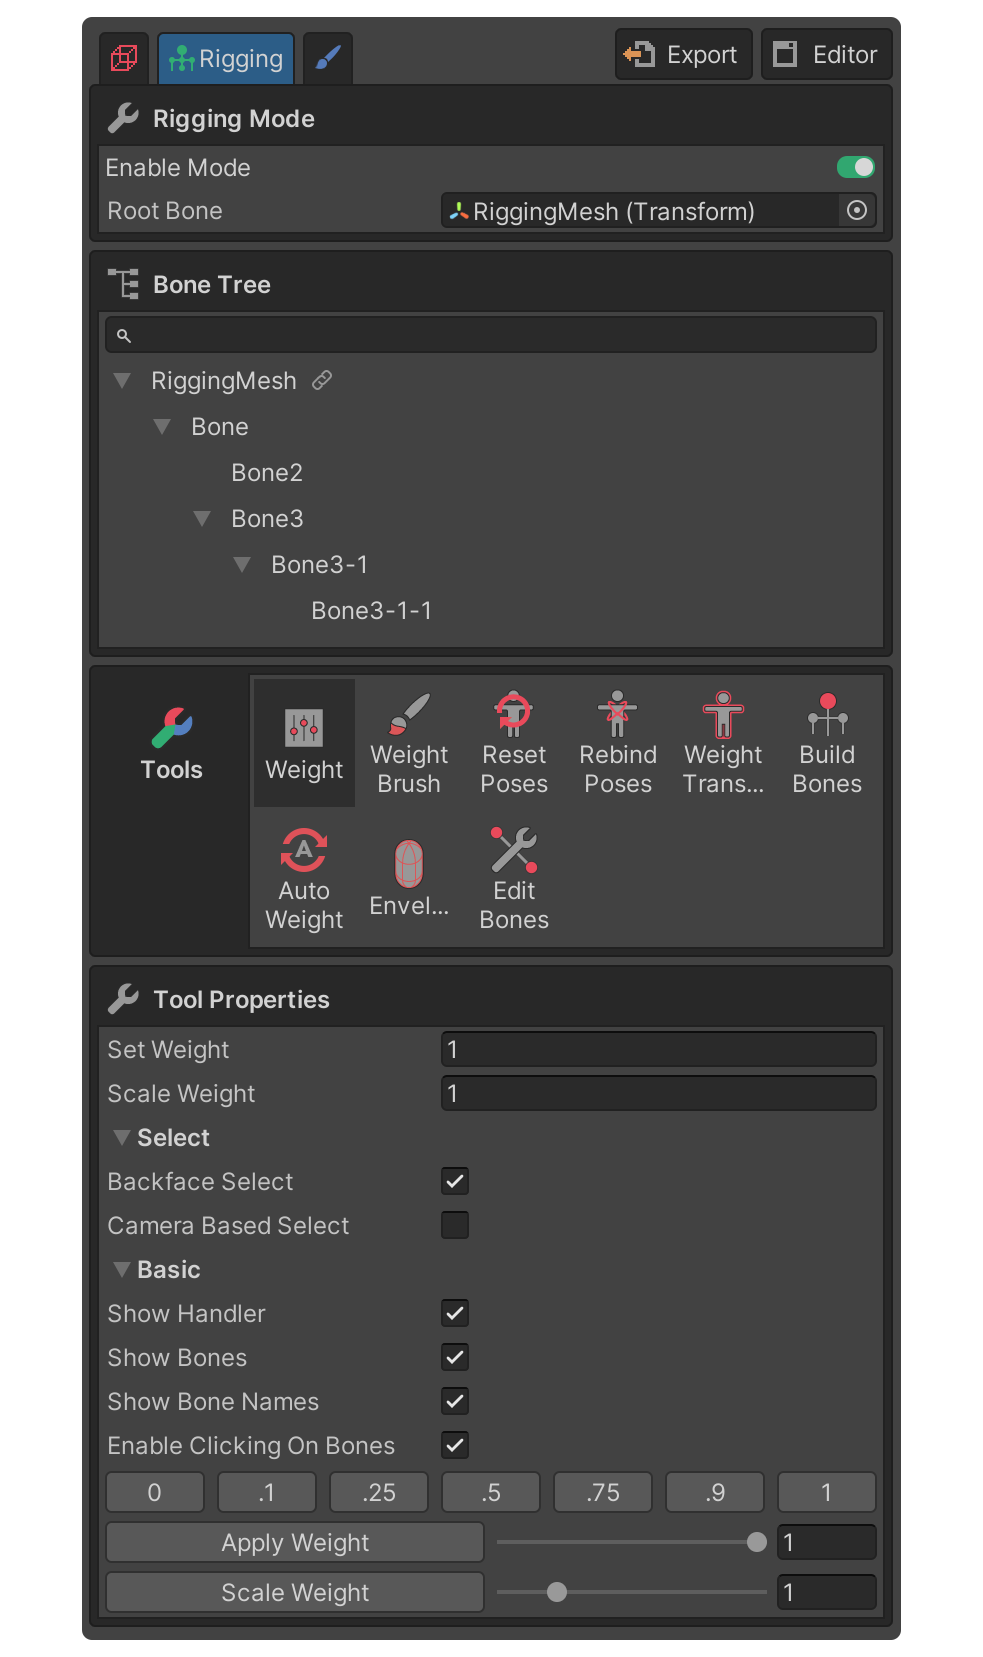
Enable Mode

The Enable Mode toggle allows you to enable or disable Rigging Mode.

Root Bone property
The Root Bone property is where you can set or view the Root Bone. If this is set when you enter Rigging Mode, then this property does not need to be modified afterward. Select the top-level Bone object in the Hierarchy window and click and drag to set it or Select a bone from the popup window that appears when you click the picker icon on the right.
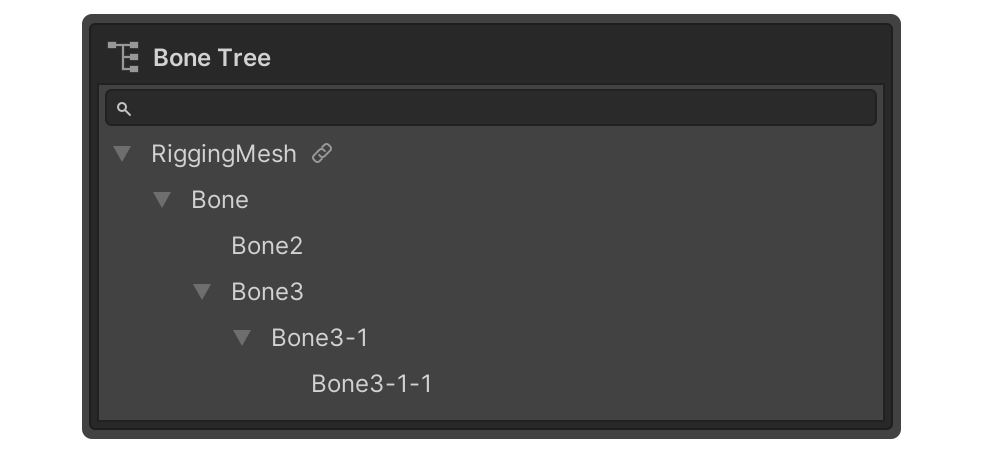
Bone Tree
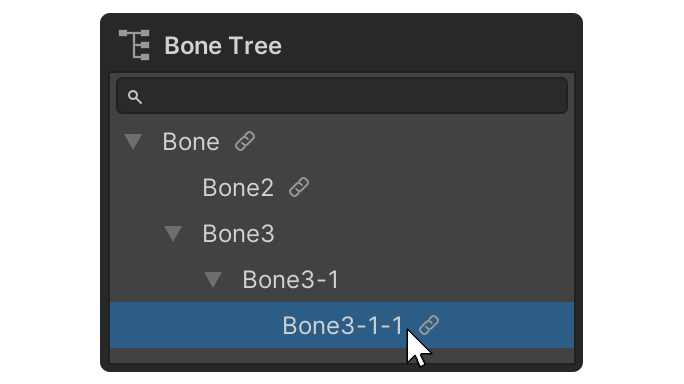
This is the area where you can see the tree structure of the Bones assigned in the Root Bone property. The Bone Tree shows all connected Bones, regardless of weight assignment, and allows for easy Bone selection.
Tools group
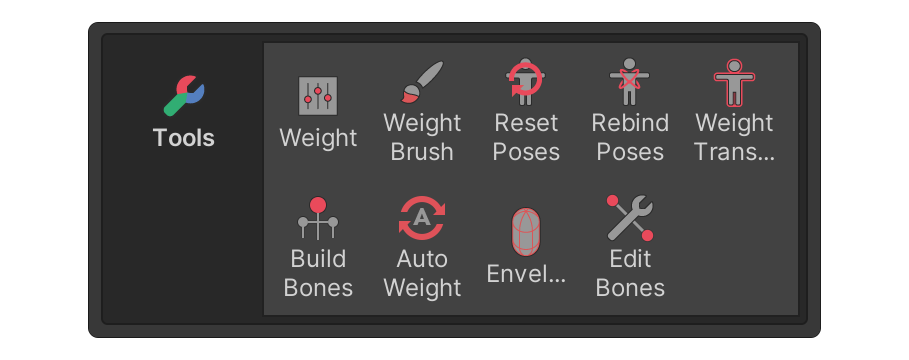
The Tools group in Rigging Mode is a collection of tools you can use to modify weights or adjust Bones.
Tool Properties
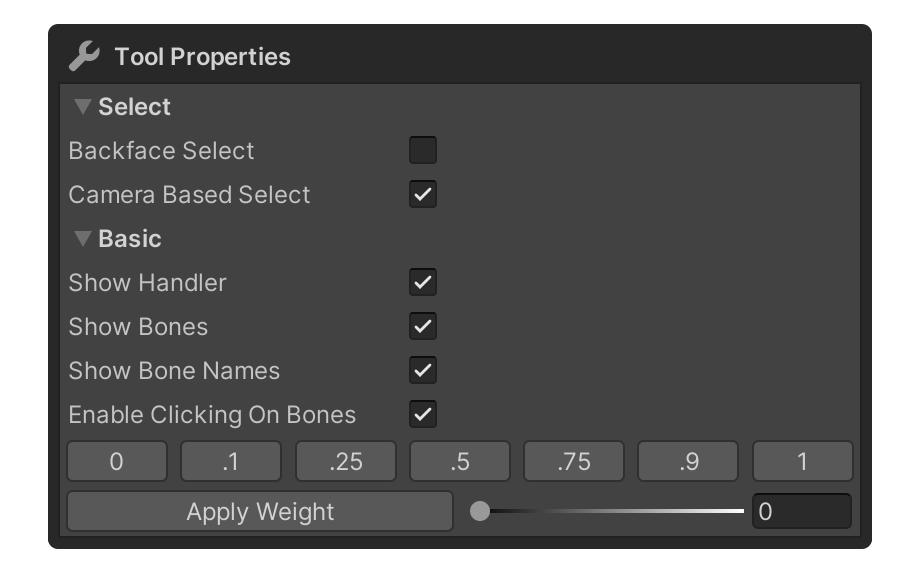
This is the area where you can set detailed properties for the tool selected in the Tools group. Some of the settings are retained when you change tools.
7. Creating Bones
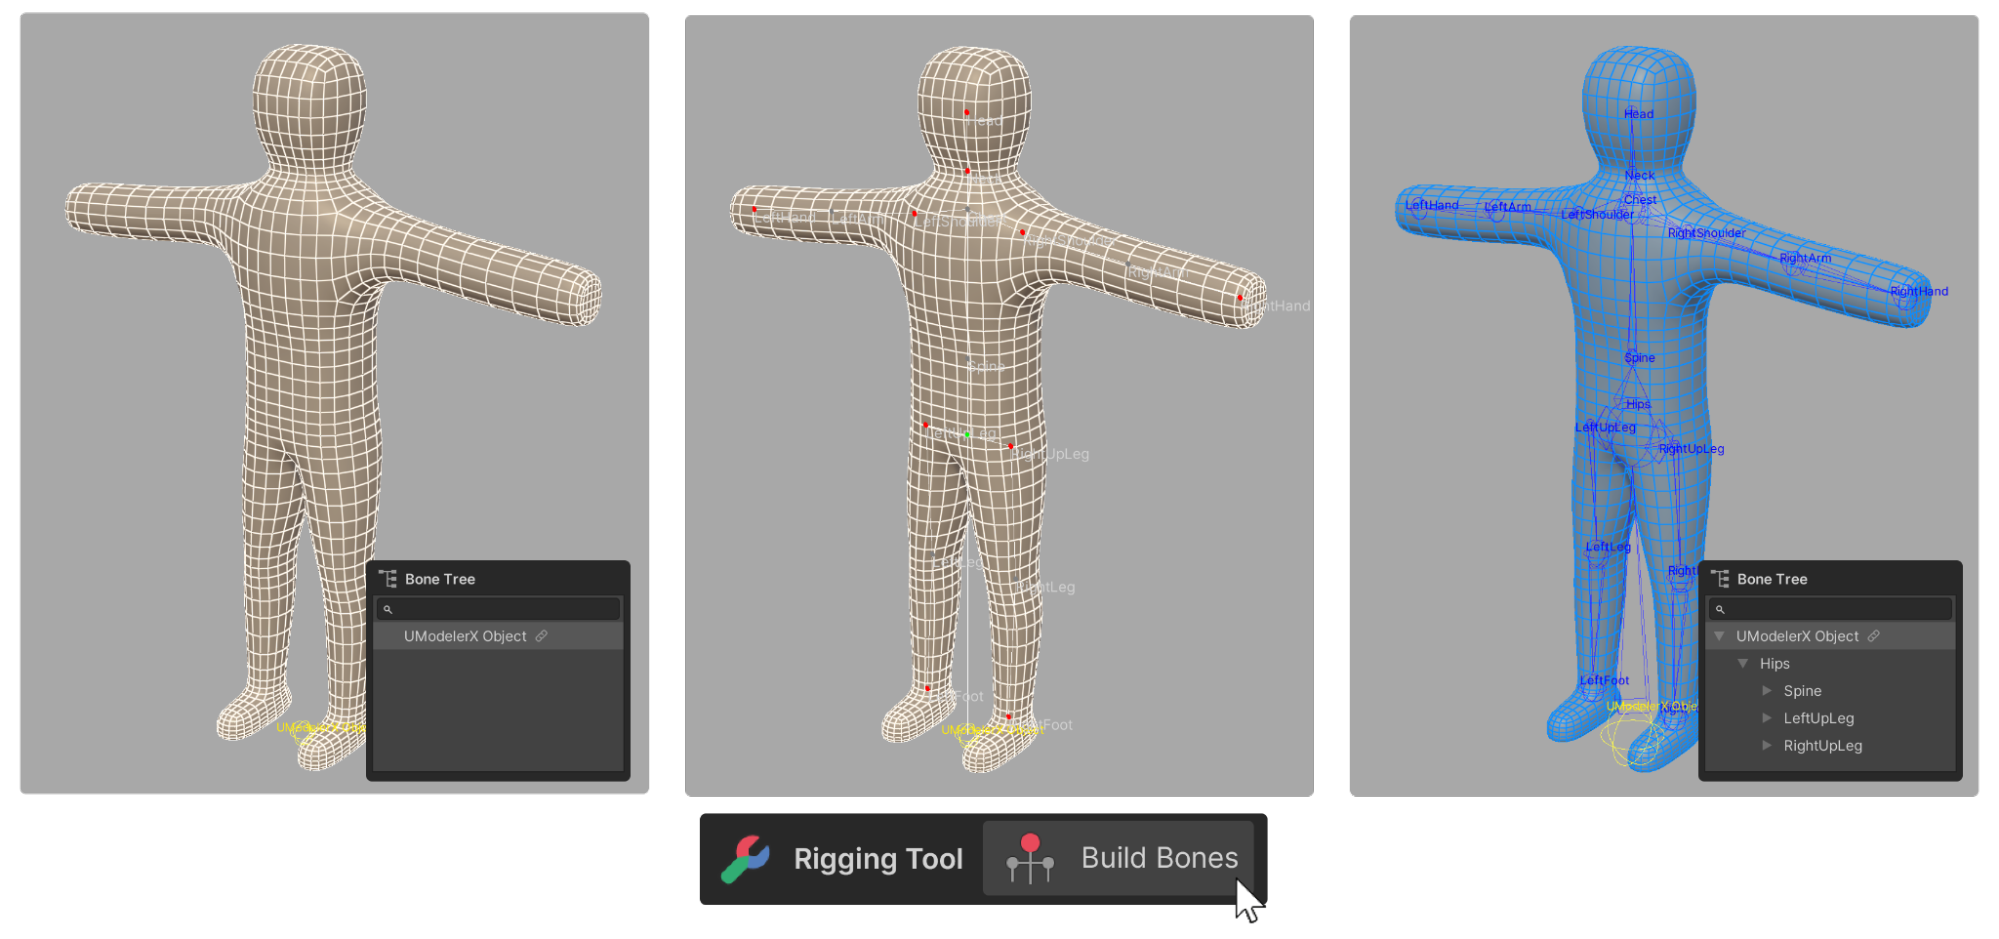
Bones act as a skeleton to control the movement of your 3D model. The process of creating Bones requires you to set the position of the Bones and the connection structure between them.
UModeler X provides the Build Bones tool to facilitate this process. This tool acts as a guide and allows you to quickly create and edit Bone structures, and also provides you with several predefined Bone structures so you don’t have to create brand new structures every time you start a new project.
The Edit Bones tool allows you to modify existing Bones.
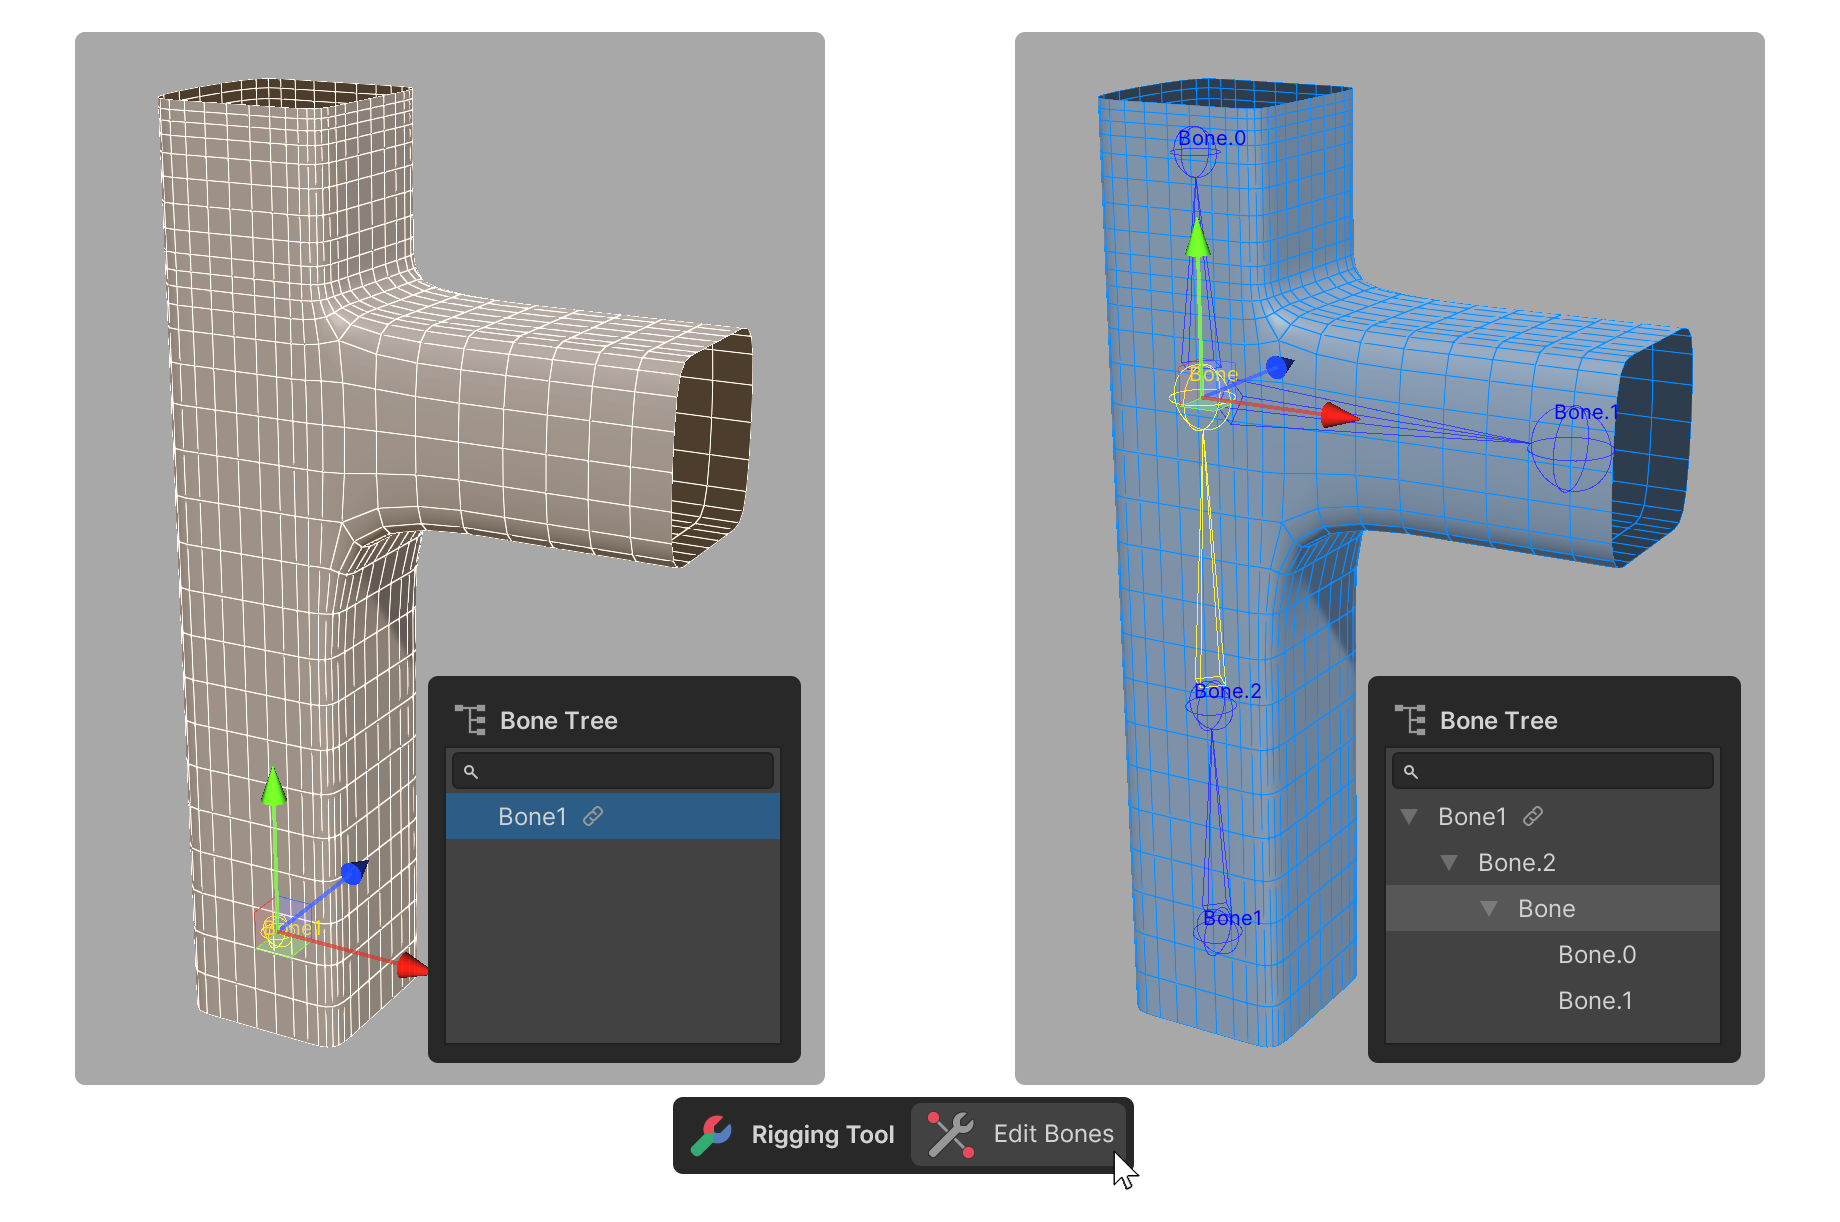
To edit Bones using the Edit Bones tool, follow these instructions:
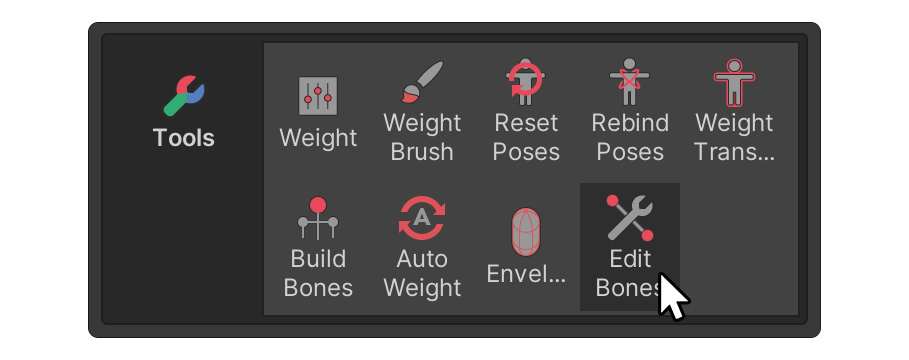
1. Select the Edit Bones tool.
2. Select the Bone you want to edit, either in the Scene view or Bone Tree.
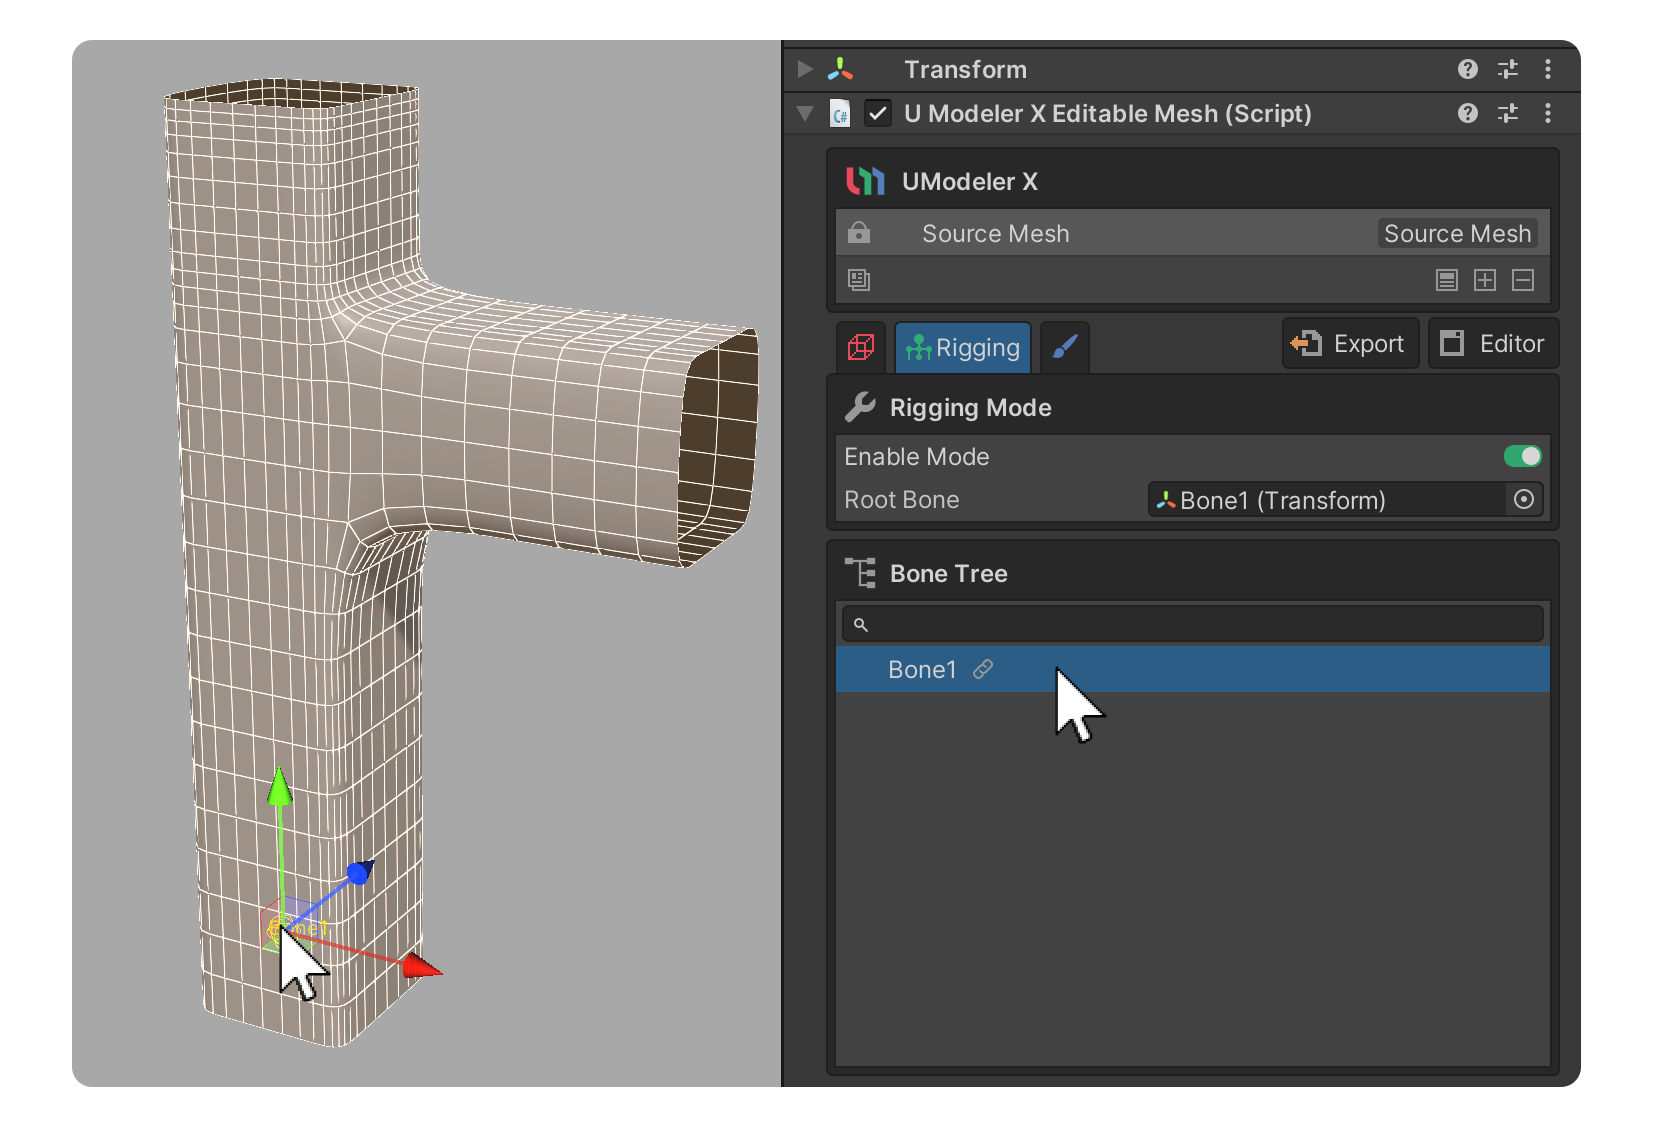
3. For the selected Bone, use the buttons in the Tool Properties area to edit the Bone.
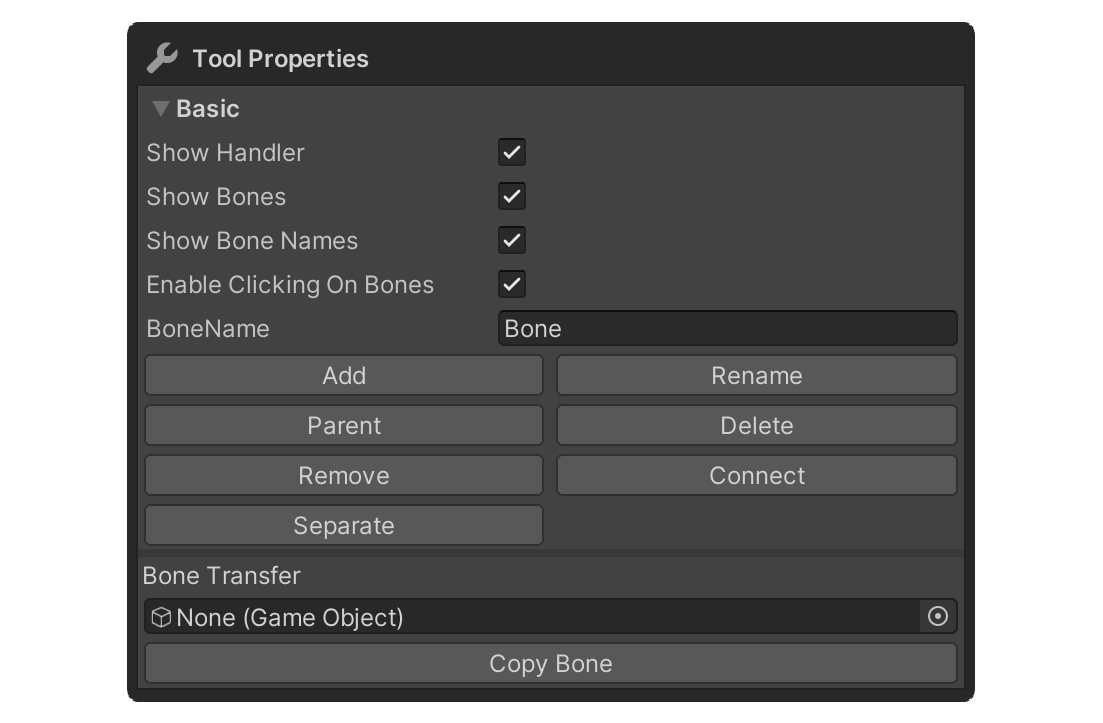
Here is a brief overview of what each of the different Tool properties are used for:
- BoneName: This property specifies what the Bone will be called once it is created.
- Add: This button adds a new child Bone at the location of the currently selected Bone with the name specified in the BoneName property.
- Rename: Select this button to change the name of the currently selected Bone to the name specified in the BoneName property.
- Parent: This button sets the selected Bone as a child Bone of another Bone. First select the Bone that you want to be a child Bone, then select the Parent button and select the parent Bone.
- Delete: This button deletes the selected Bone. The child Bones of a deleted Bone will be moved to the location of the deleted Bone and will be associated with the parent Bone. If the selected Bone is the top-level Bone, the Delete button will be disabled.
- Remove: This button deletes the selected Bone. The child Bones of a removed Bone will be linked to the parent Bones of the removed Bone, and their positions will remain the same. If the selected Bone is the top-level Bone, the Remove button will be disabled.
- Connect: This button connects selected Bones to each other by creating a new Bone between them. First select a Bone you want to connect to another and select the Connect button, then select the Bone you want to connect the first one to and a new Bone will be created between the two.
- Separate: The Separate button detaches the selected Bone from its parent Bone. The selected Bone disconnects from its parent Bone and becomes independent. However, any child Bones connected to the selected Bone are still connected to the selected Bone. If the parent Bone is connected as a child of the top-level Bone, the Separate button is disabled.
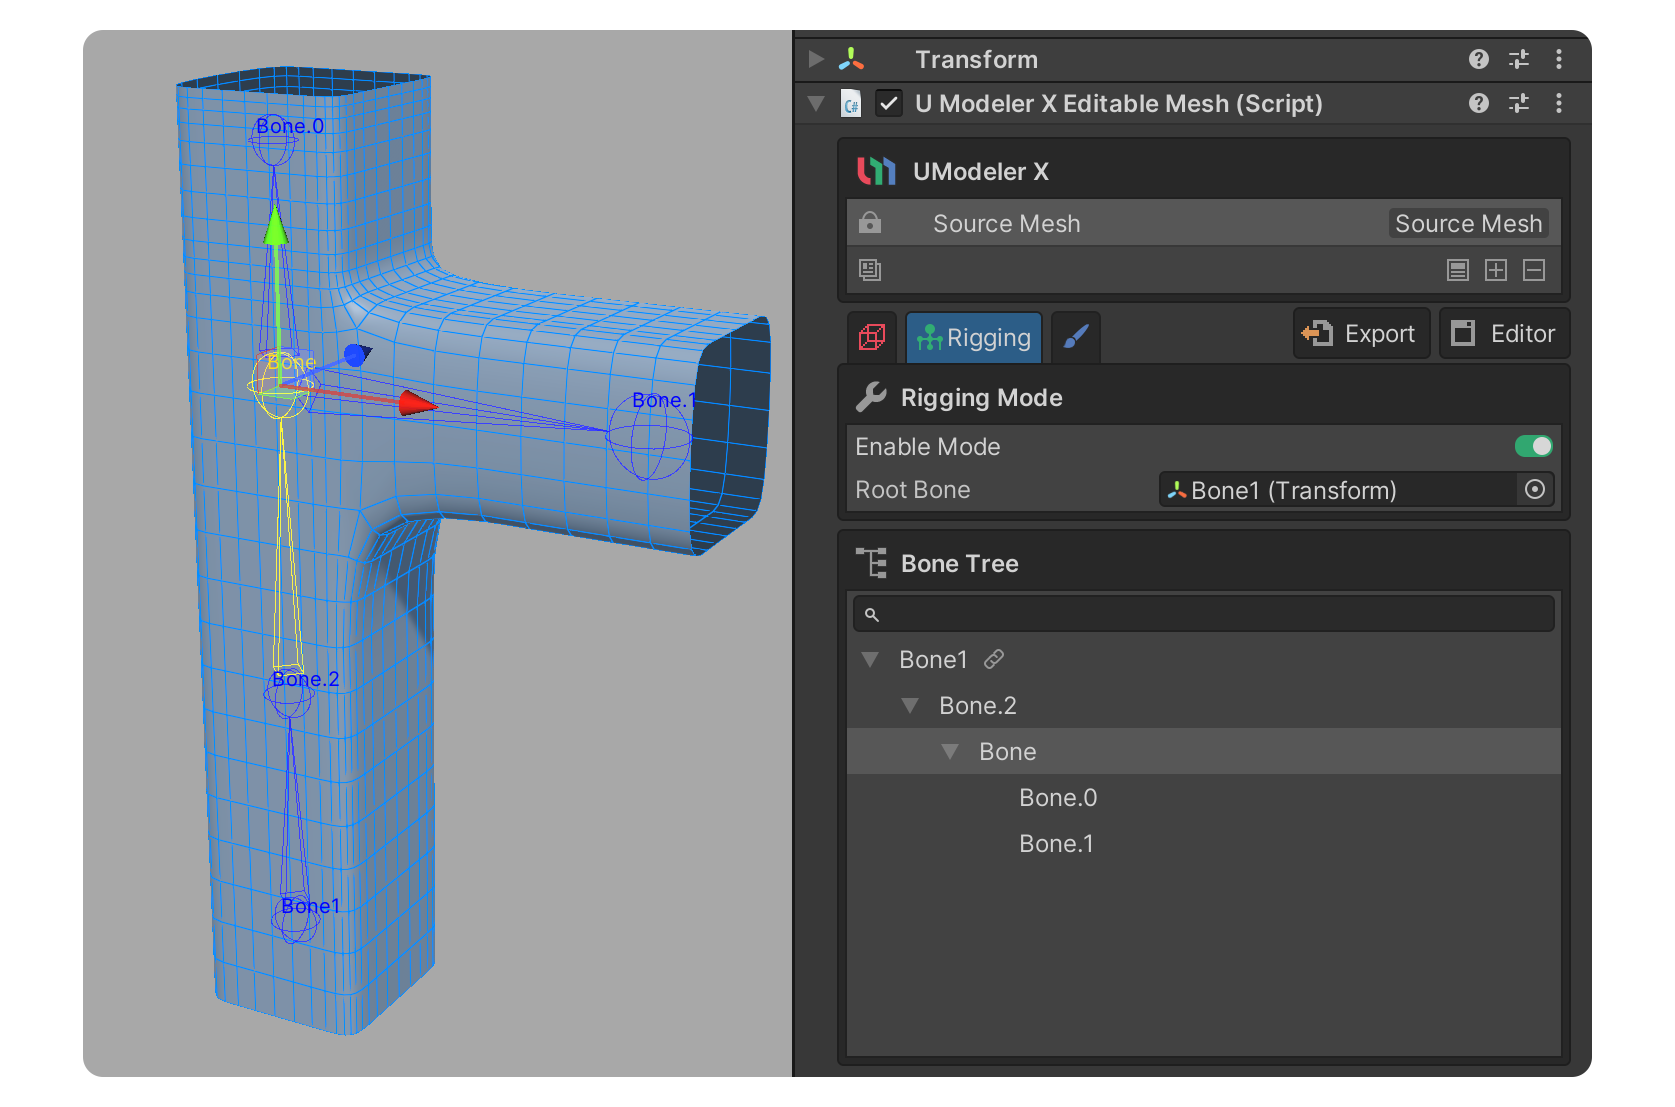
Congratulations! You have successfully completed the process of editing Bones in Rigging Mode.
The way your Bones are constructed plays a crucial role in animating your model. By observing and analyzing different movements in the real world, you will be able to construct more versatile and efficient Bones.
Next, you will learn how to connect these Bones to your model via a process called skinning.
8. Proceed with skinning
Skinning is the process of associating Bones with vertices. In this process, a weight is assigned to each vertex in order to determine how much the movement of the Bone will affect that vertex.
You can accomplish this process by using the Edit Weights tool. The following tools are available for editing weights:
- Weight tool: This tool allows you to assign weights to selected vertices.
- Weight Brush tool: This tool allows you to assign weight values to the bones by brushing the vertices of the model.
The following tools can be used to automatically assign weights or to quickly and easily assign them:
- Weight Transfer tool: This tool copies the weight applied to another object and applies that weight to the current object.
- Auto Weight tool: This tool automatically assigns weight values to vertices based on their proximity to bones, significantly simplifying the weight assignment process.
- Envelope tool: This tool allows you to edit envelopes, which are encapsulated volumes that assign weights to vertices. Each Bone has an envelope, and vertices that are within or affected by the envelope are assigned a weight.
To begin assigning each bone's influence on vertices in preparation for animating the 3D model, please follow these instructions.
1. Select the Weight tool.
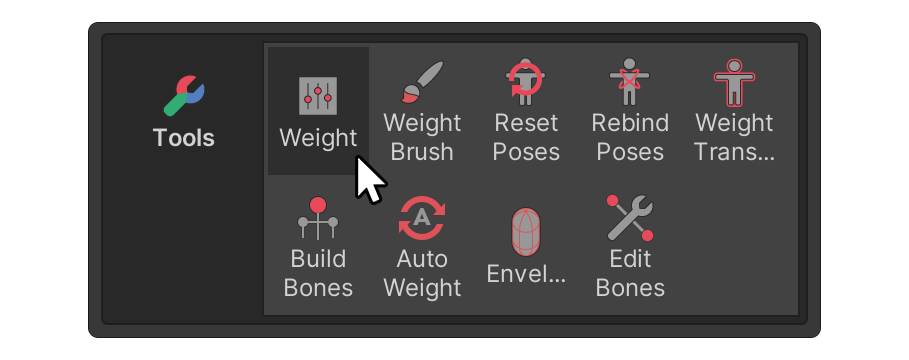
2. Select the desired Bone in the Bone Tree or Scene view.
3. Select the desired vertices.
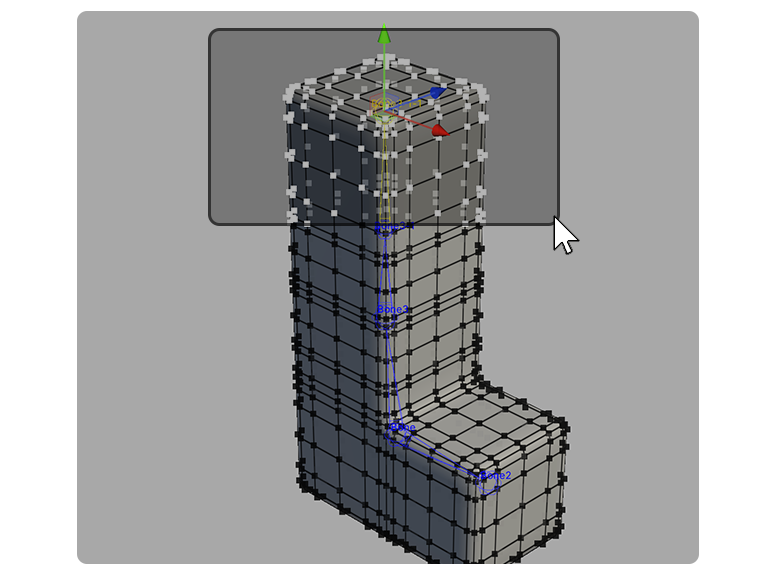
4. Use the properties of the Weight tool to assign the desired amount of weight to the selected vertex.
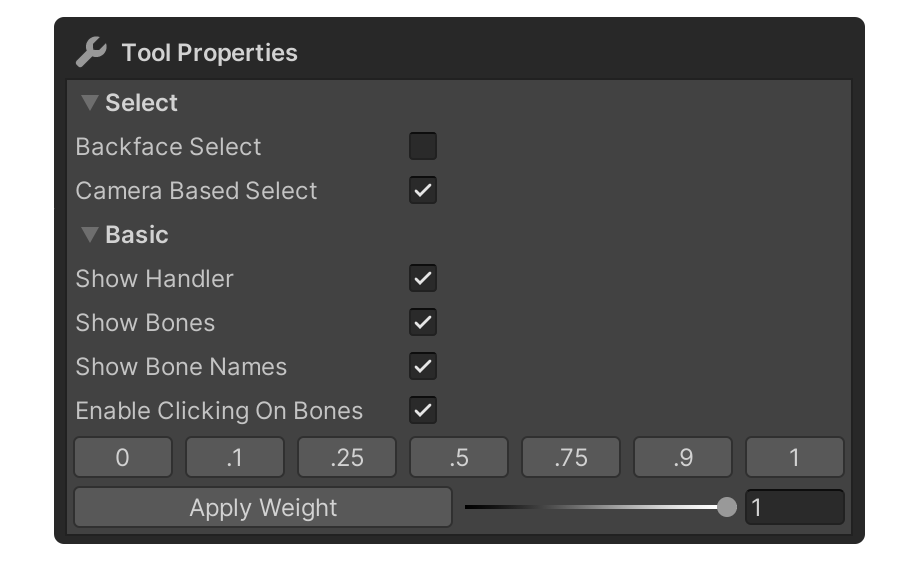
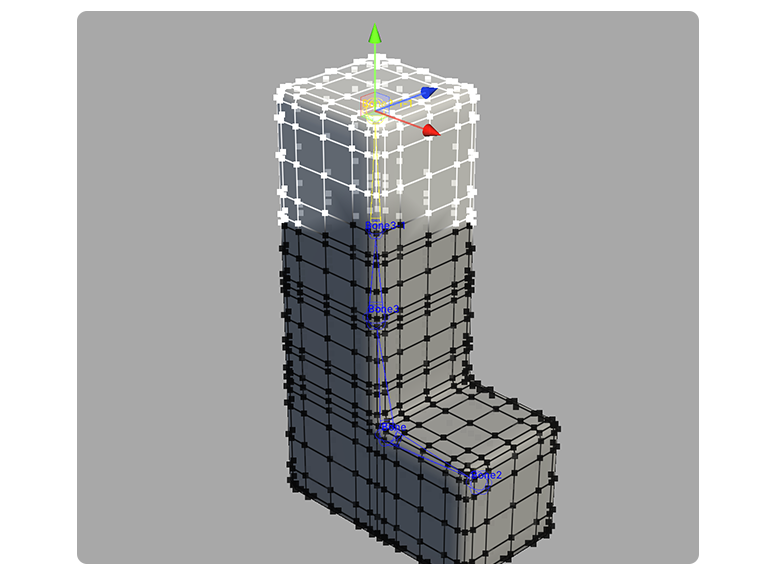
The weights will then be applied to the vertices when you click the Apply Weight button.
Congratulations! You have successfully completed the process of connecting the Bones to the vertices of your model in Rigging Mode.
Now it's time to animate the bones to check if the 3D mesh moves correctly. At this stage, you can also adjust weights further or add new bones if necessary.
In the next step, you'll have the opportunity to use Unity's animation features with 3D models rigged in UModeler X.
9. Check the results
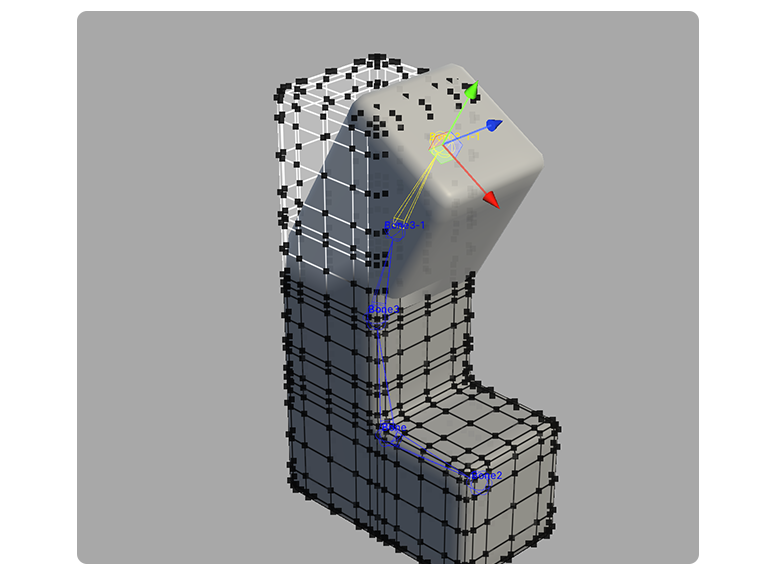
The final step in rigging is to move or animate the Bones to see the results. This step allows you to verify that the rigging was done correctly and that the desired movement has been achieved. If you don't see the results you want, you can modify the structure or weights of your Bones to achieve the desired result. You can learn more about the animation through the Creative Core: Animation tutorials.
To animate the Bones, follow these instructions:
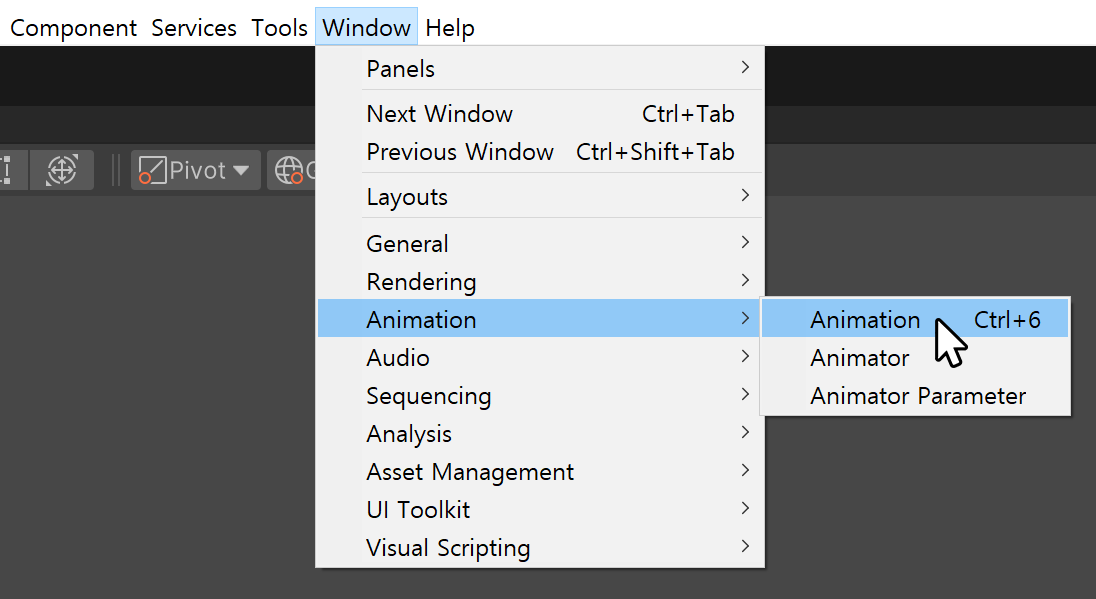
1. Open the Animation window (from the main menu of the Unity Editor select Window > Animation > Animation).
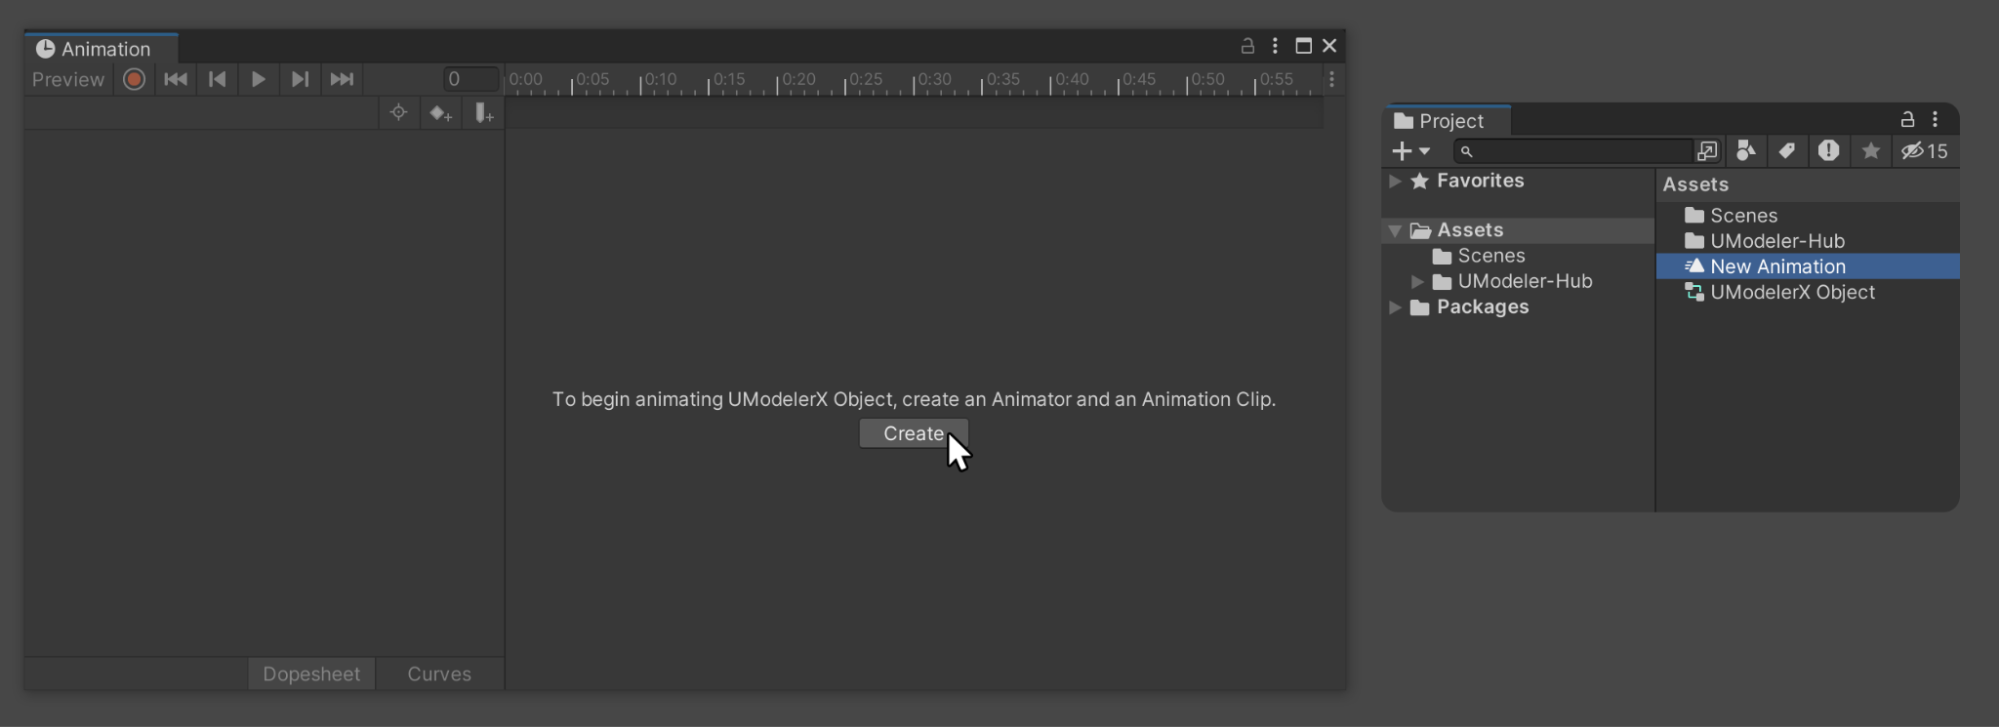
2. Select the Create button to create an animation clip and save it in the desired file path.
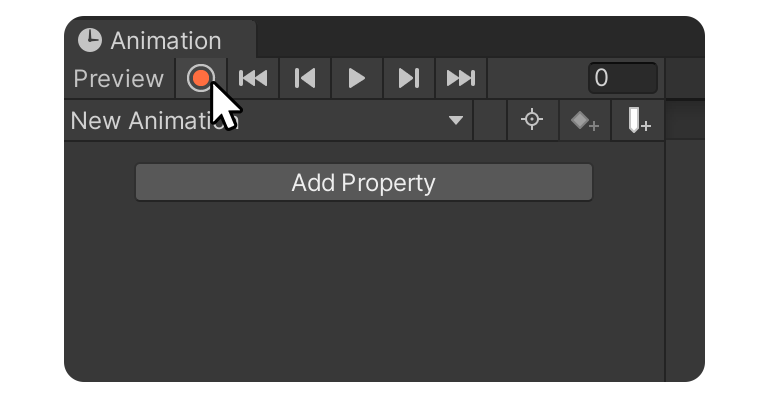
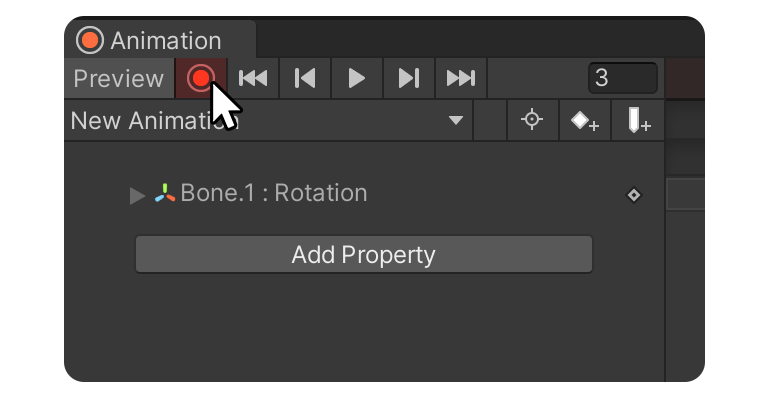
3. Enable keyframe recording mode.
4. Move the desired Bone object to register a keyframe.
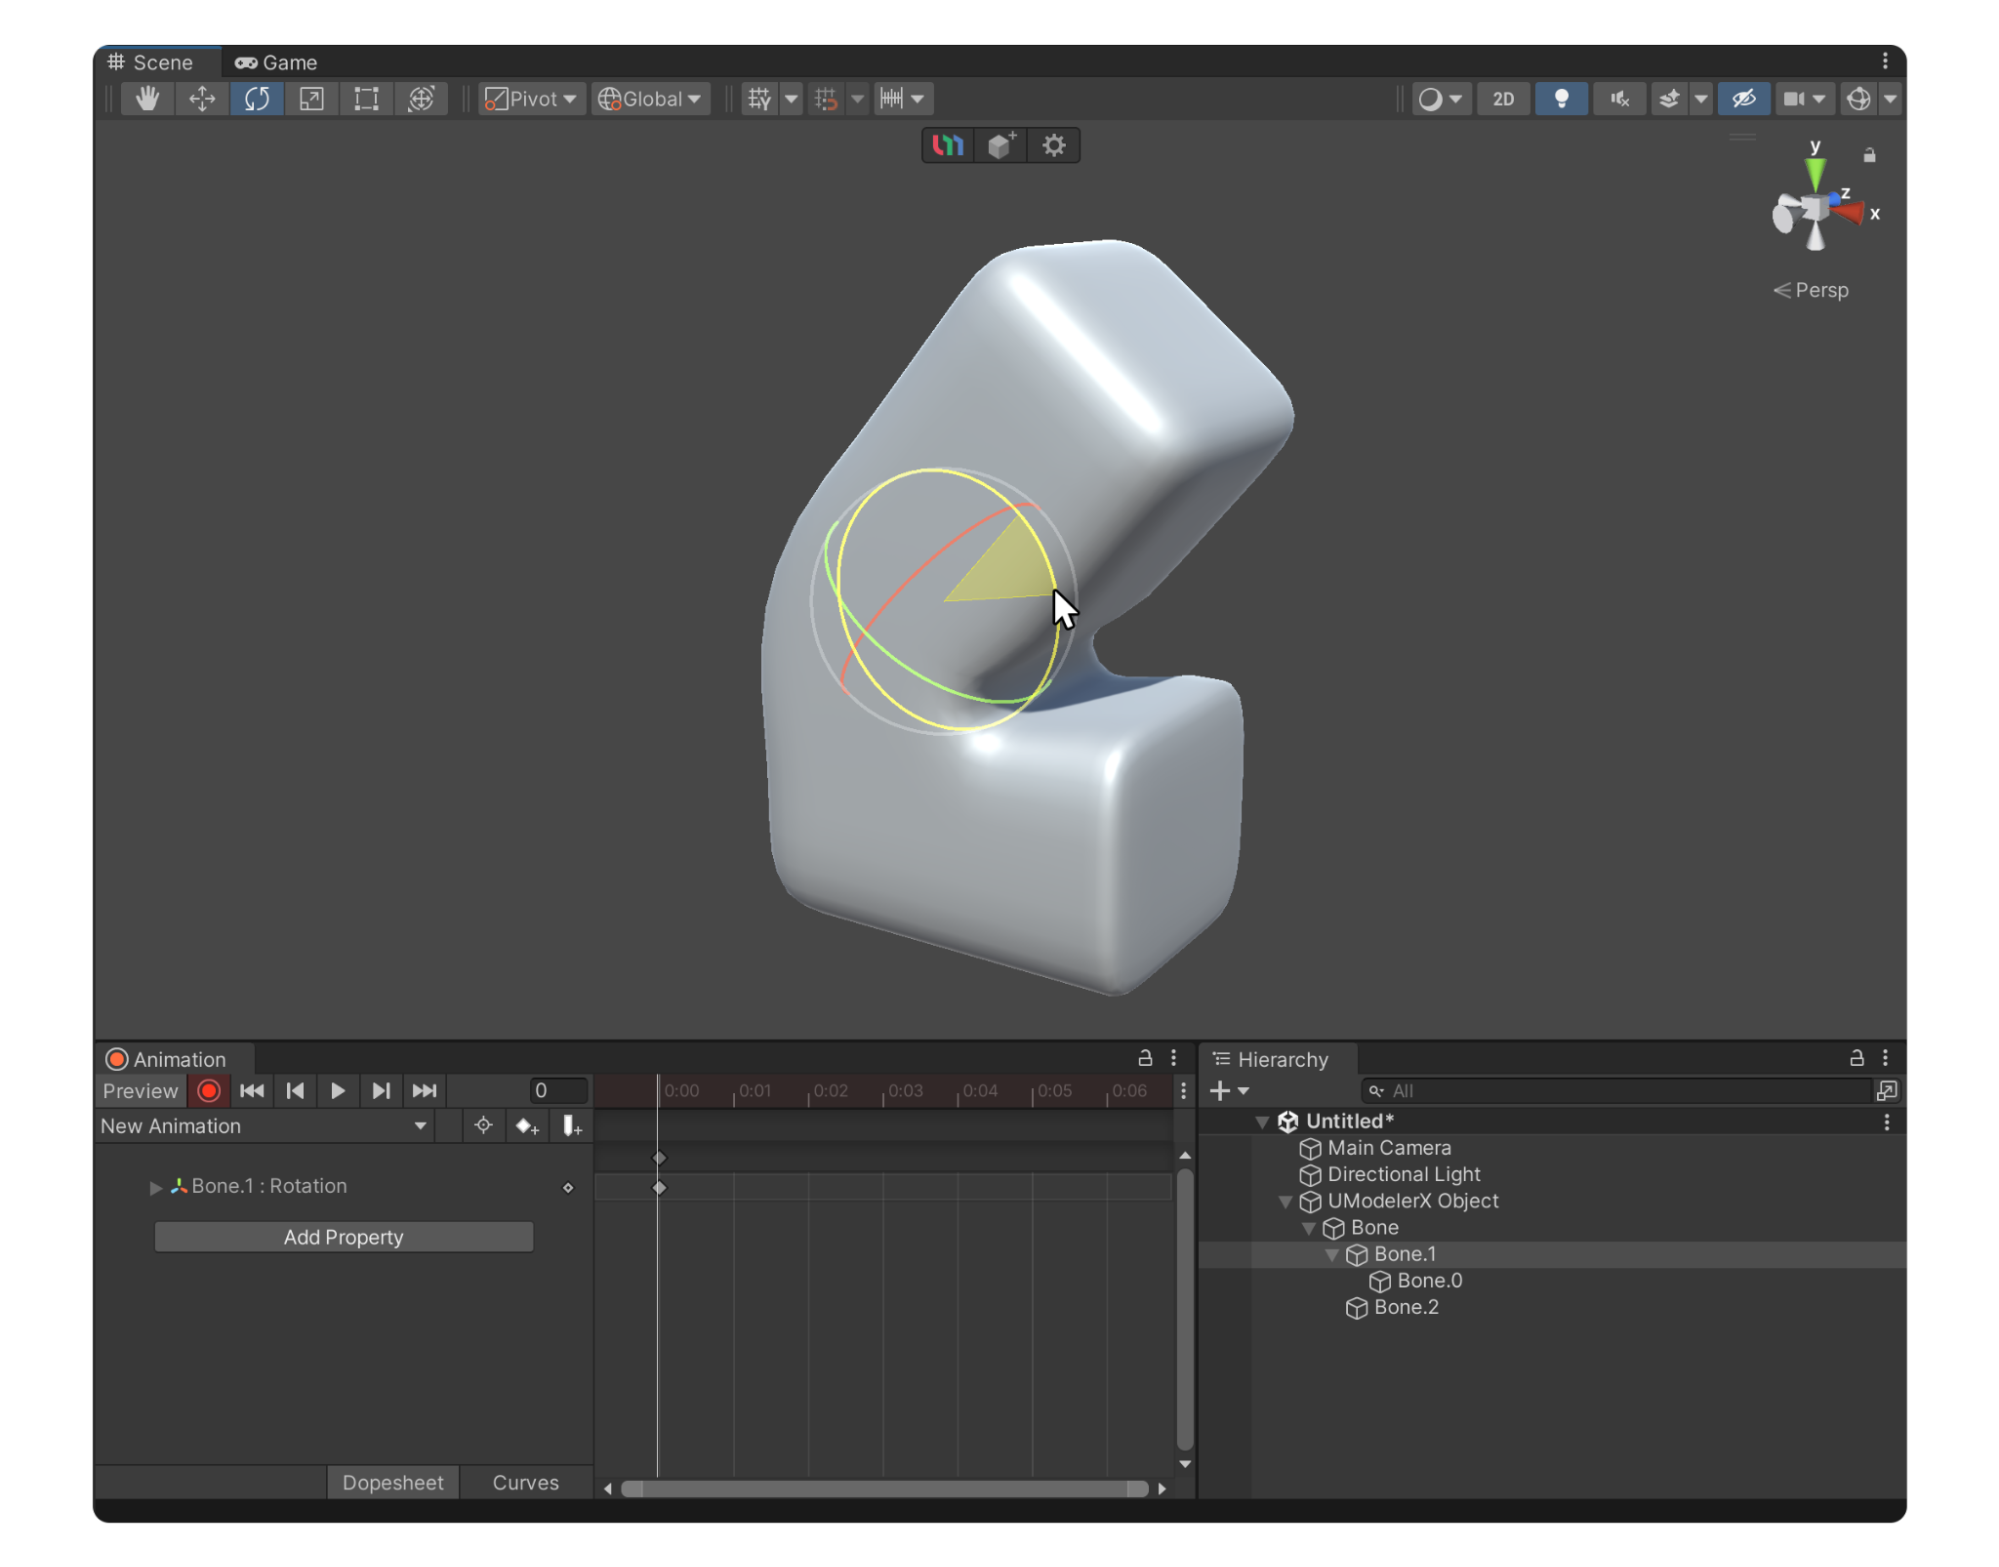
5. Move the Bone object again by changing the frame or time to register additional keyframes.
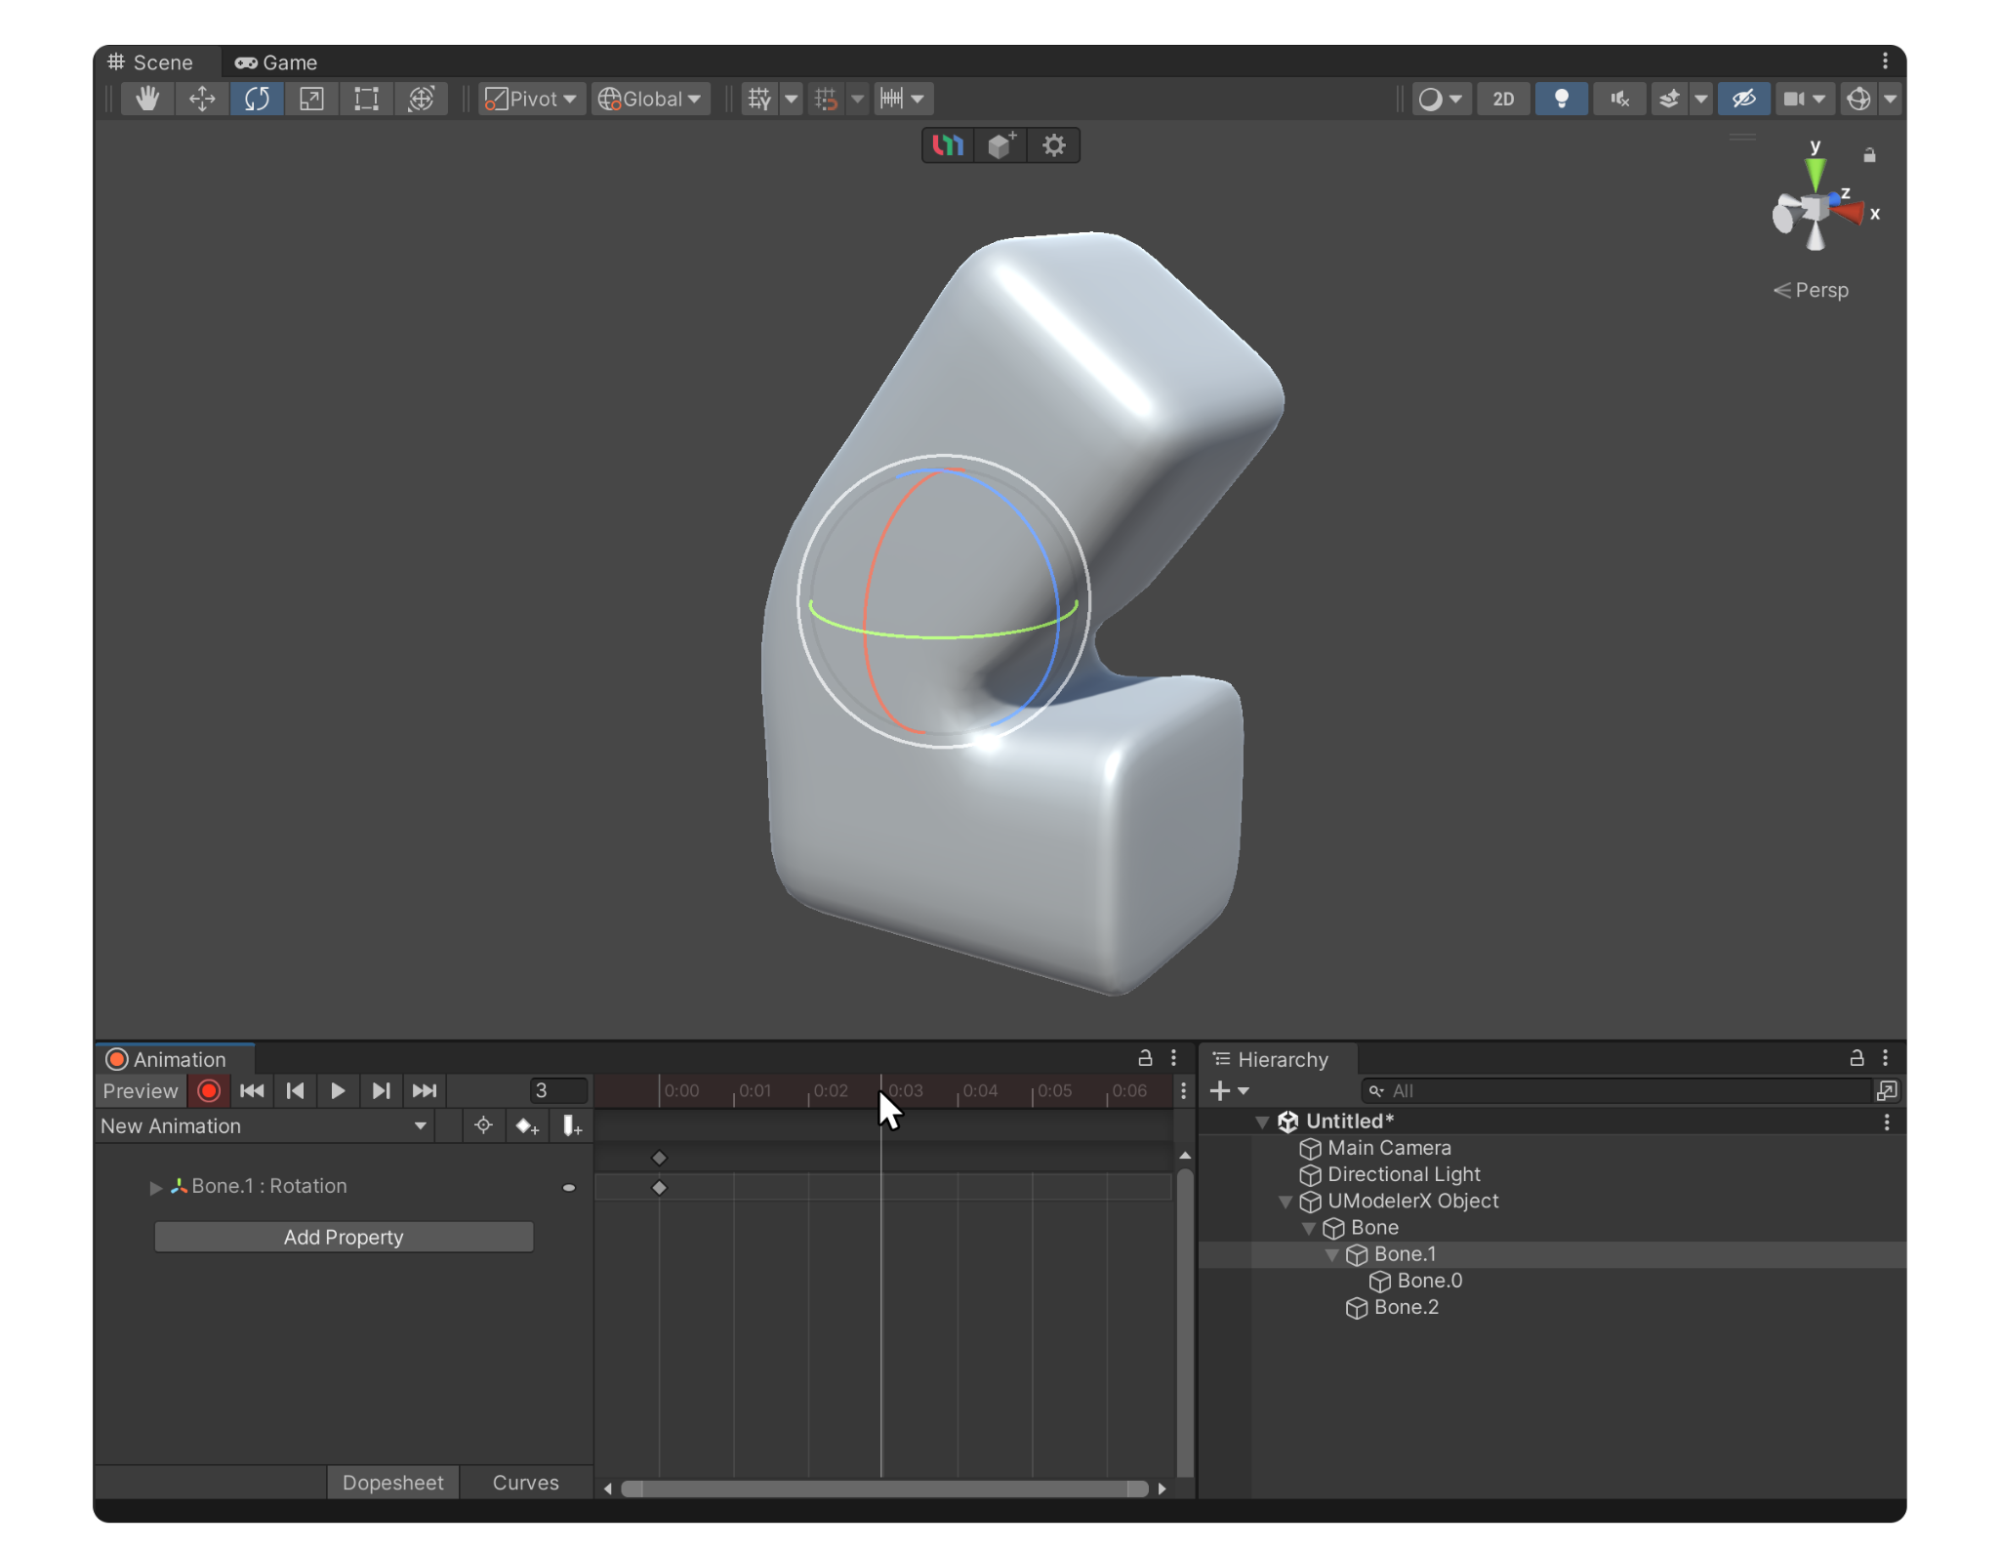
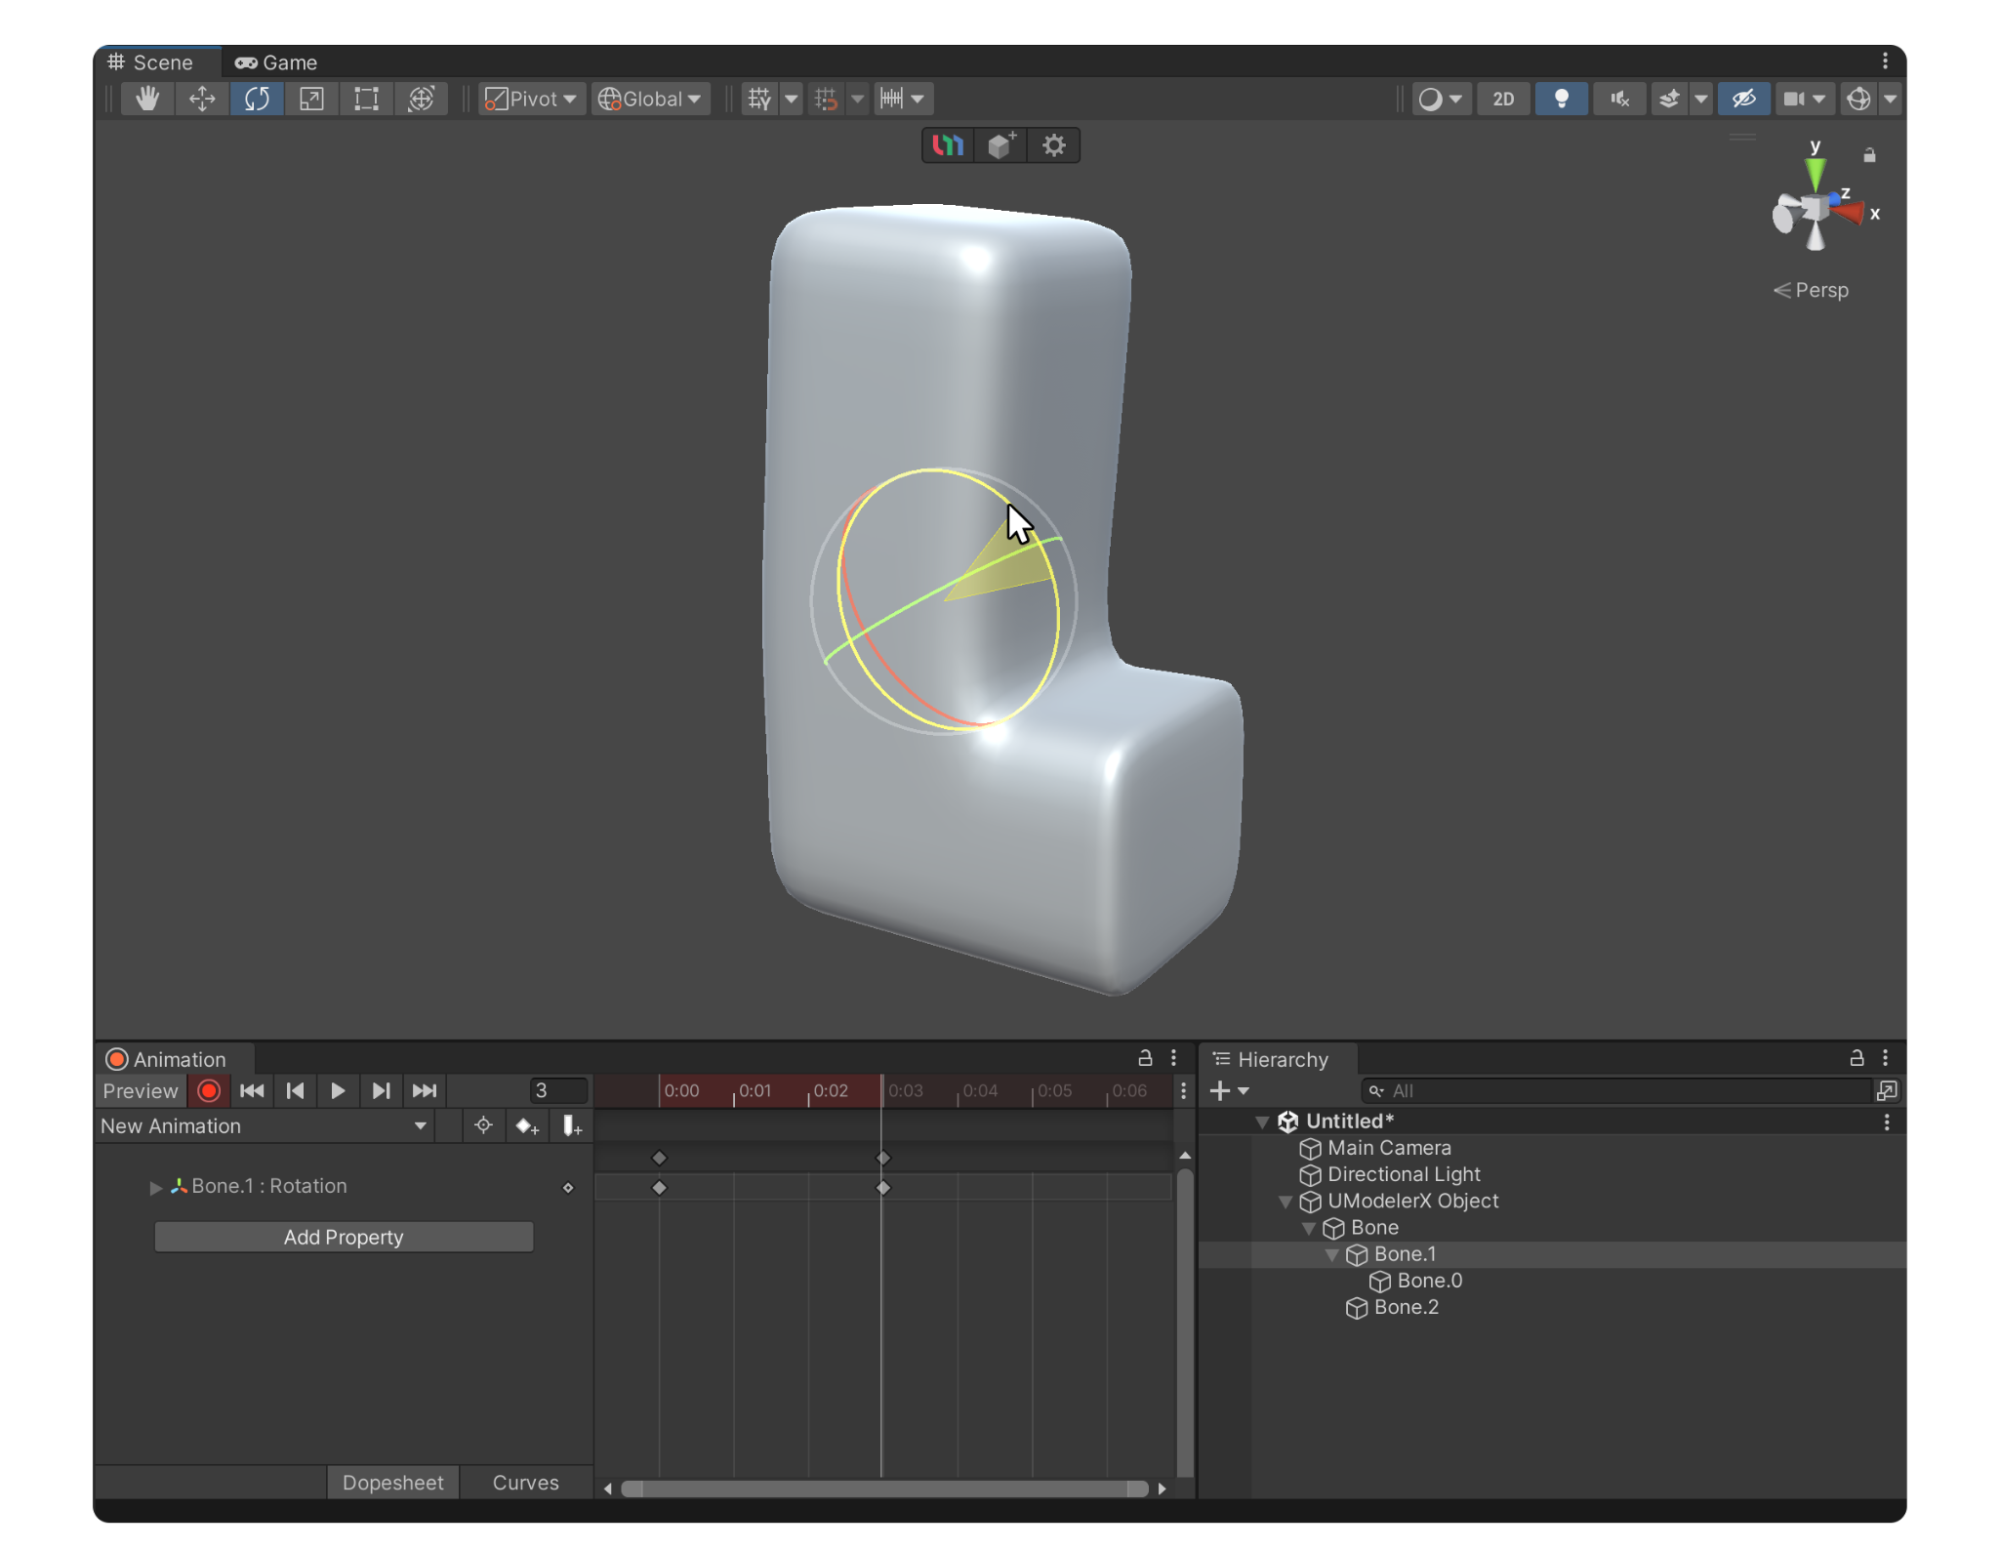
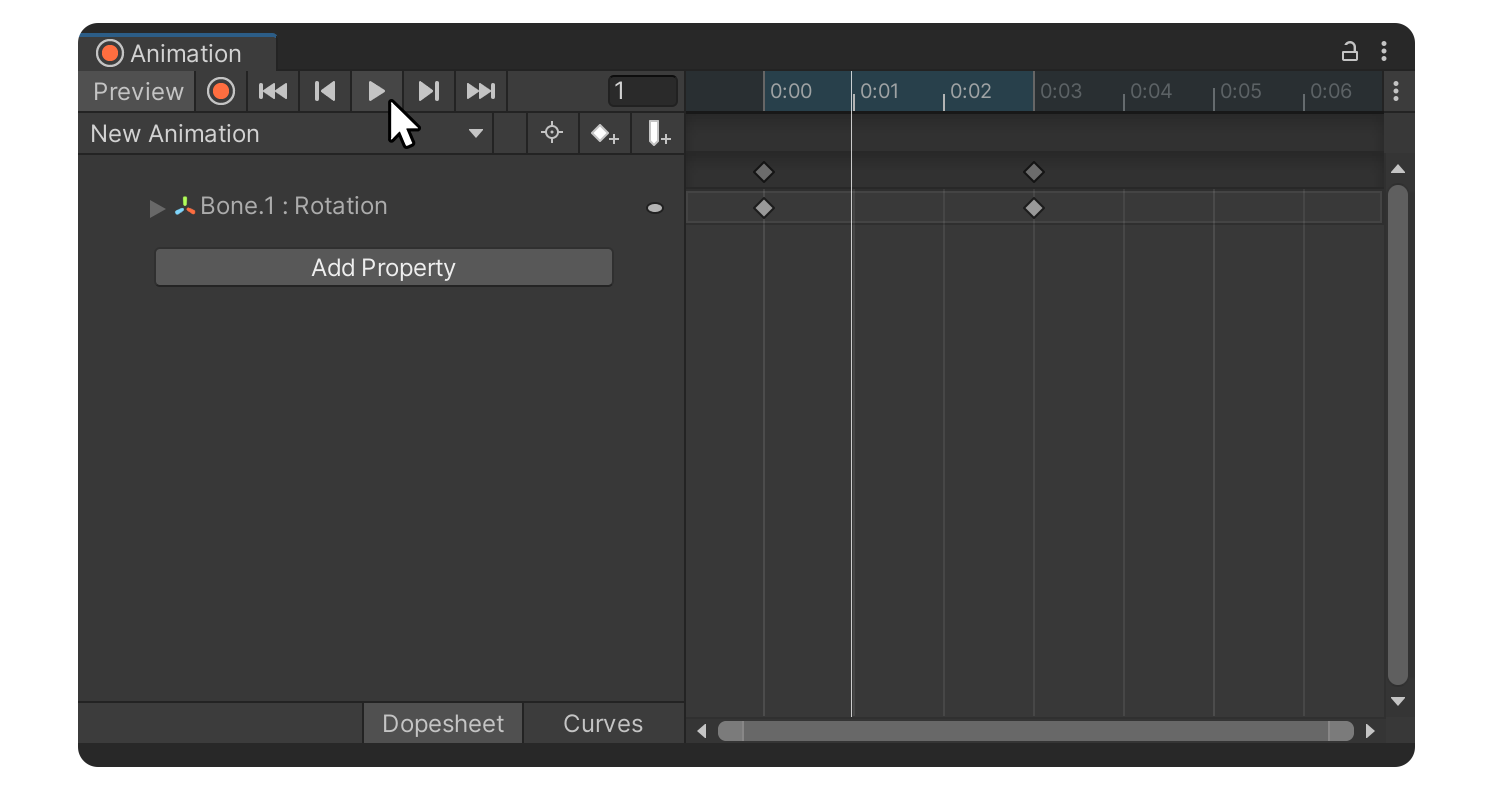
6. Disable keyframe recording mode and select the Play button to see the mesh of the UModeler X object move.
10. Next steps
Well done! Using UModeler X's Rigging Mode and the animation features of the Unity Editor, you can easily give your models movement.
This allows you to apply rigging and animation without using external tools. In the next tutorial, you'll learn how to paint colors on 3D models.