
Challenge — Adding Video and Audio in Your Scene
Tutorial
Beginner
+10XP
30 mins
(9)
Unity Technologies
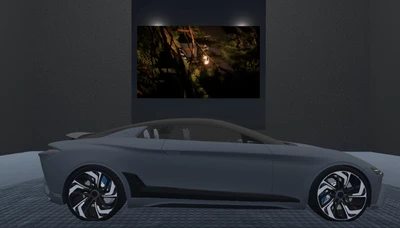
In this challenge, you’ll apply your newly developed Video Player component skills to fix the Video Player in the car showroom environment. After this, you can use the same process to make other informative videos or sound sources in a VR scene to communicate information to your user.
Resources
Languages available:
1. Overview
In this challenge, you’ll apply your newly developed Video Player component skills to fix the Video Player in the car showroom environment. After this, you can use the same process to make other informative videos or sound sources in a VR scene to communicate information to your user.
What Will You Do?
1. Add 3D and 2D audio to your Unity project.
2. Add and position video content in your Unity Scene.
3. Use the Video Player Controller to allow users to start, pause, and stop video playback while in VR.
2. Find and Add a Video Player Component onto the Video Player
- Locate the Video Player (Video > Video Player).
- Add a Video Player component by clicking Add Component and searching for Video Player.
3. Configure the Video Player and Video Controller Components
Equip the Video Player component with the Video Clip.
We want to add the play/pause feature to this video. We’ll do this by adding a component to the Video Player called Video Controller.
Here’s how you add a Video Controller script; then you’ll have a couple more steps.
- Toggle the Video Clip to Loop.
- Attach a Video Controller to the Video Player component. (Note: You’ll find the Video Player reference in the Hierarchy underneath the Video GameObject.)
--------------------
What is a Video Controller?
A Video Controller is component that allows the use of a play and pause button with your Video Player. This component is a quick way to add UI functionality to the Video Player.
4. Assign the UI Buttons to the Video Controller Component
Note that you have some empty fields on the Video Controller script (Video Player, Play and Pause buttons). We'll be assigning these fields with their respective UI elements.
Drag the video player GameObject to the open slot next to Video Player.
Do the same for both of the buttons.
- Find the Play and Pause buttons under the Canvas GameObject.
- Drag them into the Video Controller component’s respective Play and Pause Button properties.
--------------------
What is the Source Property?
The Source Property in a Video Clip component tells Unity where the media is located. Is it on the web or a local clip?
(Note: Your Source defaulted to the Video Clip setting. This is what we want so that we can play back the Unity trailer.)
5. Key Takeaways
You have now added audio and video to a Unity Scene that is ready for playback in VR.
By completing this module, you’re now able to:
- Add 2D and 3D audio to your Scene to enhance the user experience
- Include video clips in your Scene to display useful information