
Challenge: Importing a CAD Using PiXYZ
Tutorial
Beginner
+10XP
30 mins
(10)
Unity Technologies
In this tutorial, you will use a web-streamed editor to prepare a CAD model for use in Unity. It builds off of the Streaming by allowing you to implement detail specific functions on a vehicle you’d find on a road construction site. You’ll repair, tessellate, and separate the geometry of the vehicle into individual parts. This is desirable so that you can animate individual portions of the vehicle, or have more artistic control within Unity.
Languages available:
1. Overview
In this tutorial, you will prepare a CAD model for use in Unity. It builds off of the Streaming by allowing you to implement detail specific functions on a vehicle you’d find on a road construction site. You’ll repair, tessellate, and separate the geometry of the vehicle into individual parts. This is desirable so that you can animate individual portions of the vehicle, or have more artistic control within Unity.
What Will You Do?
In this challenge tutorial, you will prepare an actual flattener model for use in Unity. To do so, you’ll need to:
1. Import, repair, and tessellate a model
2. Switch view and orientation types
3. Select multiple parts
4. Invert the orientation of those parts
5. Merge the final assemblies
6. Execute a smart hidden removal script
7. Export a .FBX version of the model
(Assuming you have a free trial license, if not, visit the Studio page of the PiXYZ website and click on 7-day trial at the bottom of the page. The PiXYZ Studio workflow depends heavily on the model.)
2. PiXYZ Studio Import
Step by Step
1. Use the PiXYZ Studio’s normal Import Dialog to bring the Road Flatter .step model into the application.
3. Repair CAD
Step by Step
1. Click on CAD > Repair CAD
2. Adjust the parameters in the off-chance that you need to have a lower or higher tolerance, or essentially how accurate do you need to be a smaller tolerance is more accurate, and then click Execute.
3. After using Repair CAD, ensure the road flattener looks like this:
4. Tessellate
Run the CAD > Tessellate function.
What is a tessellation?
Especially for real-time rendering, data is tessellated into triangles. A tessellation for instance, is the tiling of a surface using one or more geometric shapes.
Step by Step
1. Click on CAD>Tessellate.
2. On the resulting dialog box, you can leave all default values and click Execute.
3. After using Tessellate, the flattener will look like this:
Note : for the first time now our statistics have changed. Statistics can be found in the top left-hand corner of the main area for model editing in PiXYZ Studio. Occurrences stay the same, but Triangles increase as PiXYZs’ algorithms correctly and quickly map the represent the surfaces of the road flattener using triangles.
Occurrences: 575
Triangles: 460,436
5. Explode Patches
Click in Mesh > Explode Patches
What is explode patches?
This is a function that will explode CAD faces or surfaces limited by spline curves into parts of their own. A finished Lego creation is defined by it’s new contours as a whole, however one can break that composition into its many Lego pieces, in essence parts.
Step by Step
Click on Mesh > Explode Patches
2. When you see the following dialog box, make sure to click Yes.
3. After using Explode Patches the road flattener will look like this:
Note that this is the top-down view with 2-Sided, 100% visibility, and B-Rep, Shaded, and Outline toggled on.
6. Use Backface (BF) Color View
You will note that currently you’re using a view that is default called 2-Sided. This isn’t going to showcase those areas of the road flattener that still aren’t fixed. Switch the view to BF Color to see areas we need to work on.
Pro Tip: Using BF Color
By using the Backface (BF) Color view you’ll be able to see areas of the geometry where the faces of the polygons generated using “Tessellate” are misaligned, hidden, or flipped. This can be managed by then using a smart orient script in the next step.
7. Use Smart Orient
Note the number of Occurrences has since grown drastically as patches were exploded to parts in step four. Smart Orient is a script used to correct and reorganize the topology to reduce pink blotches, some of which would appear as holes in the model in Unity if left unaddressed.
Pro Tip: The Smart Orient Script
The Smart Orient Script is actually just a way to speed up workflow; however, what it really does is call four other functions. Those are Smart Hidden Create Visibility Information, Orient, and Delete Hidden Attributes.
Step by Step
1. Open up the Help menu in the toolbar, and click on Open Sample Scripts Directory.
2. Use the Python script “SmartOrient.py” within the resulting file explorer window by dragging it
over into the Scripts window.
3. The Scripts window is located down at the bottom where you’ll see Output as well.
Click execute the script.
Note this window may be on the right-side of the editor or also right next to the Output bar. You need to find the scripts window and then you’ll be able to use the execution button.
When complete, the road flattener will look like this:
Note this result is almost desirable! Let’s hone in on a few of these pink areas.
8. Merge Final Assemblies
All along the way, we’re paying attention to the occurrences and tri count. Merge final assemblies will reduce our occurrences (which impact the number of Draw Calls in Unity) and triangles (which we also want to decrease by the end of this process).
Step by Step
1. Found by going and clicking on Scene > Merge Final Assemblies.
2. This is largely what the road flattener will look like before you Merge Final Assemblies
9. Smart Hidden Removal
At the very end we need to drastically reduce the amount of overall Triangles in the road flattener model.
Step by Step
1. Use Optimize Mesh > Smart Hidden Removal:
2. When the resulting dialog box pops up change Resolution to Medium:
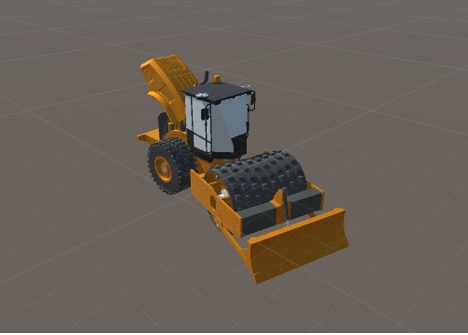
3. Once finished with the Smart Hidden Removal step, continue to export the file as a .FBX file.
This is the final state of the scene in PiXYZ Studio. Statistics read Occurrences: 486 and Triangles: 438,360
10. Key Takeaways
You have now a command of the main functions within PiXYZ Studio.
By completing this module, you’re now able to:
- Import, repair, and tessellate a model
- Switch view and orientation types
- Select multiple parts
- Invert the orientation of those parts
- Merge the final assemblies
- Execute a smart hidden removal script