Challenge — MR Interaction
Tutorial
Beginner
+10XP
30 mins
12
Unity Technologies
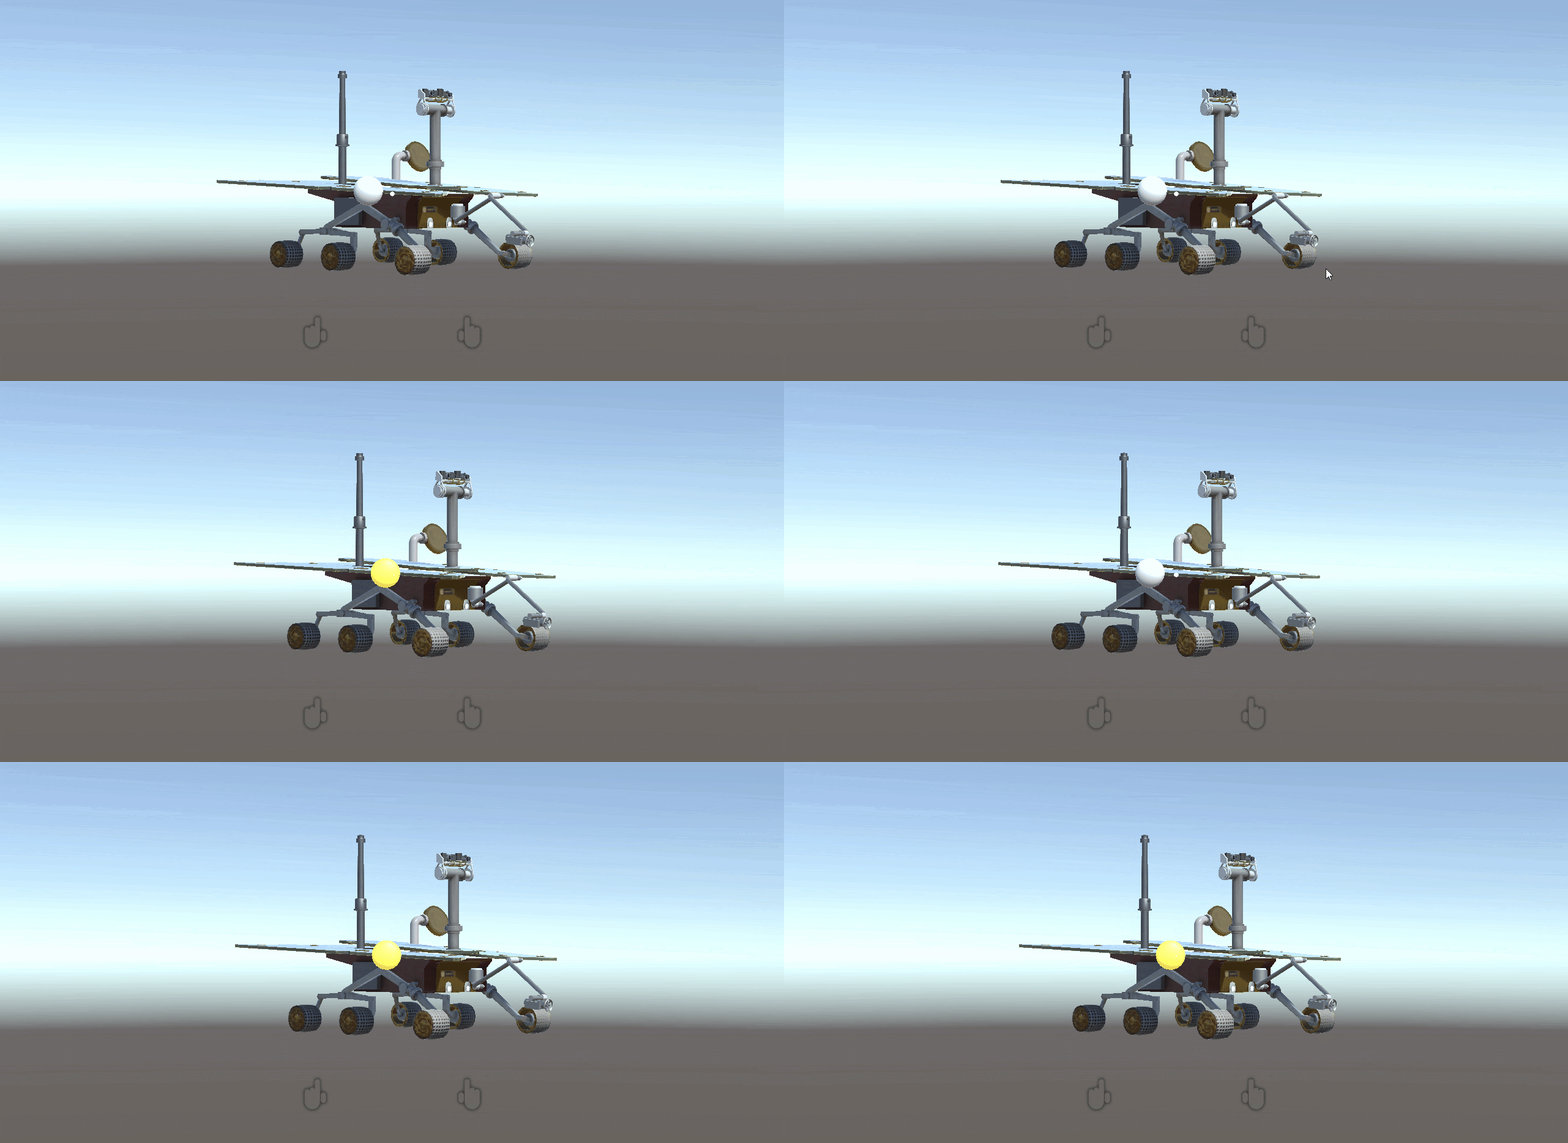
In this challenge, you will display information about and manipulate a Rover using HoloLens interactions.
Materials
Languages available:
1. Overview
In this challenge, you will display information about and manipulate a Rover using HoloLens interactions.
To do so, you’ll need to:
- Set up your Scene for Mixed Reality development
- Configure PointerEnter Gaze controls
- Configure PointerExit Gaze controls
- Display information to the user when they click on the intractable object
- Configure the PointerClick event to hide display information
- Create a Voice Manager to handle keyword inputs
- Add voice controls to the Rover to recenter the object on command
- Add the ability to scale and rotate the object
2. Set Up Your Scene for Mixed Reality Development
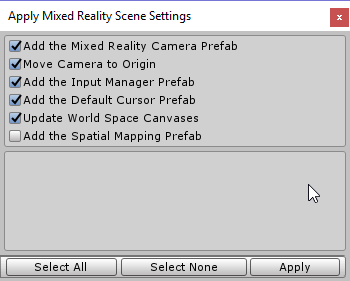
- Open the Mixed Reality Scene Settings window (Mixed Reality Toolkit > Configure > Apply Mixed Reality Scene Settings).
- Check the following checkboxes and leave the others unchecked.
- Click Apply.
3. Add a Highlight Material to the Sphere
Add the Event Trigger component to the Interaction Sphere and configure its Mesh Renderer Material to highlight upon gaze.
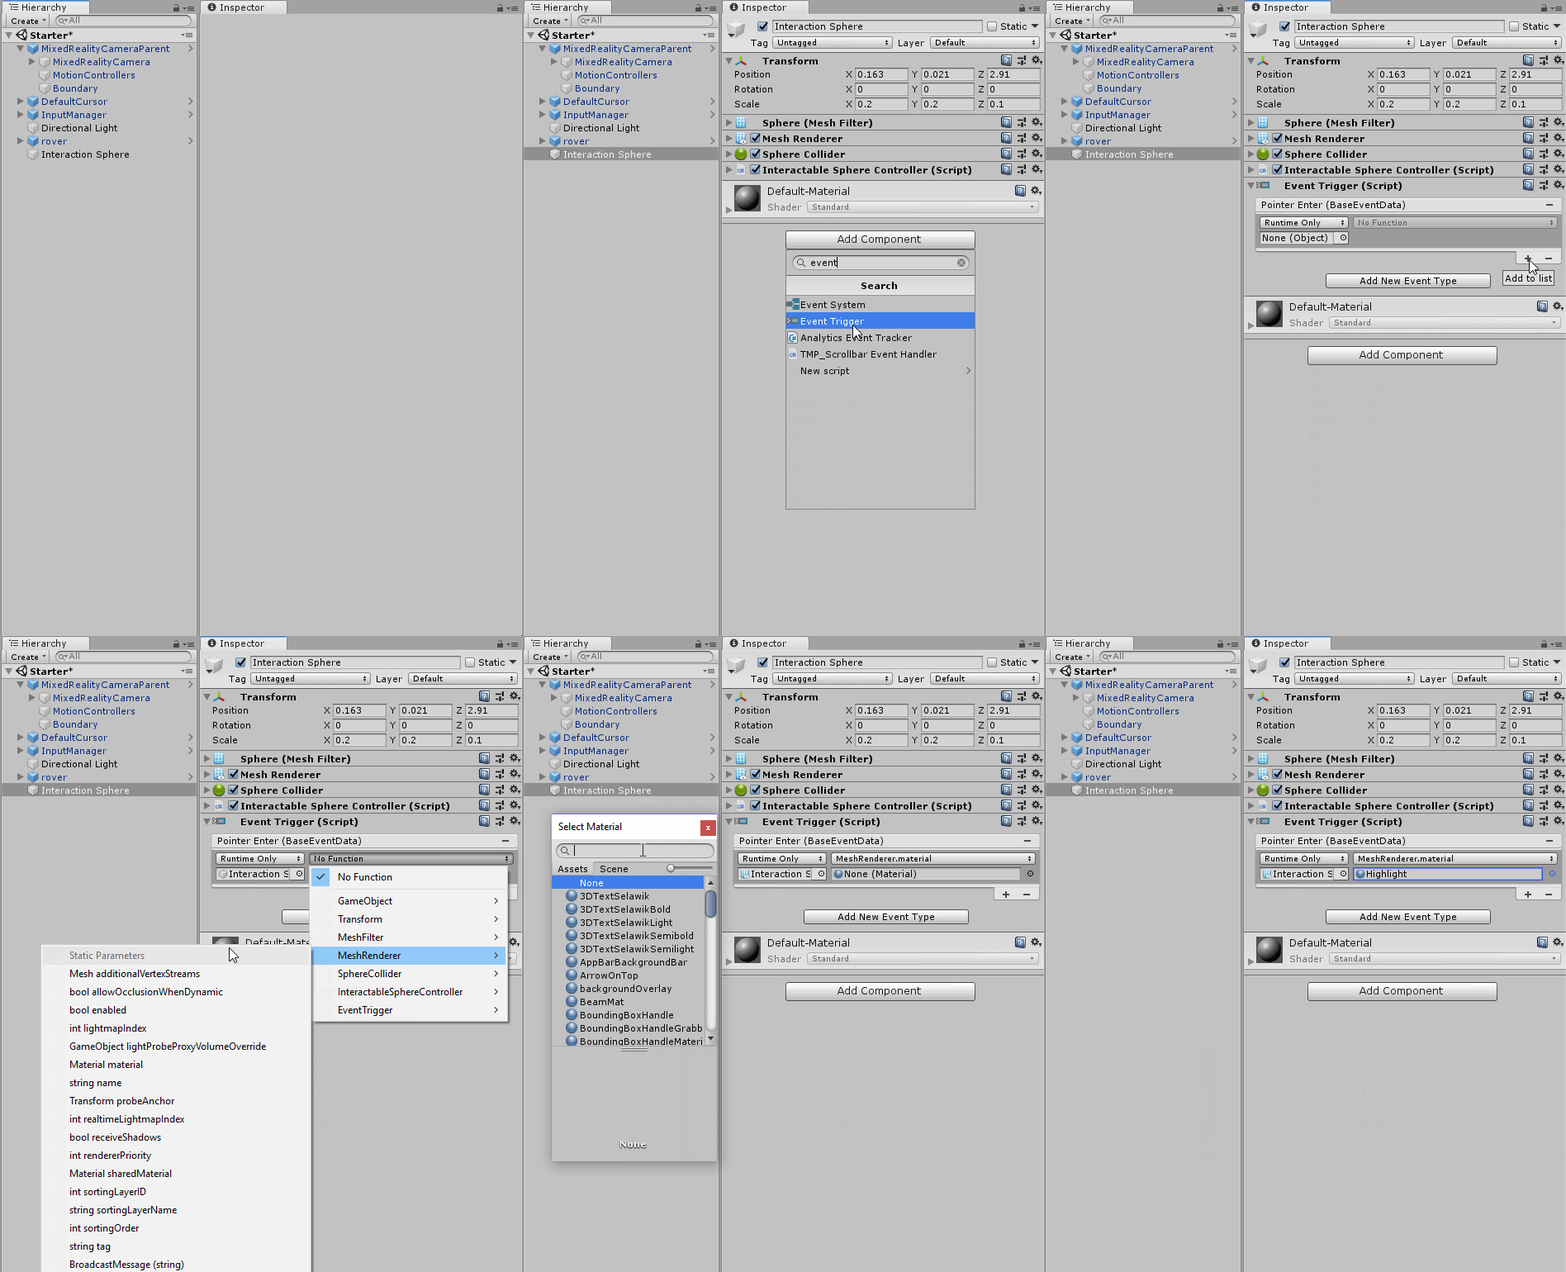
- Select the Interaction Sphere in the Hierarchy.
- In the Inspector, click Add Component, then search for and select the Event Trigger to add it to the GameObject.
- Add a Pointer Enter Event by clicking Add New Event Type and selecting PointerEnter.
- Add a Unity Event by clicking the + button in the bottom-right corner.
- Drag the Interaction Sphere GameObject into the GameObject slot.
- In the function drop-down, select MeshRenderer > Material. In the Material field, select Highlight Material.
--------------------
Tip — Indicating Interaction
Highlighting an object is a common design pattern to indicate interactivity. If one can interact with an object, typically there will be some type of feedback as one gets close to that object. Sometimes it’s visual feedback; other times it’s haptic or auditory feedback.
For this challenge, we use visual feedback to signal interactivity and do so by changing the Material upon gaze.
4. Implement the Return State after the Highlight Interaction
Add the Pointer Exit Event to the Interaction Sphere and configure it so the object returns to the default Material when the user looks looks away.
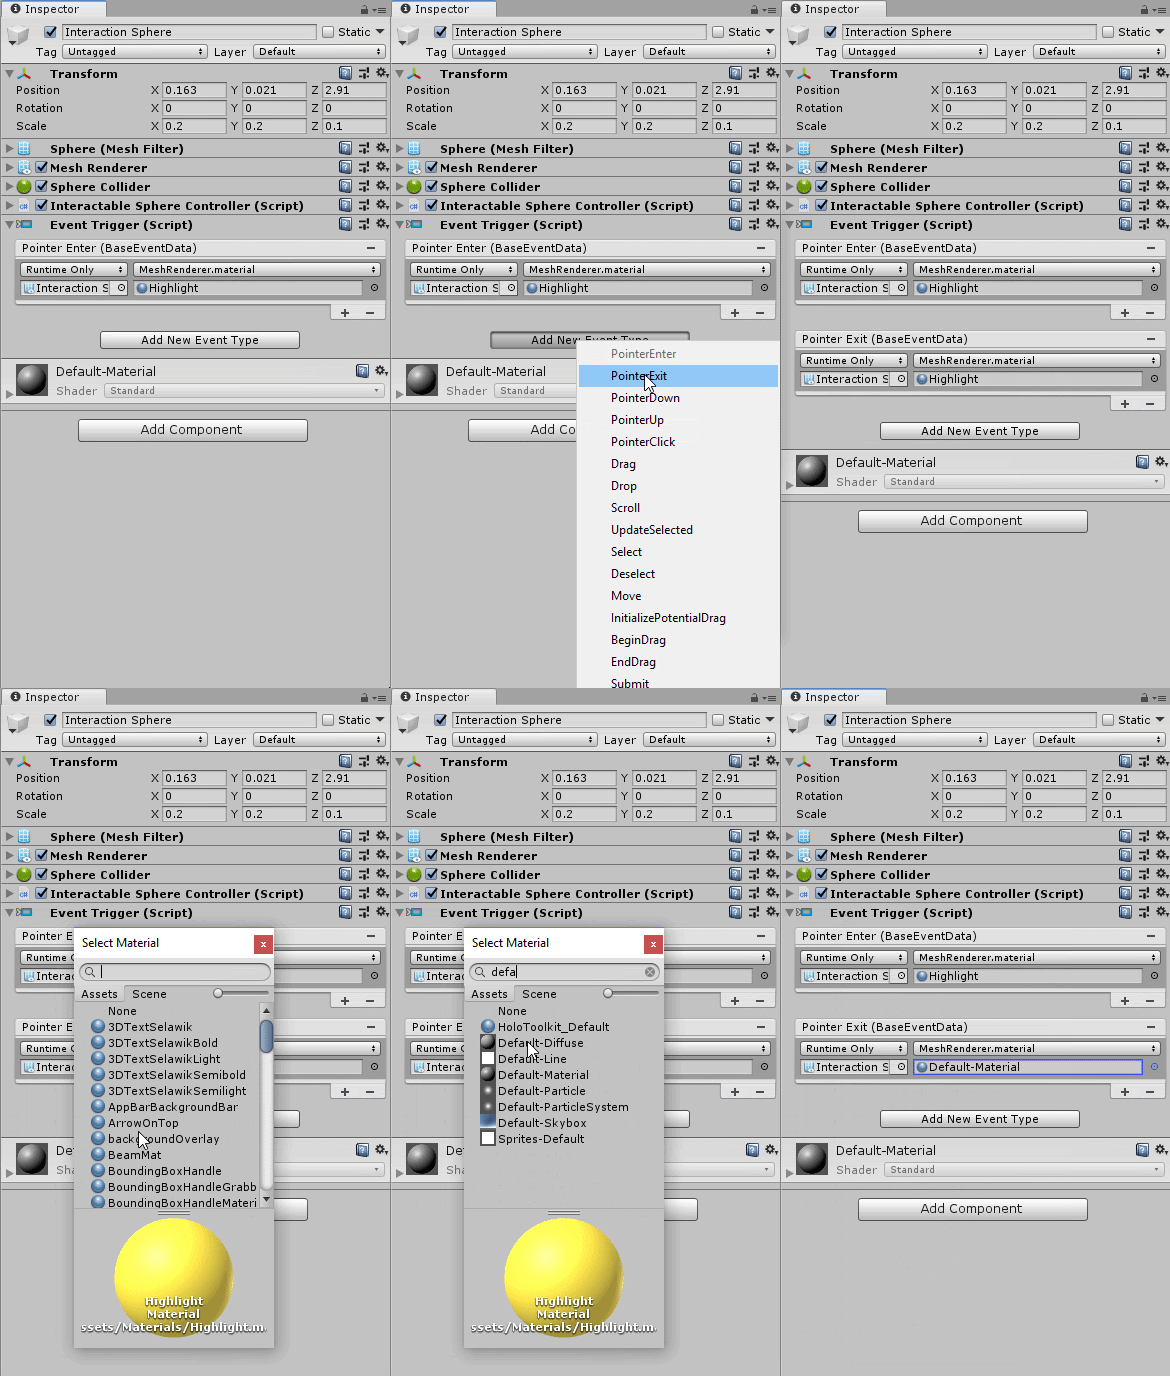
- Select the Interaction Sphere in the Hierarchy.
- Add a Pointer Exit Event by clicking Add New Event Type and selecting PointerExit.
- Add a Unity Event by clicking the + button in the bottom-right corner.
- In the GameObject slot, select the Interaction Sphere GameObject.
- In the function drop-down, select MeshRenderer > Material, and in the Material Field, select Default Material.
- Test it out!
5. Display Information During an Air Tap
Configure the information UI to display with a PointerClick event so the user can access the informational page by airtapping (clicking) on the Sphere.
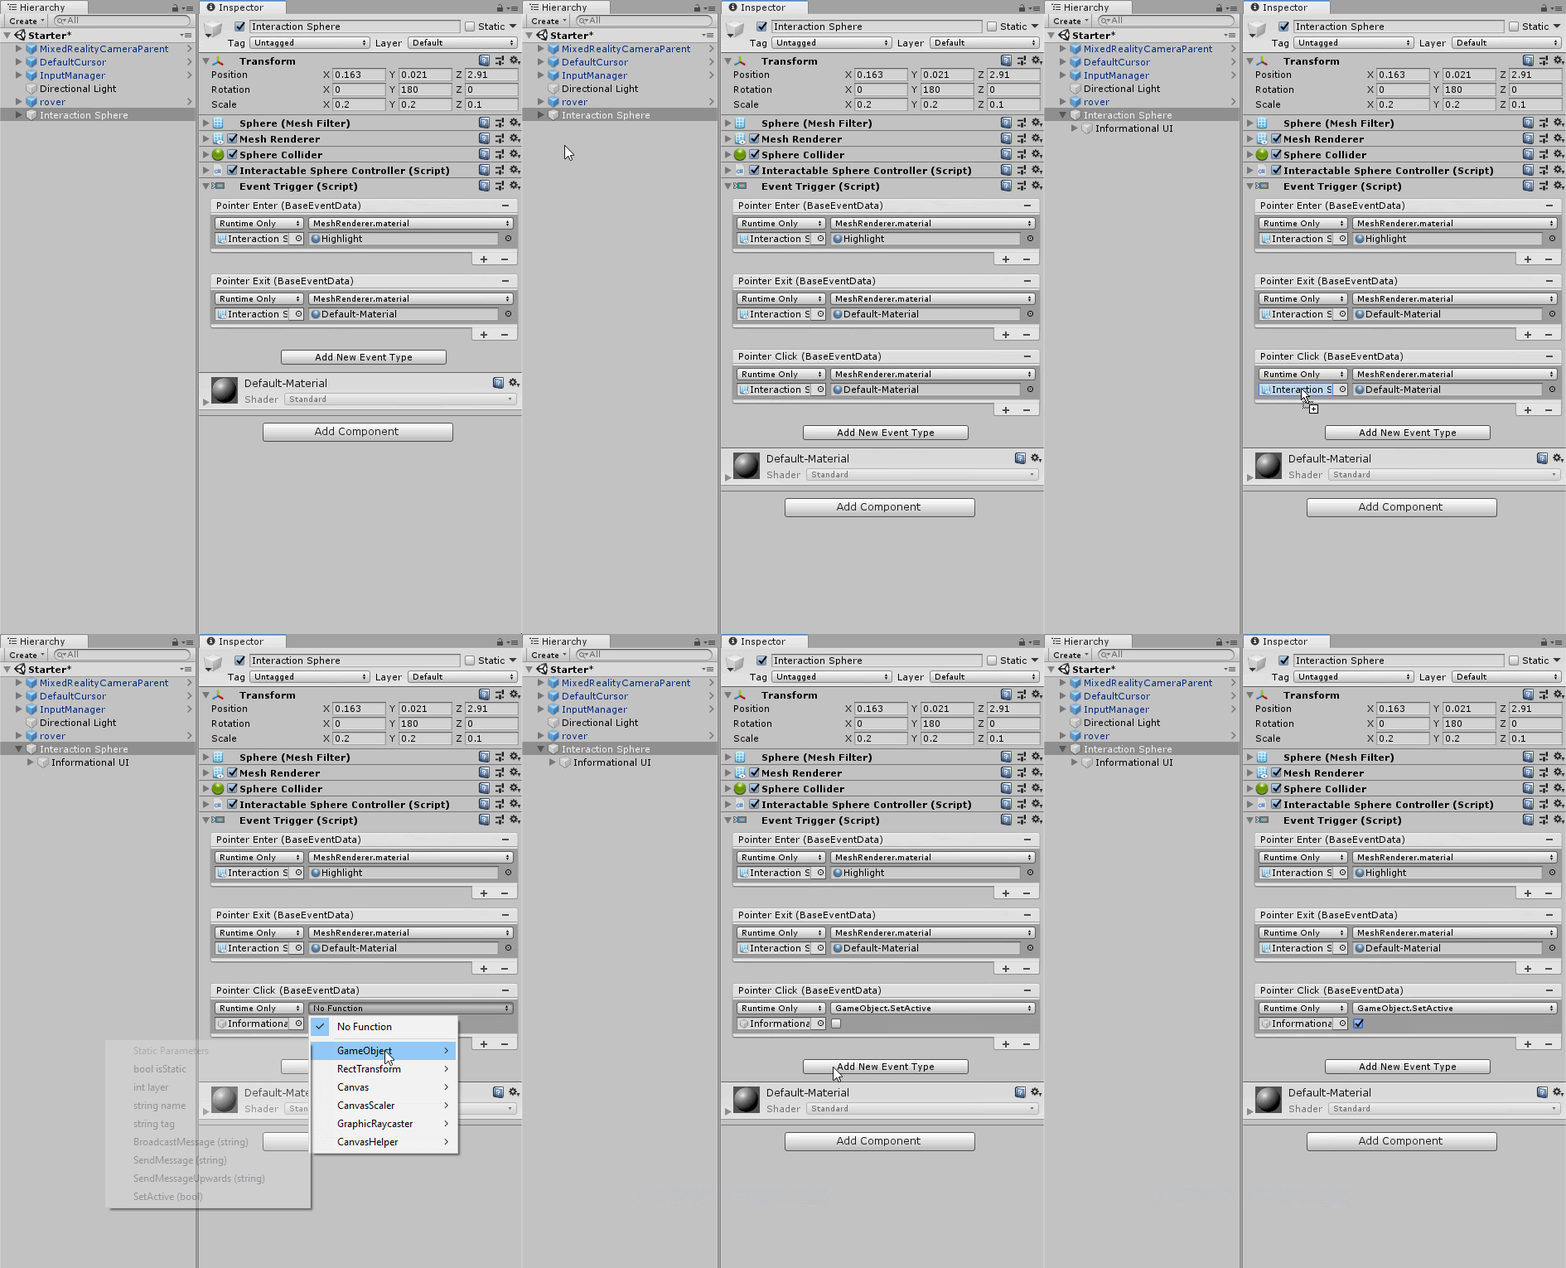
- Select the Interaction Sphere in the Hierarchy.
- Add a Pointer Click Event by clicking Add New Event Type and selecting PointerClick.
- Add a Unity event by clicking the + button in the bottom-right corner.
- In the GameObject slot, select the Informational UI GameObject (Interactable Sphere > Information UI).
- In the function drop-down, select GameObject > Enable and check the box.
6. Configure the UI-Disable Interaction
Configure another PointerClick event to hide, or disable, the informational UI when the user clicks on the page.
- Select the Informational UI (Interactable Sphere > Informational UI) in the Hierarchy.
- In the Inspector, click Add Component, then search for and select the Event Trigger to add to the GameObject.
- Add a Pointer Exit Event by clicking Add New Event Type and selecting PointerClick.
- Add a Unity Event by clicking the + button in the bottom-right corner.
- In the GameObject slot, select the Informational UI GameObject.
- In the function drop-down, select GameObject > Enable and leave the checkbox unchecked.
- Try it out!
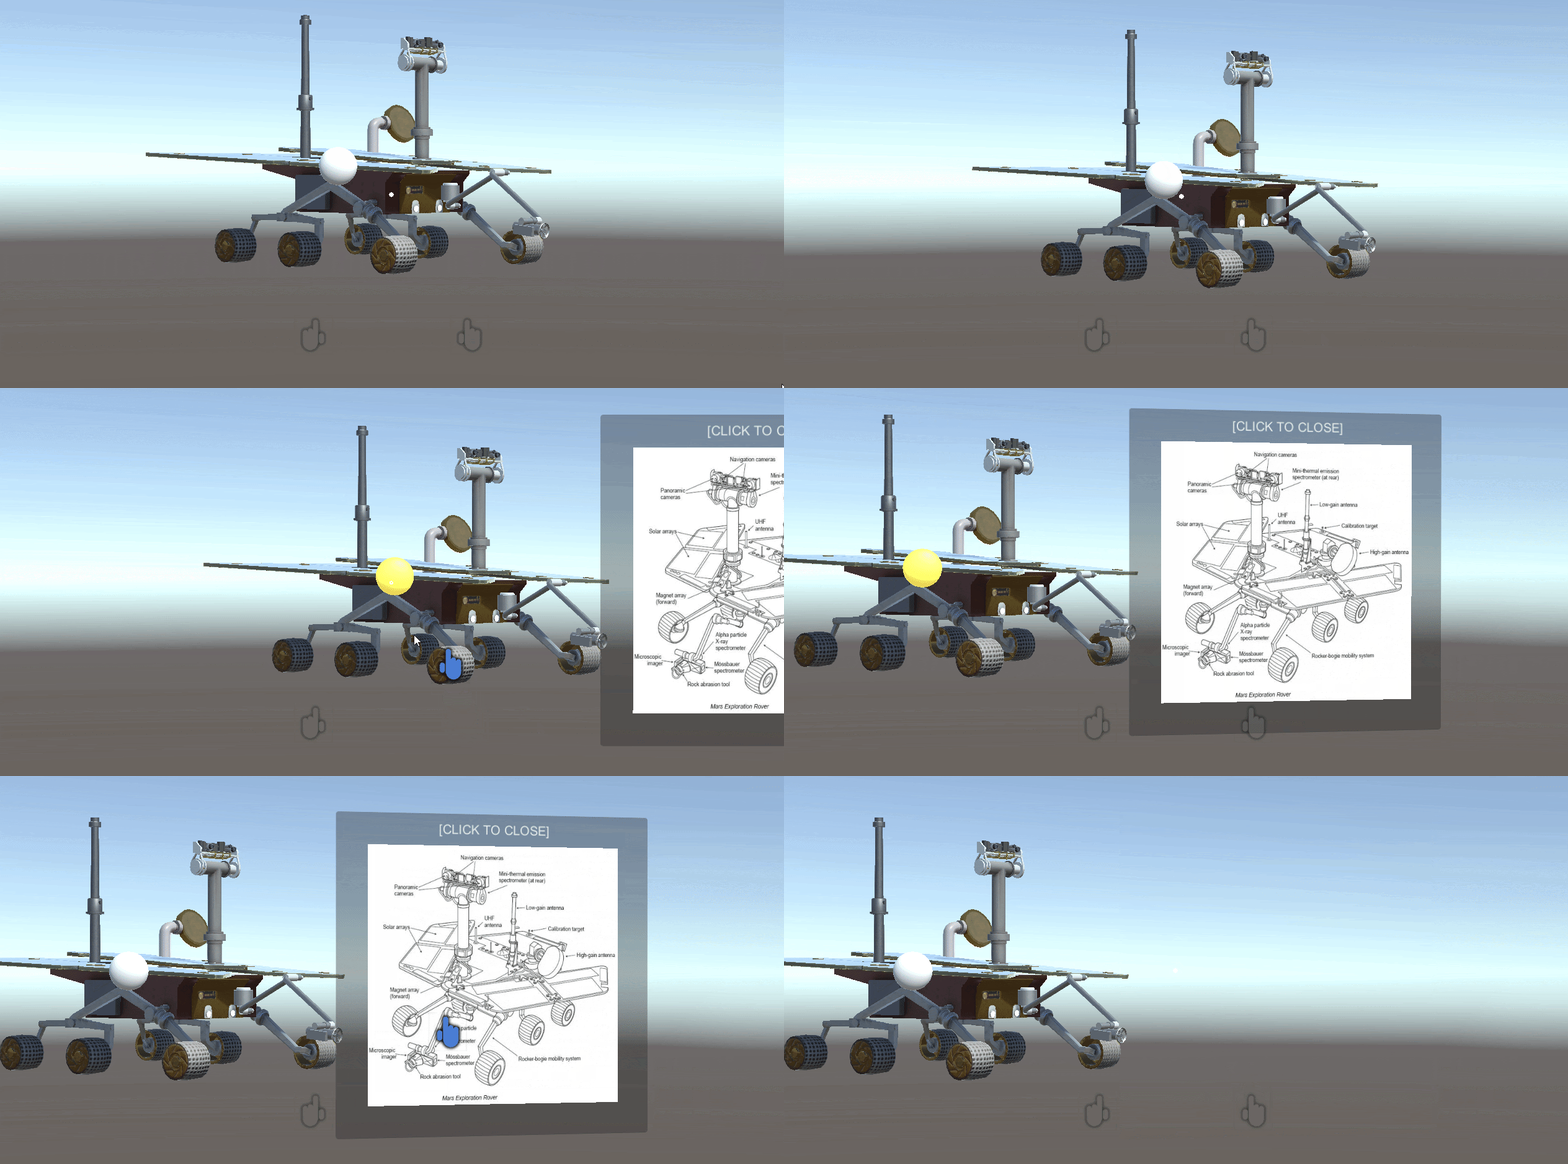
7. Configure Voice Commands with a Keyword
Create an empty GameObject named Voice Manager, add a Speech Input Source component, and add “recenter” to the keywords list.
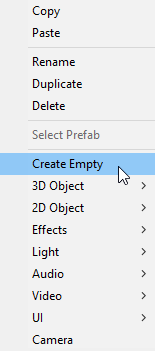
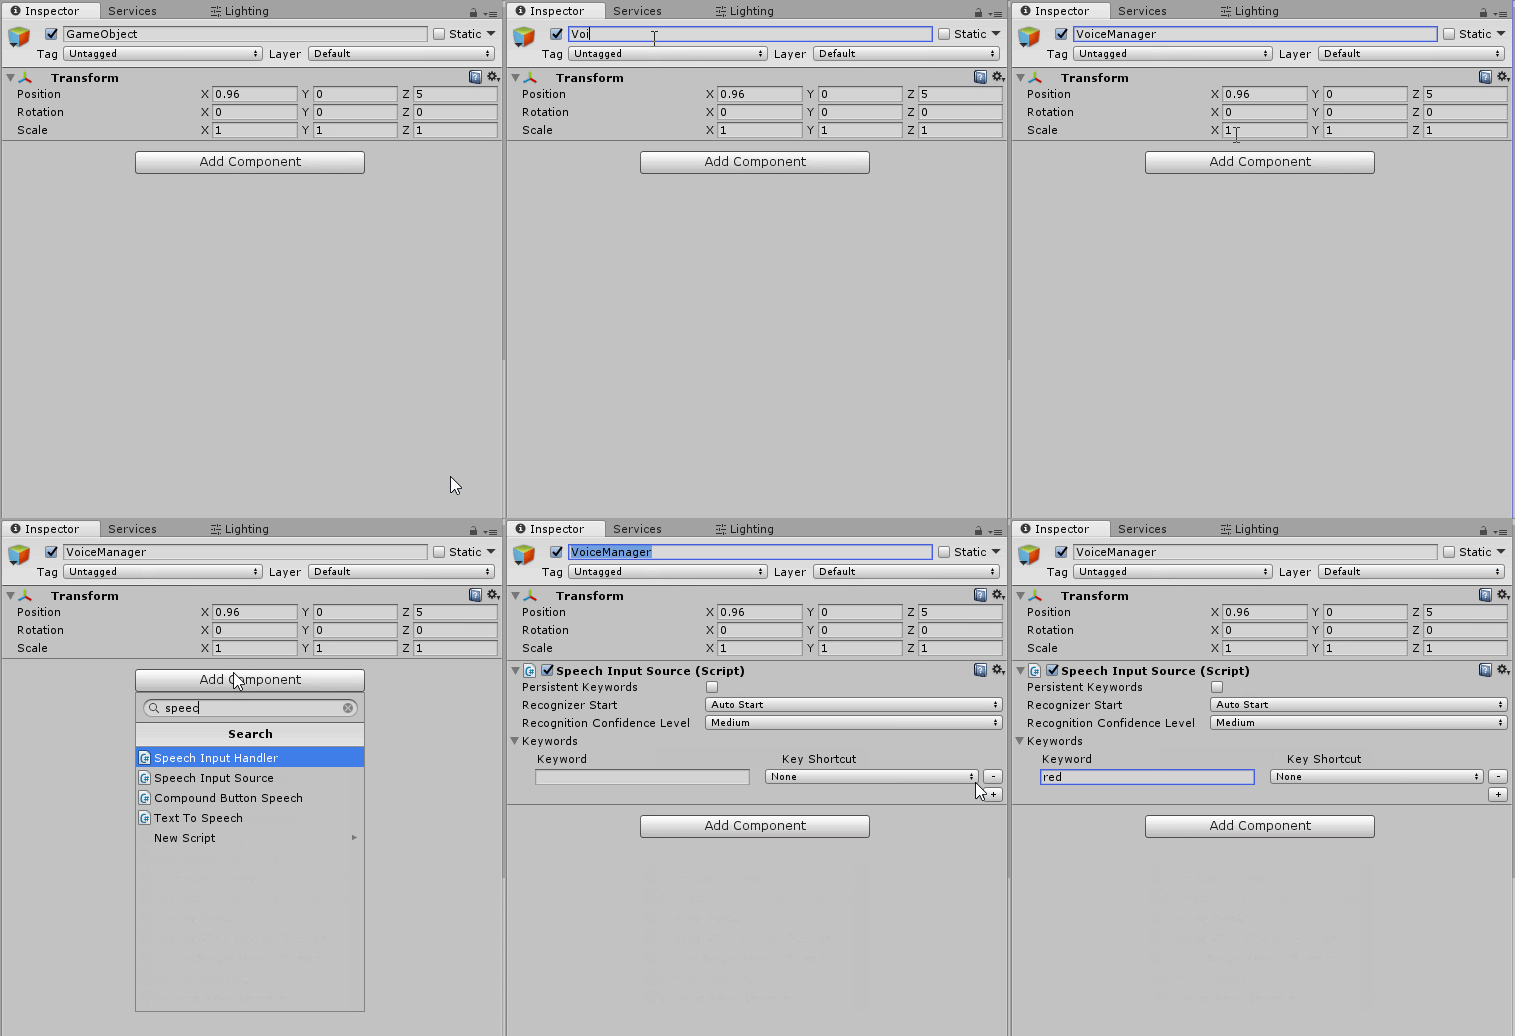
- Create an empty GameObject (Create > Empty GameObject) and name it VoiceManager.
- Add the Speech Input Source component by hitting Add Component, then searching for and selecting Speech Input Source.
- In the keywords drop-down, hit the + button to add a new keyword.
- In the keyword slot, type recenter and leave the Key Shortcut as None for now.
8. Add Voice Control to the Rover
Add a Speech Input Handler component to the Rover and add the “recenter” keyword to the keywords list. This will allow you to implement functionality when the user says “recenter.”
- Add the Speech Input Handler to the GameObject by hitting Add Component, searching for the Speech Input Handler, and double-clicking to select.
- Add the recenter keyword that was declared in the Speech Input Source by hitting the + button and using the drop-down to select recenter.
- Add a Response event by hitting the + button and dragging in the Rover GameObject.
- Add the Recenter functionality to the Response event by using the drop-down to select Recenter Controller > Recenter.
Try it out!
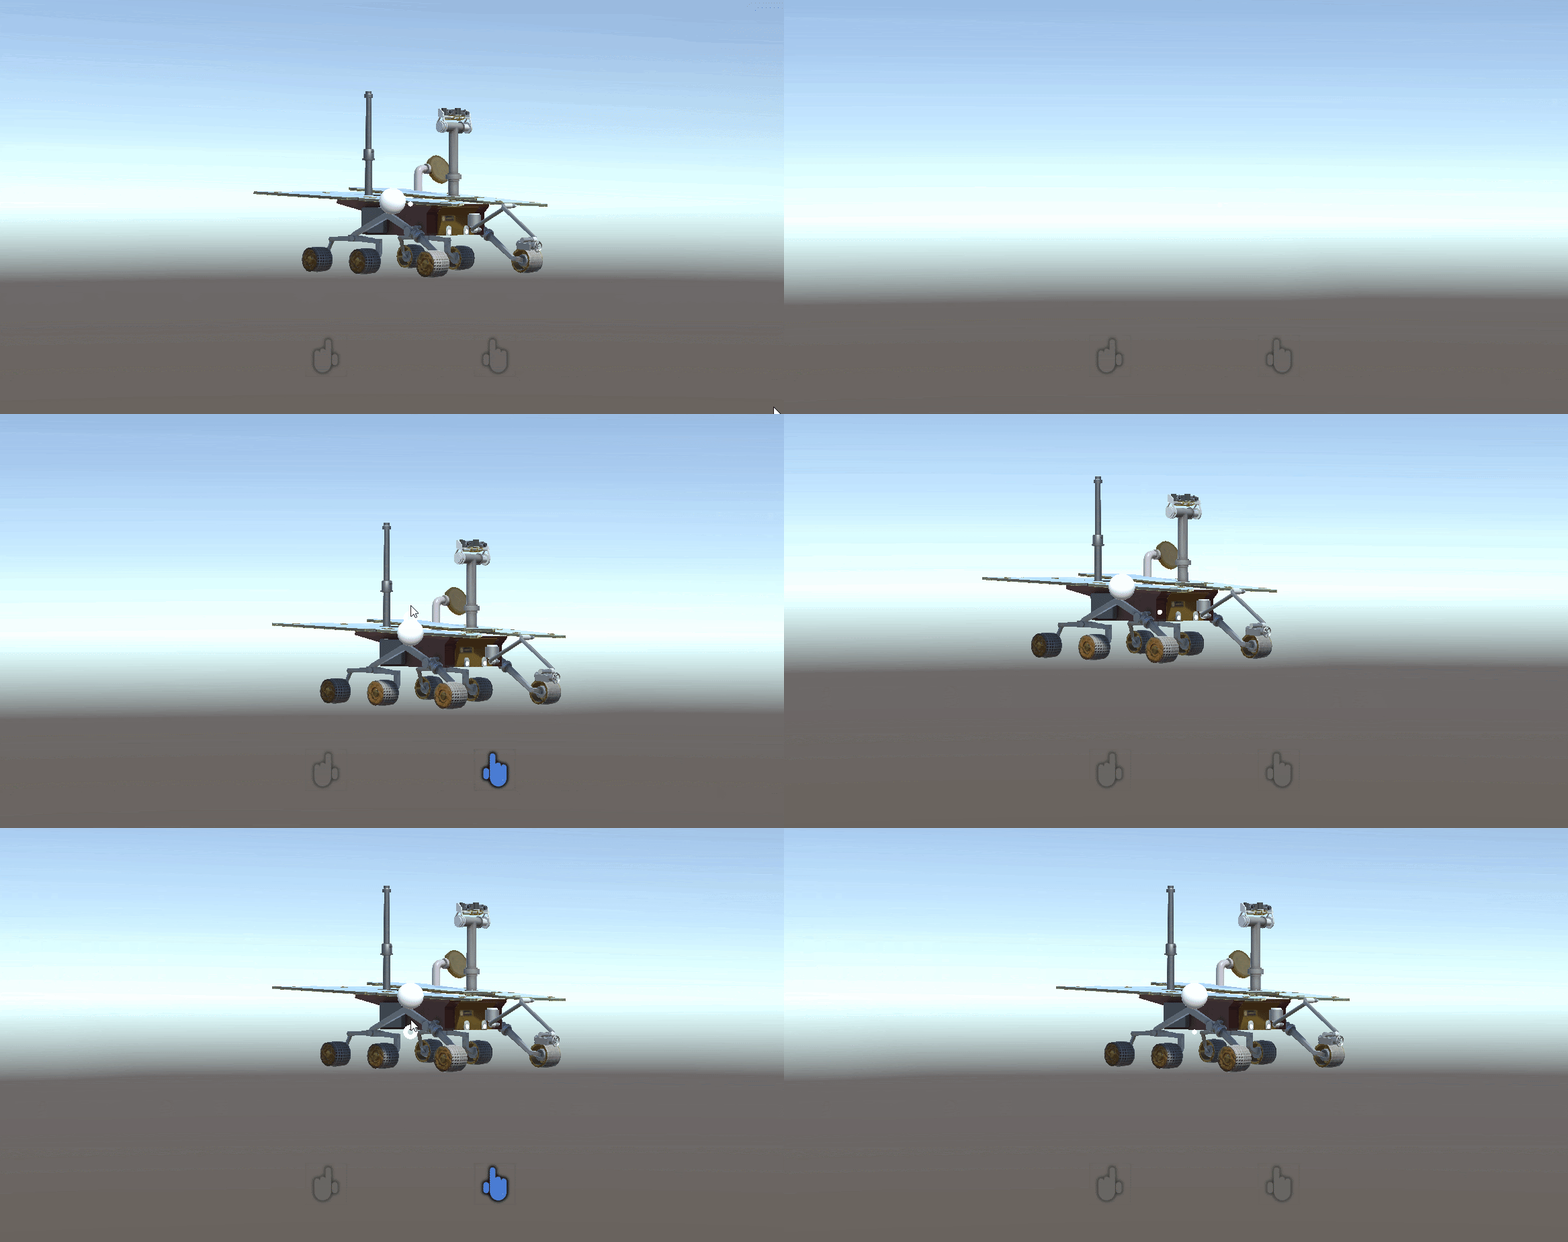
9. Add the Ability to Rotate and Scale
Add the Bounding Box Rig to the Rover and configure the Bounding Box Prefab.
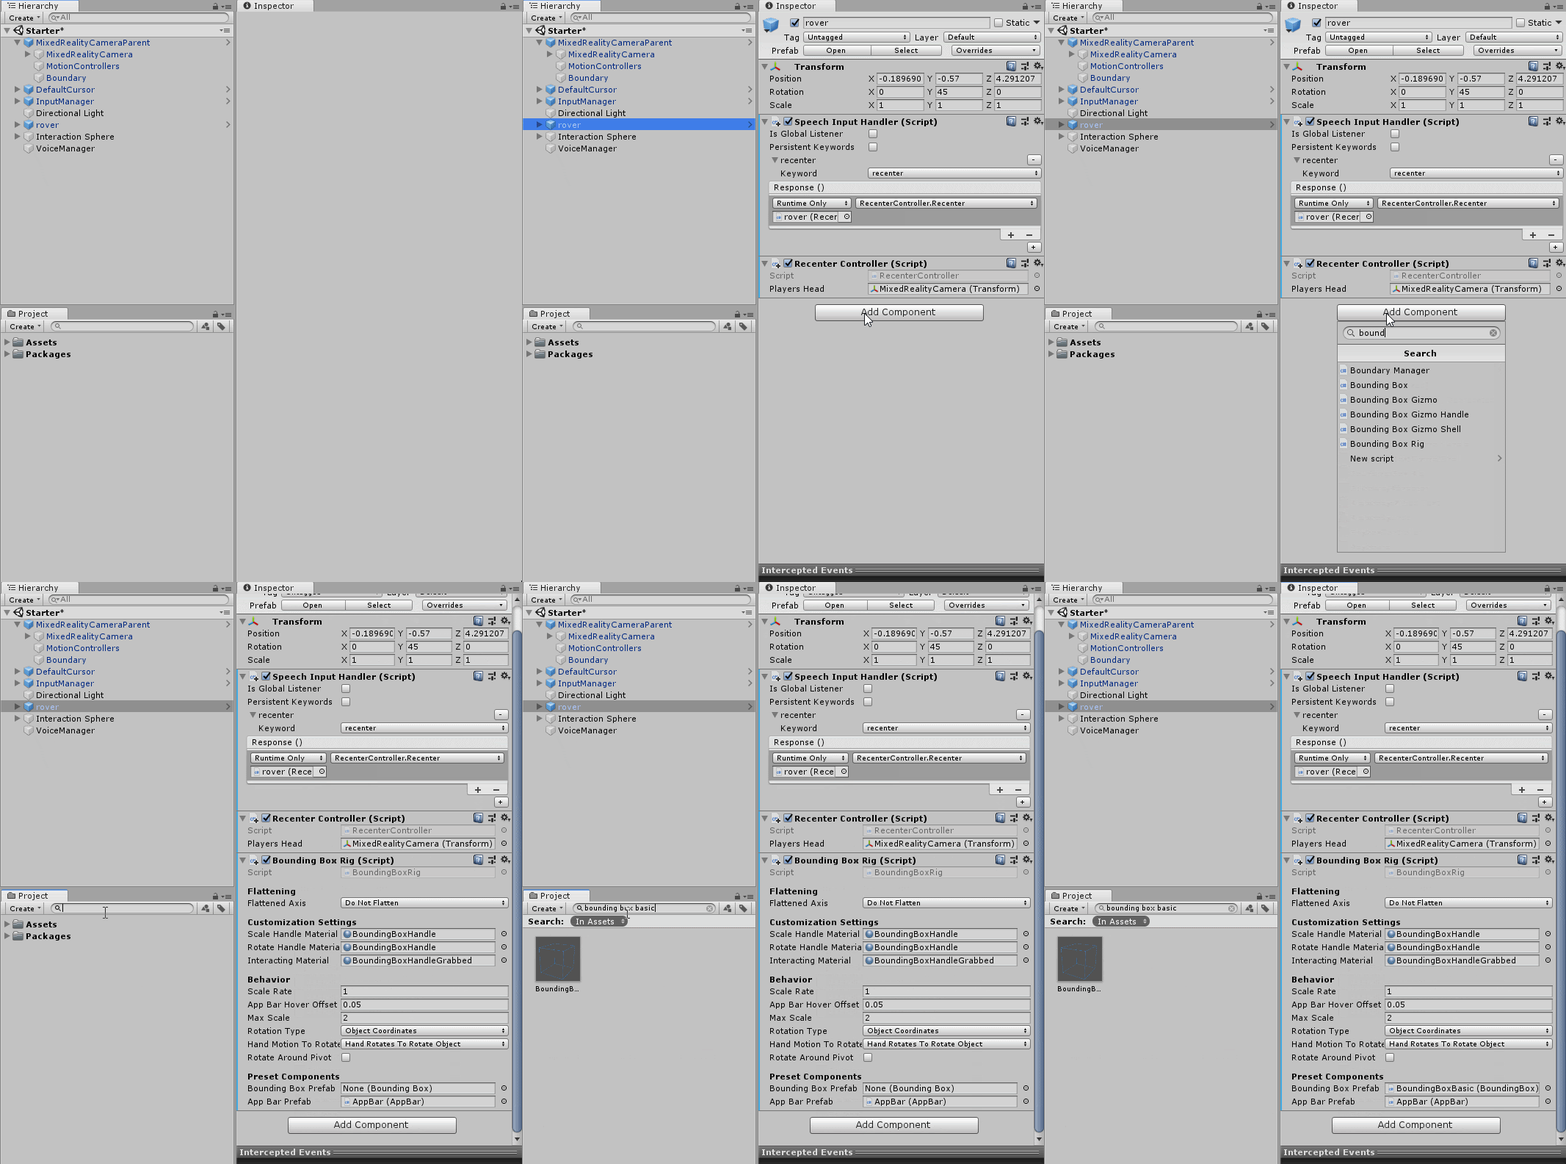
- Add the Bounding Box Rig to the Rover by hitting Add Component and searching for the Bounding Box Rig.
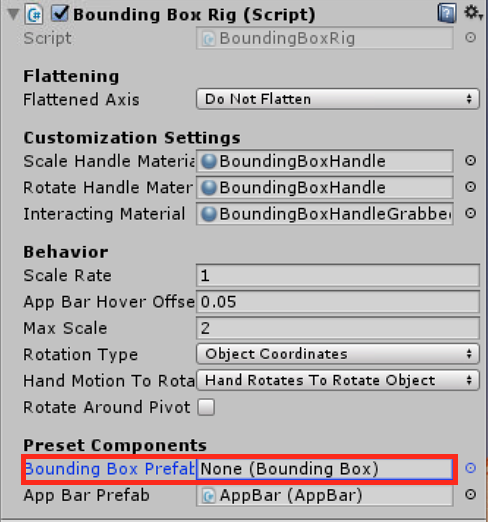
- Find the BoundingBoxBasic.prefab (Holotoolkit > UX > Prefabs > BoundingBoxes > BoundingBoxBasic.prefab) in the Project view.
- With the Rover selected, drag the BoundingBoxBasic.prefab into the Bounding Box Prefab slot on the Bounding Box Rig component.

10. Key Takeaways
Congratulations! You've now configured the Mars Rover to work with HoloLens interaction. The interaction patterns integrated in this challenge are the most common types of HoloLens interaction and are especially useful in pre-authored training applications.
By completing this challenge, you've learned core HoloLens interactions:
- In-editor HoloLens interaction simulation
- Gaze interactions to highlight interactable objects
- Gestures to display additional information
- Voice commands to recenter the object of interest
- Use the Bounding Box Prefab to rotate and scale the object of interest with the HoloLens