
Challenge — Optimizing with Light Baking and Reflections
Tutorial
Beginner
+10XP
30 mins
Unity Technologies
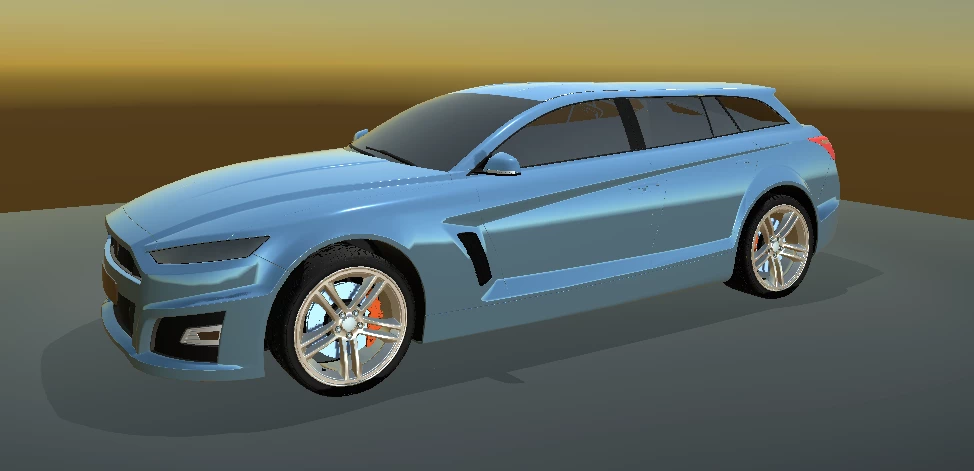
In this challenge , you will be exploring Realtime versus Baked lighting, Skyboxes, and Reflection Probes. The combination of these Unity features can dramatically increase the realism of your Scene.
Resources
Languages available:
1. Overview
In this challenge you will explore Realtime versus Baked lighting, Skyboxes, and Reflection Probes. The combination of these Unity features can dramatically increase the realism of a Scene.
In this Scene, you will add several lights to simulate different lighting scenarios for the car. To do so, you will:
- Explore an outdoor lighting challenge and give the car realistic reflections using a Reflection Probe
- Design lighting for the indoor environment
- Continue to add lights (remembering to bake them) to fill out the Scene and make the car
2. Give the Scene a More Realistic Environment by Adding a Skybox
Change the Skybox to the SkyboxParking_Lot Material
1. Open the Lighting window (Window > Lighting > Settings).
2. In the Lighting Settings, find the Skybox field and hit the circle dot to open the Selection window.
3. Search for and select the SkyboxParking_Lot Material.
Tip — Default Reflections
By default, objects in a Unity Scene will reflect the Skybox. However, this behavior can be changed for all objects in your Scene in the Lighting window, using the Reflection Source property. The Skybox, or alternatively, a custom cubemap, may be used. This Reflection Source can be thought of as a Scene-wide cubemap used by all objects in the Scene, unless overridden by adding a Reflection Probe.
Explore — Different Skyboxes
There are a few additional Skybox Materials in the project that you can swap into your Scene. Explore the different possibilities.
3. To More Accurately Pick Up the Environment Reflections, Add a Reflection Probe
Add and position a Reflection Probe near the car.
- Add a Reflection Probe to the Scene (Create > Light > Reflection Probe). Hint: You can add a Reflection Probe directly as a Child GameObject to the car to ensure it is aligned to the car properly at all times.
- Position the Reflection Probe so that it's near the car (the closer the better).
- Change the Reflection Probe to Realtime and increase the Resolution to 2048 to increase the accuracy of the car’s reflections.
4. Enhance the Indoor Lighting by Enabling the Indoor Environment
Enable the Indoor Environment in the Hierarchy
Enable Baked Lighting. Don't forget to make objects in the scene Static so Unity includes them in the lighting calculation!
Change the IndoorEnvironment and Car to Static so they receive baked light.
- Select the Indoor Environment GameObject from the Hierarchy and enable it.
- Open the Lighting window and enable Baked Global Illumination and change the Lightmapper to Progressive.
- Make the Car and Indoor Environment GameObjects static by checking their Static boxes in the Inspector window.
--------------------
Tip — To Static or Not To Static?
A good rule of thumb is to only make objects that don’t move (walls, floors, ceilings, props) Static. In fact, if an object is going to move in your Scene (animated or procedurally), it's best to use real-time lighting for that object.
Tip — Avoid Unwanted Reflections
When working on indoor Scenes, it's a best practice to turn off the Skybox to avoid unwanted reflections from seeping into your Scene and reduce the additional computational load of rendering a Skybox.
5. Add Your Own Area Light to the Wall Panels
Create an Area Light and position it on the wall panel.
- Create an Area Light (Create > Light > Area Light).
- Position it slightly in front of the wall panel and expand it using the yellow board so that it covers the whole wall
6. Bonus Challenge
Add more lights to give your car the setting it deserves!
Often, it's useful to see a car under stripped lighting or bar lights. (Note: this trick only works with baked lighting and, thus, Static GameObjects. You will notice that in the example project, the bar lighting is not included because the Car object is not static. This trick only works if you don’t need to move the car in your Scene).
- In the Hierarchy, find the LightBars GameObject and enable it.
This is a convenient trick to simulate this sort of lighting in Unity.
The GameObjects have an Emissive Material attached and an Area Light that runs the length of the GameObject.
Let Unity bake the Scene.
Pretty cool, huh!
Where else can you add lights? Explore the Scene and try out some other placements.
This challenge introduced you to the concept of robust and optimized Scene lighting. Specific design implementation will be up to you, but now you can build your Scenes with much more accurate, realistic, and high-performance lighting designs.