Choose the right Unity version
Tutorial
foundational
+10XP
15 mins
10939
Unity Technologies
In this tutorial, you’ll learn about Unity versions and how to manage them. By the end of this tutorial, you will know how to:
- Explore the differences between types of Unity version.
- Understand the Unity version naming conventions.
- Install a new version of Unity.
- Add modules to a Unity install.
Materials
Languages available:
1. Overview
There are lots of different Unity versions available, and it can be challenging to identify which one is right for your particular needs. In this tutorial, you will learn about the types and names of Unity versions, how to install them, and how to add modules.
2. Release types
There are two different types of Unity releases:
- Long-Term Support (LTS) releases
- TECH Stream releases, including alpha and beta releases
Let’s explore these in more detail with members of the Unity team.
3. Release names
Let’s explore how to interpret Unity version names. The version name for Unity includes the following information:
- Major release
- Minor release
- Update number
- Other identifiers
Release information
Major release
Unity versions are currently categorized by year. This is always the first part of the version name.
Minor release
This is the number of new Unity releases within the year. From 2020, there will be two TECH stream releases per year (2020.1 and 2020.2) and one Long-Term Support release (2020.3LTS).
In 2018 and 2019, there were three TECH stream releases and one LTS release.
Update number
There may also be an update number.
Other identifiers
The release may also include information on whether release is:
- Alpha (a)
- Beta (b)
- A candidate for final release (rc)
- A final release (f)
- The Long-Term Support version (LTS)
Review an example
2019.4.0.f.1 LTS
This release of Unity is:
- The 2019 version (2019)
- The fourth release of the year (2019.4)
- The final release (2019.4.0f1)
- The LTS support version (2019.4.0f1 LTS)
4. Choose the right version for your project
Unity Learn projects
Learning experiences on Unity Learn will always tell you the version you need to use. Beginner learning content generally requires the most recent LTS version, but occasionally TECH stream releases are used to support the long-term sustainability of our learning content.
Your own projects
As a general rule, you should use the latest LTS version for your Unity project.
There are some circumstances where you may want to use a different version, which include:
- Using features only available in a TECH stream release.
- Joining a collaborative project that was already in progress on a different version.
Upgrading a Unity project
Sometimes Unity users need to update their projects. As a general rule, you should only do this if:
- The new version includes a fix to a problem you are having.
- A feature you need has become stable and verified.
5. Install a new Unity version
When you used the Unity new user installation wizard, you downloaded the latest LTS version. Let’s install a TECH stream release, to practice installing a new version using the Unity Hub.
To install a new version of Unity:
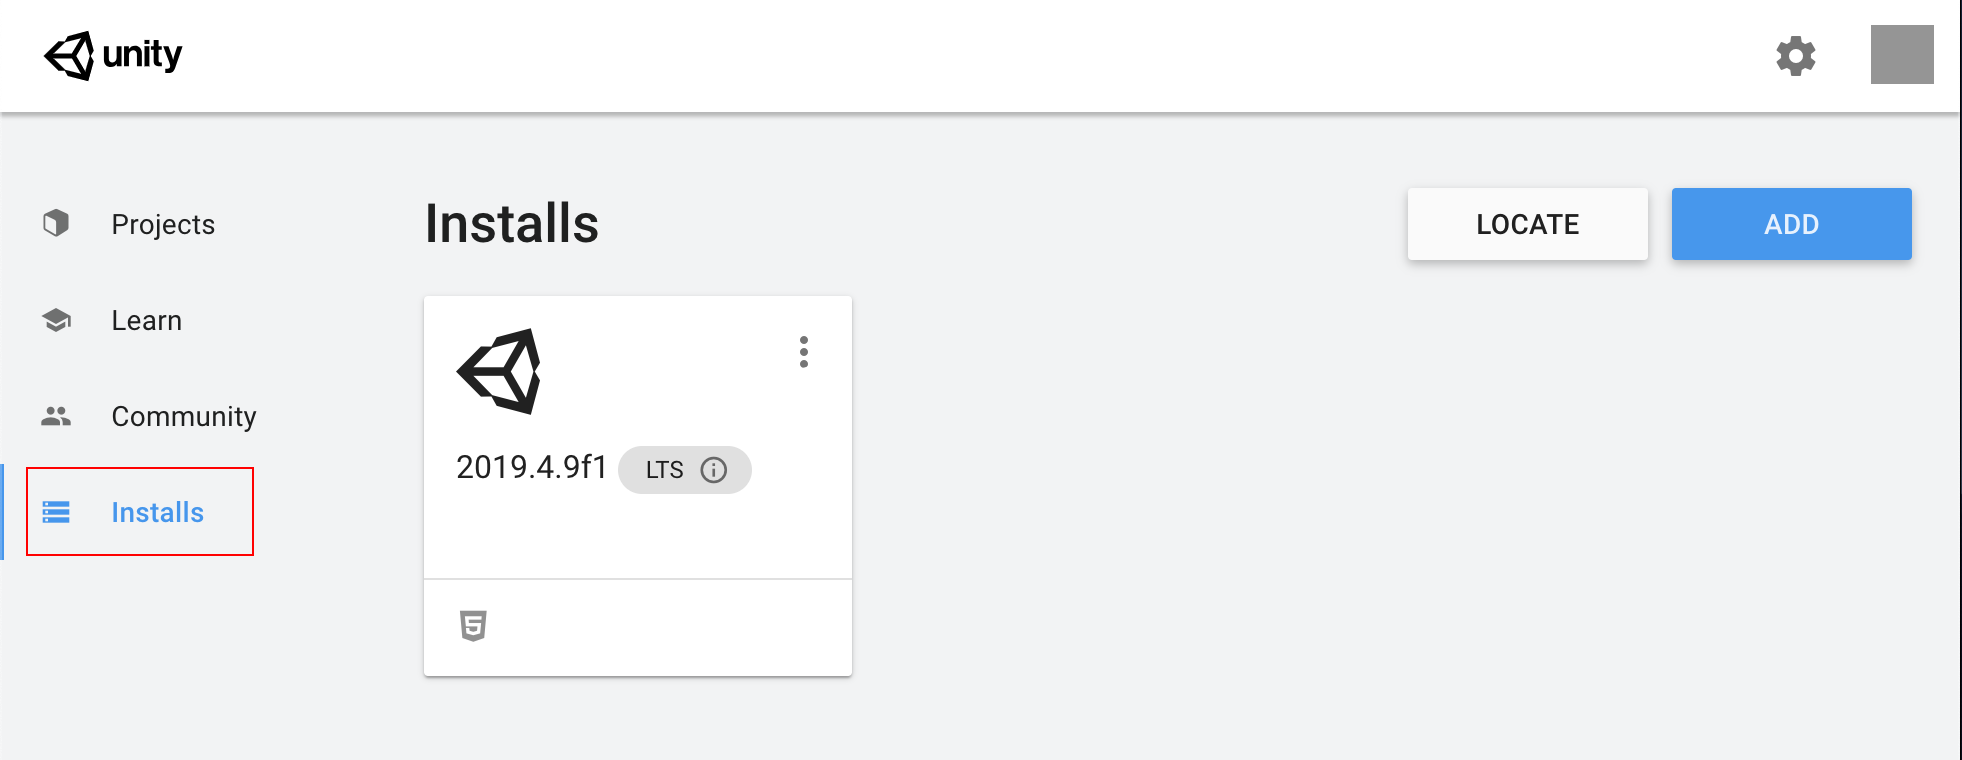
1. Open the Unity Hub and select the Installs tab.
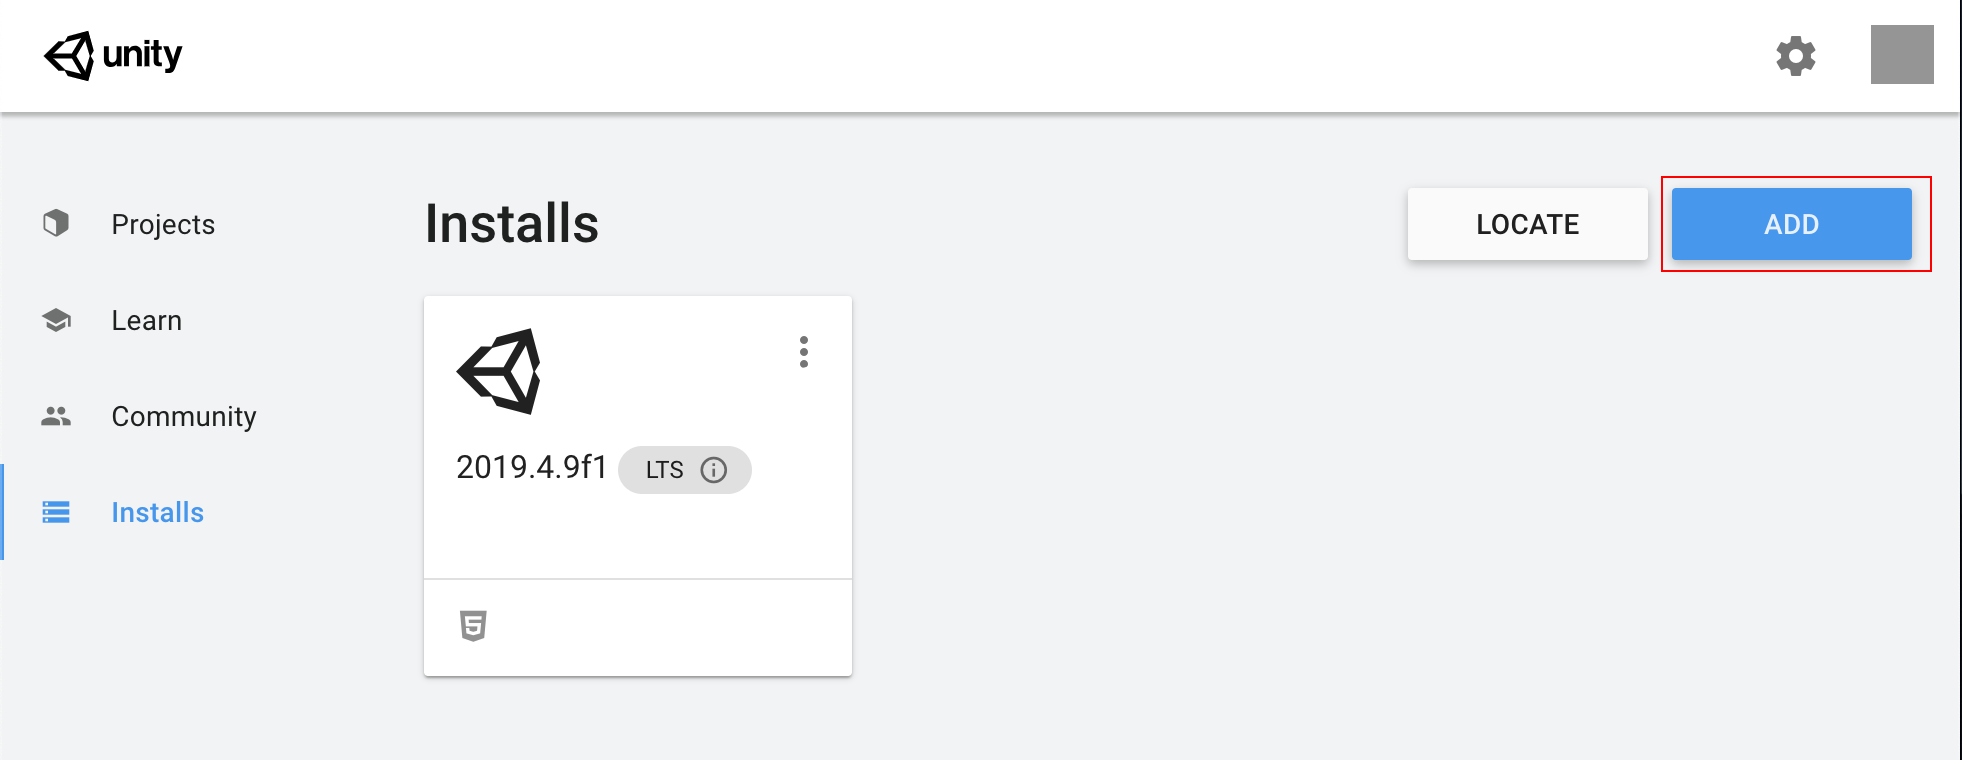
2. Select Add to add a new install.
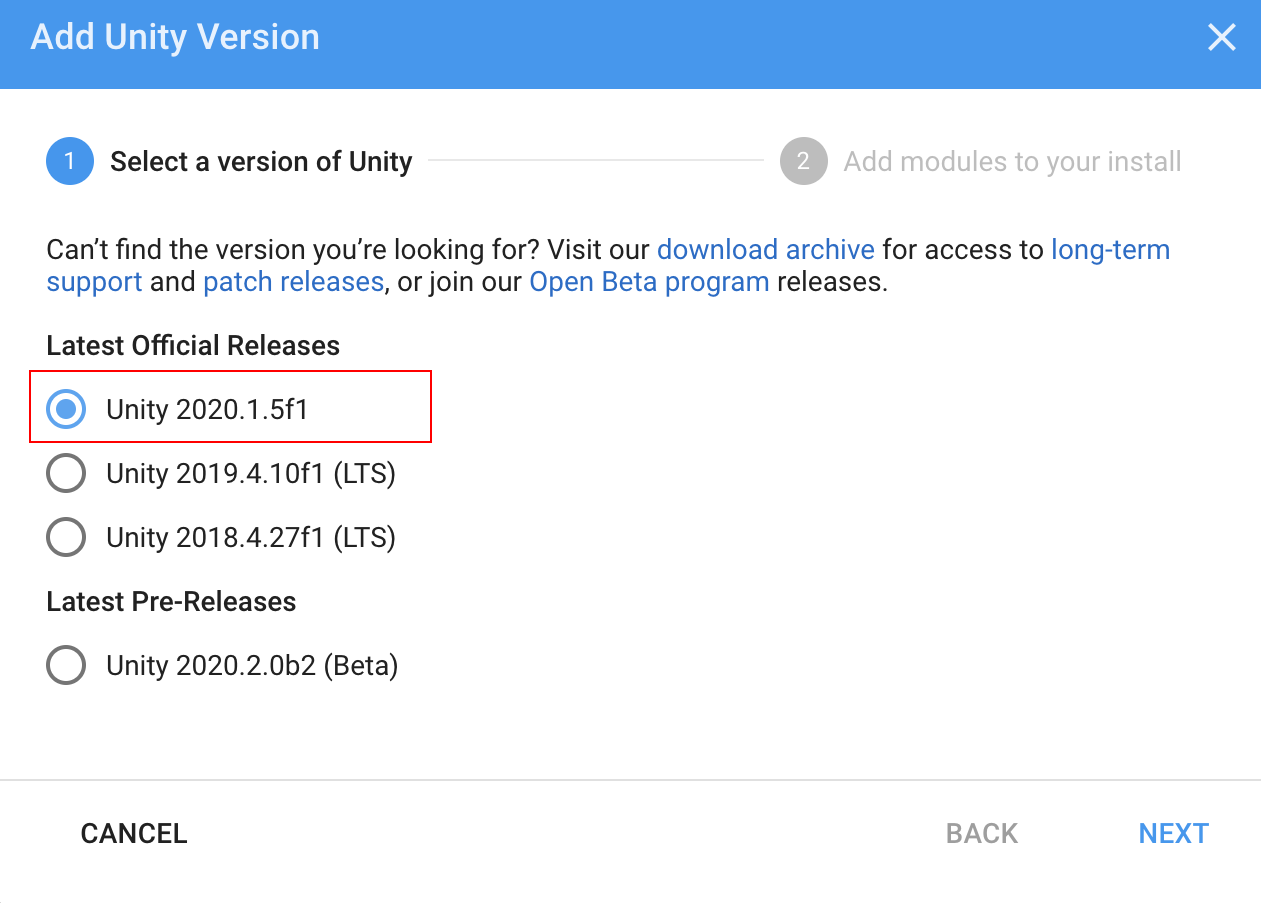
3. Select the latest official TECH Stream release and then Next to continue.
4. Select WebGL (to build projects playable in a web browser) and the Build Support option for your current platform (Linux, Mac or Windows). You can also select additional modules, which can add other features to Unity including:
- Build support, so the experiences you create can be played on different platforms.
- Documentation available in Unity Editor.
- Language packs.
Documentation will be selected by default.
Note: WebGL will be useful later in this course for sharing your work with others on the web. Please select it now.
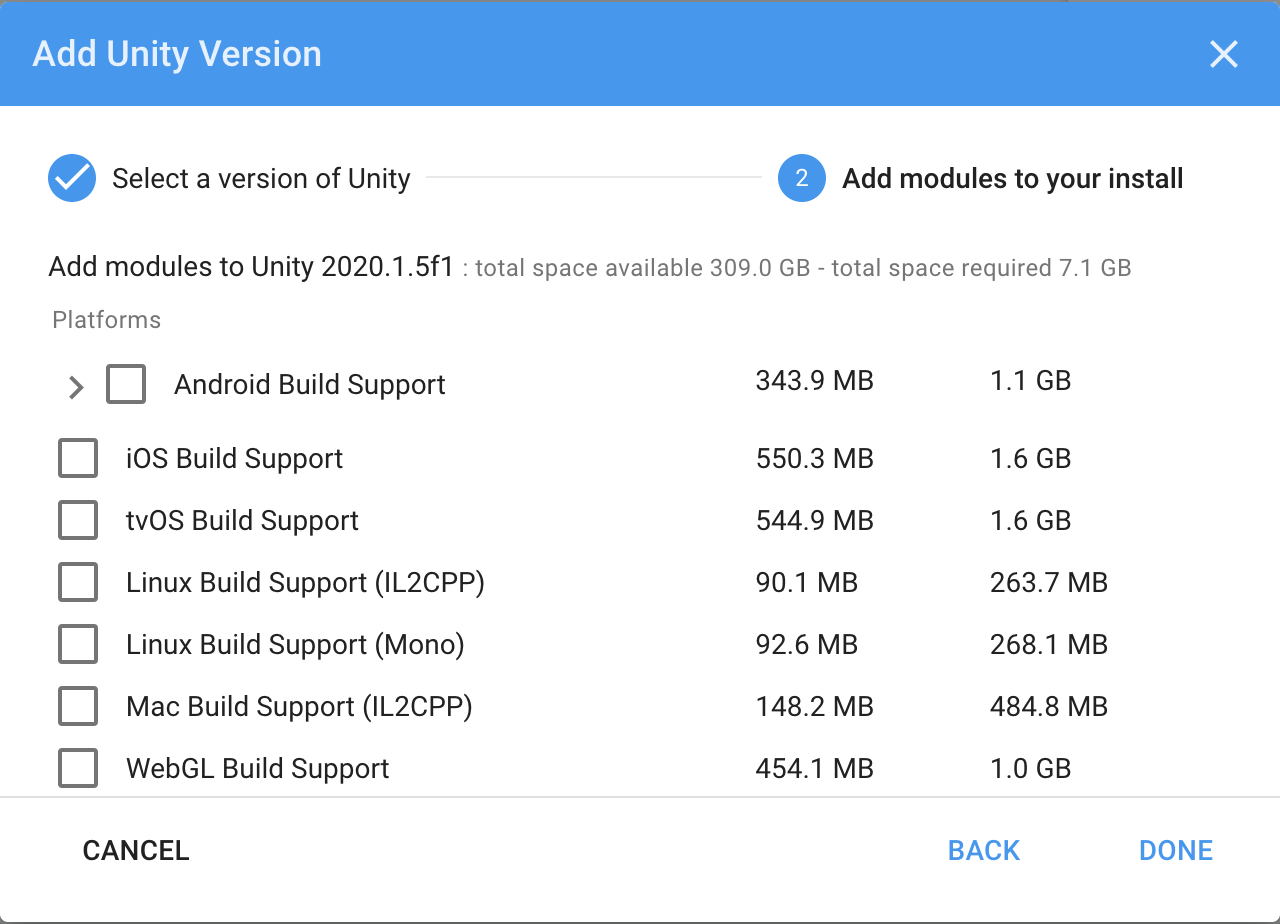
5. Select Done to add the modules.
6. Add modules to an installed Unity version
You can also add modules to any Unity version you have installed. To do this:
1. Open the Unity Hub and select the Installs tab.
2. Select the three-dot icon next to the version you want to manage.
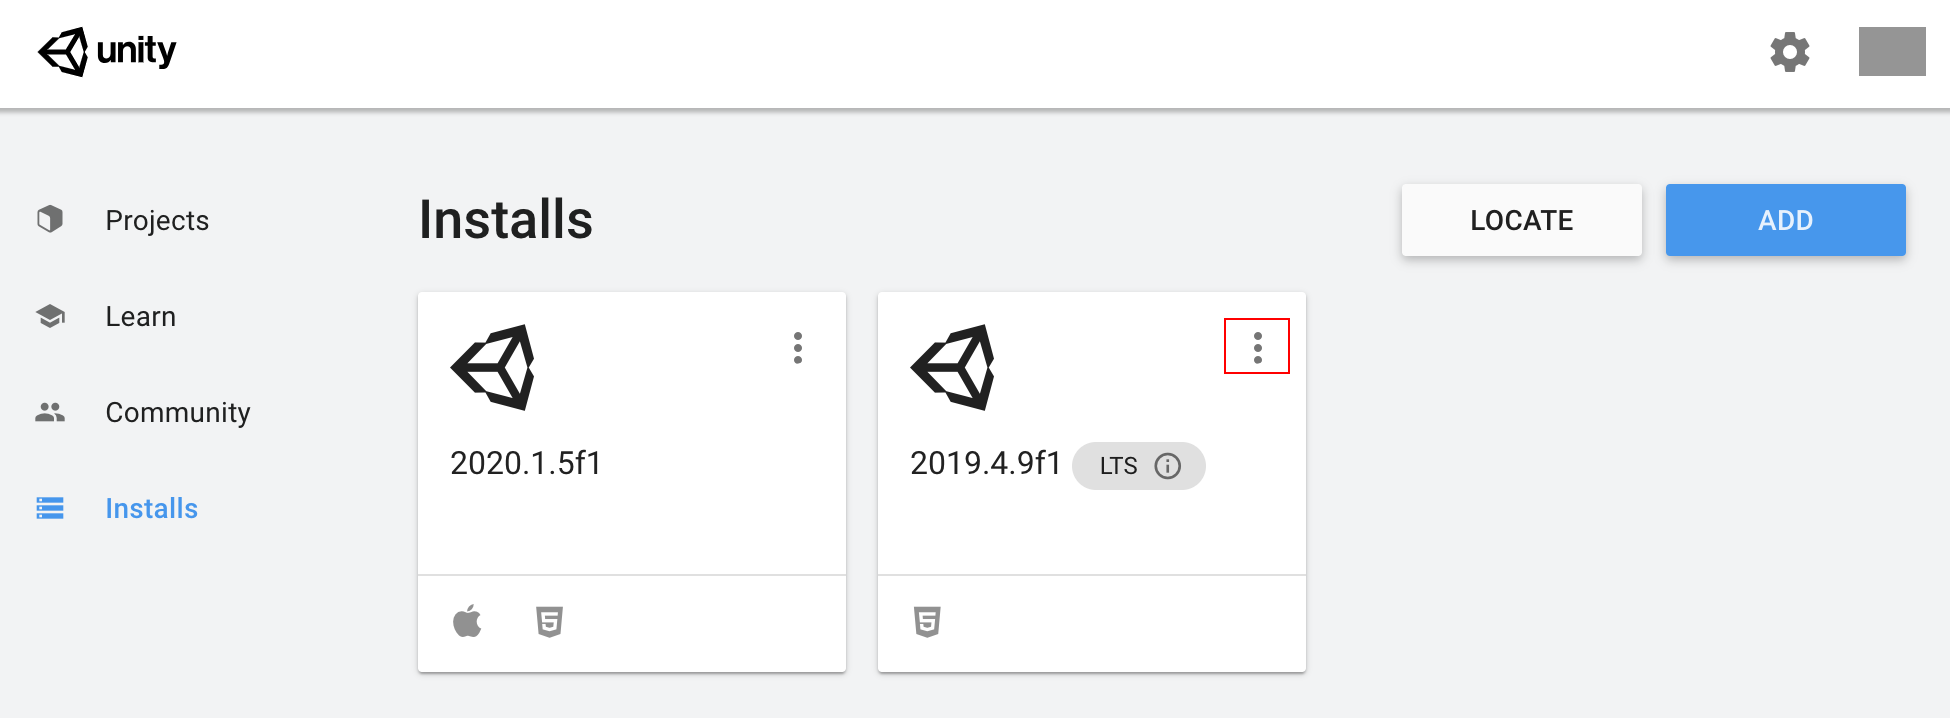
3. Select Add Modules.
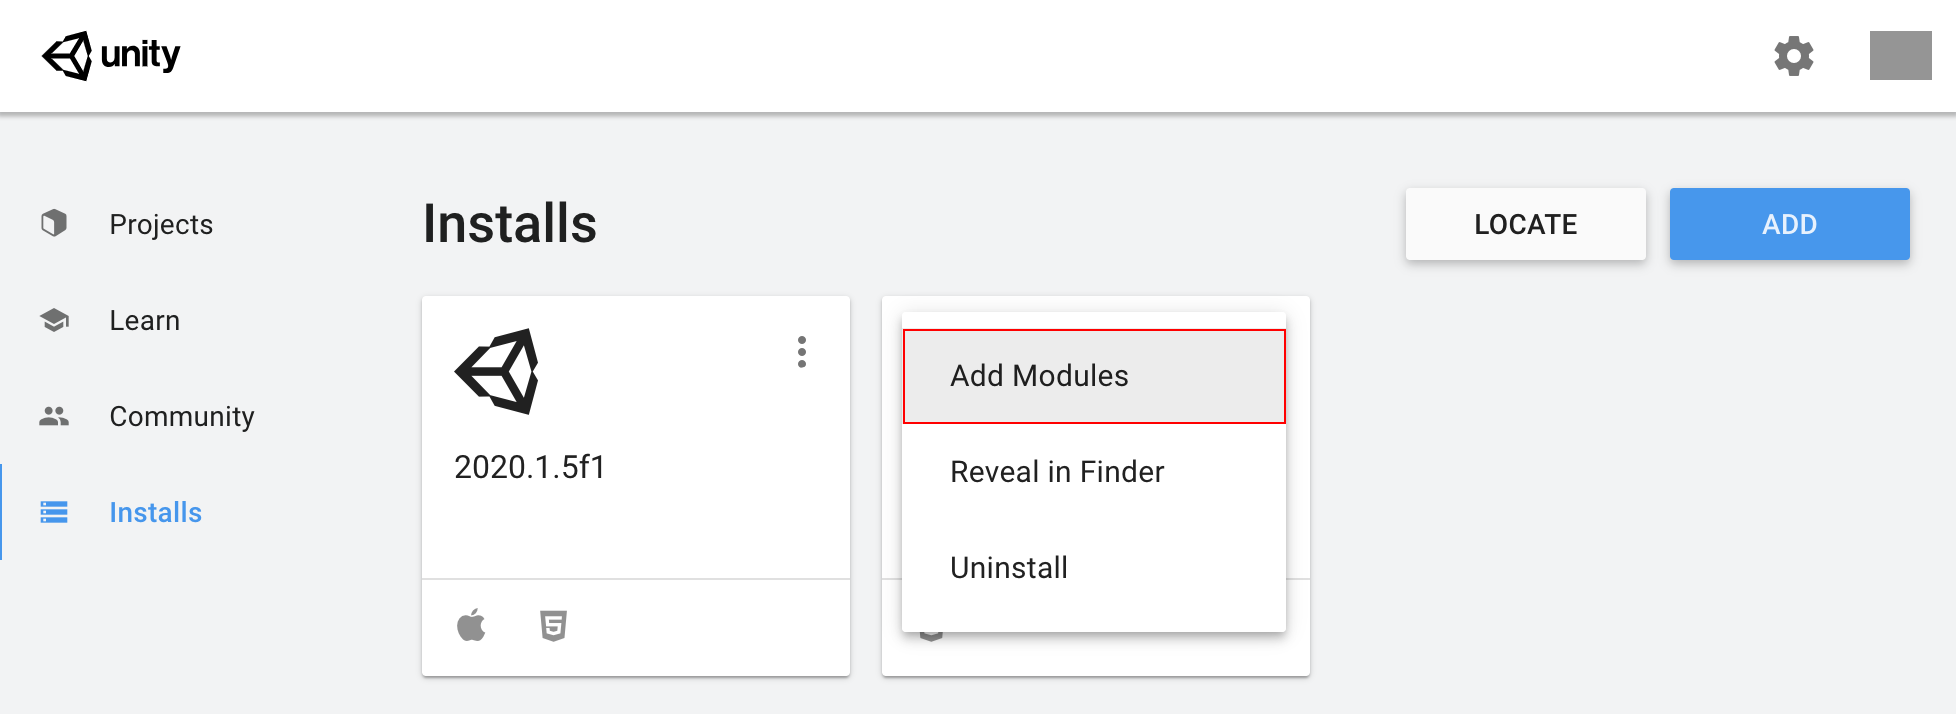
4. Select the modules you want to install, then select Done.
7. Next steps
In this tutorial, you’ve reviewed how to select the right Unity version for you. You’ve also managed modules and installed versions. Next, you’ll explore creating and managing projects.