Configuring Global Environment Lighting Settings - Unity 2019.4
Tutorial
Beginner
+10XP
10 mins
62
Unity Technologies

Lighting in Unity is not governed solely by lights placed in the scene, but also by Global Illumination (GI), which includes light that bounces from one surface onto another. In this tutorial, you'll learn how to configure Global Illumination to get realistic lighting effects for your projects.
Languages available:
1. What is Global Illumination?
This tutorial has been verified using Unity 2019 LTS
Lighting in Unity is not governed solely by lights placed in the Scene, but also by Global Illumination. Global Illumination (GI) is a series of algorithms that calculate direct and indirect lighting: light that originates from a light source, and light that has bounced from one surface onto another. Unity allows the user to fine tune GI and other settings through the Lighting window. Configuring these parameters allows designers to create dramatically different lighting scenarios, from realistic to highly stylized, with just a few clicks.
2. Exploring Environment Lighting Settings
The Lighting Settings window can be found under Window > Rendering > Lighting Settings.
The first section of the Lighting Settings window manages the settings for the Scene’s Skybox, ambient lighting, and reflections (Figure 01).

When a new Scene is created in Unity, it comes with a Directional Light and a Default-Skybox assigned. The Directional Light serves as the Skybox’s sun, and as it is rotated in the Scene, the representation of the sun in the Skybox updates with the movement. The Skybox Material option determines what Skybox is visible in the Scene. If a procedural Skybox is being used (such as the Default Skybox), Unity will automatically link the first directional light it finds in the Scene to the Skybox’s sun. If another directional light should be used for this function, it must be added to the Sun Source option.
The Environment Lighting section controls the ambient light present in the Scene. While individual light sources such as the Default Directional Light are primary contributors to the lighting in the Scene, the Skybox contributes some level of lighting as well. If the Directional Light is disabled from the default Scene, the ambient lighting effects from the Skybox become plainly visible. To see this in practice, add a cube to the Scene by clicking on the GameObject dropdown and selecting 3D Object > Cube (Figure 02).

The Environment Lighting Source is set to the Skybox by default and will take ambient lighting information from it. If the cube is not lit up make sure in Window > Rendering > Lighting Settings you turn on Auto-Generate. This is particularly helpful if a custom Skybox is being used that is created with an HDR (High Dynamic Range) image. A HDR image-based Skybox will provide complex and realistic lighting information that replicates the environment it was originally taken from. (Figure 03).

3. Exploring Color Based Options
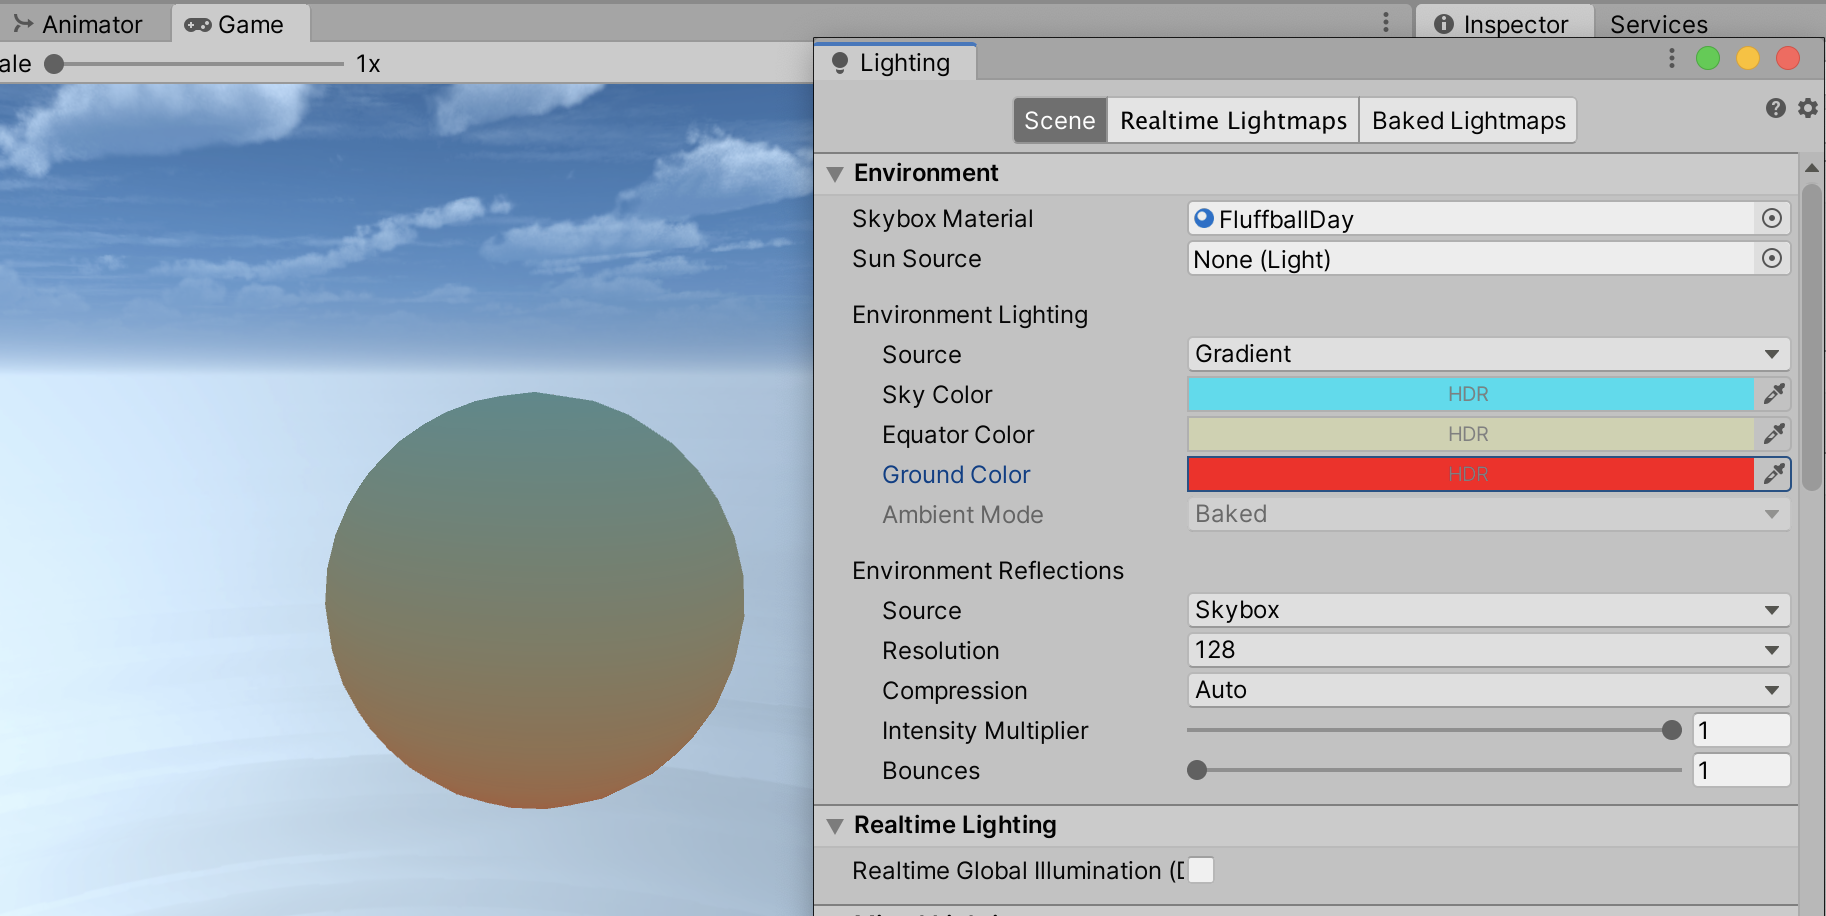
The Environment Lighting source has two other color-based options: Gradient and Color (Figure 04).

These color-based options allow the user to define a three color gradient or single color ambient light, which can give a more stylized look to a Scene (Figure 05).

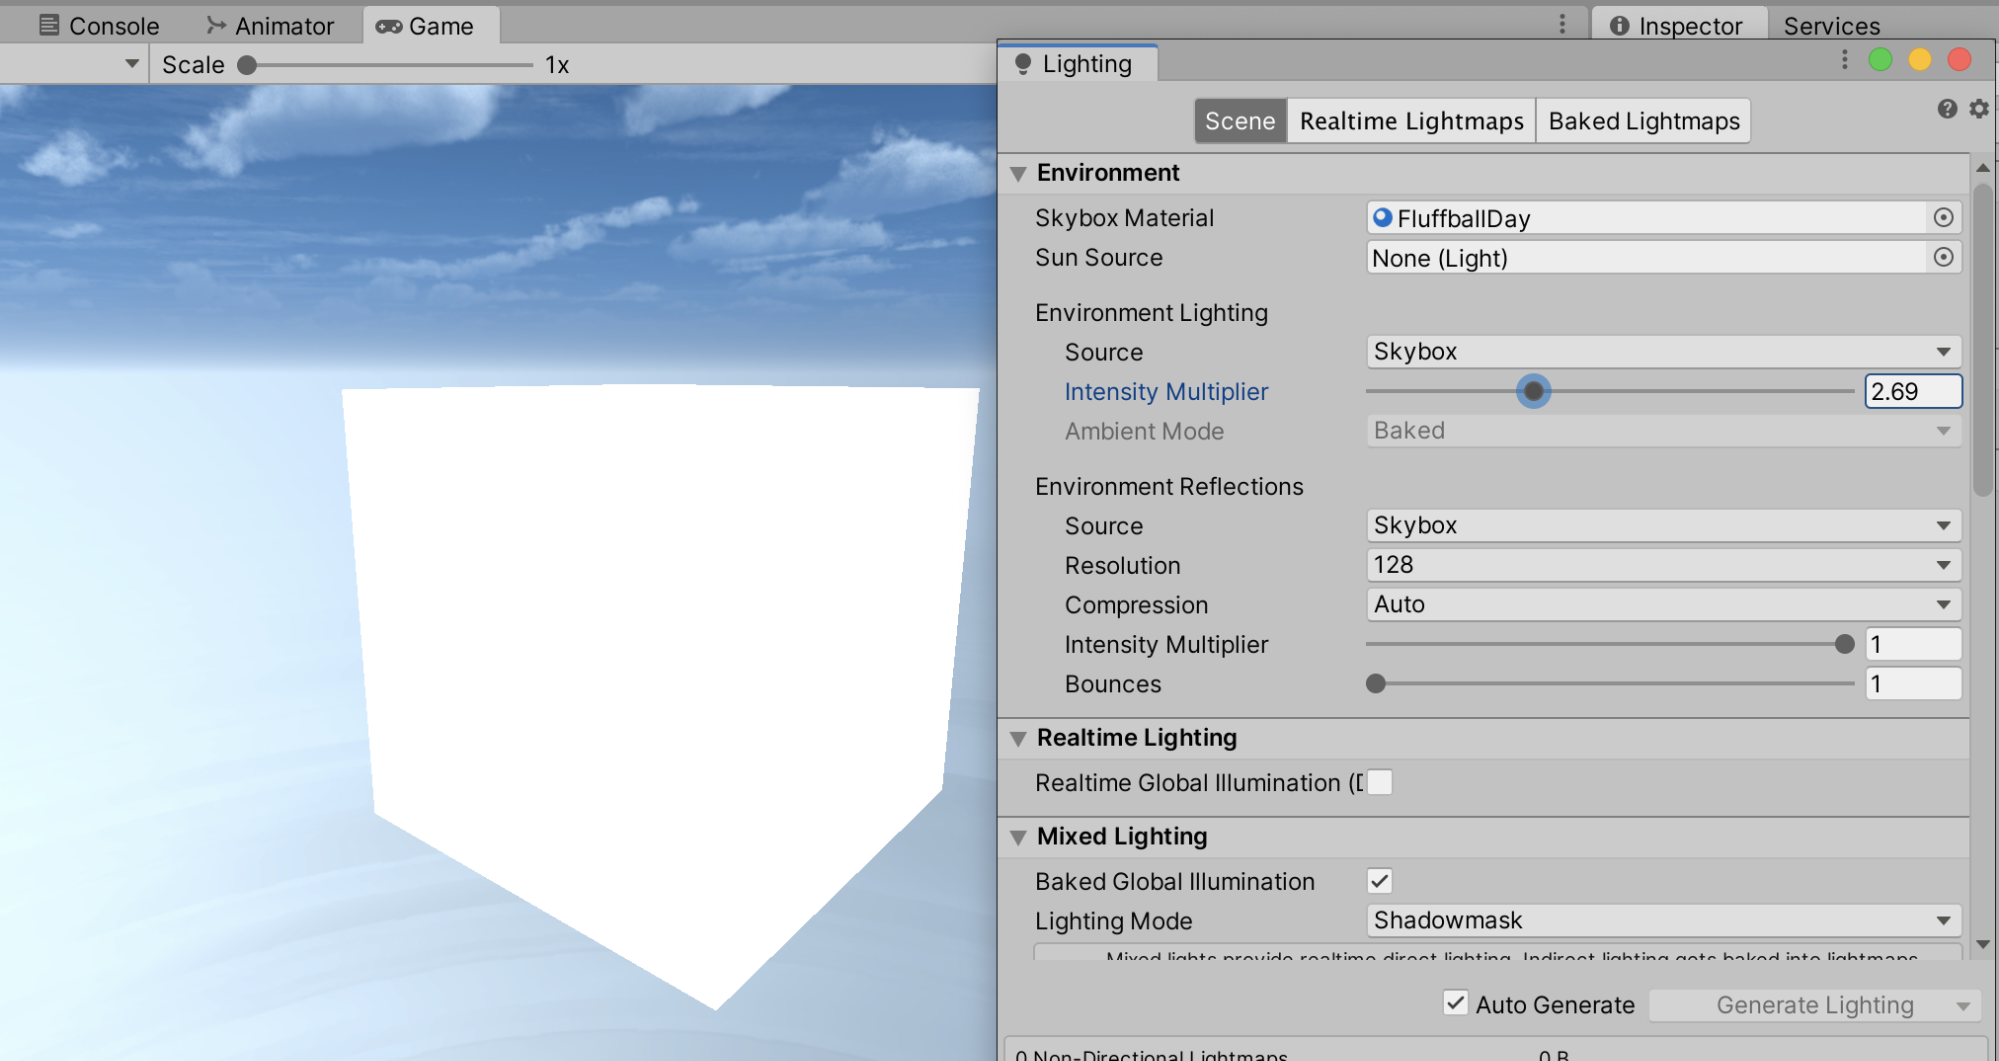
The Skybox option for Source comes with a paired Intensity Multiplier. This can increase or decrease the strength of the ambient light. The default value is 1, which for most applications, is ideal, while a value of 0 will show the minimum light value produced by the skybox. Increasing the Intensity Multiplier will brighten the Scene, but note that after a point, the light will become overblown and make everything in the Scene appear washed out (Figure 06).

The final option that is shared by all three Source types is the Ambient Mode. This defines which lighting mode (whether realtime or baked) should be taken into account when calculating ambient light. If only Realtime or Mixed lighting is selected further down in the Lighting options, this mode selection will not be available.
4. Conclusion
In this tutorial, we learned all about how to configure Global Illumination (GI) lighting settings. You learned where the lighting settings window could be found, about directional lights and procedural skyboxes, ambient lighting, and HDR (High Dynamic Range) skyboxes. With the knowledge you learned here you can take your projects to the next level and use Global Illumination to create the best lighting for your project.