
Configuring Plane Detection for AR Foundation
Tutorial
Beginner
+10XP
30 mins
(411)
Unity Technologies
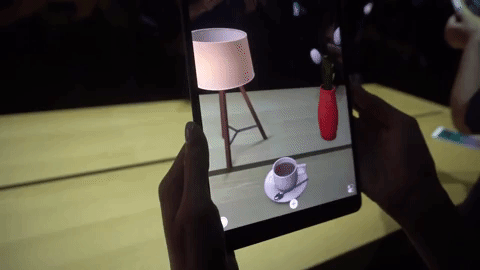
In this tutorial, we’ll create and configure plane detection for AR Foundation. Plane detection finds horizontal and/or vertical planes in your physical surroundings, depending on enabled detection mode(s).
Languages available:
1. Configuring Plane Detection for AR Foundation
Verified with: 2019.4LTS -
This tutorial assumes that you’re already working with an AR Foundation-based project.
In this tutorial, we’ll create and configure plane detection for AR Foundation. Plane detection finds horizontal and/or vertical planes in your physical surroundings, depending on enabled detection mode(s).
As each new plane, or new information about a known plane, is detected, a GameObject representing the plane is created or updated by the AR Plane Manager. When no longer valid, the AR Plane Manager removes and, optionally (enabled by default), destroys the plane GameObject.
AR Foundation includes a GameObject we can use as-is or customize, the AR Default Plane. We’ll create this Prefab first, then add an AR Plane Manager component to our AR Session Origin and set it to use the Prefab.
2. Working with the AR Default Plane
The AR Default Plane consists of two scripts, the AR Plane and AR Plane Mesh Visualizer, and the rendering components used by the Visualizer. The AR Plane component holds the plane’s boundary points, which always form a convex shape, and the plane’s normal. As these are updated, the AR Plane Mesh Visualizer updates the visual representation.
Options for the AR Plane component include:
- Destroy on Removal: When a plane GameObject is removed, it’s destroyed by default.
- Vertex Changed Threshold: This setting determines the minimum distance a vertex can move, in meters, before the boundaryChanged method is invoked.
It’s possible to customize the appearance of the plane Prefab — such as its color, Material, and Texture mode — via the Mesh Renderer Material and Line Renderer settings.
1. In the Hierarchy view, right-click and select XR > AR Default Plane (Figure 01). For now, leave the settings at their defaults.
2. Create a Prefabs folder in your project and drag the AR Default Plane from the Hierarchy view into the new folder, then delete it from the Hierarchy view (Figure 02).
3. Working with the AR Plane Manager
1. Select your AR Session Origin GameObject.
2. In the Inspector, add an AR Plane Manager component (Figure 03).
3. Drag the AR Default Plane Prefab into the Plane Prefab slot.
4. Select your Plane Detection Mode. By default, both horizontal and vertical planes are detected. On some platforms, vertical plane detection can be a bit more demanding. If you only need one type or the other, disable the unneeded mode (Figure 04).
5. If you are using Android, you must first change a few build settings in order to build your app.
6. First go to Edit > Project Settings… > Player > Other Settings and go to the Graphics APIs section. Remove the Vulkan API from the list (Figure 05).
7. Set the Minimum API Level to API Level 24 or higher (Figure 06).
8. Open a web browser and go to https://gradle.org/releases/
9. Download Gradle v5.6.4 and unzip it into a location of your choosing.
10. Go to Edit > Preferences… > External Tools and uncheck Gradle Installed with Unity, then set the Gradle location to the location where you unzipped the download (Figure 07).
11. Now we just need to alter some Gradle files located in Assets\Plugins\Android inside your Project folder.
12. Go to https://developers.google.com/ar/develop/unity/android-11-build and follow the directions in the Unity 2019.3 and 2019.4 section.
13. Build and launch your project on your device. Move around to watch as the AR Default Plane Prefab is placed on flat surfaces in your AR play area.
4. Conclusion
Plane detection gives your project a firm footing in the physical world and, using AR Foundation, is fairly straightforward. The most time-consuming part is choosing the appearance of your Plane Mesh Visualizer.