
Configuring Reflection Probes - 2019.3
Tutorial
Beginner
+10XP
15m
(88)
Unity Technologies
In this tutorial, we’ll go over how to set up Reflection Probes and how to get them to work in real-time. In Unity’s included sample scene of a Workshop Set, Reflection Probes are automatically included. Here, they will be removed so we can recreate our own Reflection Probes.
Languages available:
1. Introduction
If you are using Unity 2019.1 or 2019.2, click here. If you are using Unity 2018, click here.
A Reflection Probe is like a camera that captures a spherical view of its surroundings in all directions. The image is then stored as a Cubemap that can be used by objects with reflective Materials, like chrome surfaces. You can use multiple Reflection Probes in a Scene and set up objects to use the Cubemap of the nearest probe. This helps reflective Materials in the Scene properly reflect its surroundings.
In this tutorial, we’ll go over how to set up Reflection Probes and how to get them to work in real-time. In Unity’s included sample scene of a Workshop Set, Reflection Probes are automatically included. Here, they will be removed so we can recreate our own Reflection Probes.
2. Default Behavior of Reflectivity
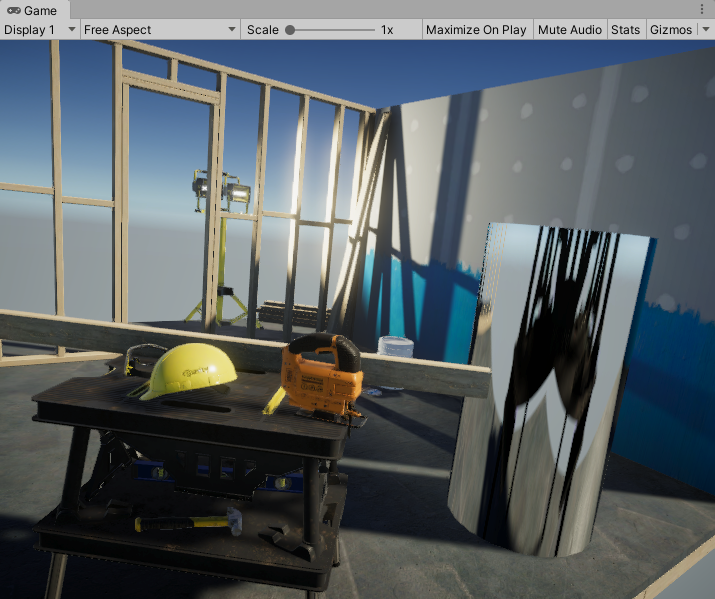
In the Workshop Set sample scene, a new Cylinder GameObject has been added to the set, with a reflective material attached to it. By default, this and any other objects with a reflective surface will only reflect the currently assigned skybox. If the Scene is sparsely populated, it is easy to assume this effect is appropriate; however, the limitations of true reflectivity is apparent when other nearby objects are not reflected (Figure 01).
3. Setting up Reflection Probes
To resolve this issue, Unity uses Reflection Probes, which feed reflection information about a Scene to all Materials that can make use of this data. The setup for Reflection Probes is very simple, and after they’re configured, the probes automatically communicate with the Materials in the Scene.
1. Select all of the static objects in your Scene that should be visible in reflections.
2. In the upper-right corner of the Inspector, click Static. If prompted, apply these changes to child objects (Figure 02). After a moment, the Scene lighting will be updated, though you won’t see accurate reflections yet.
3. From the Top Menu drop-down select: GameObject > Light > Reflection Probe. A Reflection Probe is represented by a reflective orb in the center of a yellow wireframe cube. This wireframe represents the bounds of the probe, and any object within the bounds will be reflected (Figure 03).
4. Align the Reflection Probe so the sphere is in the center of the Scene.
5. In the Inspector, click the Edit Bounding Volume button (Figure 04).
6. Click and drag the new handles on each probe face, to roughly align the sides to the Scene (Figure 05).
7. Click on the Move Selected Objects button in the Inspector window (Figure 06) to change the capture position of the Reflection Probe.
8. Position the orb where you want to capture the reflection. Note that the Reflection Probe is automatically Baked, because the Probe’s Type is set to Baked as default (Figure 07).
The reflective Cylinder GameObject will now accurately reflect the Scene environment. If there are any black artifacts, you can remedy this by setting the objects producing the artifacts onto a Layer that the Reflection Probe will ignore.
4. Real-Time Reflection Probes
Reflection Probes update in real-time, which allows dynamic objects to be visible in the Scene (vital for animated objects). Be aware, however, that this comes at a high processing cost. Real-time reflections should be limited to areas where they are absolutely necessary, such as in the rear-view mirror of a driving simulator.
To enable real-time reflections, select the Reflection Probe, and set the Type to Realtime (Figure 09). Any dynamic objects in the Scene will now appear in the reflection.
5. Conclusion
Now you know how to use Reflection Probes to create convincing reflections in your Scenes. Experiment with the positioning and the size of the Reflection Probe to see how it changes the Cubemap it shares with reflective Material in its area.