
Controller input
Tutorial
intermediate
+10XP
30 mins
(13)
Unity Technologies
The Magic Leap 2 comes with a single handheld controller. The controller offers six degrees of freedom (6DoF) tracking, haptic feedback, and flexible input methods, allowing for dynamic interactions with virtual objects and environments.
In this tutorial, you will learn how to access and respond to input from the Magic Leap 2 controller, including an example of a typical use case where the user can toggle and control global dimming.
Languages available:
1. Overview
The Magic Leap 2 controller has a touchpad, a bumper, a trigger, a menu button, and a home button.
What input can the controller receive?
Although the Home Button is reserved for exiting an application, all other controller inputs can be accessed during runtime to perform whatever actions you want. If you read through the input table, you’ll see all of the available inputs and notice that you are not limited to simple button presses: you can access the position and rotation of the controller itself, the precise trigger value between 0-1, the position of multiple touches on the touchpad with the force applied, and more.
If you explore the inputs in the Controller window of the Application Simulator, you will also see that the touchpad can track specific gestures like swipes, taps, and scrolls, including their respective states and directions.
What you’ll learn in this tutorial
In this tutorial, you will learn how to access and respond to input from the Magic Leap 2 controller. You’ll also see an example of a typical use case where the user can toggle and control global dimming and video playback with the bumper, menu button, and touchpad.
2. Before you begin
Before you begin working through this tutorial, you should make sure your development environment is set up for Magic Leap 2 development and download the example prototype project.
Set up your development environment
If this is your first time developing in Unity for the Magic Leap 2, make sure you have your development environment configured properly using one of the following guided options:
- Follow the Unity: Getting started guide from the Magic Leap 2 developer documentation.
- Follow the Magic Leap 2 in-Editor tutorial project in the Unity Editor.
Download and open the example prototype
This tutorial will guide you through the implementation of this feature in your own application using an example prototype. If you want to explore the code of the prototype yourself, download the accompanying prototype project and open it in Unity.
3. Basic input setup
Add an XR Rig
Just like with any Magic Leap 2 project, the first step is adding the XR Rig prefab to the scene from the Magic Leap SDK package (Packages > Magic Leap SDK > Runtime > Tools > Prefabs).
You will notice that the XR Rig includes an Input Action Manager component with a MagicLeapInputs action asset already assigned to it.
Inspect the Magic Leap input actions
From the Inspector window, double-click the MagicLeapInputs (Input Action Asset) to open it in the Action Asset editor. From the Action Asset Editor, you can explore all of the inputs from the controller, as well as from the head-mounted display (HMD), the user’s eyes, and the user’s left and right hands in this editor.
Enable the Magic Leap inputs in a script
To get access to the inputs through a script, you need to create a new script, enable the Magic Leap inputs, and initialize a new Controller Actions object.
This process is explained in detail in the Magic Leap 2 controller input documentation.
public class ControllerInput : MonoBehaviour
{
    private MagicLeapInputs mlInputs;
    private MagicLeapInputs.ControllerActions controllerActions;

    void Start()
    {
        mlInputs = new MagicLeapInputs();
        mlInputs.Enable();
        controllerActions = new MagicLeapInputs.ControllerActions(mlInputs);
    }
}4. Respond to controller input events
The main purpose of getting access to the Magic Leap controller inputs is, of course, to respond in some way when the user interacts with the controller.
You can read about these events in the Magic Leap 2 Controller Input Events documentation, but all you need to do is subscribe to whichever controller events you’re targeting, then call those events and perform some action.
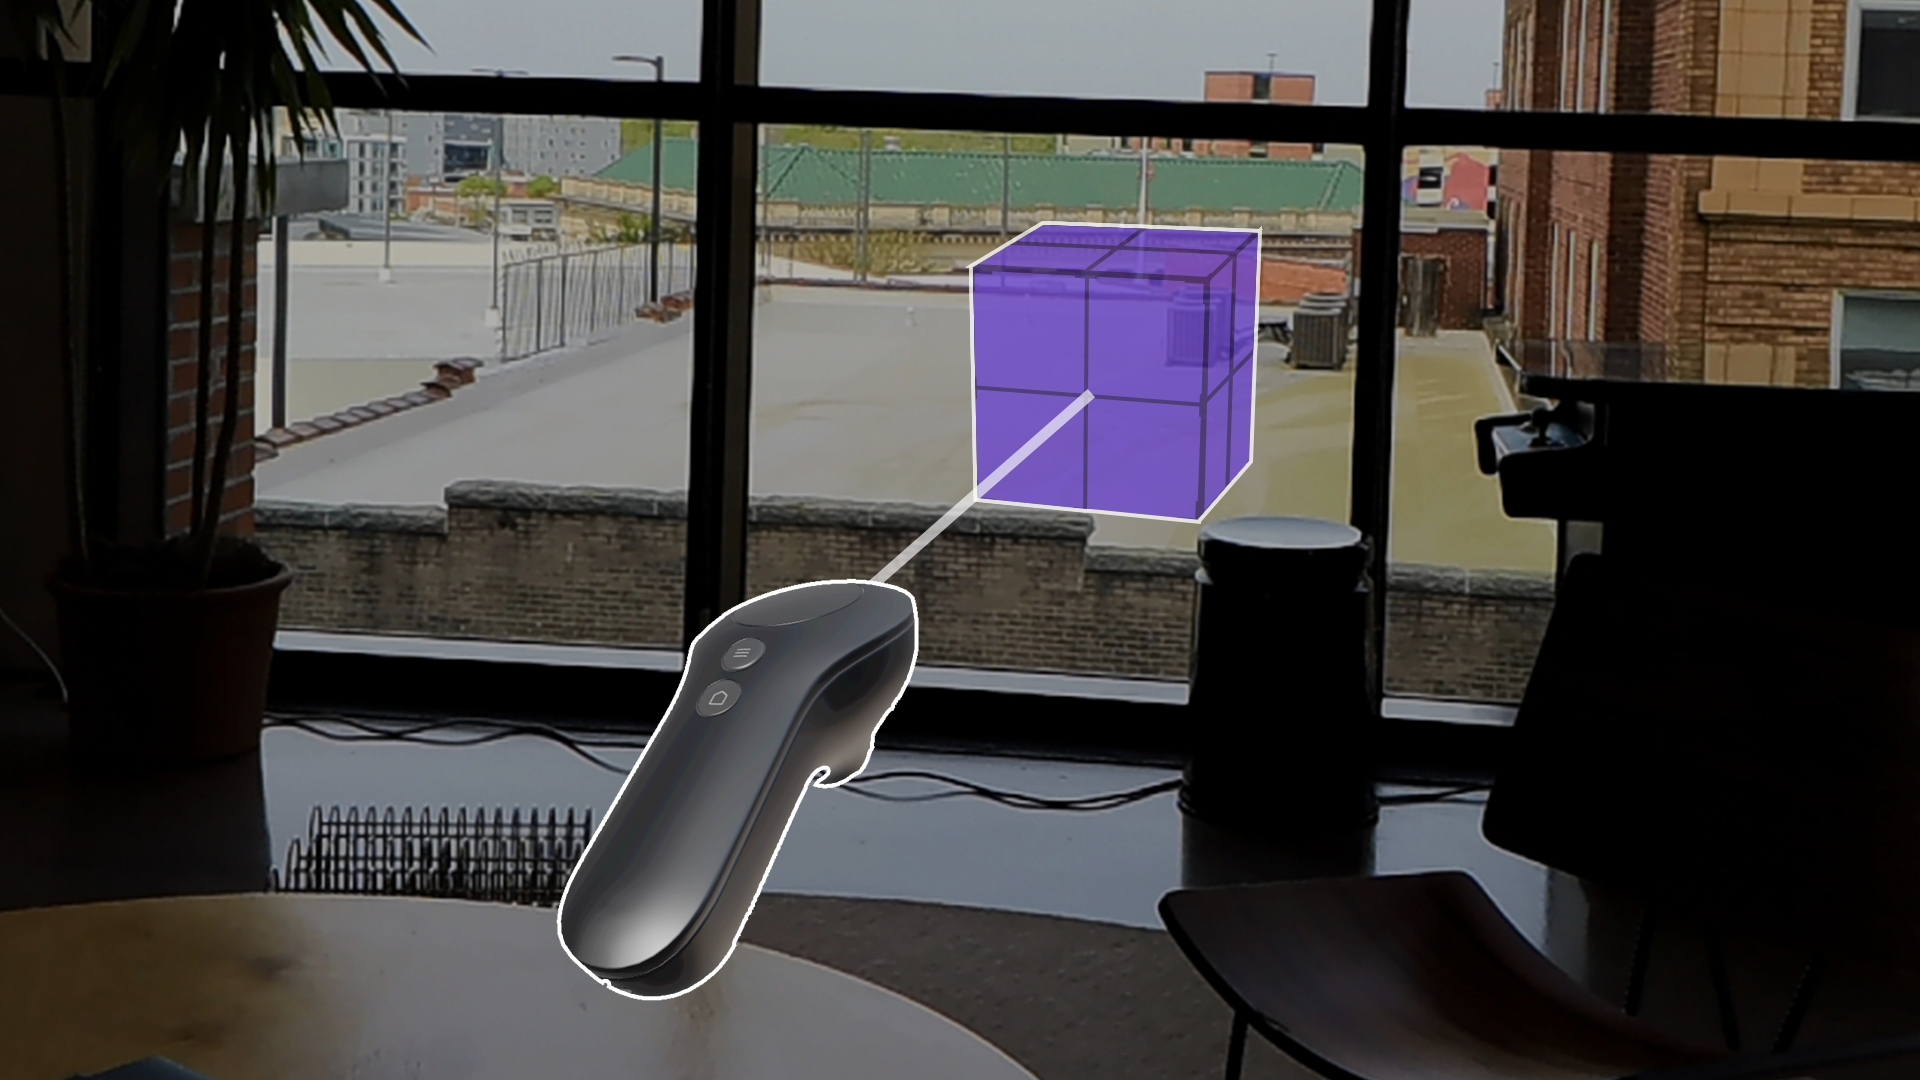
The example below subscribes to the bumper and touchpad events. When the bumper is pressed, a new cube is created at the controller’s location. The touchpad’s y-position sets the scale of the most recently created cube. If you want to try this for yourself, remember to assign your GameObjects in the Inspector window.
using UnityEngine;
using UnityEngine.InputSystem;

public class ControllerInput : MonoBehaviour
{
    private MagicLeapInputs magicLeapInputs;
    private MagicLeapInputs.ControllerActions controllerActions;

    public GameObject newCube;
    public Transform controllerTransform;
    private GameObject currentCube;


    private void Start()
    {
        magicLeapInputs = new MagicLeapInputs();
        magicLeapInputs.Enable();
        controllerActions = new MagicLeapInputs.ControllerActions(magicLeapInputs);

        // subscribe to the controller events
        controllerActions.Bumper.performed += Bumper_performed;
        controllerActions.TouchpadPosition.performed += TouchpadPositionOnperformed;
    }

    // when bumper is pressed, instantiate a new cube
    private void Bumper_performed(InputAction.CallbackContext obj)
    {
        currentCube = Instantiate(newCube, controllerTransform.position, controllerTransform.rotation);
    }

    // when the touchpad is touched, set the local scale of the current cube
    private void TouchpadPositionOnperformed(InputAction.CallbackContext obj)
    {
        var touchPosition = controllerActions.TouchpadPosition.ReadValue<Vector2>();
        var touchValue = Mathf.Clamp((touchPosition.y + 1) / (1.8f), 0, 1);
        currentCube.transform.localScale = new Vector3(touchValue, touchValue, touchValue);

    }

}5. Controller input in context
Now that you know how to detect and respond to user input, let’s check out an example of how this feature can be combined with other interactive functionality.
Following the example below is not required in order to understand controller input, but doing so will be helpful to better appreciate how controller input can be integrated in real use cases.
In this example, the bumper is used to play and pause a video in a media player, the menu button toggles Global Dimming, and the y-value on the touchpad dynamically controls the dimming value.
To learn how to implement this functionality yourself, you can review all of the code for this demo in the example prototype project.
6. Next steps and additional resources
In this tutorial, you learned about controller input on the Magic Leap 2. You can learn more about controller input with the following resources:
- Magic Leap’s controller example scene from the samples project
- Magic Leap’s guide on controller input
- Magic Leap’s scripting documentation on input
You may also want to learn more about out the other features highlighted in the example prototype:
Otherwise, feel free to go back to the overview page, where you can explore other tutorials and resources.