Counting Prototype
Exercise
Beginner
+60XP
120 mins
Unity Technologies

In this exercise, you'll build a prototype of your own design that uses a provided counting functionality.
Materials
Languages available:
1. Overview
In this mission, you expanded your foundational programming skills and built four new projects. Your skills have grown, and the time is right for you to begin developing different concepts for your personal portfolio. You might find that sometimes coming up with an initial idea can be challenging, and you may feel like you don’t know where to start. To help you practice developing your own ideas, you’ll begin this exercise with an existing project as a starting point, and you’ll build a new concept on top of it.
2. Download the provided assets and import them into a new Unity project
To begin this challenge, you must first download the challenge assets and import them into a new Unity project:
1. Download CountingPrototype.zip.
2. To unzip the contents of the folder, right-click the folder and select Extract All (macOS: double-click the zipped folder). Inside you will find Counter.unitypackage.
Note: While it is possible to view the contents of a folder while it’s still zipped, the data is still compressed. Attempting to import the contents of the CountingPrototype folder while it’s still zipped will result in an error message in Unity. Ensure that you have unzipped the folder before proceeding to the next step.
3. Create a new Unity project using the 3D template — remember to use one of the supported versions of Unity, such as 2022.3 LTS or 6000.0 LTS.
4. Import Counter.unitypackage into your new 3D template project.
3. Observe the default scene functionality
Before you start coming up with ideas to extend the existing project, take some time to explore what it can currently do. The imported package will contain four components: A script, a scene, and two materials.
1. Open the scene and enter Play mode to observe the default behavior.
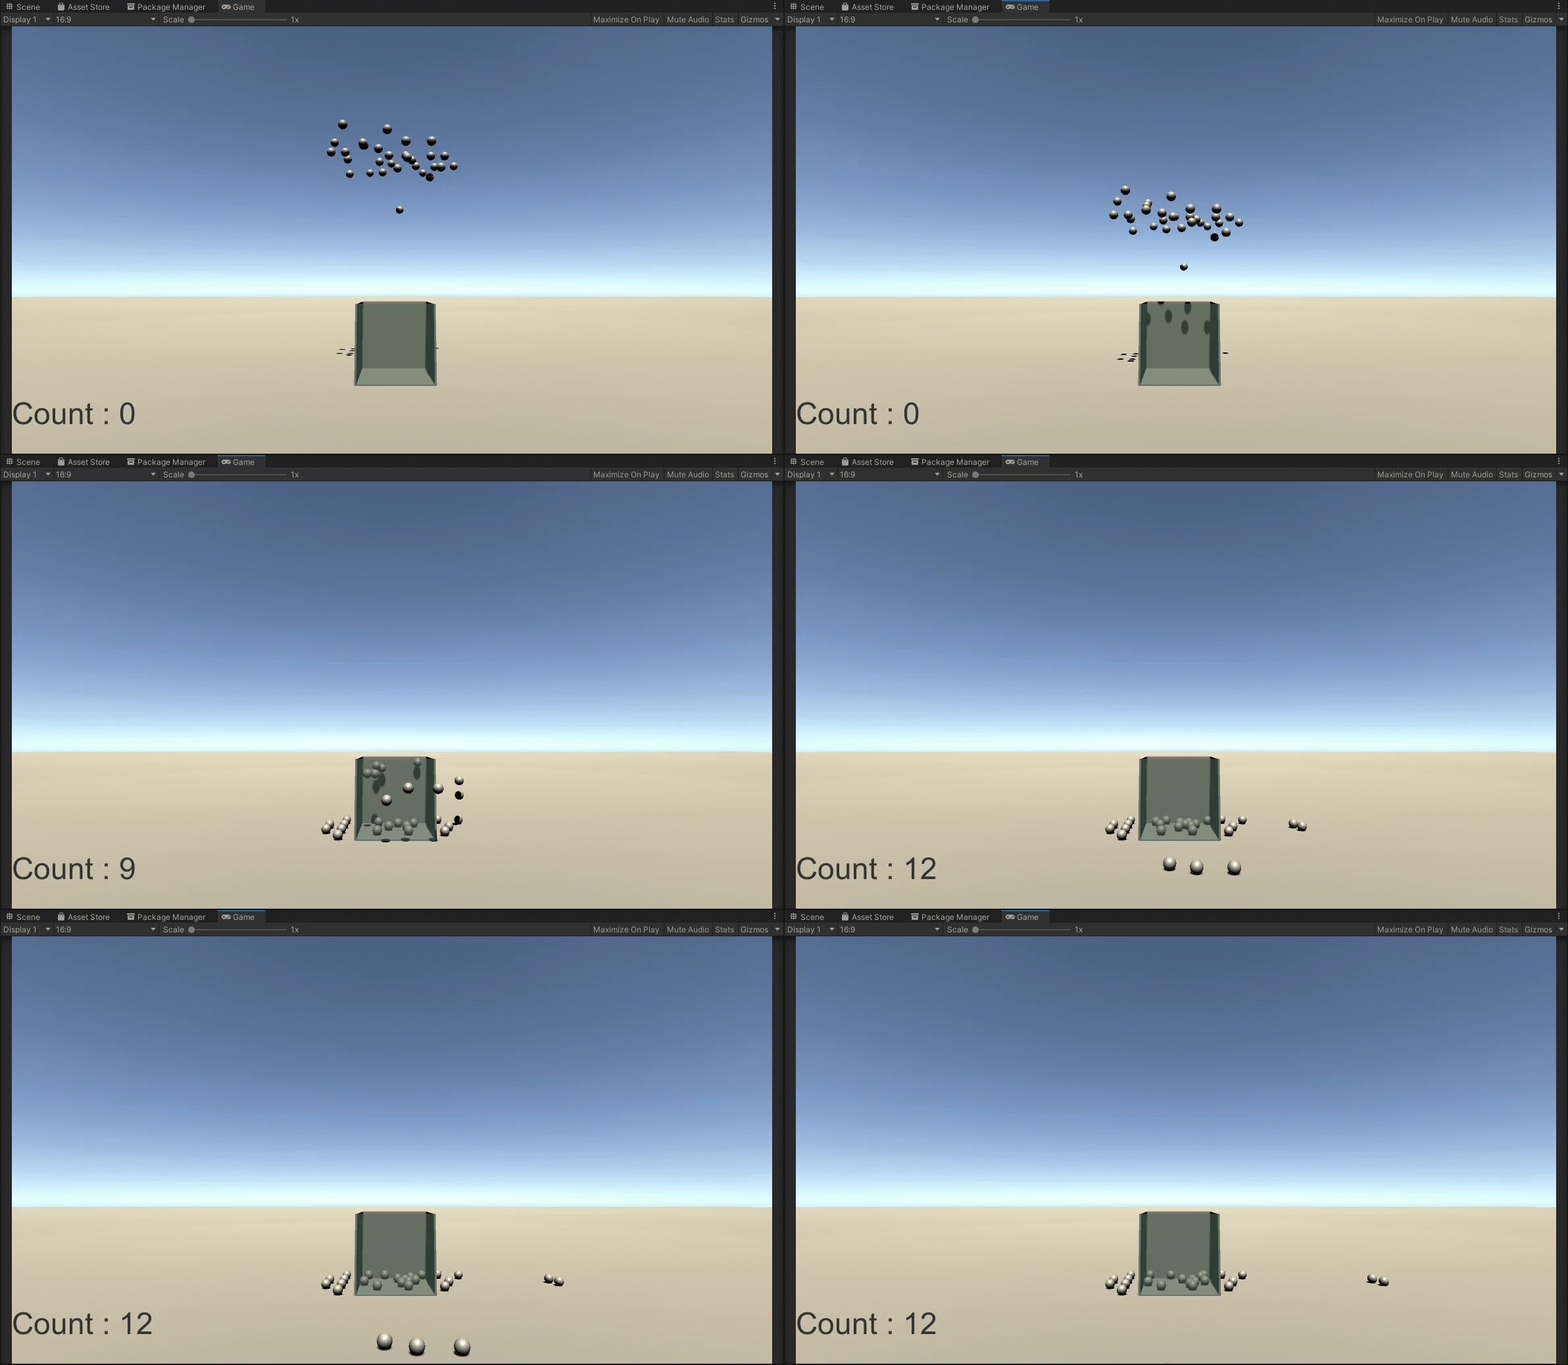
The scene contains a simple UI counter, a box, and several spheres placed above it. All of the spheres have Rigidbody components attached. When you play the scene, the spheres drop, and the UI counter updates to show how many of them landed in the box.
A script named Counter.cs is applied to the box mesh, which has a Box Collider set as a trigger. This trigger is scaled to the exact size of the interior of the box. Counter.cs has a public text variable for the UI counter.
2. Open the Counter.cs script and explore its functionality.
4. Create a design document
The project provided to you is very basic, but there are a lot of opportunities to turn it into a variety of interesting prototypes! Take some time to think about what kind of application you’d like to make and write up a design document describing the application’s functionality. This concept phase is part of the overall exercise, so spend as much time as you need to come up with something interesting.
There are only two requirements for your new prototype:
- The prototype must still count something.
- There must be a UI element displaying that count.
Everything else is up to you! Here are a few suggestions for inspiration:
- A hoops style game: Toss a basketball into the net as many times as possible in the allotted time.
- A pachinko game: Drop several small balls down a pegboard and have each section at the bottom have a different point value.
- A stock counter: Different objects get sorted into their own spaces and then the total count is displayed for each.
- A neighborhood planner: Items found in a neighborhood, such as streets, sidewalks, houses, and streetlights, are contained in drag-and-drop style UI boxes. Users can drag out the items and plan their neighborhood design, and the UI tracks how many of each item they’ll need to build it in the real world.
5. Create the prototype application
Once you're confident about your concept, build out the prototype in Unity! You can work directly from the files you imported for this exercise, and add anything you need to complete the prototype. Remember that if you’d like to use additional assets, there are plenty available for free on the Unity Asset Store.
6. Optional: Create a WebGL build of your prototype
To complete this exercise, you’ll only need to upload your design document and a video showing your prototype in action.
However, if you want to, you can create and publish a WebGL build of your prototype and upload it to Unity Play, and include the link to it in your submission description.
7. Criteria
You’ll know you’re successful if you’ve met these criteria:
- Your design document describes the functionality of a prototype based on the supplied base project.
- Your new prototype counts something.
- Your prototype has a UI component that displays that count.
- Your prototype in Unity has the functionality described in your design document.
- OPTIONAL: You created a WebGL build of your prototype and uploaded it to Unity Play.
8. Next steps
As your programming skills grow, so too will the complexity of your portfolio pieces. It might be tempting to wait to develop portfolio pieces until you’re a more experienced programmer — but a great deal of knowledge and experience can be gained while working on the portfolio itself. There’s no such thing as a project that’s too simple, as long as it represents your current programming skill set. Just remember to do your best, and that you’ll be replacing simpler projects with more complex ones in no time!
9. Submission
Once you have completed this exercise, please submit your design document and a video of your prototype in action to the submission upload below. If you have a WebGL build of your prototype on Unity Play, please include the link in the submission description.
Please login to submit
Complete this Tutorial
Submission Gallery

Ball Shooter
Created a shooting game where you prevent the ball dropping in the middle hole. Created a asset using Solidworks for I am not yet familiar with Blender. Downloaded some Effects and Background. Some Backgrounds and Particle effects are functioning in editor but during build there seems to be a Build Issue or WebGL issue.

Pocnihkolatro
This is my take on this exercise. My vision of the game: player in debt trying to reach specific amount to pay it back (win condition to pay everything). Each round debt would be increasing. User would have a shop where he can buy upgrades, like increased multiplier, or free balls and also was thinking about enemy that could steal money, you would need to purchase some defence skills against it. Overall something inspired by Bolatro. However after spending 2 weeks i realised that it will take much longer time to implement everything, so I decided to keep it very simple, so at the end we have just a simple Pochinko game.

Canon Hooper
Controls: > Use arrow keys or A/D keys to turn the canon > Use space bar to fire canon balls > You can charge the canon ball if you hold space Objective: >Get as many canon balls as you can in the box

Counting Prototype: Color Counter
I made 3 different materials (Red, Blue and Green) and randomly assigned each sphere a material at the start. Then I assign tags and have the collider count how many of each color end up in the box.

Counting Prototype
Counitng Prototype exercise from Junior Programmer course complete.

UFO Bomber
I took the counting prototype and turn it into short simple retro arcade challenge. You are UFO defending your home world and you need to drop as many bombs on enemy UFO's as possible.

Counting Project Game
The player needs to jump on the platform and shoot as many projectiles as they can into the container before the time runs out.

Shooter Target Game
I can't add a video so this is the link to the game https://play.unity.com/en/games/f5a5ea0c-c5b9-445f-a171-be0e13a3c7a2/shooter-target-build