Create 2D particle effects
Tutorial
Beginner
+0XP
30 mins
15
Unity Technologies

You have a fully-functioning game, but visual flair can make a big difference. In this tutorial, you’ll add 2D particle effects to your 2D adventure.
By the end of this tutorial, you’ll be able to do the following:
- Configure a looping particle system to achieve a visual effect.
- Adjust the EnemyController script to end the visual effect when the enemy character is fixed by the player.
- Configure particle systems using burst emission.
Languages available:
1. Overview
You’re now putting the finishing touches to your game. Visual effects (VFX) are a great way to create a more engaging and polished experience. Effects can also help to make the world of the game feel grounded – even a 2D game!
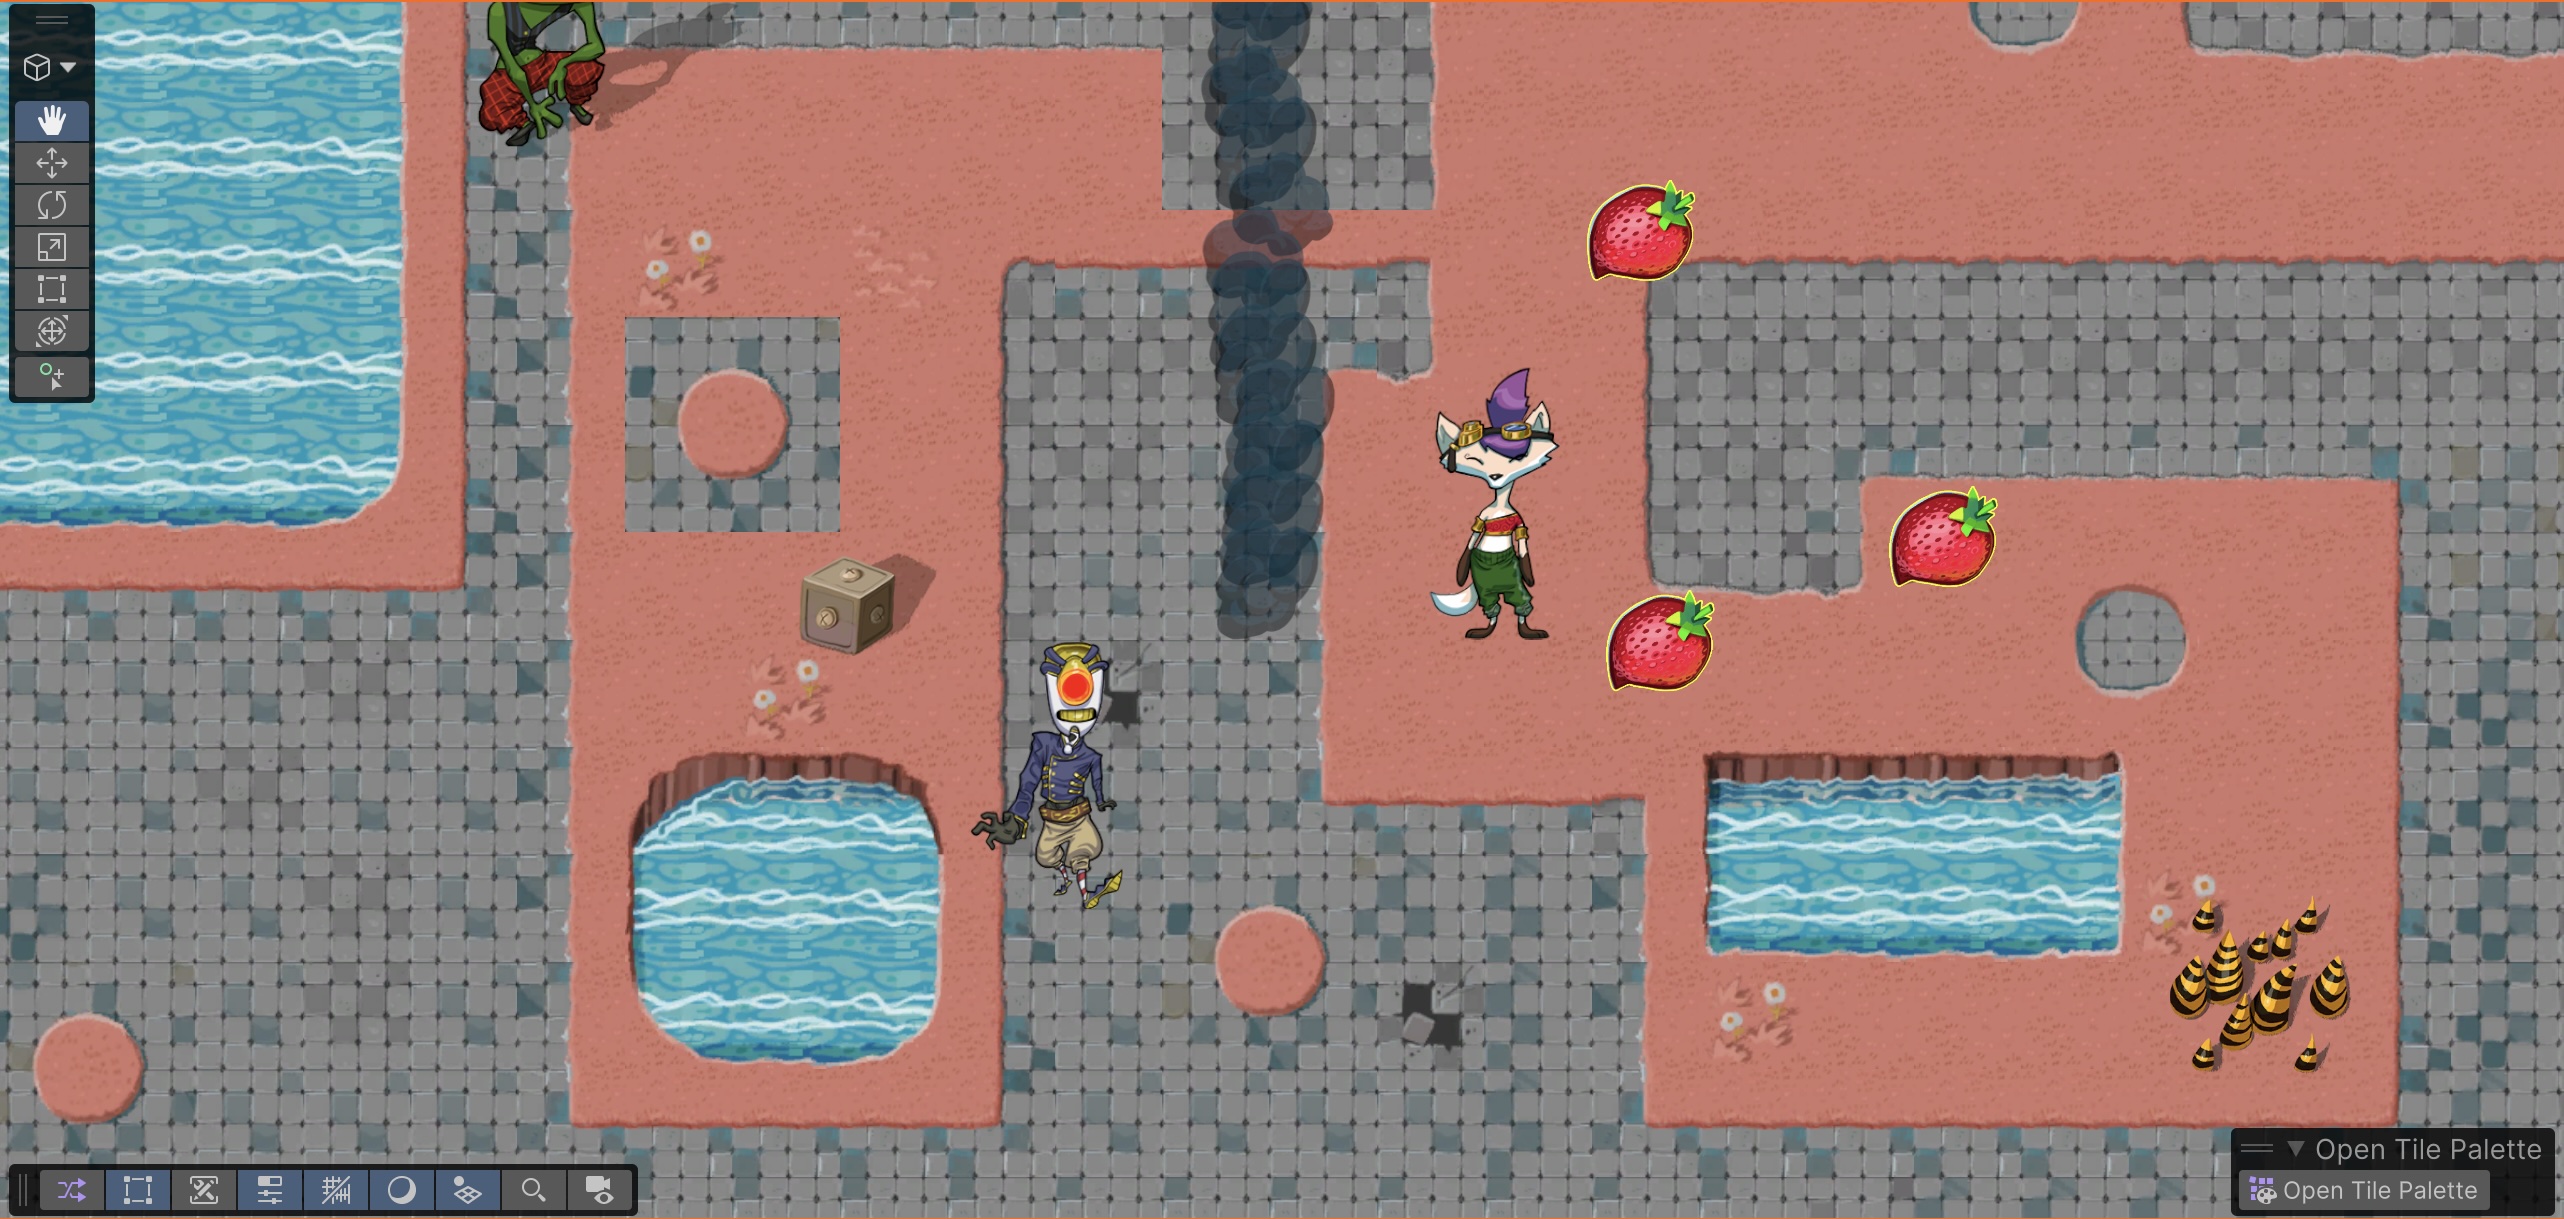
For your 2D adventure game, you’re going to create a smoke effect for broken enemies. You’ll create this effect using a 2D particle system: a large group of tiny images or sprites (particles) that Unity simulates to create the impression of an effect like smoke, snow, sparks, or fire.
Note: For the purposes of this tutorial, we chose to use the Ruby’s Adventure asset set, and the images used in instructions will reflect this. If you chose another asset set, the file names will be the same, but in your corresponding theme folder.
2. Prepare the spritesheet for particle effects
Your adventure game doesn’t need particularly complicated effects, so you’re going to use Unity’s Built-in Particle System to create 2D effects. If you want to further explore VFX we encourage you to complete the Creative Core Pathway: VFX course.
To prepare sprites to use in your smoke particle system, follow these instructions:
1. In the Project window, navigate to the Assets > _2DAdventureGame > Art > [Your Chosen Project] > VFX folder and select the ParticleSpriteAtlas asset.
2. In the Inspector window, open the Sprite Mode property dropdown and select Multiple.
3. Ensure that the Pixels Per Unit property is set to 100.
4. Open the Mesh Type property dropdown and select Full Rect.
This configuration ensures that the sprites maintain the correct proportions when used in the Particle System component.
5. Select the Apply button.
6. Open the Sprite Editor window and slice the sprite atlas into a 4 by 4 grid, with the same process you used in Slice the tileset into sprites. (Or in an appropriate grid for its layout, if you are using your own alternative sprite sheet.)
3. Create a smoke effect
To create a smoke effect particle system, follow these instructions:
1. Right-click in the Hierarchy window and select Effects > Particle System.
In the Scene view, you’ll see the default particle system that consists of white squares being emitted from a source point.
Note: You can pause the simulation using the Pause button of the Particles overlay window .
2. Rename the ParticleSystem GameObject “SmokeEffect”.
3. In the Inspector window, review the Particle System component.
A variety of different properties are displayed, and many of these properties are expandable. The properties control the behavior of the particle system and the individual particles that it creates.
4. Enable the Texture Sheet Animation module, then select the module name to expand its properties.
5. Open the Mode property dropdown and select Sprites.
6. Select the Add Item (+) button next to the empty sprite property to create one extra Sprite box.
If you're using the provided ParticleSpriteAtlas, you'll notice it contains six different sprites after being sliced. These six sprites are not part of a single effect; the first two are used for the smoke effect, the third one is used when the PlayerCharacter gets hit, and the remaining three are used for the enemy repair effect, or you could even use them for when a collectible is being picked.
7. Select the Sprite picker (⊙) and select the two smoke sprites (ParticleSpriteAtlas_0 and ParticleSpriteAtlas_1).
8. Open the Start Frame property dropdown, select Random Between Two Constants, and set the second Start Frame value to 2.Note: The Start Frame value will change to 1.9998 after you’ve set it. If this happens, don’t worry; the effect will still work as expected!
9. Select the Frame Over Time property box.
When the particle system creates a new particle, it will pick a random value between 0 and 2 (excluding 2) and use the corresponding sprite stored in that position for the new particle shape.
The visualization in the Particle System Curves pane at the bottom of the Inspector window shows how the frame will change over time, from frame 0 to frame 1.
10. Right-click the key frame on the right of the graph and select Delete Key.
The reason for this is that you don't need a transition from one sprite to another; you want each particle to display only one of the two sprites. By deleting the second key, you're defining this behavior.
4. Configure the Shape module
In the Scene view, the particles are now one of the smoke sprites! Now it’s time to refine the effect. The particles currently spread upright across the scene – indicated by the light blue cone in the Scene view, which isn’t a particularly effective representation of the smoke that might come from a broken robot.
To start to adjust how the particles are created, follow these instructions:
1. In the Particle System component, open the Shape module.
2. Set the Angle property to 5 so that the particles are less spread out and generated in a straighter line.
You can adjust this value further to customize your effect later, if you like.
3. Set the Radius property to 0 so that all particles start from a single point.
Note: This value will change to 0.0001, which is the closest value to 0 that Unity can accept here.
4. Save your changes so far.

The particles will now be generated from a single point and have an improved direction for the smoke effect, but they’re still moving too quickly. The effect also looks quite artificial – the particles are both a very similar shape and they lack the randomness of real smoke.
5. Add more randomness to the particle system
To add additional randomness to the particle system and create a more realistic effect, follow these instructions:
1. In the Inspector window, in the SmokeEffect GameObject’s ’s main module, find the Start Lifetime property.
![Unity Particle System component for “SmokeEffect” with parameters; Start Lifetime highlighted at value 5.]](https://storage.googleapis.com/learn-platform-bucket-production/tutorial/b4a517b5-35f4-4771-b1d4-976df445b8d7/versions%5B_key==%22c2f665d9d0ad%22%5D.sections%5B_key==%22714fec32639a%22%5D.body%5B_key==%220778952fe871%22%5D.image/6.3.5.1%20Add%20more%20randomness%20to%20the%20particle%20system_20251204_154508.png)
A particle’s lifetime is how long it is rendered before it gets destroyed by the particle system. The particles currently all have the same lifetime and speed, so they end up being destroyed at the same distance.
2. Open the Start Lifetime property dropdown and select Random Between Two Constants.
3. Set the Start Lifetime values to 1.5 and 3.
This change means that the particles will have a shorter lifetime in general and that the lifetime will be variable for each particle.
4. Repeat the process for the following properties:
- Start Speed, setting the two values to 0.5 and 1.
- Start Size, setting the two values to 0.3 and 0.5.
Now the smoke effect is more intense and on a much more constrained scale, which is a good fit for a broken machine.
The effect is still a bit strange: some particles just disappear at the end of their lifetime. A fade of the particles before they disappear would feel more realistic.
6. Fade particles at the end of their lifetime
You can create a fade for your smoke by increasing the transparency of the particles as they get closer to the end of their lifetime.
To configure the fade effect, follow these instructions:
1. In the Particle System component, enable and open the Color over Lifetime module.
2. Select the Color property box to open the Gradient Editor window.
This Gradient Editor window shows how the color of a particle changes over its lifetime. At the moment, the particle is the default white throughout its lifetime and there are no transparency changes. 3. Select the marker on the upper-right corner of the gradient box.
4. Set the Alpha property value to 0, then close the Gradient Editor window.
The Alpha property controls transparency; now over each particle’s lifetime, the sprite will fade to transparent.
5. In the Particle System component, enable and open the Size over Lifetime module.
6. Select the Size property box.
The graph in the Particle System Curves pane shows that the particles are currently growing in size over their lifetime, from 0 to their maximum size of 1.
7. At the bottom of the Particle System Curves pane, select the fifth preset option.
This preset sets the maximum size at the start of the particle’s lifetime and, in a curve behavior, reduces its size to 0 at the end of its lifetime.
8. Hold Ctrl (macOS: Cmd) and select the start and end points, then use the tangent that appears next to each point to control the curve and drag to change the size reduction over time. Adjust the curve until you’re happy with the result in the Scene view.
For more realistic smoke, make the curve stay flat until at least half of its lifetime and then steeply decrease its size.
9. Save your changes.
7. Add the particle system to the enemy
Now you’re created and configured your smoke effect particle system, you’re ready to add it to the enemy character and have it play whilst the enemy is broken.
To set up the enemy smoke effect, follow these instructions:
1. Create a prefab from the SmokeEffect GameObject and delete the one in the scene.
2. Open the Enemy prefab in prefab editing mode.
3. Click and drag the SmokeEffect prefab from the Project window and release it over the Enemy GameObject in the Hierarchy window to make the SmokeEffect prefab a child GameObject of the Enemy GameObject.
![Unity Hierarchy showing Enemy object with a child “SmokeEffect” particle system selected.]](https://storage.googleapis.com/learn-platform-bucket-production/tutorial/b4a517b5-35f4-4771-b1d4-976df445b8d7/versions%5B_key==%22c2f665d9d0ad%22%5D.sections%5B_key==%221fb3e57fdf91%22%5D.body%5B_key==%22dc85356b2617%22%5D.image/6.3.7.1%20Add%20the%20particle%20system%20to%20the%20enemy_20251204_154630.png)
4. In the Scene view, select the Move tool in the tools overlay and position the SmokeEffect GameObject so that the smoke appears to be coming from the top of the Enemy GameObject.
5. Save your changes and exit prefab editing mode.
You’re almost done! The smoke effect definitely makes it more clear that the enemy is broken, but there are still two things that aren’t quite right:
- The smoke is moving with the enemy in a very rigid way, which is not how smoke behaves in the real world.
- The smoke continues after the enemy is fixed, rather than stopping to reflect the fixed state.
8. Fix the smoke issues
The two issues that we’ve listed have separate solutions.
Fix the smoke movement
To fix the smoke movement, follow these instructions:
1. Open the Enemy prefab in prefab editing mode.
2. In the Hierarchy window, select the SmokeEffect child GameObject.
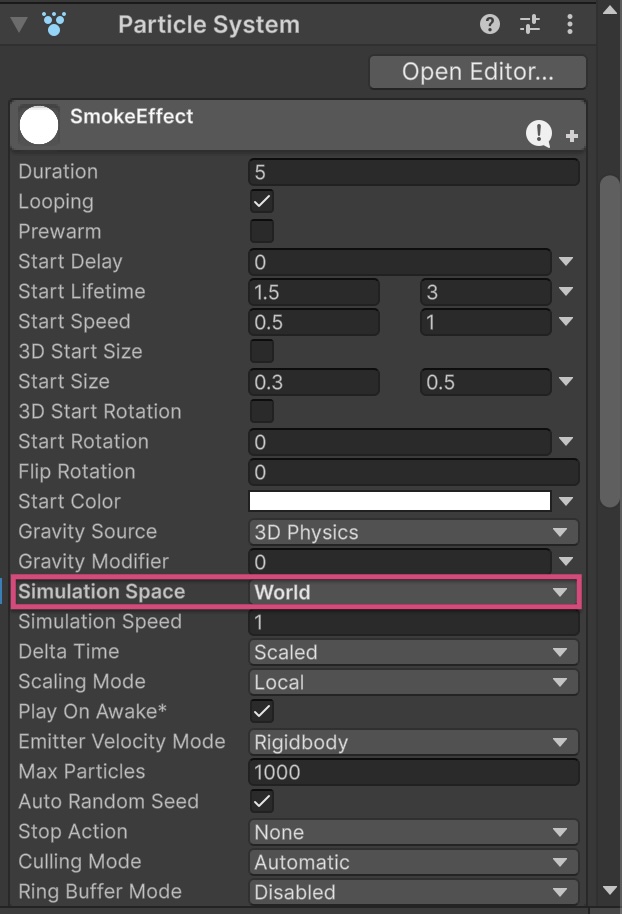
3. In the Inspector window, in the Particle System component’s main module, open the Simulation Space property dropdown and select World.
This change means that the particles will move in the world space for your game, rather than moving in the parent GameObject’s local space (and therefore following the enemy patrol).

4. Save your changes and exit prefab editing mode.
Stop the smoke effect
To end the effect when the player has fixed the enemy, follow these instructions:
1. Open the EnemyController script in your IDE.
2. At the top of the Enemy Controller class, add a new public class member of type ParticleSystem:
public ParticleSystem smokeParticleEffect;Here’s an explanation of this code:
- If a public variable is a component type rather than a GameObject type, when you assign a GameObject with the specified component, Unity will store a reference to the component itself. This approach to getting the reference means that you don’t need to use GetComponent after, and you can’t accidentally assign a GameObject without the correct component to the variable.
3. In the Fix function, at the bottom of your script, add the following instruction:
smokeParticleEffect.Stop();This instruction stops the particle system, rather than destroying it. When you destroy a particle system, you also destroy all the particles that it’s currently handling. Stopping the system means that no new particles will be created, so it’s a more natural-looking way to end the effect.
4. Save your changes and return to the Unity Editor.
5. With the Enemy GameObject still open in prefab editing mode, review the Enemy Controller (Script) component in the Inspector window.
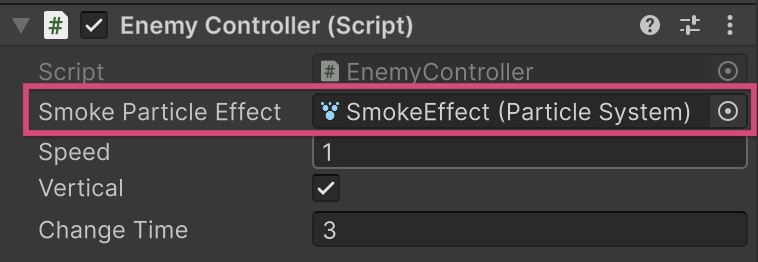
You’ll now find a new Smoke Effect property listed.
6. Click and drag the SmokeEffect child GameObject from the Hierarchy window and release it over the Smoke Effect property to assign it.

7. Save your changes, and test the game.
The effect now ends when the enemy is fixed.
9. More things to try
If you want to further develop your skills, explore new concepts, or improve your project, check out some of the optional activities below. Each one is tagged as either Easy, Medium, or Difficult, so you can choose the level of challenge.
These activities are entirely optional, so if you’re not interested, no problem – just skip this step. We do recommend attempting at least one of them in order to get the most out of this learning experience. Good luck!
Easy: Add other types of particle effects
Now that you know how to configure a basic particle system, you can create other effects for your 2D adventure game. The ParticleSpriteAtlas asset in your chosen asset pack also includes sprites designed for effects when the player character takes damage and when they pick up a health collectible or the Enemy GameObject gets fixed, but you can also use your own sprites or create different effects to suit your specific game.
As you create more effects, play around with the settings to try and create something that fits with your vision for the game. You can also refer to Creative Core: VFX course if you’d like a little more support than the guidance below.
We’ll provide instructions for setting up the particle effects for each type listed. However, these steps alone aren’t enough for them to work as expected; you’ll also need to complete the basic setup you learned earlier, assign the appropriate sprite images, adjust the values as needed, and turn them into prefabs.
Type 1: Limited-time particle effects
One effect that doesn’t need to loop continuously and only plays for a limited duration is the one triggered when the Enemy gets fixed. As mentioned before, the ParticleSpriteAtlas asset uses the last three sprites for this effect.
To configure a particle system to run for a limited time, follow these high-level instructions:
1. In the Particle System component, go to the main module.
2. Disable the Looping property.
3. Set the Duration property to your desired length for the effect to last (in seconds).
4. Open the Stop Action property dropdown and select Destroy.
This selection means that the particle system will only be destroyed after the lifetime of its last particle has ended, so you won’t encounter the problem of everything immediately disappearing.
Type 2: Burst emission
Your smoke effect was emitting particles at a steady rate. You can set that rate in the Emission module using the following properties:
- Rate over Time: Controls how many particles are emitted per unit of time.
- Rate over Distance: Controls how many particles are emitted per unit of distance moved (which can be useful if you only want a visual effect to work when something is moved, such as exhaust smoke for a vehicle).
However, for some effects you might want to emit a lot of particles at once; when the PlayerCharacter is hit, for example. You can use burst emission to configure the system to emit particles in one or more large bursts.
To configure a burst for a player hit effect, follow these high-level instructions:
1. In the Particle System component, go to the main module.
2. Disable the Looping property.
3. Open the Stop Action property dropdown and select Destroy.
4. In the Emission module, set the Rate over Time property to 0.
This effect creates a single burst of particles, not a constant emission over time.
5. In the Bursts list of the Emission module, select the Add (+) button.
6. Set the Count property to 5 and keep the default Time property of 0.00.
Note: You can experiment with different values for the Count property until you find your desired result.
As soon as the particle system is created, it will emit five particles and then destroy itself once those particles reach their end of lifetime.
Instantiate a particle system
Once you’ve created a prefab for a particle system, you can use the Instantiate function to create one in the scene through code. This is the case for effects that should happen once, like a hit or the robot fix effect. You need to do the following:
- Store a reference to the prefab in a public variable, as you did for the SmokeEffect.
- Call Instantiate when the effect should happen. For example, to play an effect when the player picks up a health collectible, this would be the if statement code block within the OnTriggerEnter2D function in the HealthCollectible script, just like the instruction to play the collection sound effect.
If you’ve configured the system burst emission as outlined in the instructions above, the effect will play and then the particle system will be destroyed.
10. Check your script
Take a moment to check that your scripts are correct before continuing.
EnemyController.cs
using UnityEngine;

public class EnemyController : MonoBehaviour
{
// Public variables
public float speed;
public bool vertical;
public float changeTime = 3.0f;
public bool isBroken { get { return broken; } }
public ParticleSystem smokeParticleEffect;

// Private variables
Rigidbody2D rigidbody2d;
Animator animator;
float timer;
int direction = 1;
bool broken = true;

// Start is called once before the first execution of Update after the MonoBehaviour is created
void Start()
{
rigidbody2d = GetComponent<Rigidbody2D>();
animator = GetComponent<Animator>();
timer = changeTime;
}

// Update is called every frame
void Update()
{
timer -= Time.deltaTime;

        	if (timer < 0)
        	{
            		direction = -direction;
            		timer = changeTime;
        	}
}

// FixedUpdate has the same call rate as the physics system
void FixedUpdate()
{
if(!broken)
{
return;
}
Vector2 position = rigidbody2d.position;
if (vertical)
{
position.y = position.y + speed * direction * Time.deltaTime;
animator.SetFloat("Move X", 0);
animator.SetFloat("Move Y", direction);
}
else
{
position.x = position.x + speed * direction * Time.deltaTime;
animator.SetFloat("Move X", direction);
animator.SetFloat("Move Y", 0);
}
rigidbody2d.MovePosition(position);
}

void OnTriggerEnter2D(Collider2D other)
{
PlayerController player = other.gameObject.GetComponent<PlayerController>();

if (player != null)
{
player.ChangeHealth(-1);
}
}

public void Fix()
{
broken = false;
rigidbody2d.simulated = false;
animator.SetTrigger("Fixed");
smokeParticleEffect.Stop();
}
}
11. Next steps
Visual effects are a great way to add polish to your game and make the world feel more cohesive and engaging. With this final addition, you’ve now implemented all the core features of the 2D Adventure game, and your project is fully functional.
In the next tutorial, we’ll give you general guidance on optional features you can add to take your game to the next level. If you’re not interested in implementing these enhancements, you can simply skip ahead to the final step of the next tutorial, where you’ll learn how to Build and share your game.