
Creating a Construction Sequence Viewer
Tutorial
intermediate
+10XP
20 mins
Unity Technologies
The metadata from BIM models provide powerful identifying data that can be used to create custom functionality. In this tutorial, we’ll use the data from a Revit model to create a slider that shows/hides objects based on their projected completion dates.
Resources
Languages available:
1. Introduction
The metadata from BIM models provide powerful identifying data that can be used to create custom functionality. In this tutorial, we’ll use the data from a Revit model to create a slider that shows/hides objects based on their projected completion dates.
For this tutorial, you will need:
- The Reflect Package installed via the Package Manager
- A Pro license for the Unity Editor
- The Unity custom package “CreatingConstructionSequenceViewer_Resources.unitypackage”
- A Revit installation with an activate Reflect plugin
2. Setting Up the Revit Project
For this sequence viewer to work, you need to prepare a Revit project by adding specific metadata to the Scene. A sample Revit model with the metadata already set up is provided in the resources files for this tutorial.
1. Open a Revit project you wish to use. We used the sample project that is installed with Revit (Figure 01).
2. Go to the Manage Tab and select Project Parameters in the Settings section (Figure 02).
3. Create a new project parameter called “Completion Target” and fill out the rest of the options as shown. Take care to expand all the options under the categories and make sure everything is checked (Figure 03).
4. Now, the tedious part. Take your time and select all the elements in the Scene that should be part of a phase. Once all are selected, add a completion date in the properties panel in the format of month/day/year. Unity will be converting this text to a date when you run the scripts (Figure 04).
5. Keep repeating this process until all the elements in the Scene have a target completion date. Tip: Hide the elements as you assign a completion date. This will make it easier to keep track of what still needs a date assigned.
6. When all elements have a date assigned, unhide everything and export the model again to Reflect using the Export View option in the Unity tab (Figure 05)..
3. Running the Custom Viewer in Unity
For this project, we’re going to use a custom viewer created by Brian Bare, solutions engineer at Unity. This viewer contains a slider and scripts that will search for the specified metadata, create a list of dates based on the imported dates, and then hide and show elements based on the dates assigned to them.
1. Install the Unity Reflect package via the Package Manager.
2. Download and import the “CreatingConstructionSequenceViewer_Resources” package from the Tutorial Materials tab.
3. Add the custom viewer to the Scene by dragging the Reflect Custom Viewer Sequencing Prefab from Assets > Custom Reflect Viewer > Prefabs to the Scene Hierarchy (Figure 06).
7. Expand this custom viewer Prefab and select Canvas > Completion Canvas (Figure 07).
8. In the Inspector, add the metadata field you will be using to retrieve the dates to the Parameter slot. This is the parameter that was set up in Revit. In this tutorial, we used Completion Target (Figure 08).
9. Run the project and import the Revit model you exported. Select the construction sequence button (Figure 09).
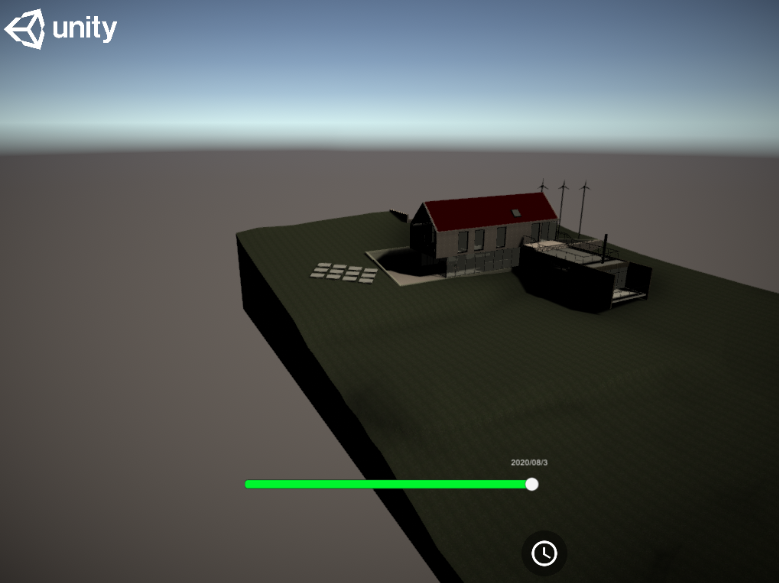
10. A slider will appear. As you move the slider back and forth, it will iterate between the dates specified in the metadata and show/hide elements based on their status (Figure 10).
4. Next Steps
Open and study the scripts to gain an understanding of how the metadata is passed and how it’s used to populate the slider. The scripts can be found under Assets > Custom Reflect Viewer > Scripts.