Creating a prototype blockout from concept art
Tutorial
intermediate
+10XP
15 mins
104
Unity Technologies

In this tutorial, you will:
- Explore the process of creating a prototype environment from concept art
- Identify the key environmental features in concept art
This tutorial is part of Buried Memories: High Fidelity Game Visuals.
Materials
Languages available:
1. Overview
In this tutorial, you will:
- Explore the process of creating a prototype environment from concept art
- Identify the key environmental features in concept art
- Consider the benefits of a modular design approach
After completing the tutorial, you can apply your learning by creating a prototype room design for the Buried Memories: Serekh demo or your own industrial science fiction game project.
2. Identifying key environmental features
The goal of the team for Buried Memories: Serekh was to create a demo in Unity to showcase high fidelity visual best practices through strong visual worldbuilding.
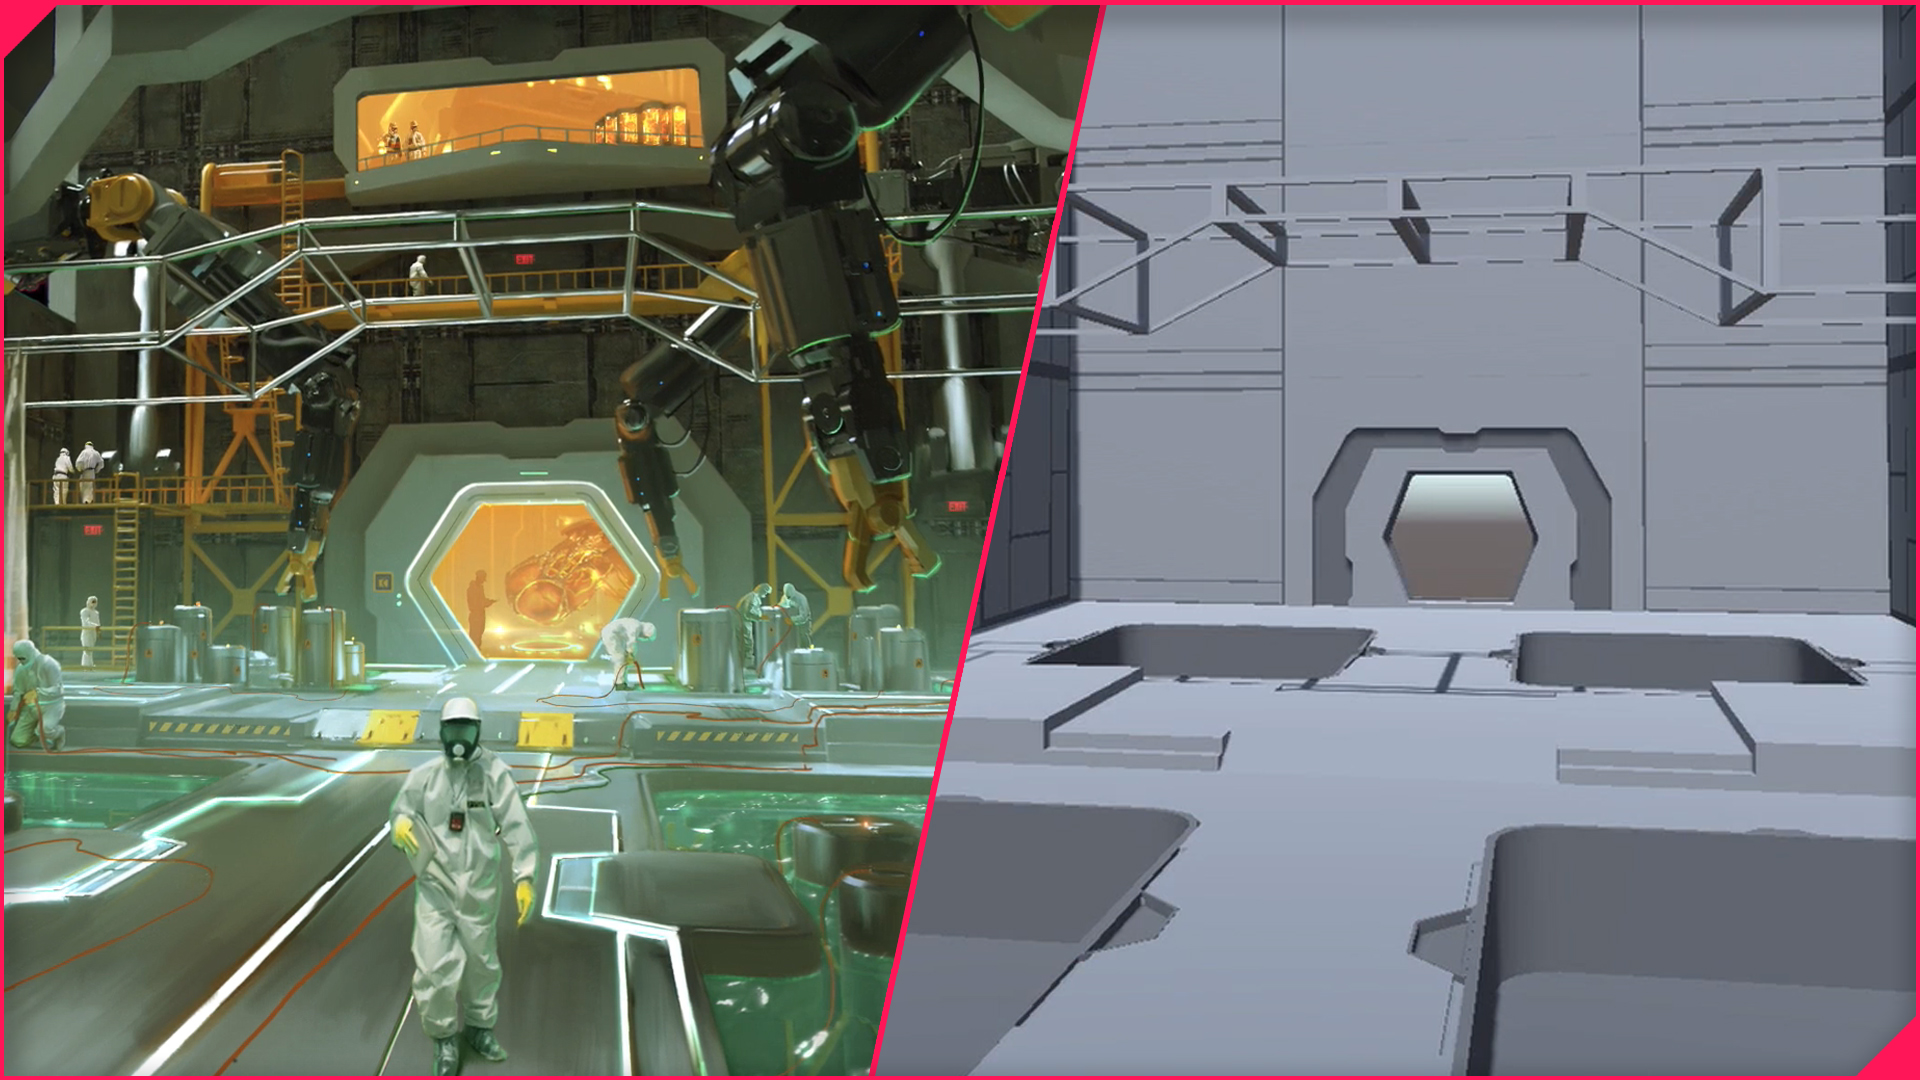
Using the concept art for the two rooms, and in collaboration with other artistic contributors, the Level Designer began by identifying key environmental features in the concept art. They focused on elements which would make a significant contribution to the look and feel of the final world, with an initial focus on shape and architectural features. The goal of this was to plan a greybox version of the level for the Environment Artist.
Example: Service Room
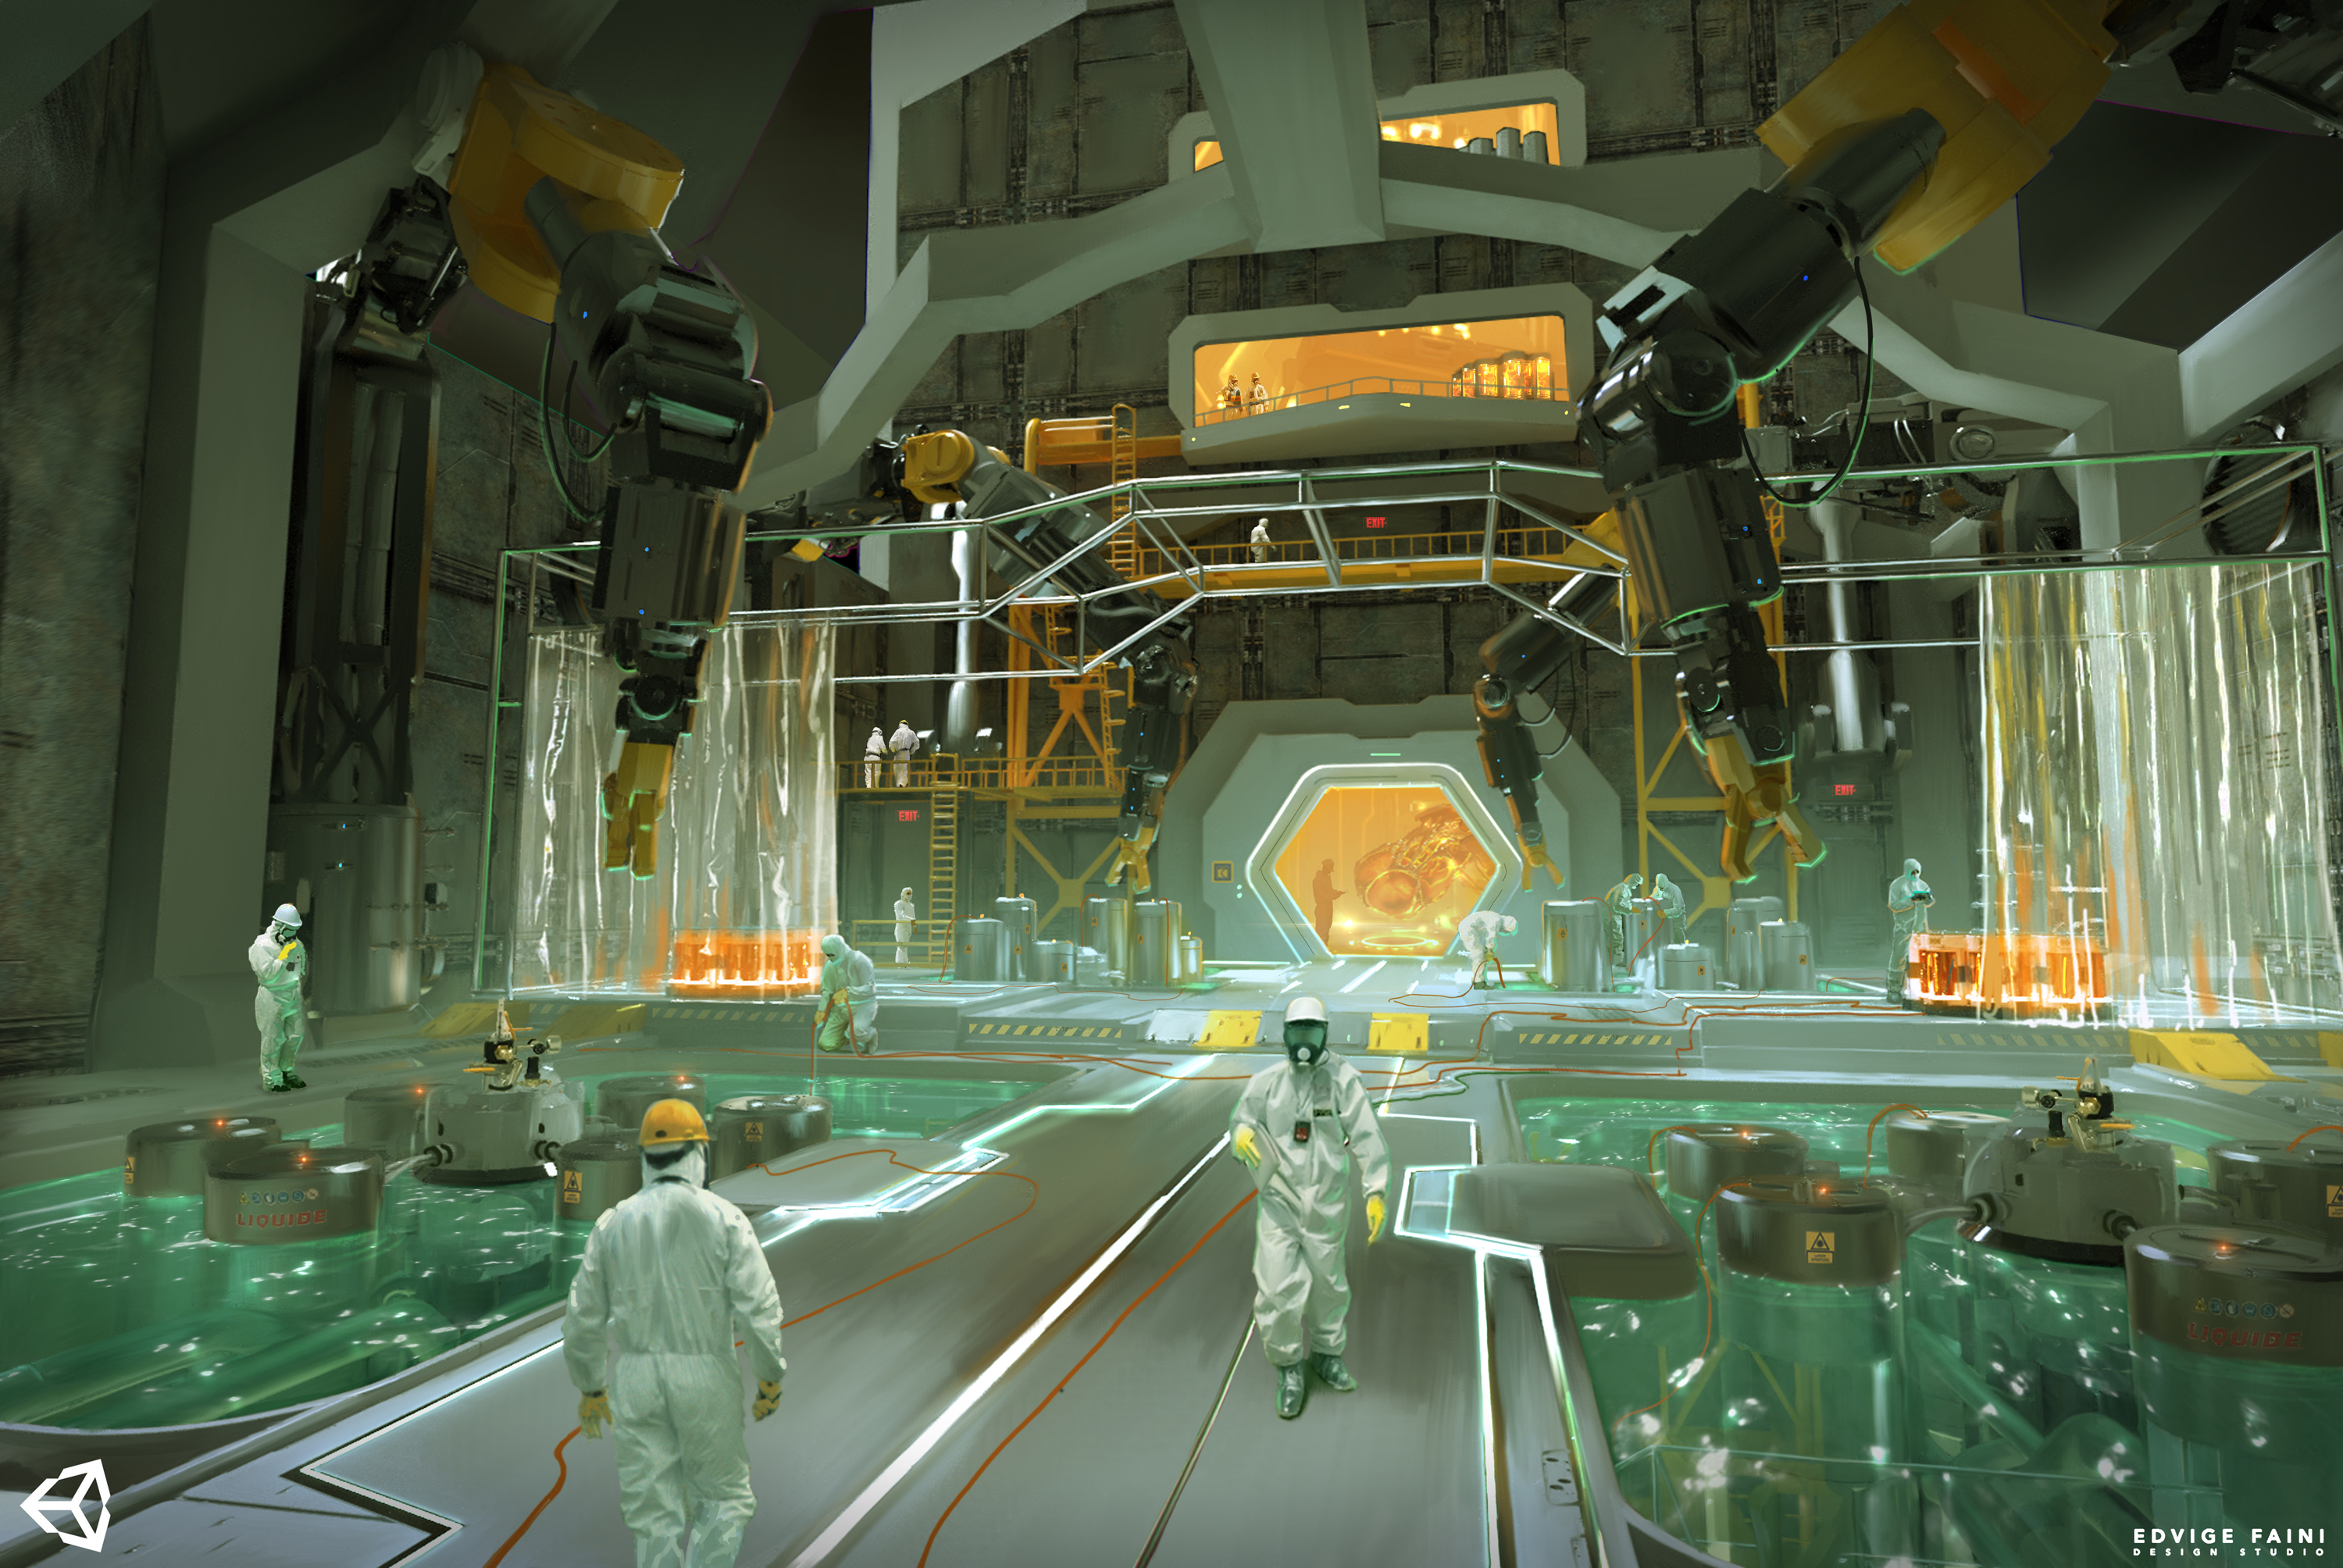
Let’s explore the Service Room concept art as an example:

This room concept features:
- Repeating or mirrored structural elements. For example, robot arms with supporting pillars and green pools.
- Repeated or mirroring decorative elements. For example, the translucent plastic curtains and cylindrical pods in the foreground pools.
- Subtle repeated elements. For example, floor trim and wall panels.
These repeated elements make it easier to break down not just the models but also the Materials and Textures required to recreate the image in 3D.
3. Identify key environmental features in the Exolab
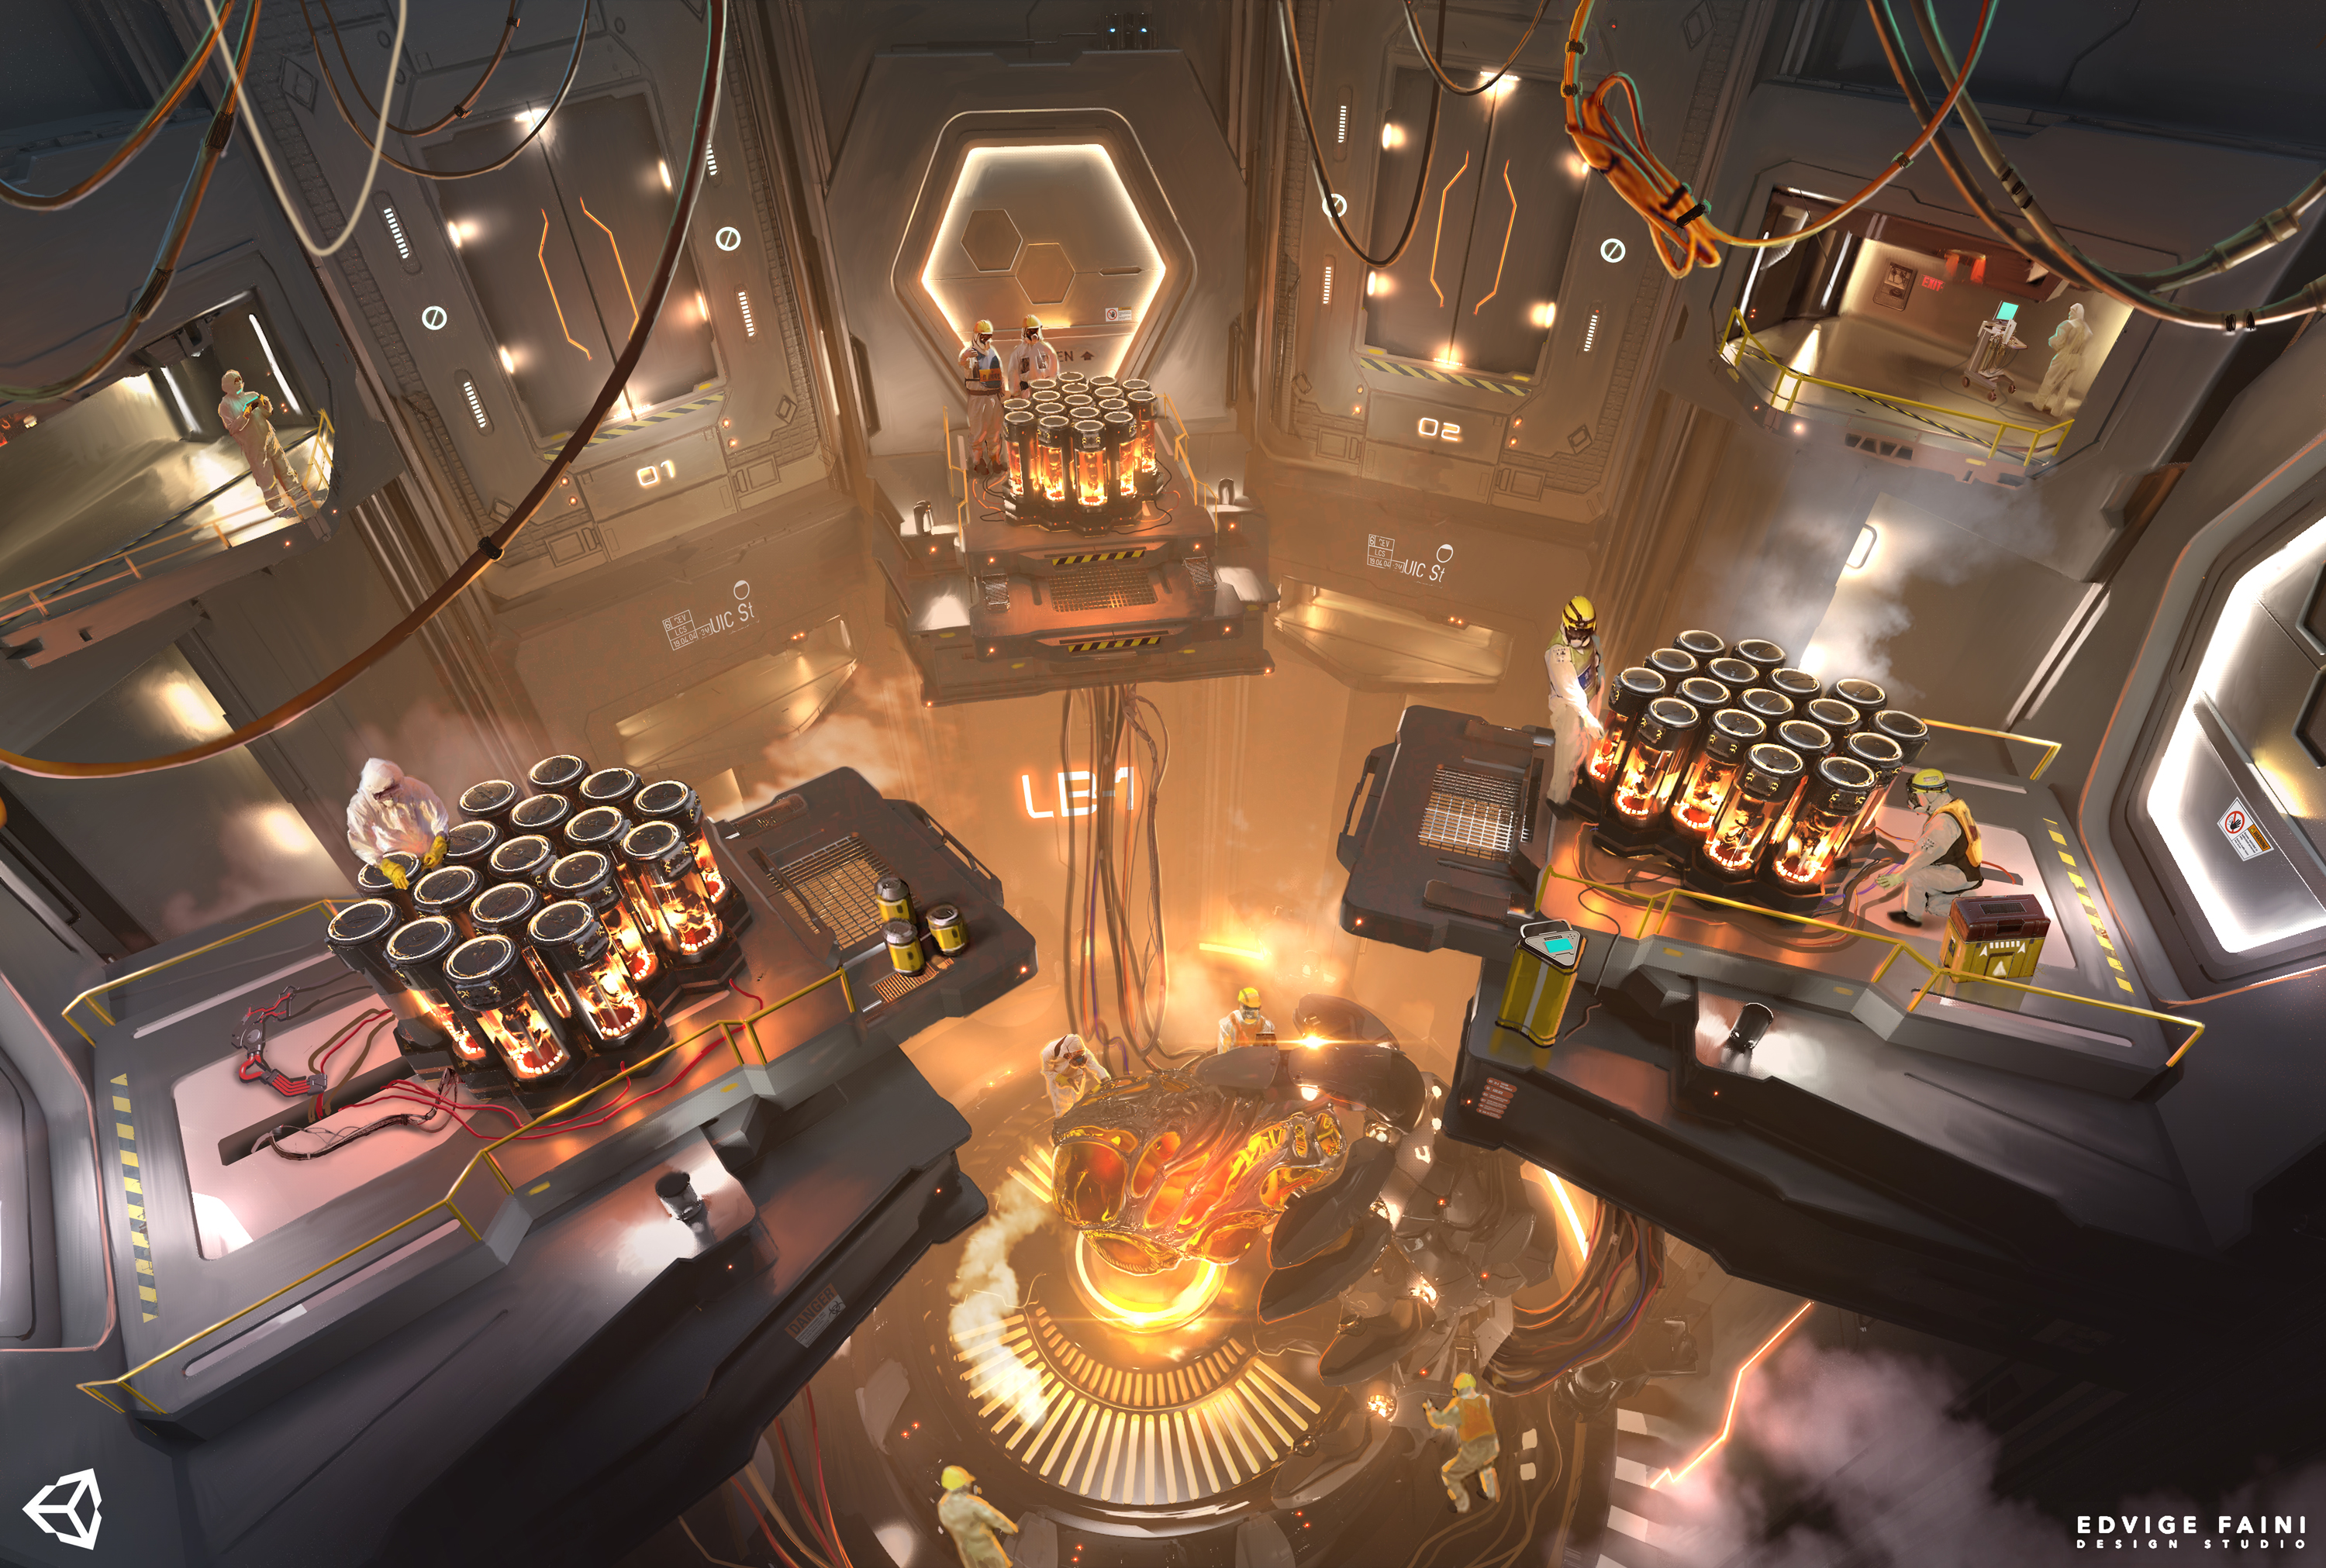
Now that you’ve seen the elements identified by the Icons team in the Service Room, evaluate the concept art for the second room (the Exolab) below and identify the key elements in the room.
This will enable you to identify where an Environment Artist would choose to focus detail and time when recreating the room in 3D.

Use the following guidance to help you:
- Notice where your eye is immediately drawn by the concept art . Where are the focal points and directional lines in the room?
- Imagine the atmosphere you would want to create for an industrial science fiction game. Which features of the room would most significantly contribute to that?
- Consider the similarities and differences between the two rooms . Are there common environment design features in both?
- Consider how the player will experience different areas. Which ones will they interact with and which will be harder to view?
This evaluation would provide the Level Designer with important information to help them create their initial design. When you’ve finished, check your observations in the next step.
4. Review key environmental features in the Exolab
Within the Exolab concept art, you can find the following key environmental features:
- The focal point of the room is the unique central pod. A player would be able to move around the pod, and potentially interact with it.
- The central pod uses warm lighting and fog to draw a player’s attention to it and create a mysterious feeling.
- Areas with less narrative importance are more cooly lit. These areas also make use of repeated elements, some which are similar to the Service Room.
5. The benefits of a modular approach
The Assets for Buried Memories: Serekh are as modular as possible. This was done to:
- Enable collaborators to maintain an efficient workflow
- Provide Asset Pack users with scope to customize the Assets and craft unique player experiences.
What are the benefits of a modular approach?
Assets for AAA games require high resolution models and Textures that can quickly add up to make your Project feel bloated.
Breaking down content into manageable, modular pieces not only allows models and Textures to be reused throughout the Project, they also enables artists and designers to more quickly create levels by reusing art. This enables rapid iteration and the creation of thematically similar areas using a smaller pool of Assets in Unity.
Modular environment design in Unity
Unity's Prefab workflow provides a modular solution that allows for reuse and constant iteration, from the earliest blockouts to final art Assets. Completed Assets can be easily swapped in from programs such as Maya or 3ds Max.
Texturing software, such as Substance Designer and Painter, also enables you to create sets of Textures and Materials that can be repeated or reused with multiple Assets in Unity Projects.
6. Creating a blockout from concept art
In this video, you will review the Level Designer’s process for creating a blockout from the Buried Memories: Serekh concept art.
Note: The transcript will open in your current tab.
7. Summary
In this tutorial, you:
- Explored the process of creating a prototype environment from concept art
- Identified the key environmental features in concept art
- Considered the benefits of a modular design approach
Next, you can create a greybox prototype of your own room in the course learning Scene.