
Customizing BIM Display
Tutorial
intermediate
+10XP
20 mins
Unity Technologies
In this tutorial, we will explore how you can customize the Reflect Viewer filtering system. Specifically, we’ll explore how the filtering system manages Materials that are applied when the system is activated. The filtering system uses two Materials: a highlight Material that is applied when an element is selected in a Scene and a transparent Material that is applied to the Scene’s unselected objects.
Resources
Languages available:
1. Exploring the Highlighting System
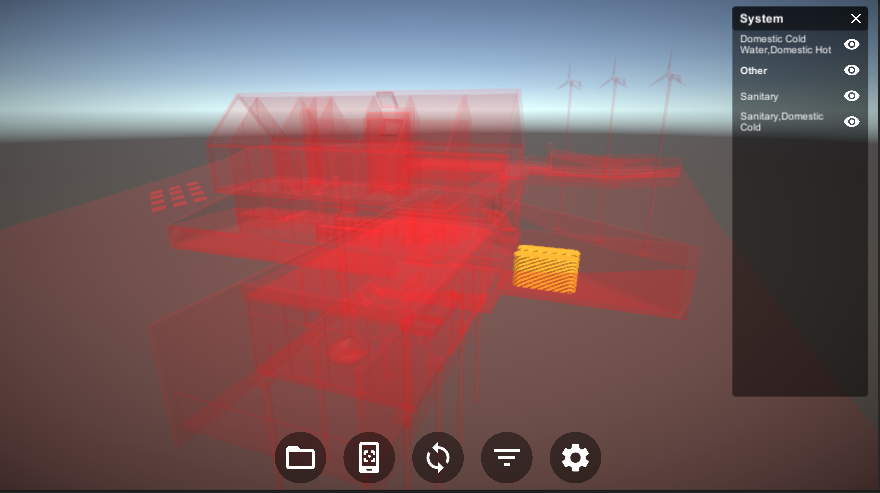
Typically, when the Reflect Viewer’s highlighting system is activated and an element is selected, the selected object is highlighted while the rest of the project elements become transparent (Figure 01). To achieve this, the Reflect Viewer assigns a transparent material (1) to all unselected objects and a highlight material to the selected object (2).
You can customize the Materials that are used in the highlighting system.
1. The materials used in the filter highlights are stored in the Materials folder of your Assets. The specific materials used are “Outline” (01) for the highlighted objects and “Transparent” (02) for the rest of the elements that are not highlighted.
2. Select the “Outline” material and in the Inspector panel, change the color to a hue of your choice (Figure 03).
3. Run the Viewer and select any item in the Filter list. You should now see the new color applied (Figure 04).
2. Next Steps
This tutorial showed you how to change Materials when using the filtering options in the Reflect Viewer. Understanding this process will allow you to further customize your projects and explore how the different parts of the Reflect Viewer work together.