Developing for visionOS with Unity
Tutorial
intermediate
+10XP
30 mins
84
Unity Technologies
In this tutorial, you’ll dive into the world of visionOS development using Unity. You’ll start by learning about the core concepts behind visionOS and the capabilities of Apple Vision Pro. The tutorial will guide you through setting up your development environment, including the Unity Editor and essential packages for visionOS development. By creating a simple application, you’ll learn about the different modes and use cases for each one, such as Mixed Reality (MR), Virtual Reality (VR), and Windowed Mode. This practical, hands-on experience will culminate in building an Xcode project and testing your application using the visionOS device simulator.
By the end of this tutorial, you’ll be able to do the following:
- Grasp the core concepts of developing for visionOS and the capabilities of Apple Vision Pro.
- Install the appropriate version of the Unity Editor that is compatible with visionOS development.
- Understand and install visionOS and PolySpatial packages using the Package Manager.
- Install the correct version of Xcode for visionOS development.
- Recognize the significance of developing apps with different entry points: Windowed, MR, and VR.
- Set up a simple scene in Unity to allow for basic user interactivity in a visionOS app.
- Configure build settings accurately and build your project to Xcode.
- Navigate and utilize the visionOS device simulator effectively.
Languages available:
1. Overview
In this tutorial, you’ll be introduced to Apple Vision Pro and Unity's development process for deploying visionOS applications. You'll learn to install the Unity Editor version suitable for visionOS, along with visionOS and PolySpatial packages via the Package Manager. We will also cover the importance of various app entry points like Windowed, MR, and VR. The tutorial will walk you through the process of setting up a simple Unity scene for visionOS app interactivity, configuring build settings for Xcode, and effectively using the visionOS device simulator.
2. What is visionOS?
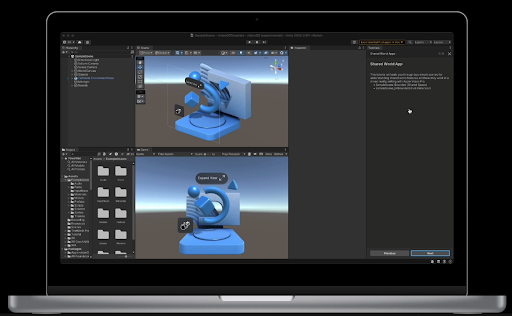
visionOS is a specialized operating system created by Apple Inc. exclusively for Apple Vision Pro, Apple’s mixed reality device. visionOS is based on iOS frameworks, and is tailored for mixed reality (MR) experiences, integrating specialized MR frameworks such as foveated rendering and real-time interaction.
Apple Vision Pro offers users a spatial canvas for immersive engagement in three-dimensional environments. Users can seamlessly interact with applications while maintaining awareness of their physical surroundings or opt for complete immersion in virtual worlds.
visionOS offers fluid transitions between different modes of interaction. Users can seamlessly navigate from conventional window-based experiences to 3D content and even transition to fully immersive environments.
3. Building blocks for visionOS development
visionOS applications are designed around the following features, named Building Blocks:
Windows
Windows are similar to browser windows and can contain traditional views and controls. You can also add depth to your window experiences by adding 3D content. You can create one or more windows in your visionOS app.
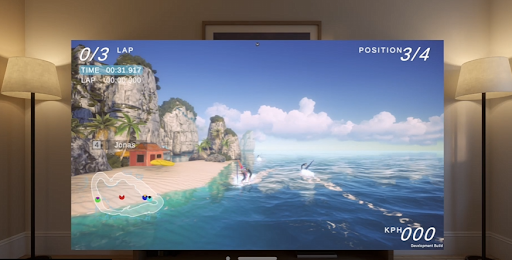
Volumes
Volumes are containers that represent spatial environments capable of displaying 3D content. You can use volumes to enhance your app's immersion by incorporating 3D volume features. These volumes are visible to the developer when developing in the Unity Editor.
Spaces
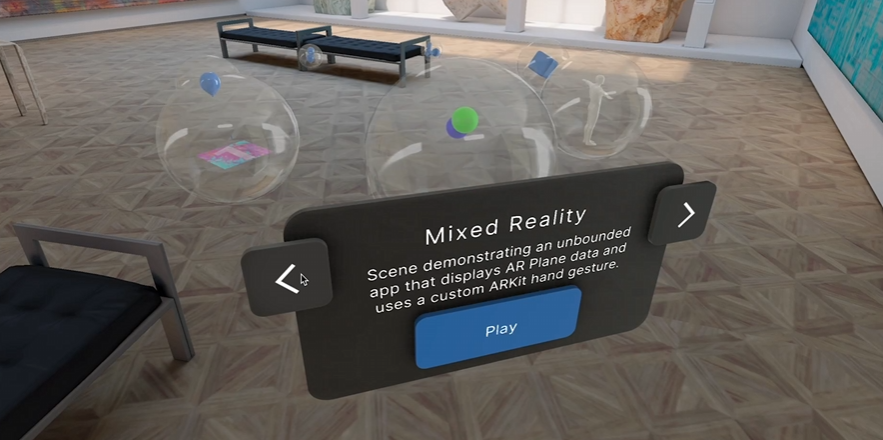
By default, applications are launched into the Shared Space, allowing them to coexist alongside each other, akin to multiple applications on a Mac desktop. Within this space, apps utilize windows and volumes to display content, which users can freely reposition according to their preference. For a heightened level of immersion, apps have the option to open a dedicated Full Space, where only the content of that specific app is visible. Within this Full Space, apps retain the flexibility to utilize windows and volumes, generate limitless 3D content, establish portals to alternate worlds, or completely immerse users within a virtual environment.
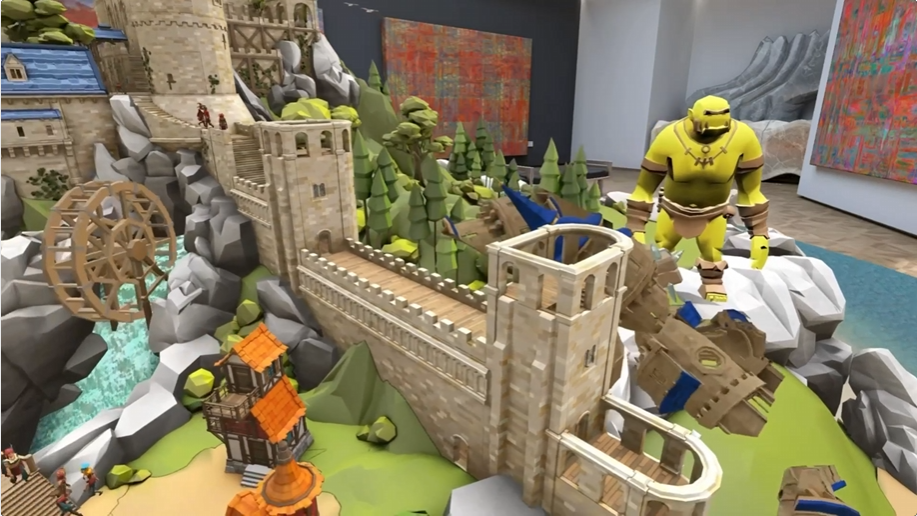
4. Exploring different modes and use cases
Apple Vision Pro has three modes available to users: Mixed Reality, Virtual Reality, and Windowed mode. Understanding the different levels of immersion in each mode will help you select the right one for your needs. You’ll need to select the relevant mode before building an app to Apple Vision Pro.
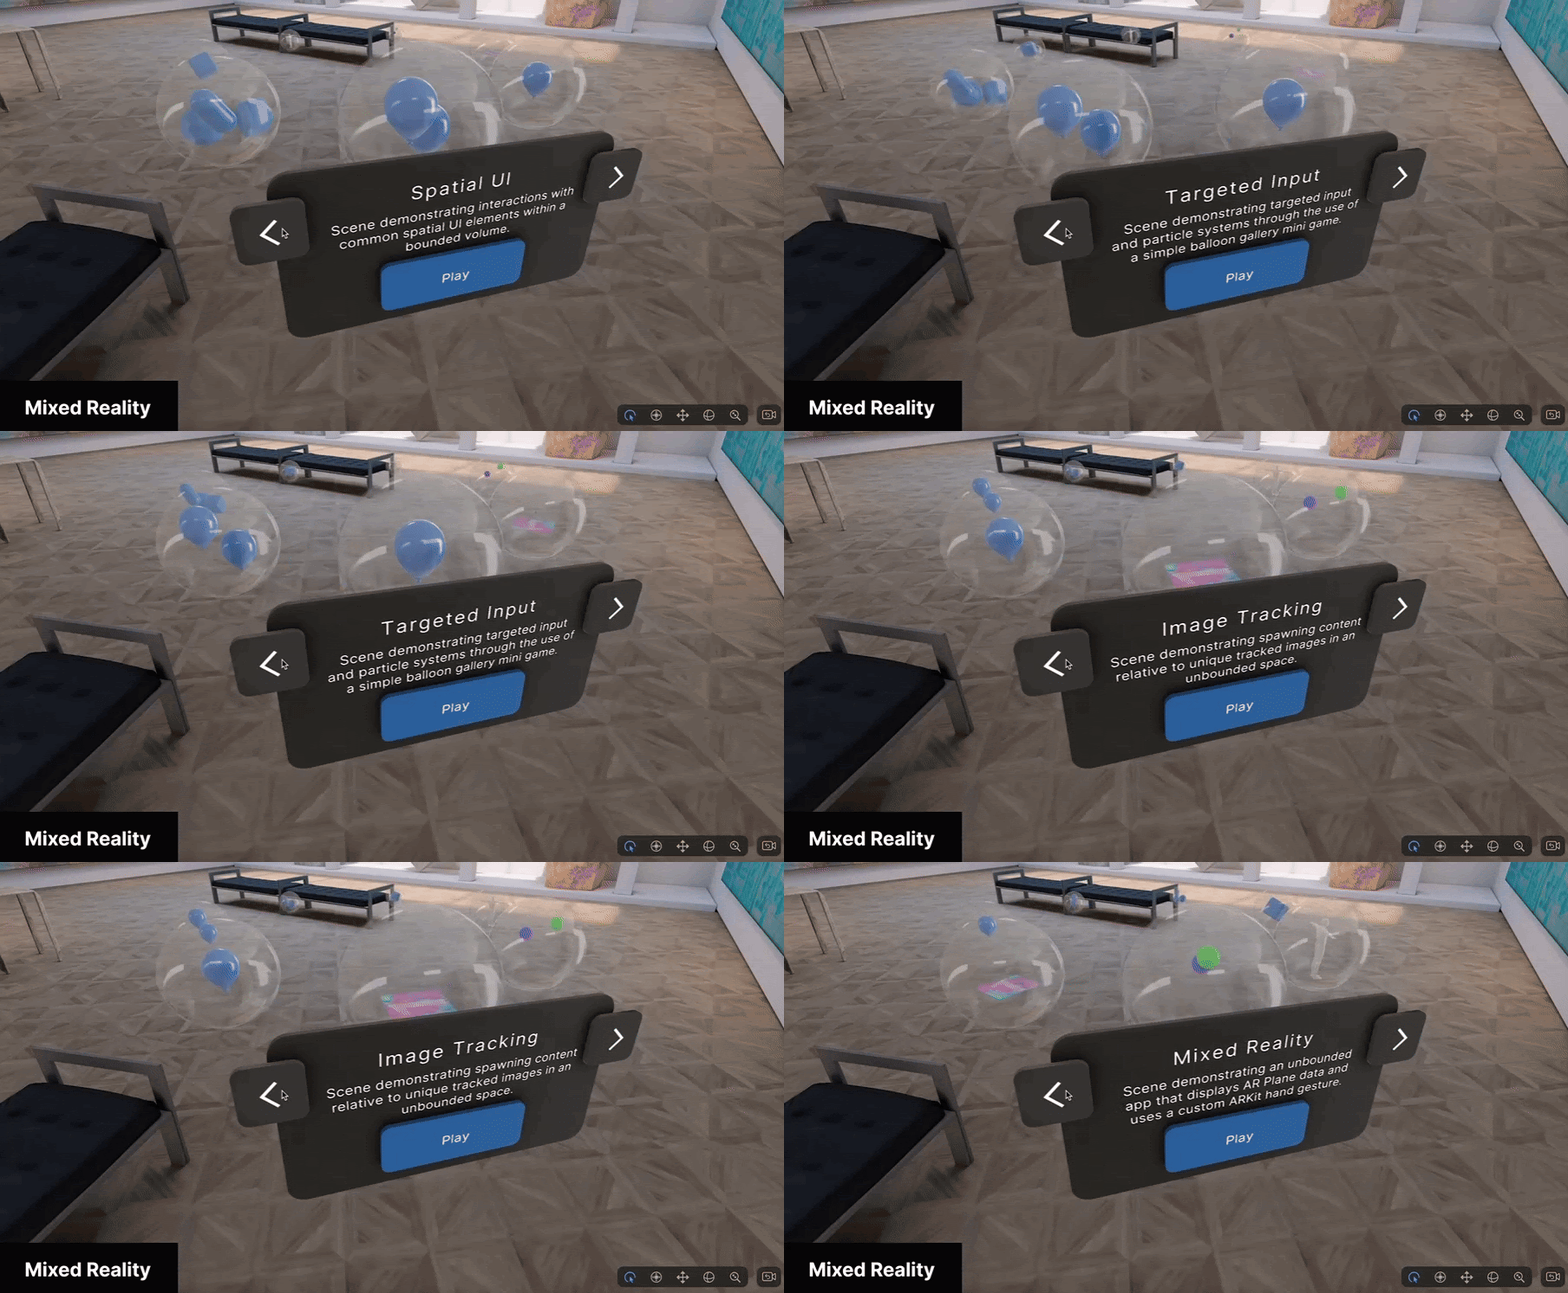
Mixed Reality
Mixed Reality (MR) mode uses multiple sensors to accurately overlay digital content onto the real world, achieving the truest implementation of spatial computing.
MR mode is best suited for applications where the context of the physical world is essential to the experience; for example, games that use the physical world as the backdrop for the experience, or training simulations where real world context is critical.
Virtual Reality
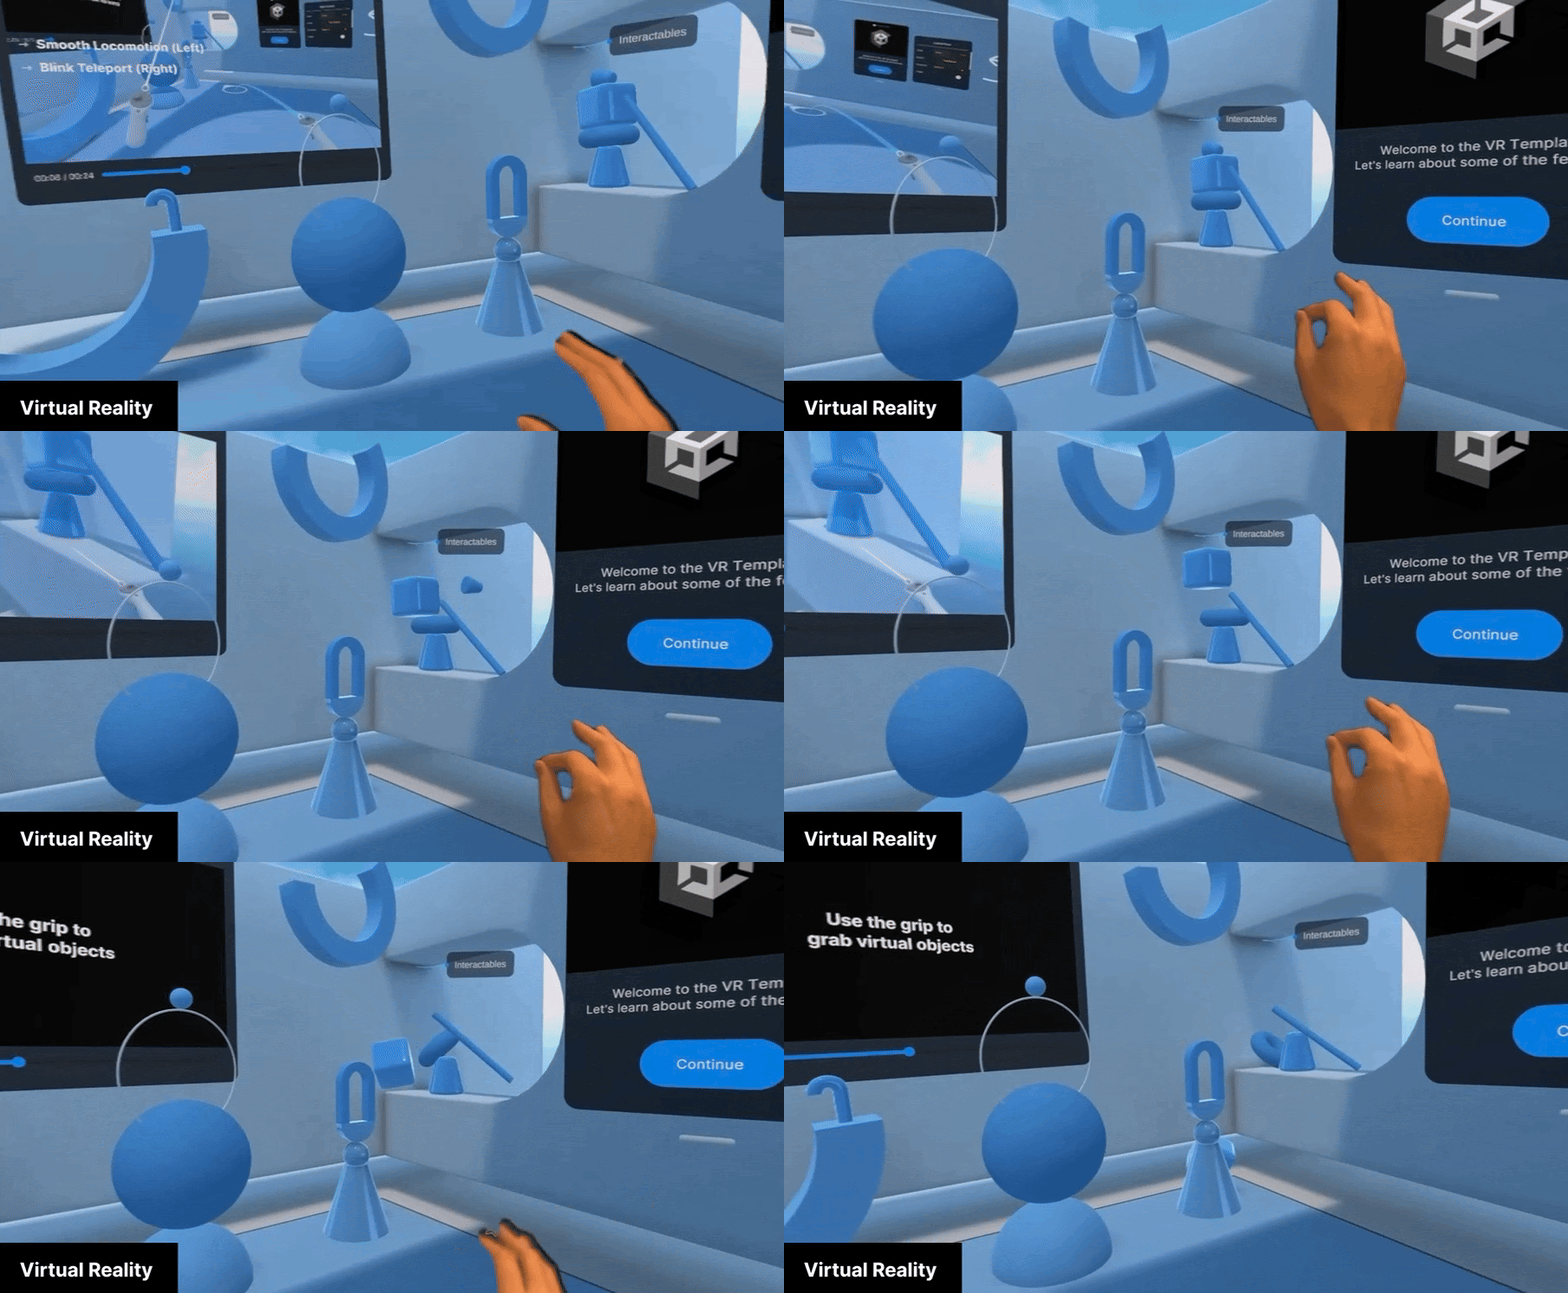
Virtual Reality (VR) mode completely immerses the user in the virtual environment. While Apple Vision Pro is aware of the physical surroundings when in VR mode, it only uses this information to track the position of the user in the space and does not show it to the user.
VR mode is best suited to applications where a complete immersive experience is desired and the context of the physical world is not important. It can be used for games, immersive experiences, and simulations.
Windowed mode
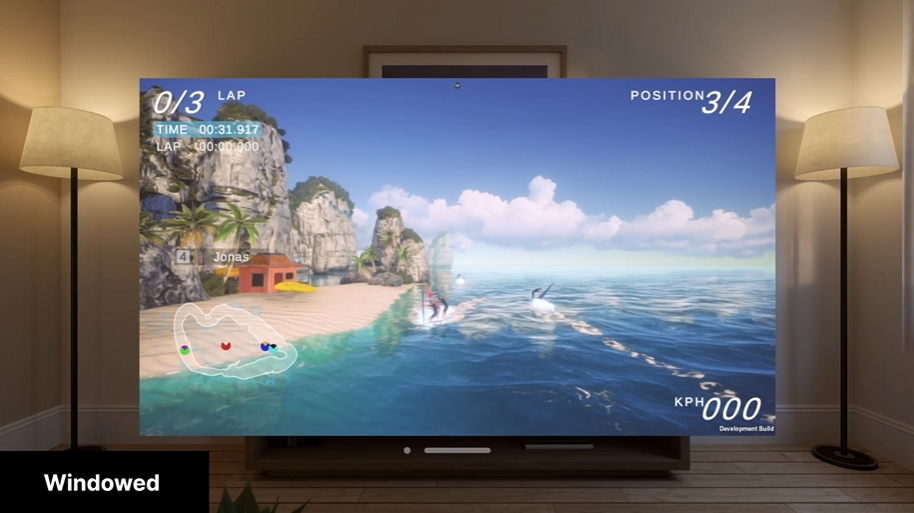
Similar to MR, windowed objects are displayed as digital content mixed with the real world, but in Windowed mode, windows are used to present 2D or 3D content or use volumes to present 3D content and objects. Think of Windowed mode like a screen, but a screen that floats in front of you.
Windowed mode is best suited for porting typical screen-based applications, like email or video players, to a visionOS experience.
5. Set up your development environment
Now that you have a basic understanding of visionOS and the capabilities of Apple Vision Pro, you’ll set up your development environment so you can start creating your own visionOS applications.
Important: You can only develop applications for Apple Vision Pro on an M-series Apple Silicon (M1, M2, etc.) and with a Unity Pro, Unity Industry, or Unity Enterprise license.
If you don’t have the hardware or license required, you may still find it interesting to read on and see what developing for Apple Vision Pro with Unity is like.
Create a new Unity project
The first step is to create a new Unity project:
1. Install Unity 2022.3 LTS, if you haven’t already done so.
2. Add the iOS Build Support module to your installation of Unity [2022.3], if you haven’t already done so.
3. Create a new Unity project using the 3D (URP) Template. The High Definition Rendering Pipeline (HDRP) is not supported on Apple Vision Pro at this stage.
Configure the required packages
Unity provides packages specific for the development of visionOS applications. In this section, you’ll install these packages:
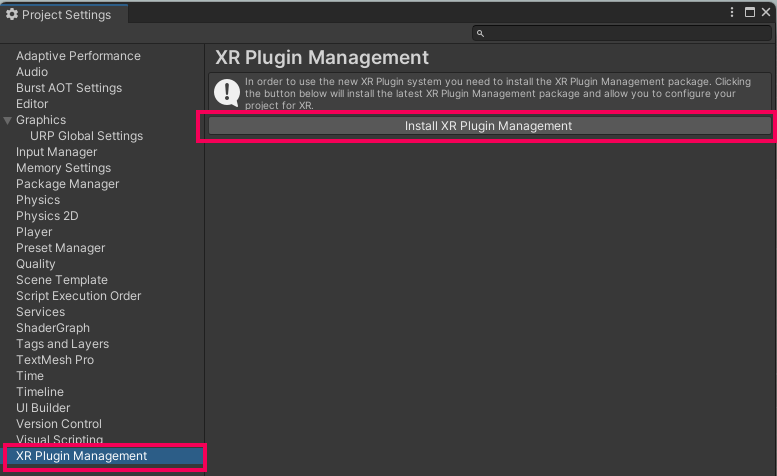
1. Open Project Settings (Edit > Project Settings).
2. Select XR Plugin Management.
3. Select Install XR Plugin Management and wait for the installation to finish.
4. Select the visionOS tab and enable the Apple visionOS plug-in provider.
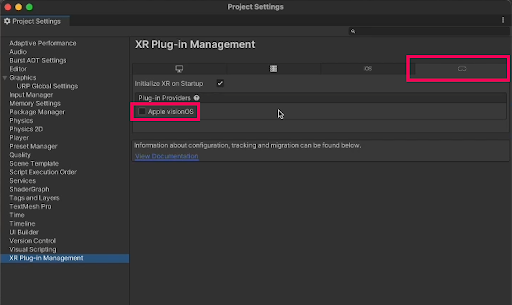
Note: If you get a warning that the project needs to use the New Input system, select yes to continue.
5. In the Project Settings window, select visionOS, and under App mode, select Mixed Reality - Volume or Immersive Space. When prompted, install PolySpatial packages.
6. Go to Window > Package Manager to open the Package Manager.
7. Check that you have installed the following packages:
- com@unity.polyspatial
- com.unity.xr.visionos
- com.unity.polyspatial.visionos
- com.unity.polyspatial.xr
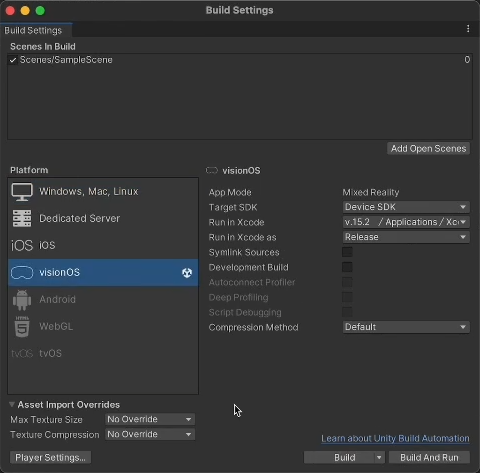
8. Go to File > Build Settings and check that the build target is set to visionOS.
Install Xcode
Download and install a copy of the latest Xcode version from Xcode 15 - Apple Developer.
6. Build your first visionOS application
You’re now ready to create visionOS applications. In this step, you’ll build a sample scene to the provided simulator application.
Open the sample Project Launcher scene
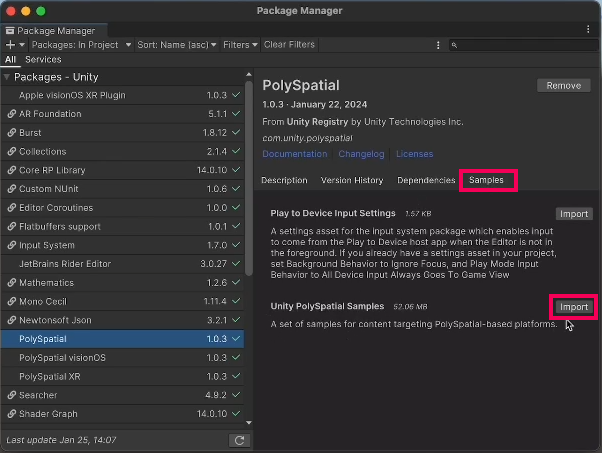
1. Open the Package Manager and locate the PolySpatial package.
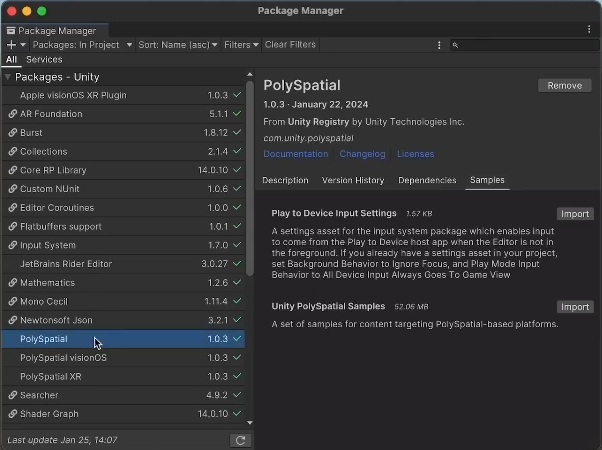
2. Select the PolySpatial package, and under Samples, import the Unity PolySpatial Samples.
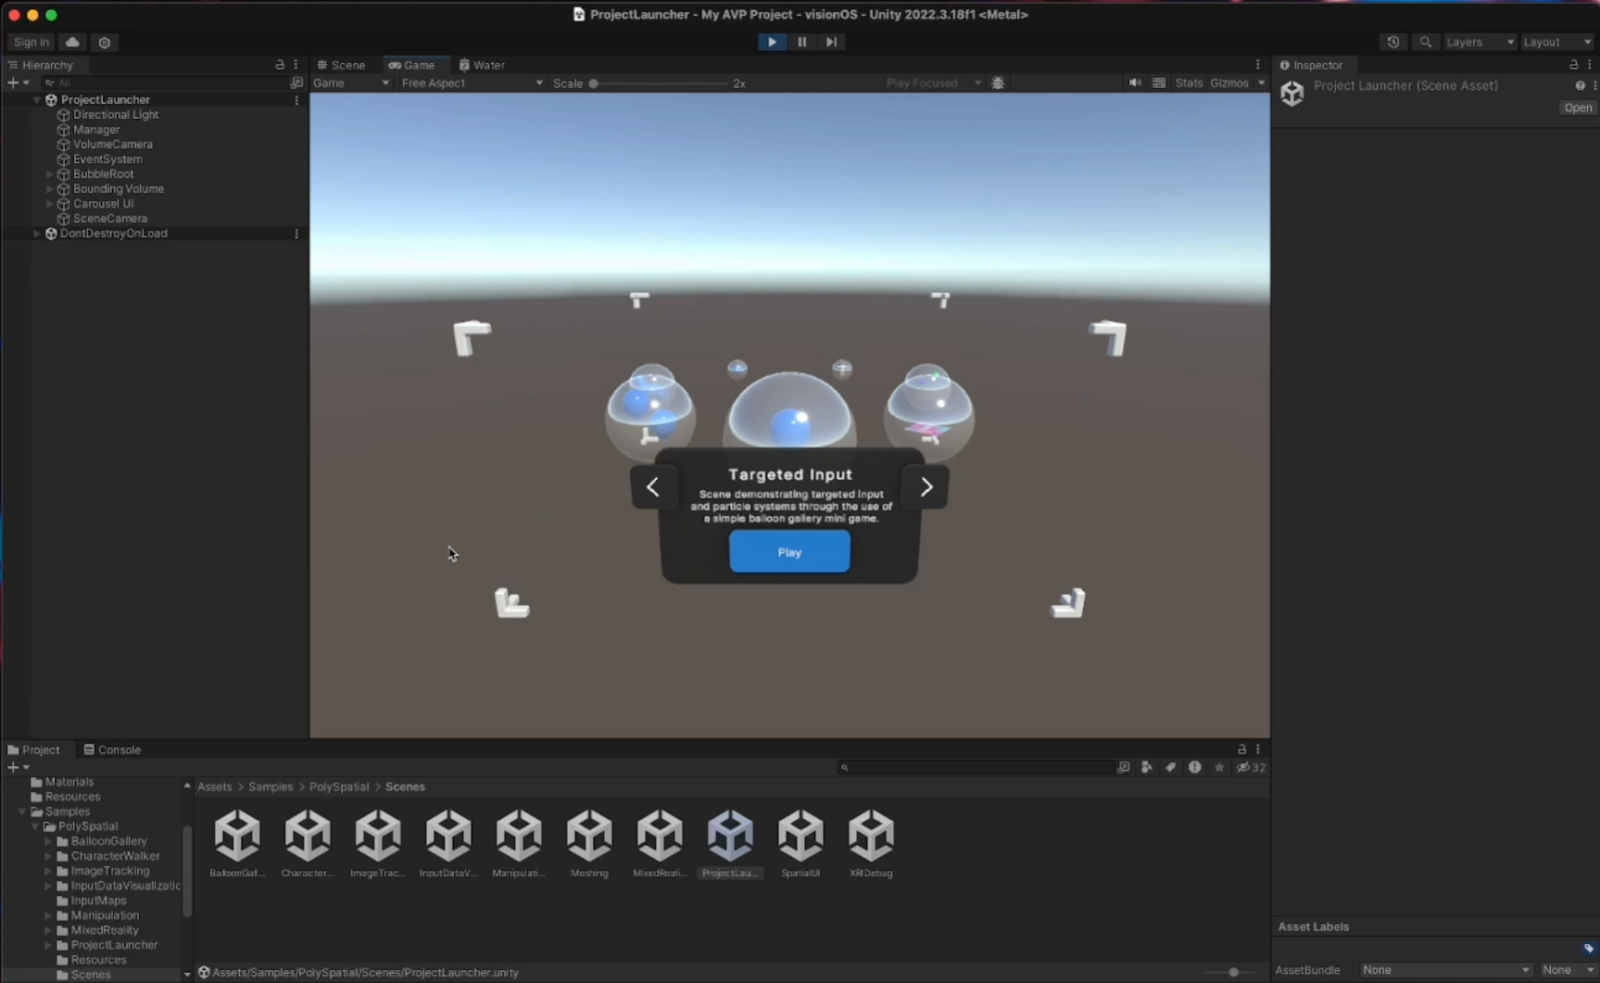
3. When the import is complete, go to Assets > Samples > PolySpatial > Scenes and open the Project Launcher scene.
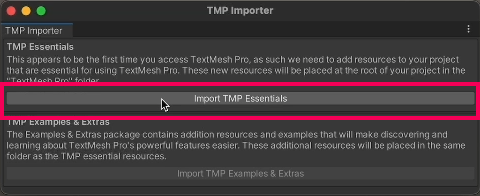
4. If you get a prompt to import TMP Essentials, select the Import TMP Essentials button.
Configure your project settings
1. Open your Project Settings from Edit > Project Settings.
2. Select Apple visionOS and then change the App Mode to Mixed Reality - Volume or Immersive Space.
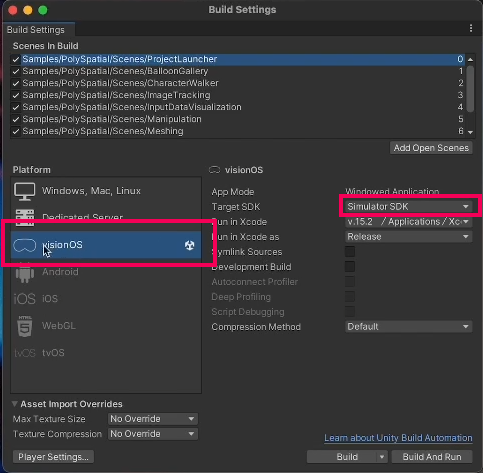
3. Select File > Build Settings to open the Build Settings window.
4. Remove the SampleScene from Scenes in Build.
5. Drag all of the scenes from Assets > Samples > PolySpatial > Scenes into the Scenes in Build section of the Build Settings window.
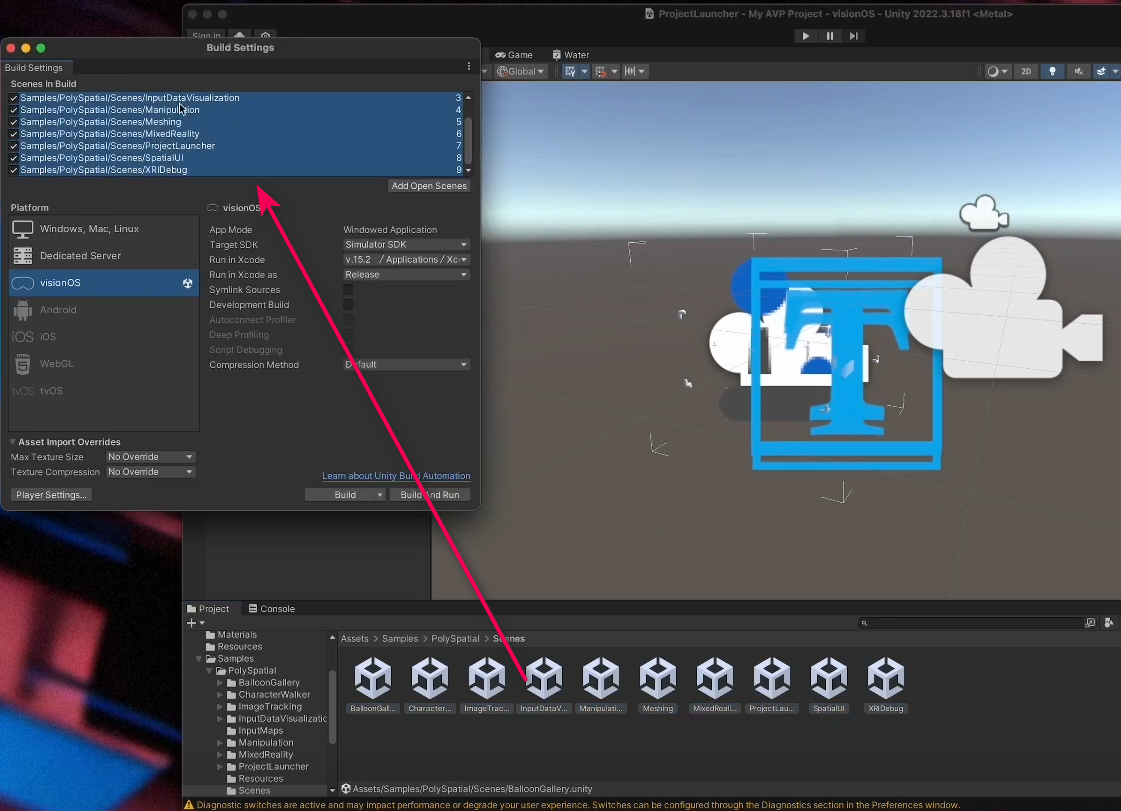
6. Drag the Project Launcher scene so it is at the top of the list.
7. Make sure that visionOS is selected as your target platform and that your target SDK is set to Simulator SDK.
Build the Xcode project
1. In the Build Settings dialog, select Build to start the building process.
2. Select or create a location to save the build.
3. Wait for the build to finish and open the location you saved the build to.
Unity created an Xcode project for you at this location, the next step is to open this in Xcode.
Run the simulator in Xcode
1. Open Xcode, then select Open Existing Project.
2. Locate the project you built before and open it in Xcode.
3. Open the dropdown from the top toolbar of the Xcode interface and change the target to Apple Vision Pro simulator.
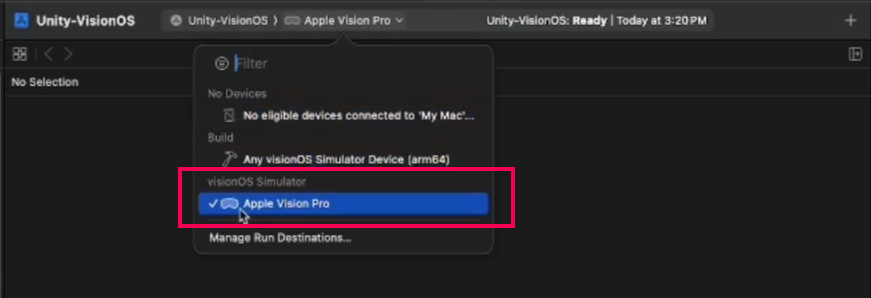
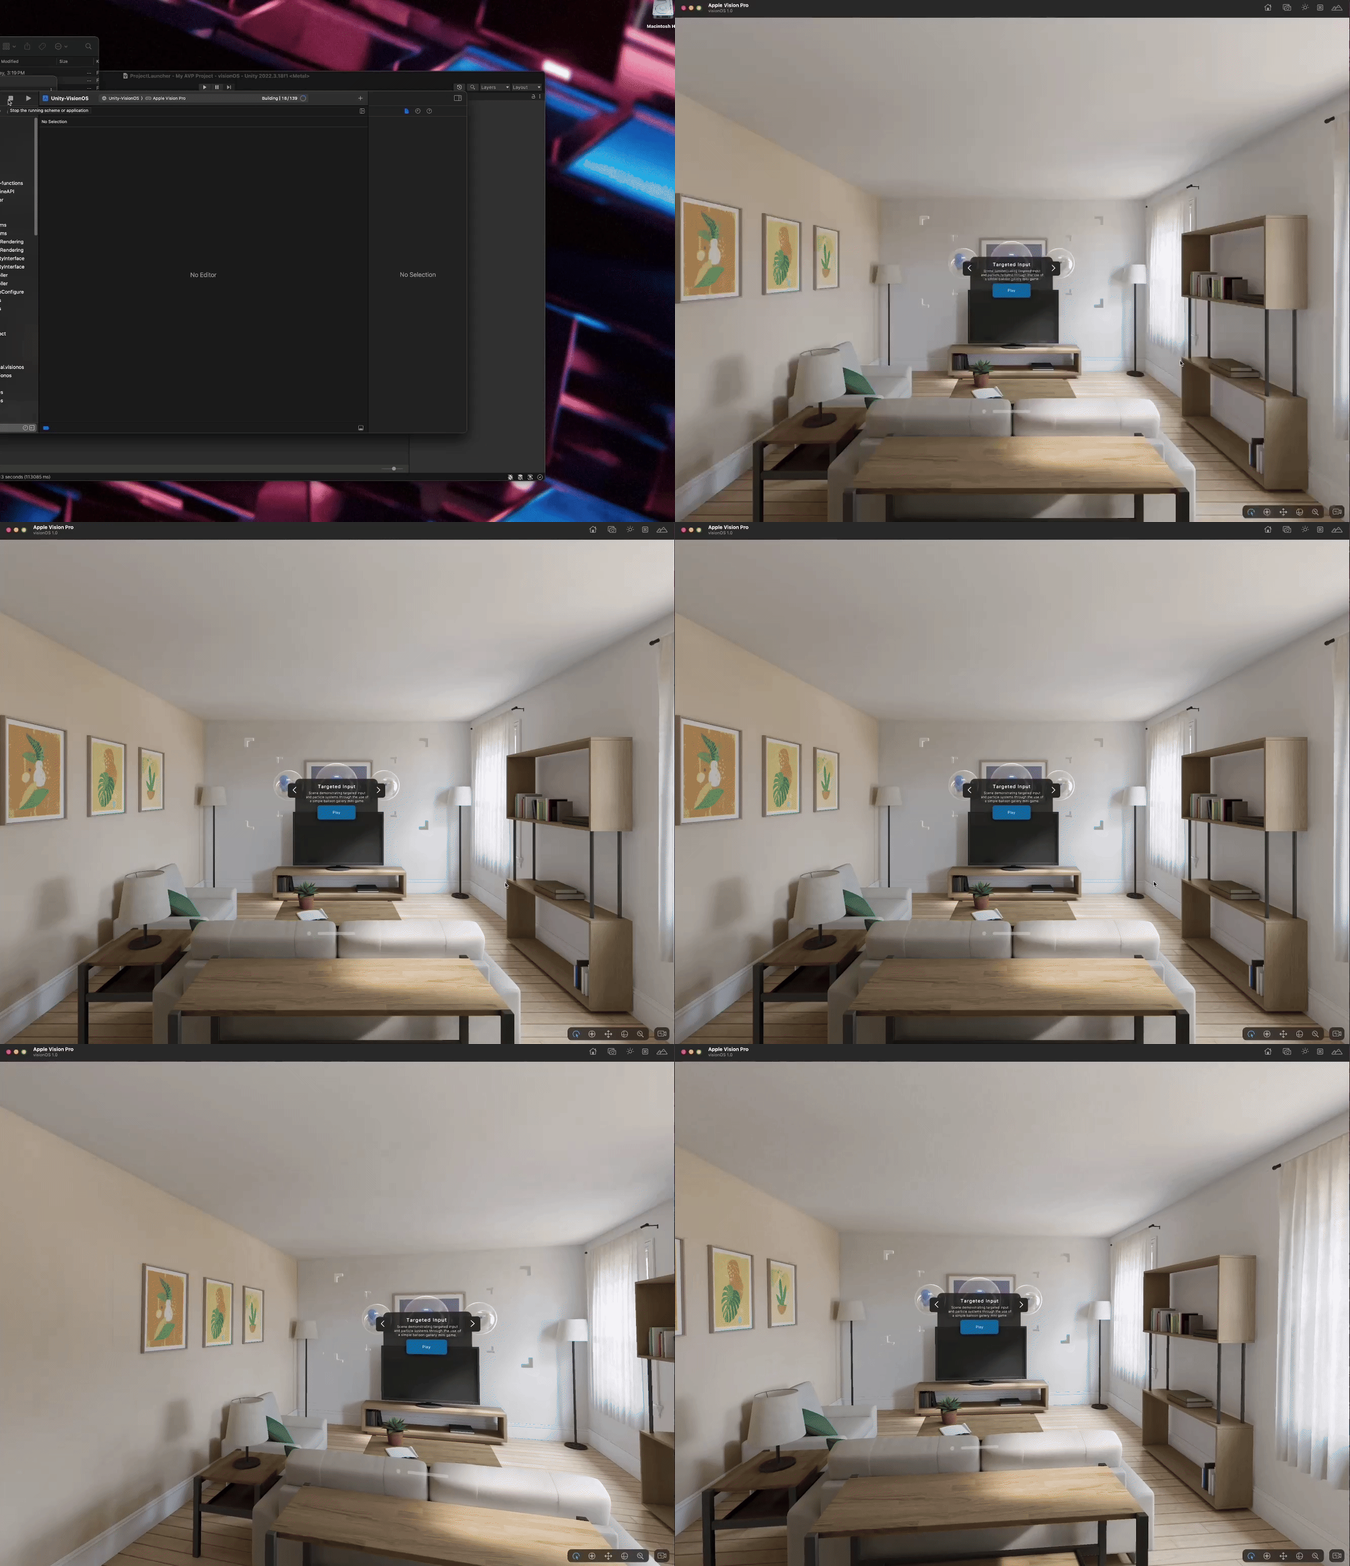
4. Select the Build button in Xcode to start the building process.
Xcode will now compile the project and launch it in the visionOS simulator.
Speed up development with the Play to Device feature
Once you built a project in Xcode, you can use the Play to Device feature to test changes in the simulator without the need to build a project every time. The Play to Device feature significantly speeds up your development process by allowing you to test your application in Play mode in the Unity Editor and see real-time changes in the Device Simulator window.
If you want to learn how to set it up, check out the PolySpatial documentation.
7. Next steps and further learning
If you’re interested in learning how to create more advanced visionOS applications in Unity, check out our on-demand training platform, where you’ll find a range of courses on visionOS development and other topics.
Additionally, you can download our Create virtual and mixed reality experiences in Unity e-book. Written by seasoned 3D artists and Unity developers, this comprehensive guide covers the tools, methodologies, and techniques essential for crafting immersive and interactive realities. From constructing environments to implementing intuitive interactions, you’ll get the tips and guidance you need to bring your VR and MR applications to life.
If you want to learn more about working with Unity’s XR Interaction Toolkit, watch the video tutorial below.
Thinking about optimizing your XR projects in Unity? Pick up tips and best practices from the Optimize your game performance for mobile, XR, and the web in Unity (Unity 6 edition) e-book and watch the video tutorial below.