Project setup processes
Tutorial
foundational
+0XP
5 mins
931
Unity Technologies
This is a guide through common processes you may need to set-up a Unity project to complete one of our tutorials.
Languages available:
1. Overview and Unity Hub version
This is a collection of common processes for project setup. You may be directed here from other learning experiences if you need to recap one of these processes.
Important: Before you begin to set up your Unity project, consider updating your Unity Hub to the latest general (non-beta) release.
If you are using a beta version of the Hub, you may find minor differences between the process guidance here and your experience.
2. Install a version of the Unity Editor from the Hub
The easiest way to install the Unity Editor is to use the Unity Hub. For instructions on how to install the Hub, refer to Install Unity and the Hub.
To install a new version of the Unity Editor using the Unity Hub, follow these instructions:
1. Open the Unity Hub and select the Installs tab.
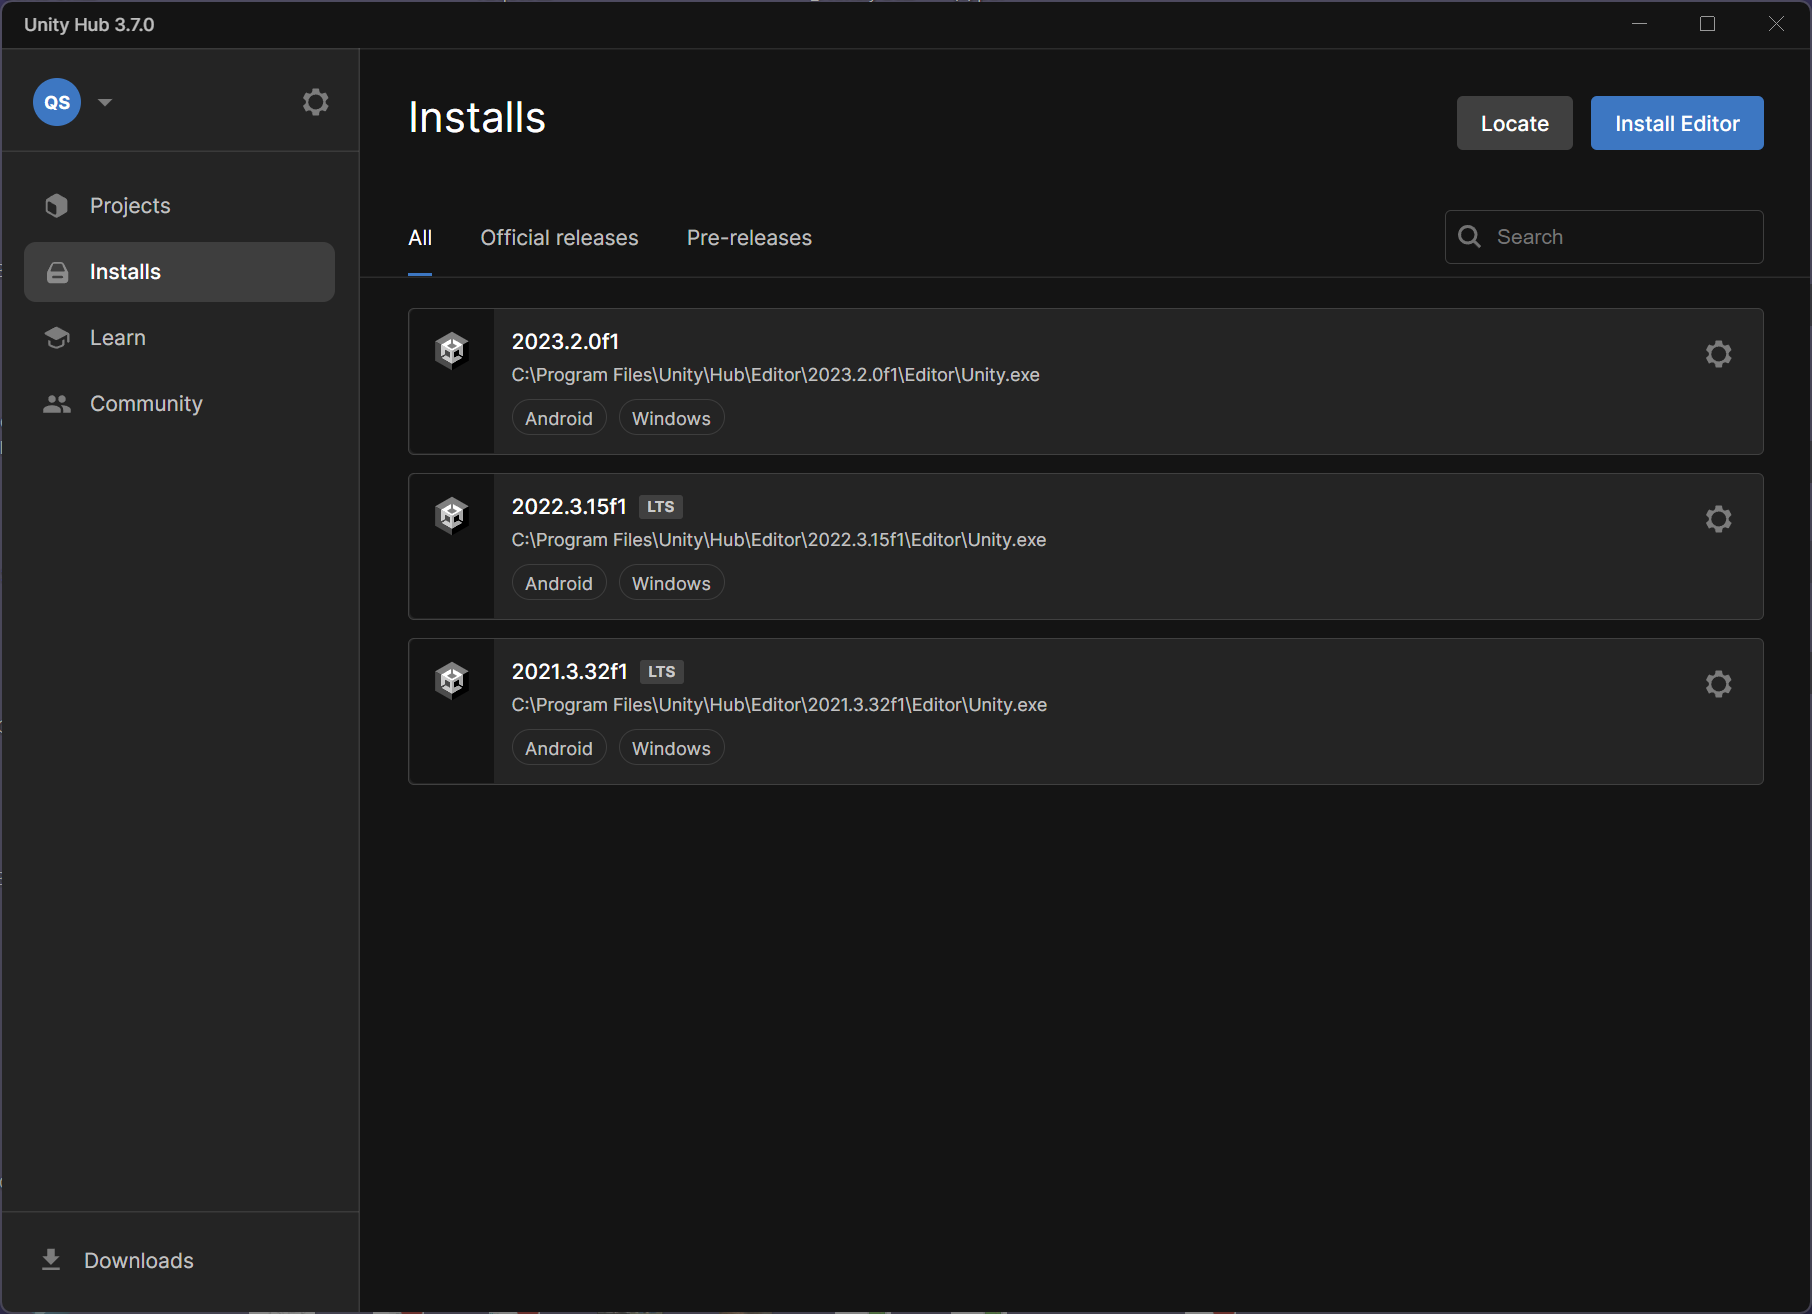
The Installs tab shows you all of the Unity versions that you already have installed on this computer.
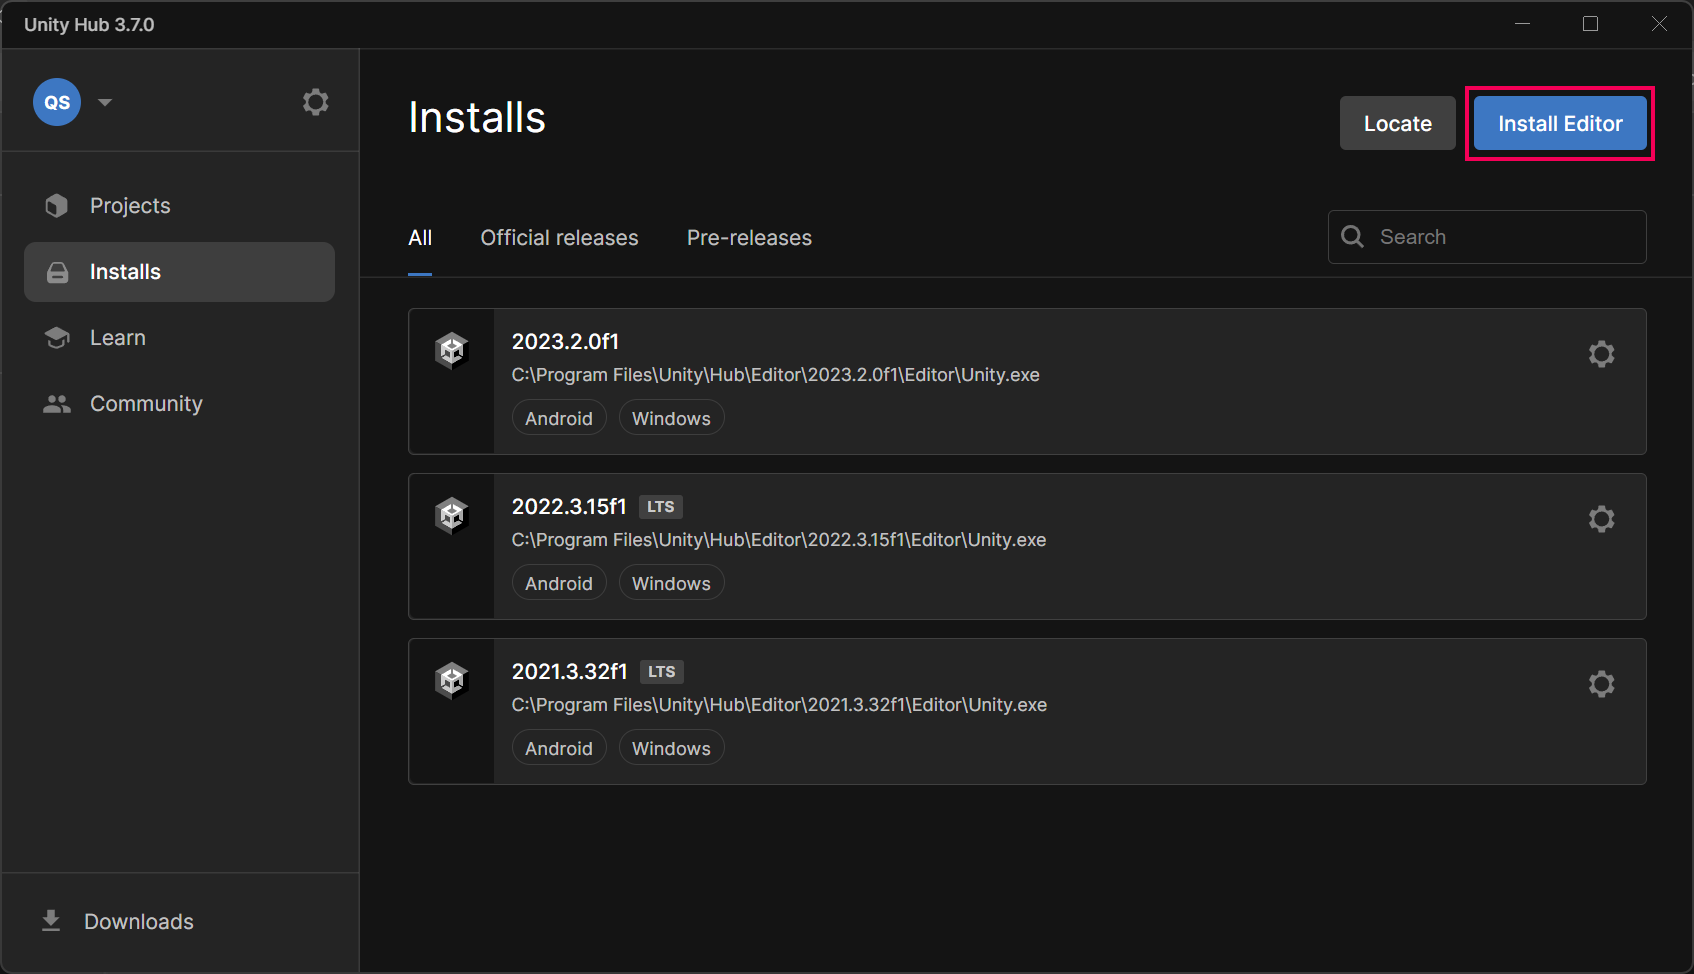
2. To install a new version, select Install Editor.
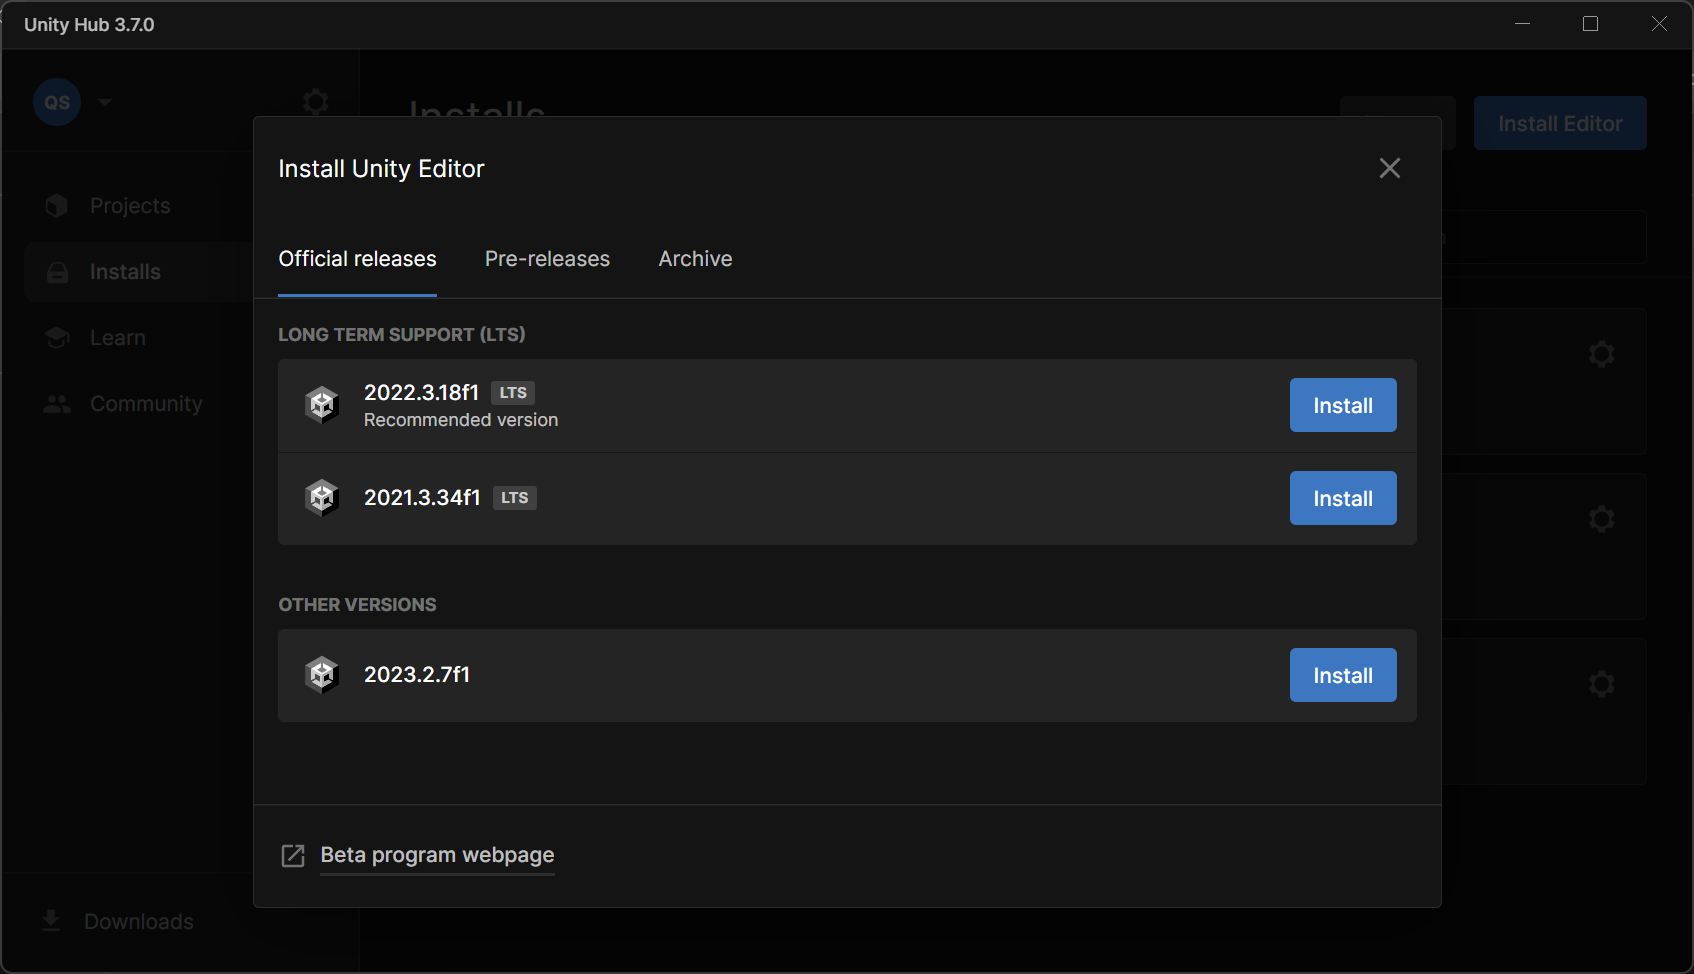
3. In most cases, you'll want to select the most recent long-term support (LTS) version of the editor, as listed on the Official releases list. Find the version you need and select Install.
Next, the Add modules window appears, listing add-on modules for the Unity version you selected.
4. Select any modules that you want to add. Categories include the following:
- Dev tools, such as Microsoft Visual Studio Community, for code editing in Unity.
- Build support, which allows the experiences you create to be played on different platforms (WebGL, Windows, Mac and Linux).
- Language packs.
- Documentation, an offline version of the Unity Manual for your chosen Unity version.
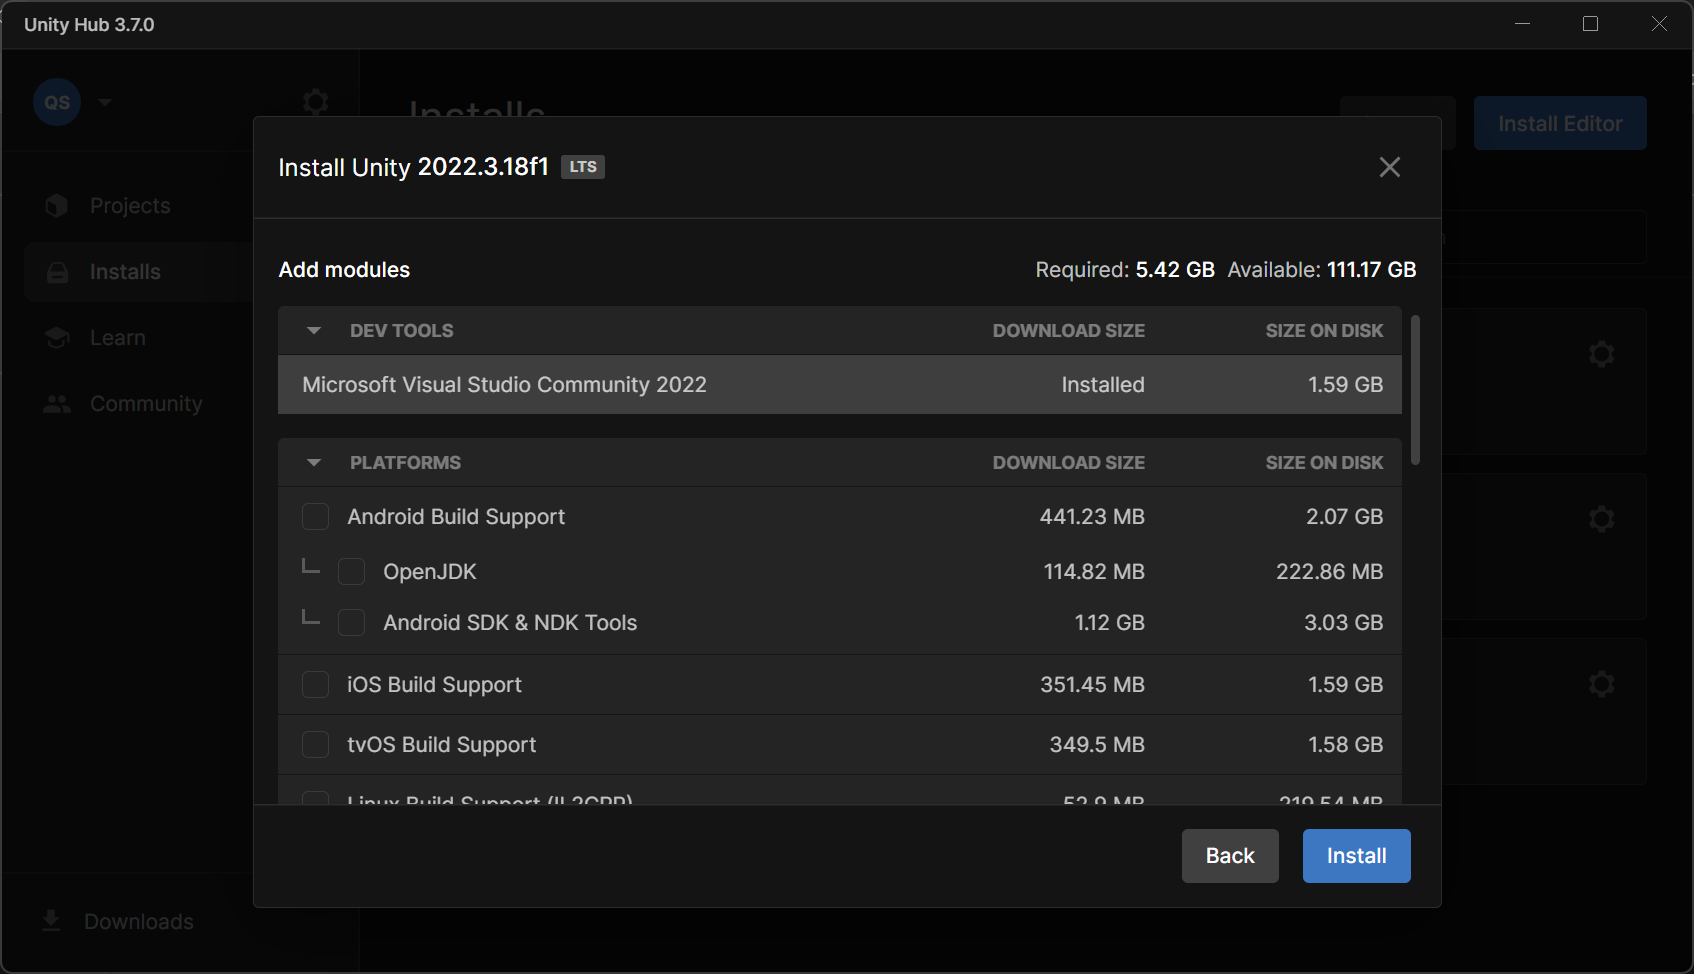
5. Select Install or Continue to complete the installation.
You might be prompted to accept additional terms and conditions for certain modules.
When you’ve completed this process, return to your learning experience.
Troubleshoot your download
If you see any errors while the new version of Unity is downloading, consider the following tips and workarounds:
- Do you have enough memory and disk space? Check the minimum system requirements for the Unity version you are installing to make sure your computer is ready. Locate the dropdown menu in the upper-left corner of the “System requirements” page to find the right Unity version.
- Disable the dev tools. If you aren’t planning to do any scripting with this version of the Editor, disable the option to download “Microsoft Visual Studio Community” tools (or a similar option). This will save disk space and avoid possible errors.
- Check the release information page for this version. Start on the page for version 2022.3.0, and use the dropdown at the top of the page to select the version you are installing. Look for any known issues that might be causing your problem. If absolutely necessary, you can use these pages to download a version of the Unity Editor without using the Hub.
- Contact Unity Customer Support for more help. Be sure to sign in on the Support pages. Browse articles, consult the community, or select Submit a request to explain your situation to a Unity expert.
3. Add modules to an installed Unity version
You can add modules to a Unity version after you have installed it.
Note: Make sure you save and close any open Unity projects before installing new modules for a Unity version that you are using.
To add modules to any Unity version you have installed, follow these instructions:
1. Open the Unity Hub and select the Installs tab.
2. Select Settings (⛭) menu on the tile of the version you want to manage, and select Add modules.
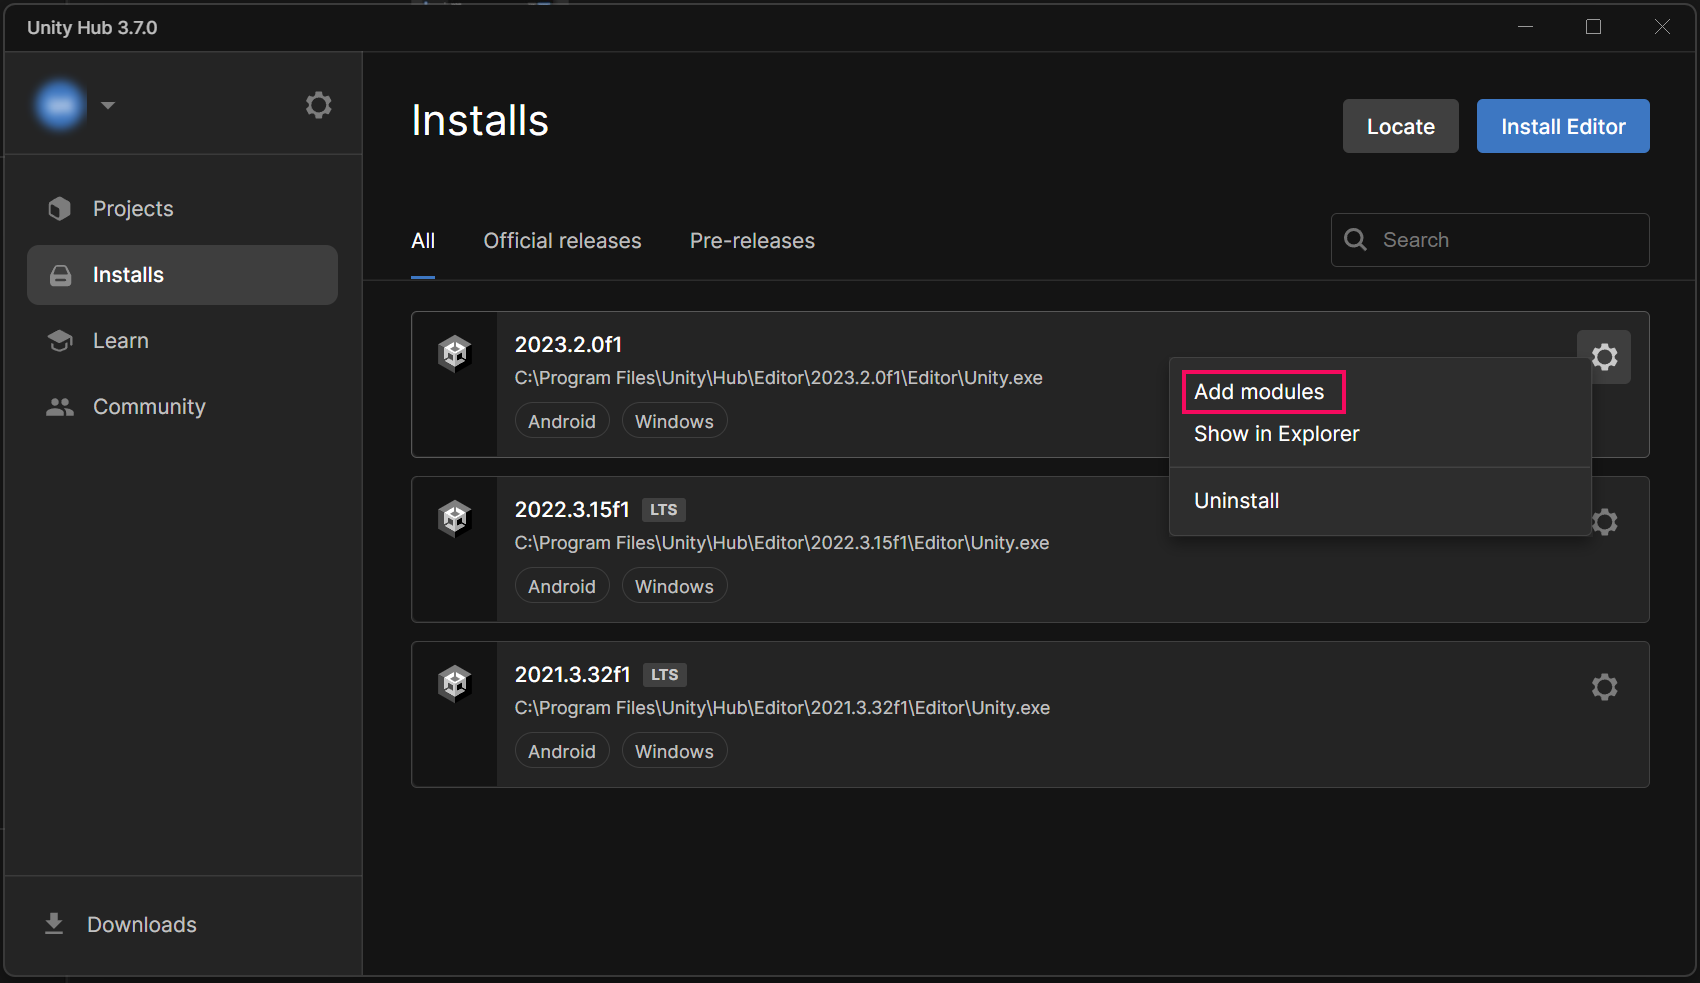
3. Select any modules that you want to add. Categories include the following:
- Dev tools, such as Microsoft Visual Studio Community, for code editing in Unity.
- Build support, which allows the experiences you create to be played on different platforms (WebGL, Windows, Mac and Linux).
- Language packs.
- Documentation, an offline version of the Unity Manual for your chosen Unity version.
4. Select Install or Continue to complete the installation.
You might be prompted to accept additional terms and conditions for certain modules.
When you’ve completed this process, return to your learning experience.
4. Add a project to the Unity Hub
You might load Unity projects onto your computer from .zip files, version control software, or the Asset Store. Follow these instructions to add a project from your computer to the Unity Hub so that it is listed on the Projects tab with your other projects.
Important: If the file path to a project on your computer is more than 260 characters long, or if there are spaces in that file path, you might encounter errors when you initially open your project from Unity Hub. To avoid encountering these errors, we recommend that you do one or more of the following:
- Check that the folder you are organizing your Unity projects in isn’t at the end of a long file path.
- Remove any spaces from the folder names in the file path to your Unity projects.
- Name your project without spaces. You can use underscores (_) if this is helpful.
To add a Unity project to the Unity Hub, follow these instructions:
1. In the Projects tab, open the Add dropdown and select Add project from disk.
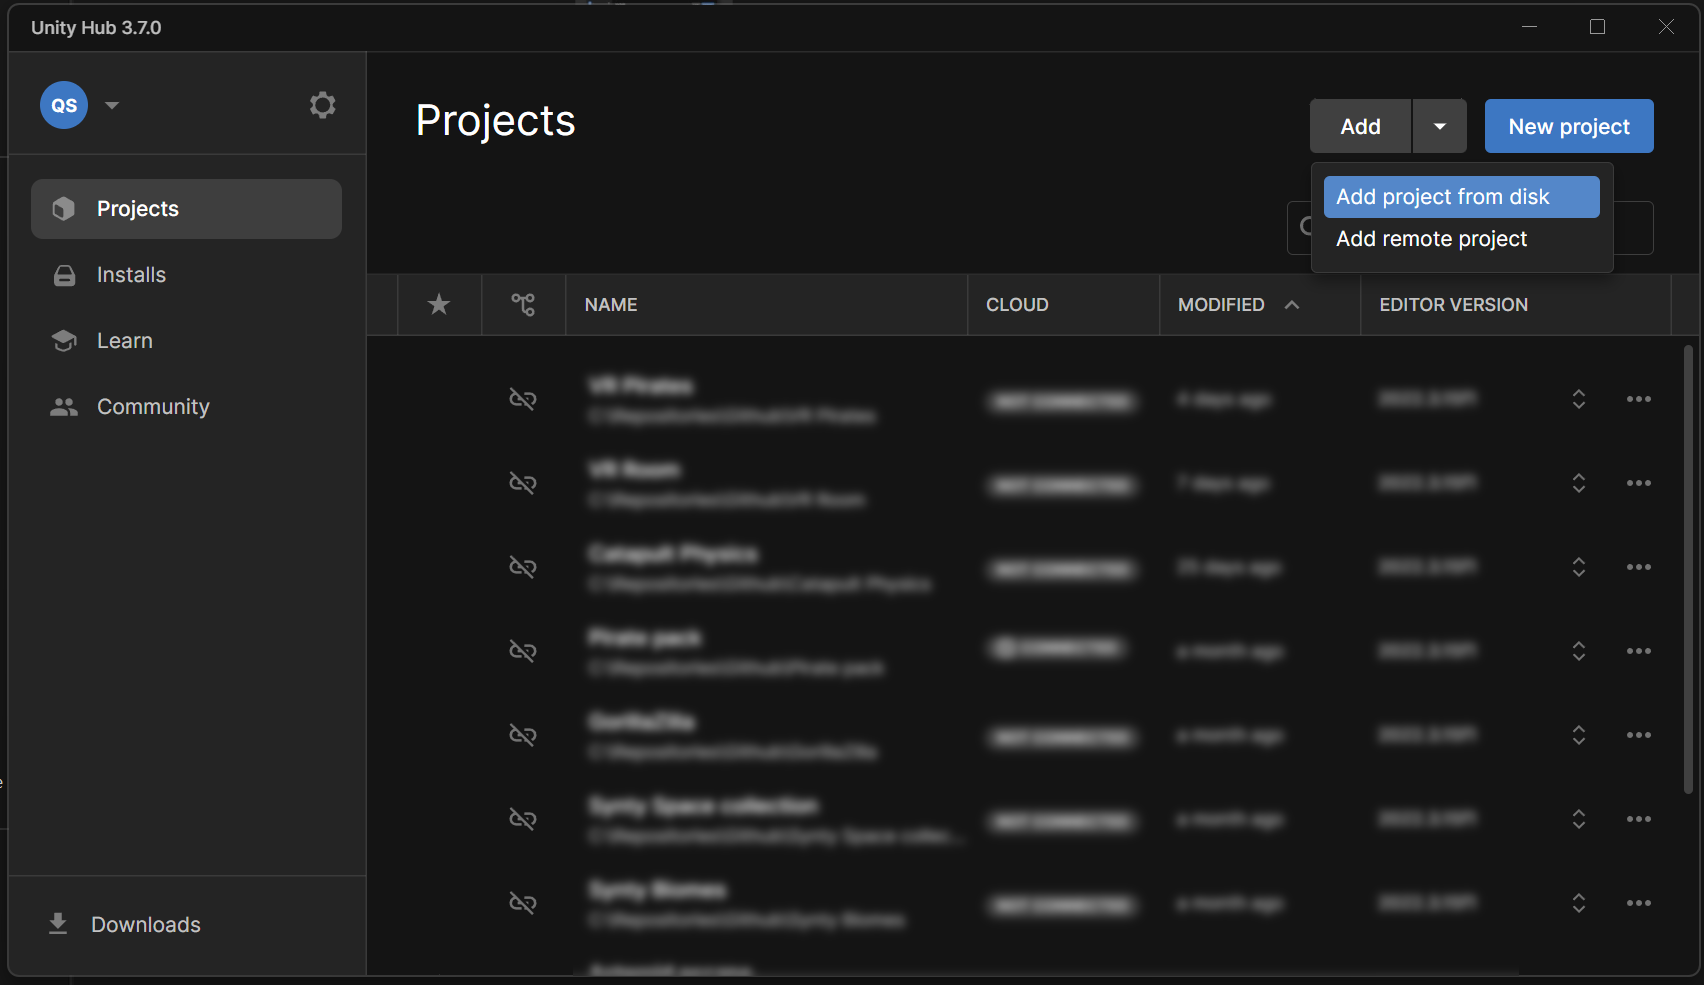
2. Navigate to the root folder for the Unity project and then Select Folder.
The project will appear in the list available on your Projects tab.
3. If the project uses a Unity version that you don’t have installed, you’ll see a warning in the Editor Version column.
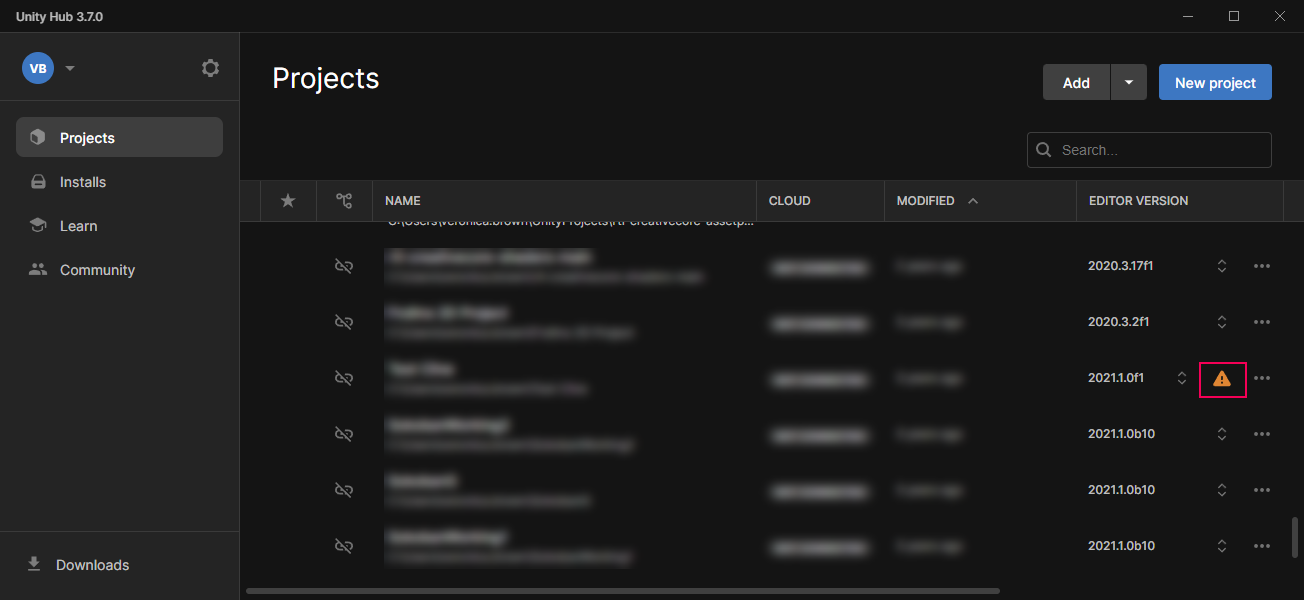
To fix this, you can do one of the following:
- Go to the Unity Download Archive and install the missing Unity version.
- Select Choose another Editor version and open the project using a newer Unity version that you have installed previously.
Note: When you open the project, you'll be prompted to confirm that you want to upgrade the project to a different Unity version.
Important: Don’t open any Unity project with an older Unity version — this is known as downgrading.
When you’ve completed this process, return to your learning experience.
5. Create a new Unity project
To create a new Unity project, follow these instructions:
1. Open the Unity Hub.
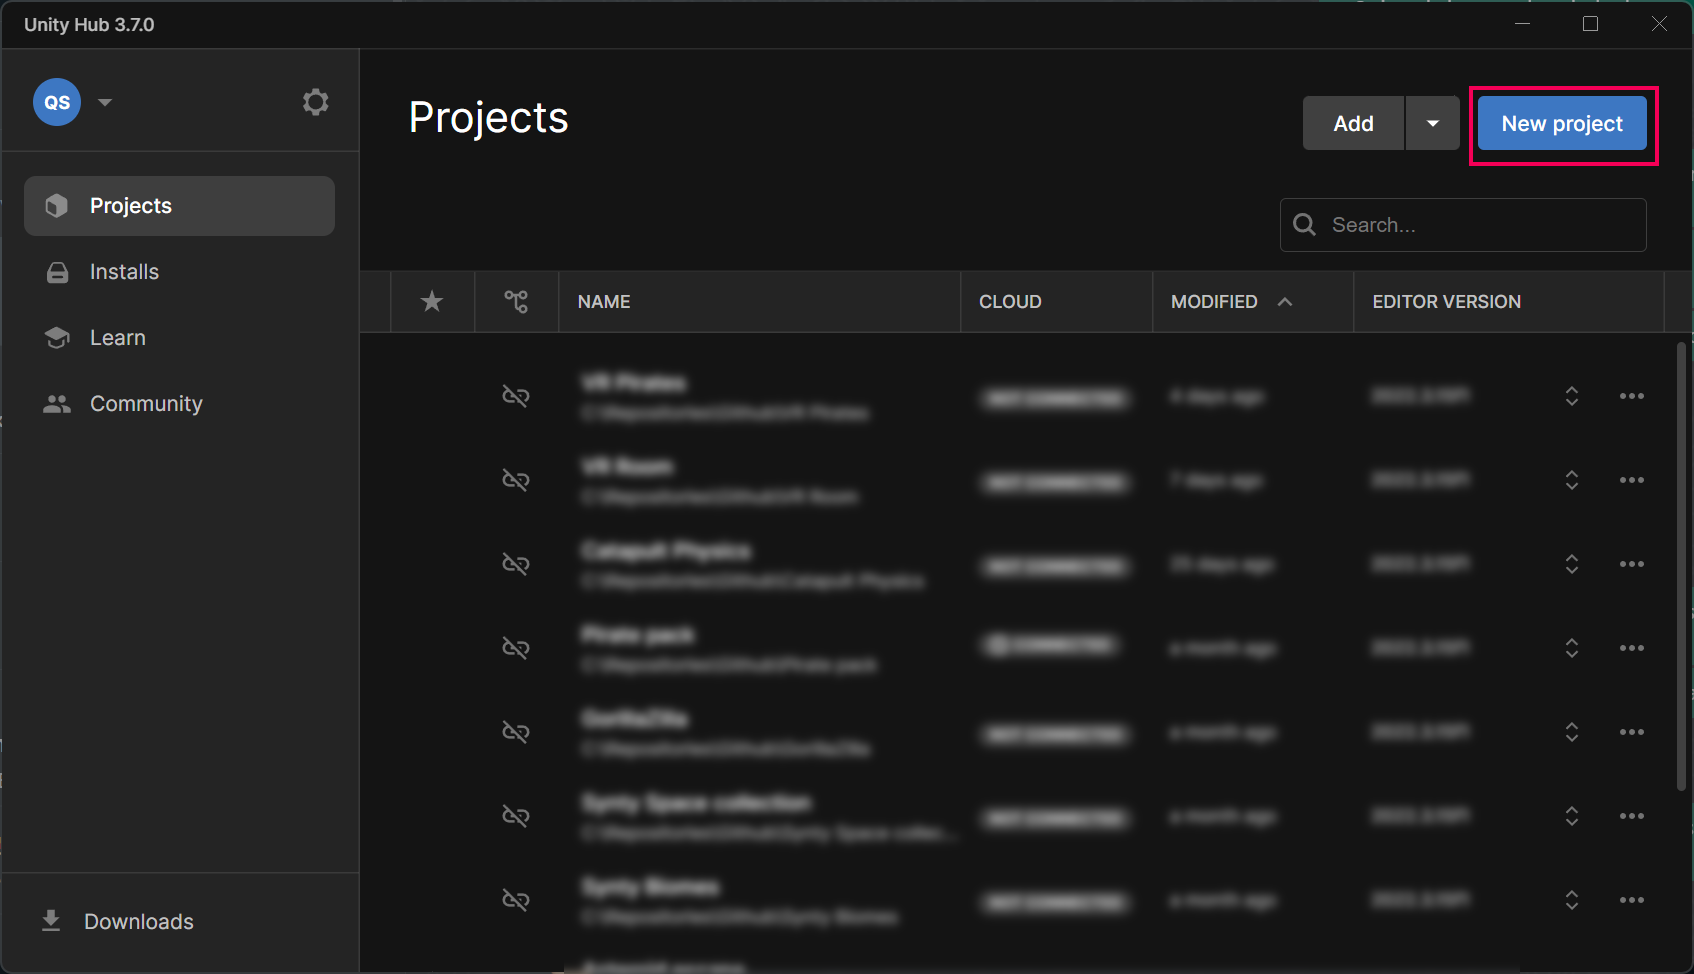
2. In the Projects tab, select New project.
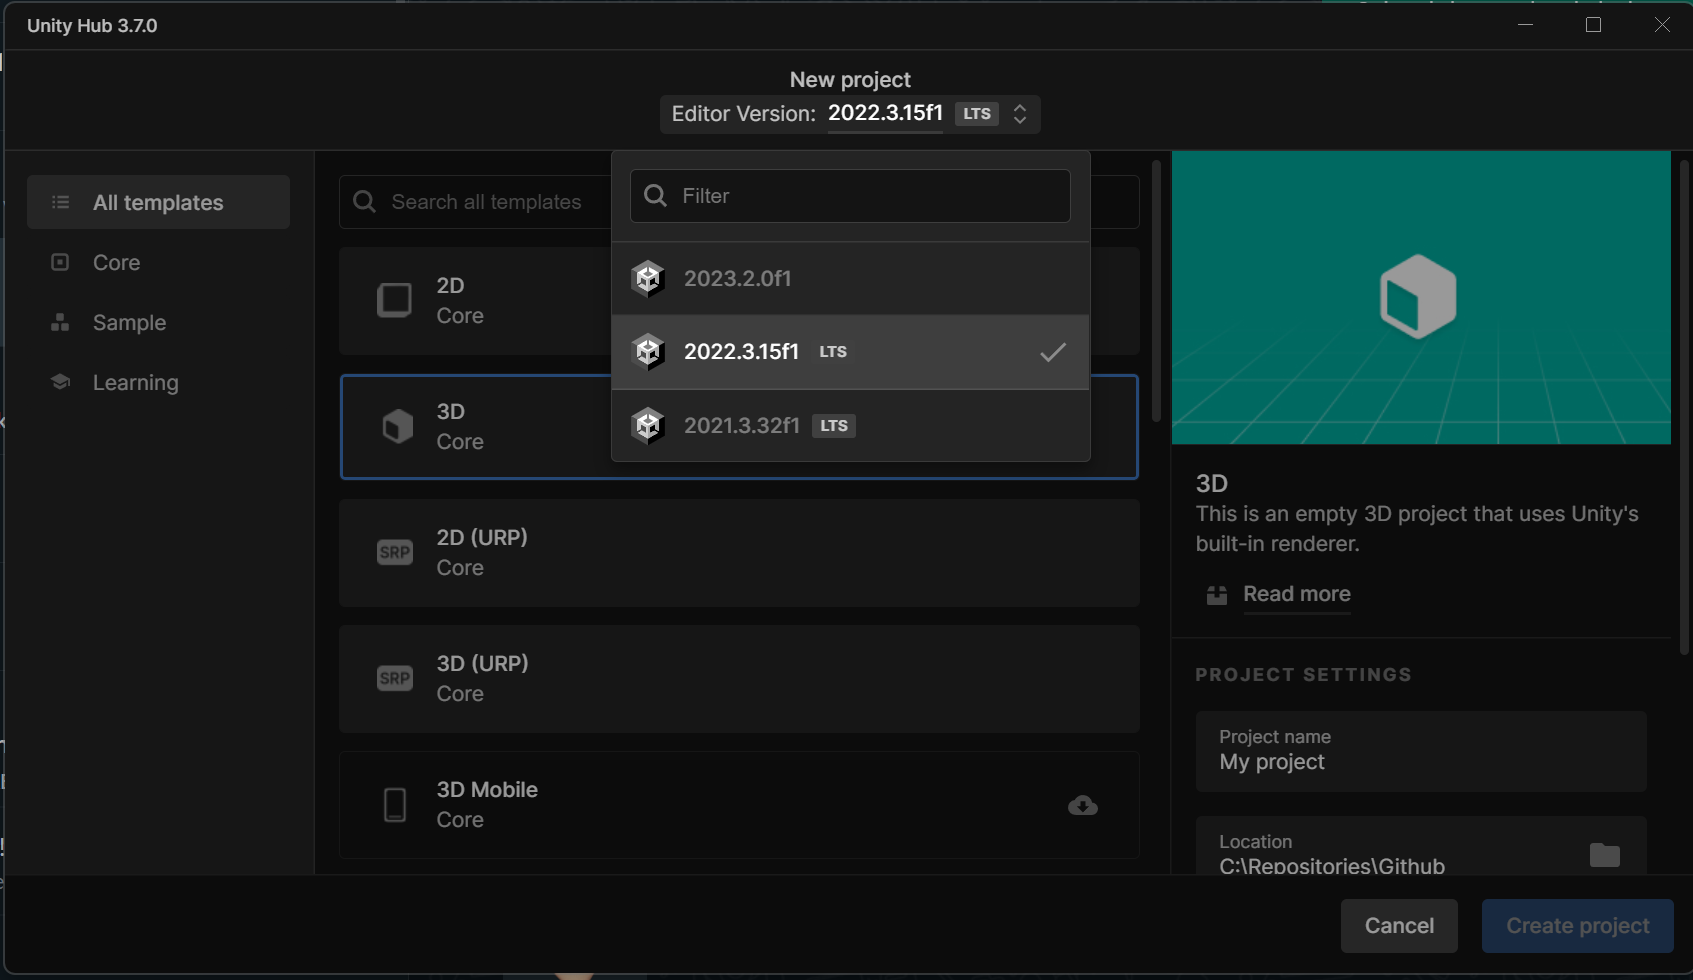
3. Select the Unity version you’d like to use with the Editor Version dropdown.
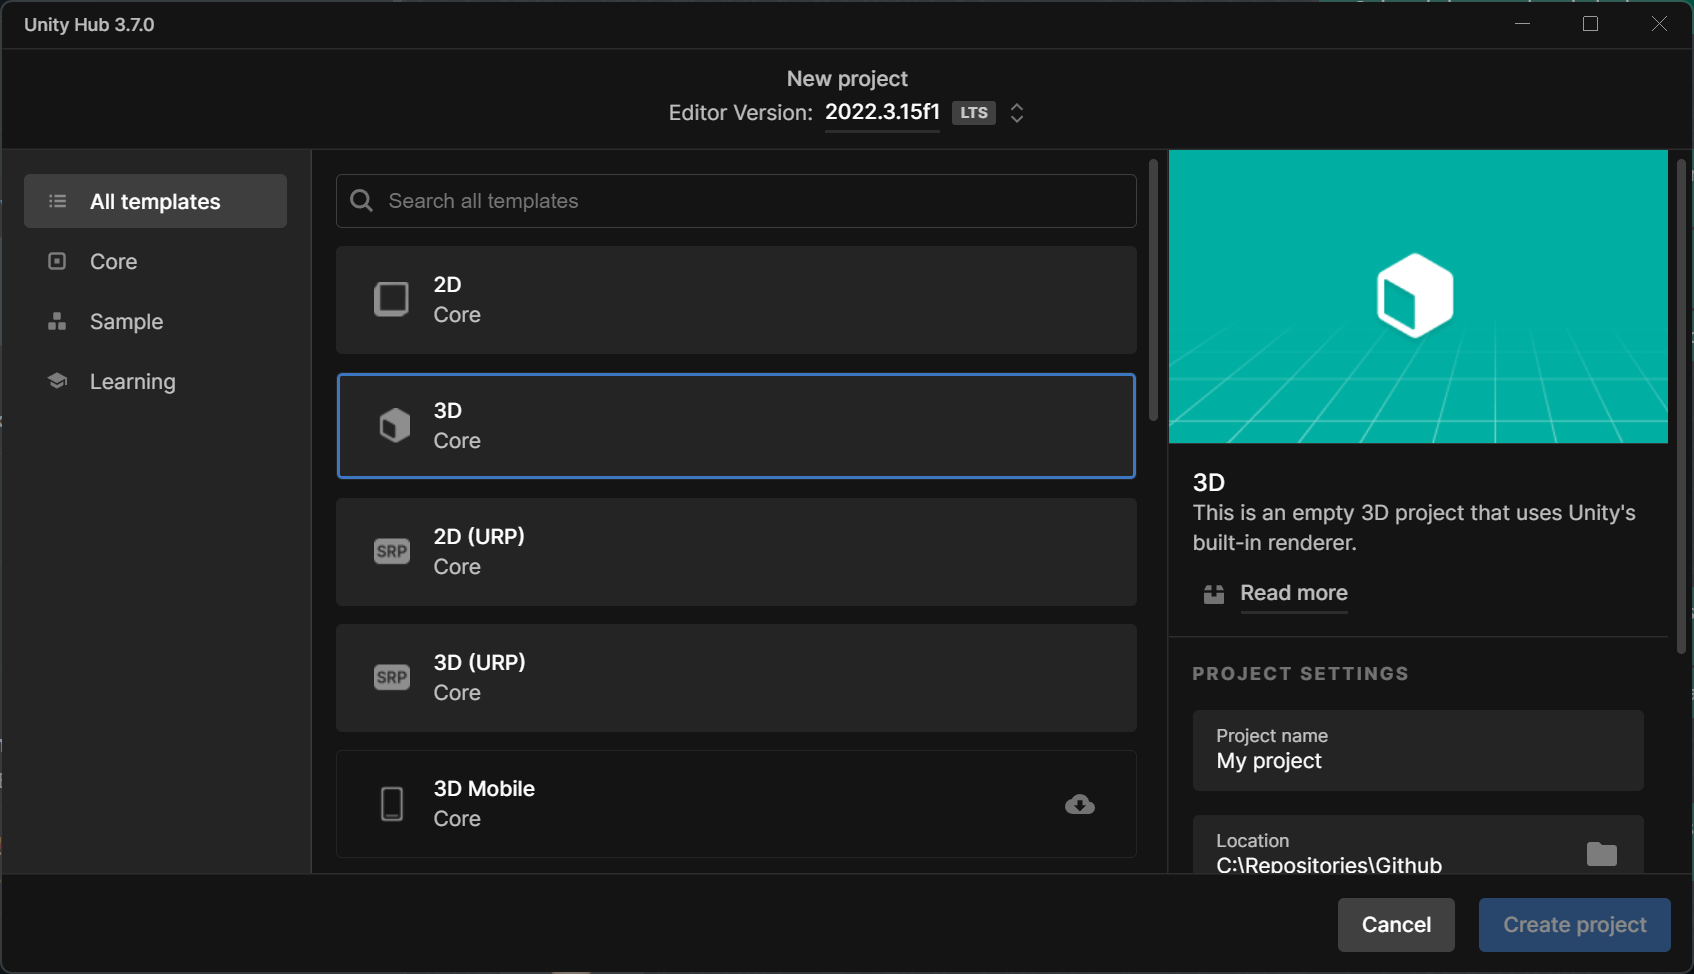
4. Select the template that you want to use.
In most Learn tutorials, we'll instruct you on the right template to choose for your learning experience.
If you see the download icon (cloud with a down arrow), you’ll need to download the template or update it before you can use it.
5. Name your project and set the location for saving the project on your computer.
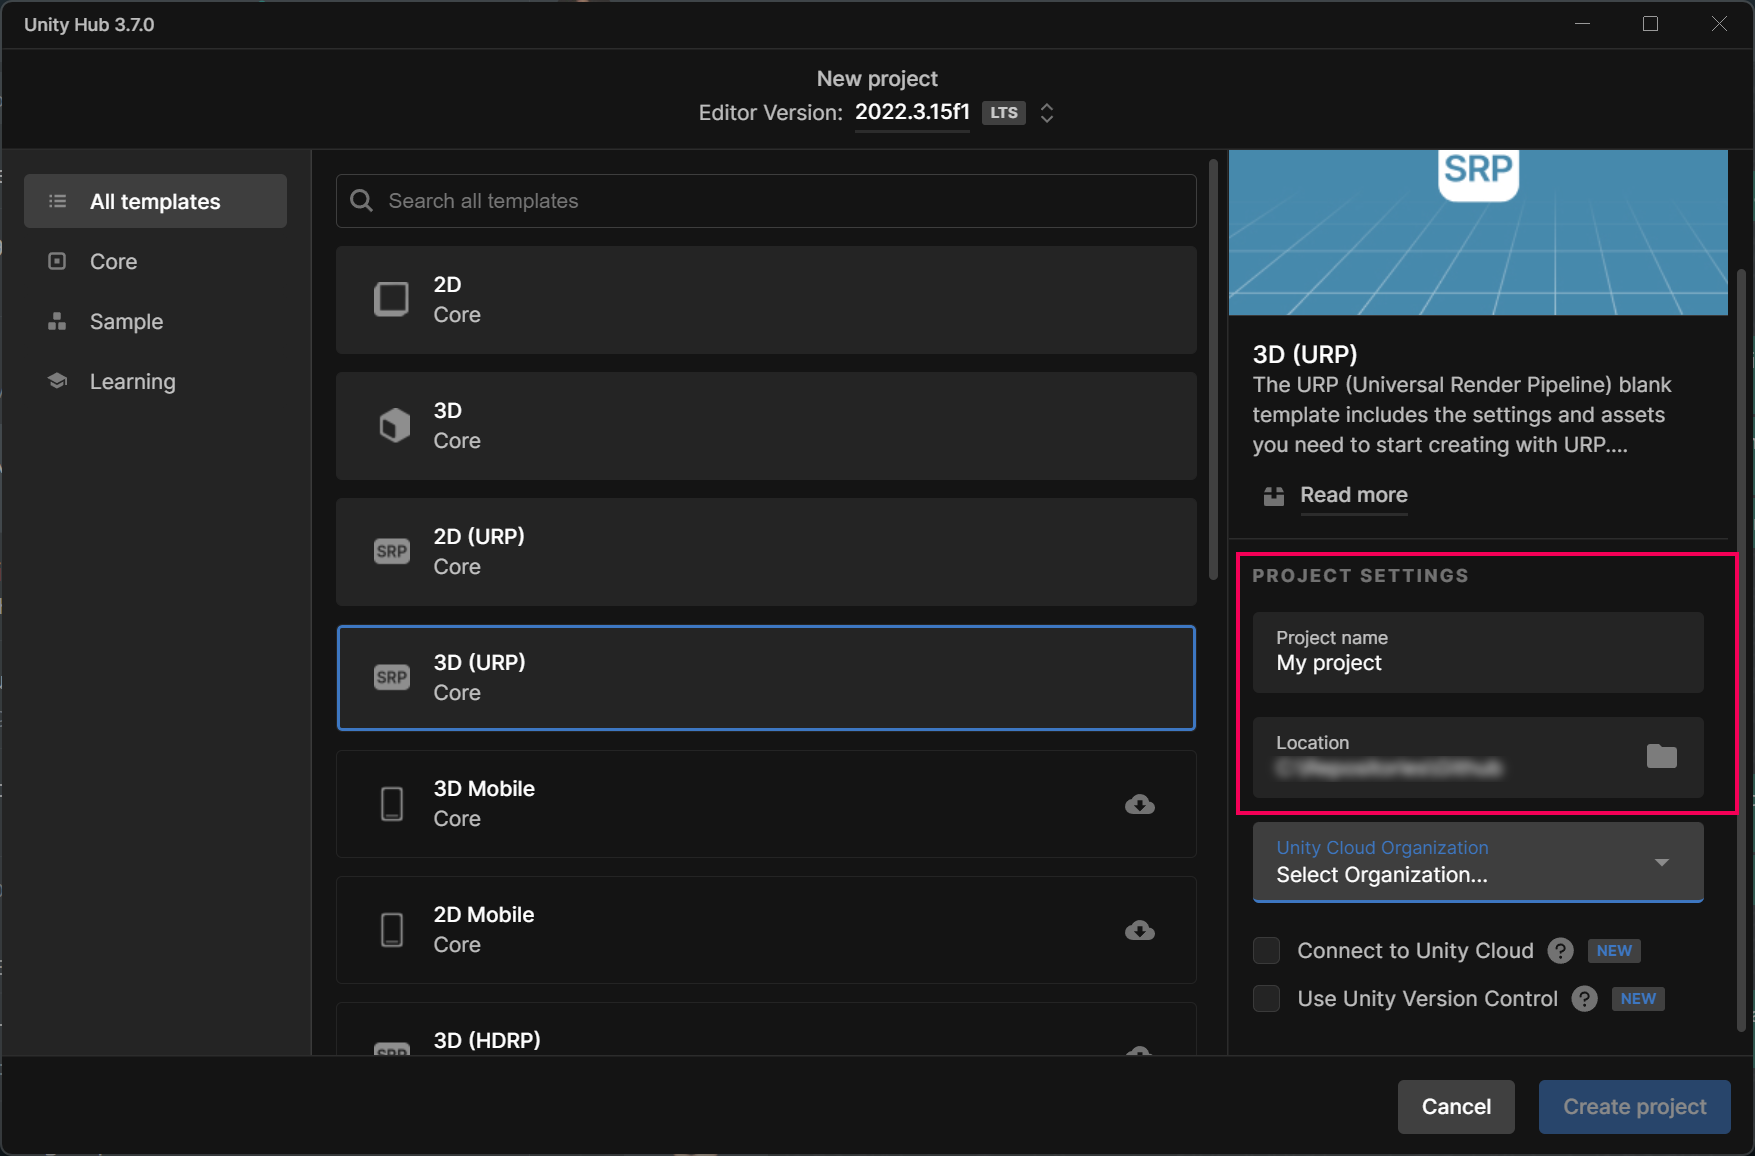
6. Select the organization the project should be associated with.
Organizations are created and managed in your Unity Account Dashboard. You can create your own organization or be assigned to an existing one by an organization administrator.
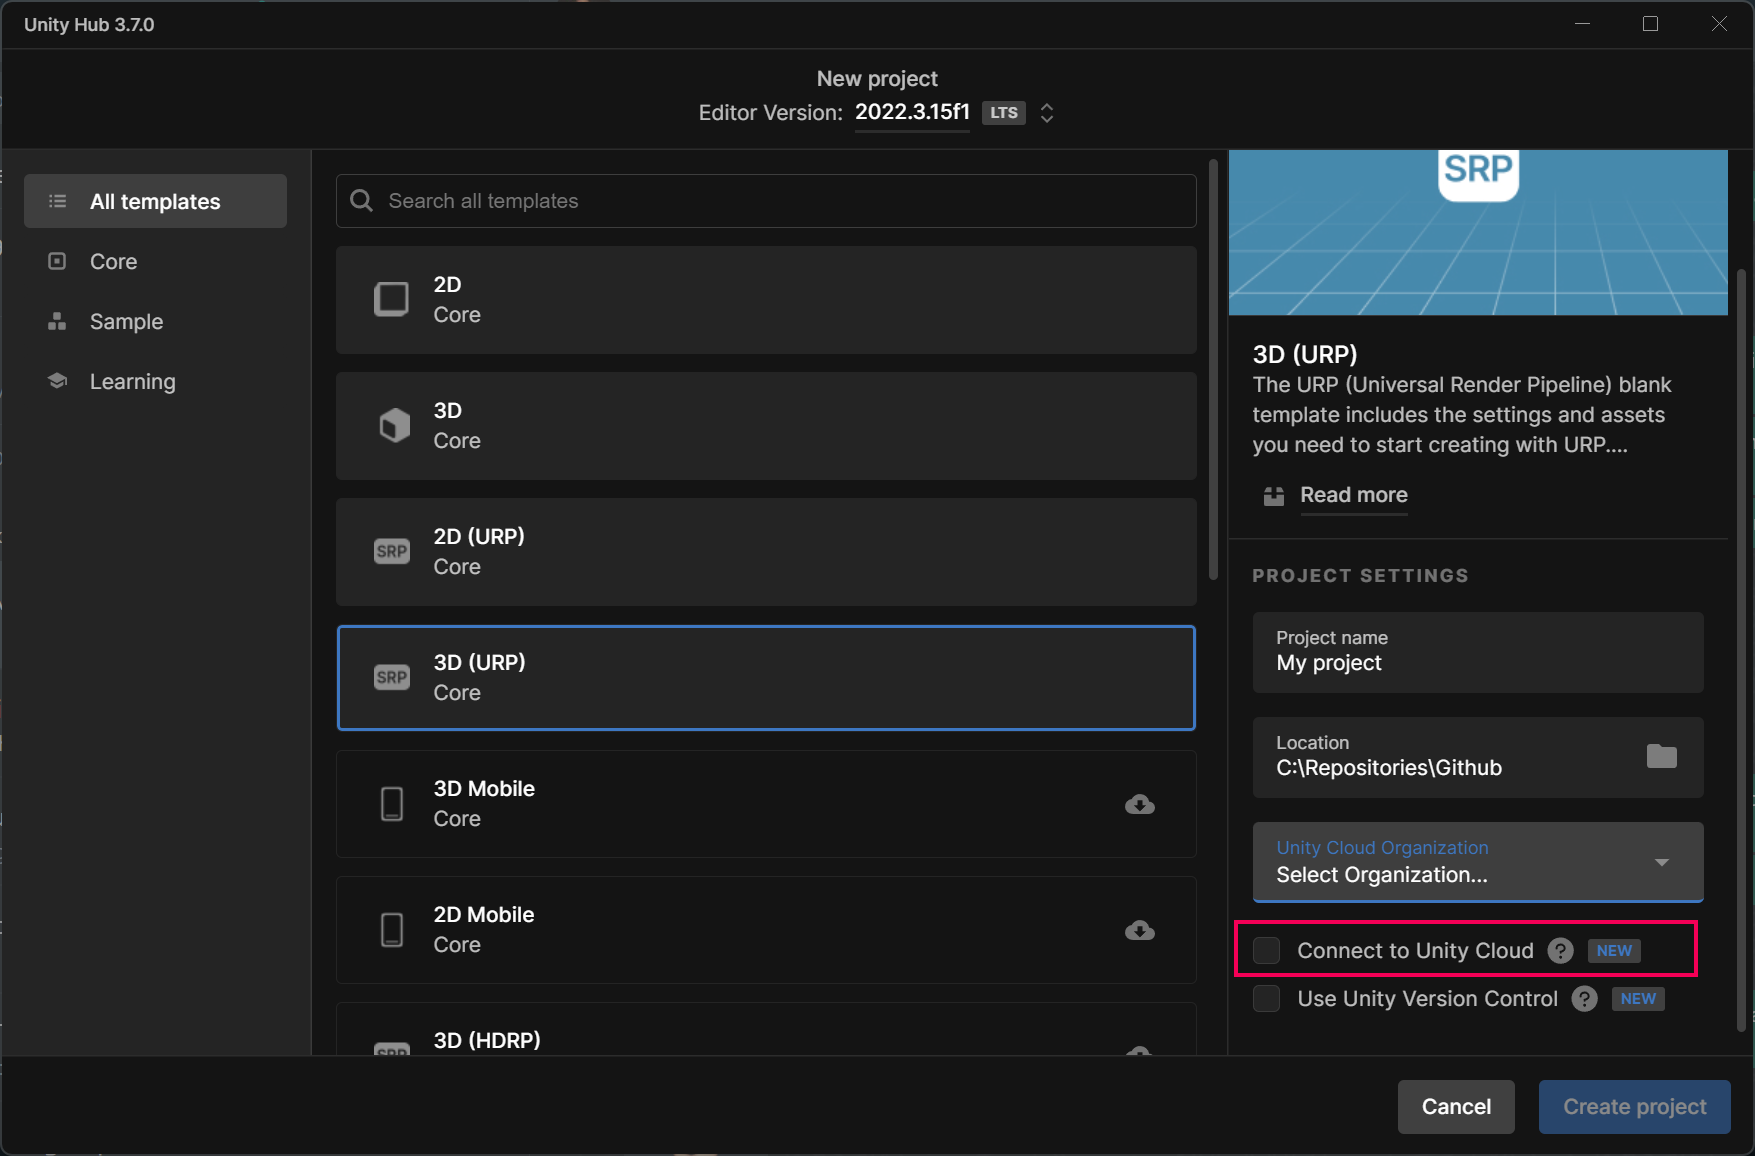
7. Select whether or not the project should be connected to the Unity Cloud services.
Unity Cloud is an ecosystem of products and services that makes work on games and real-time 3D experiences more creator-focused, accessible, and connected.
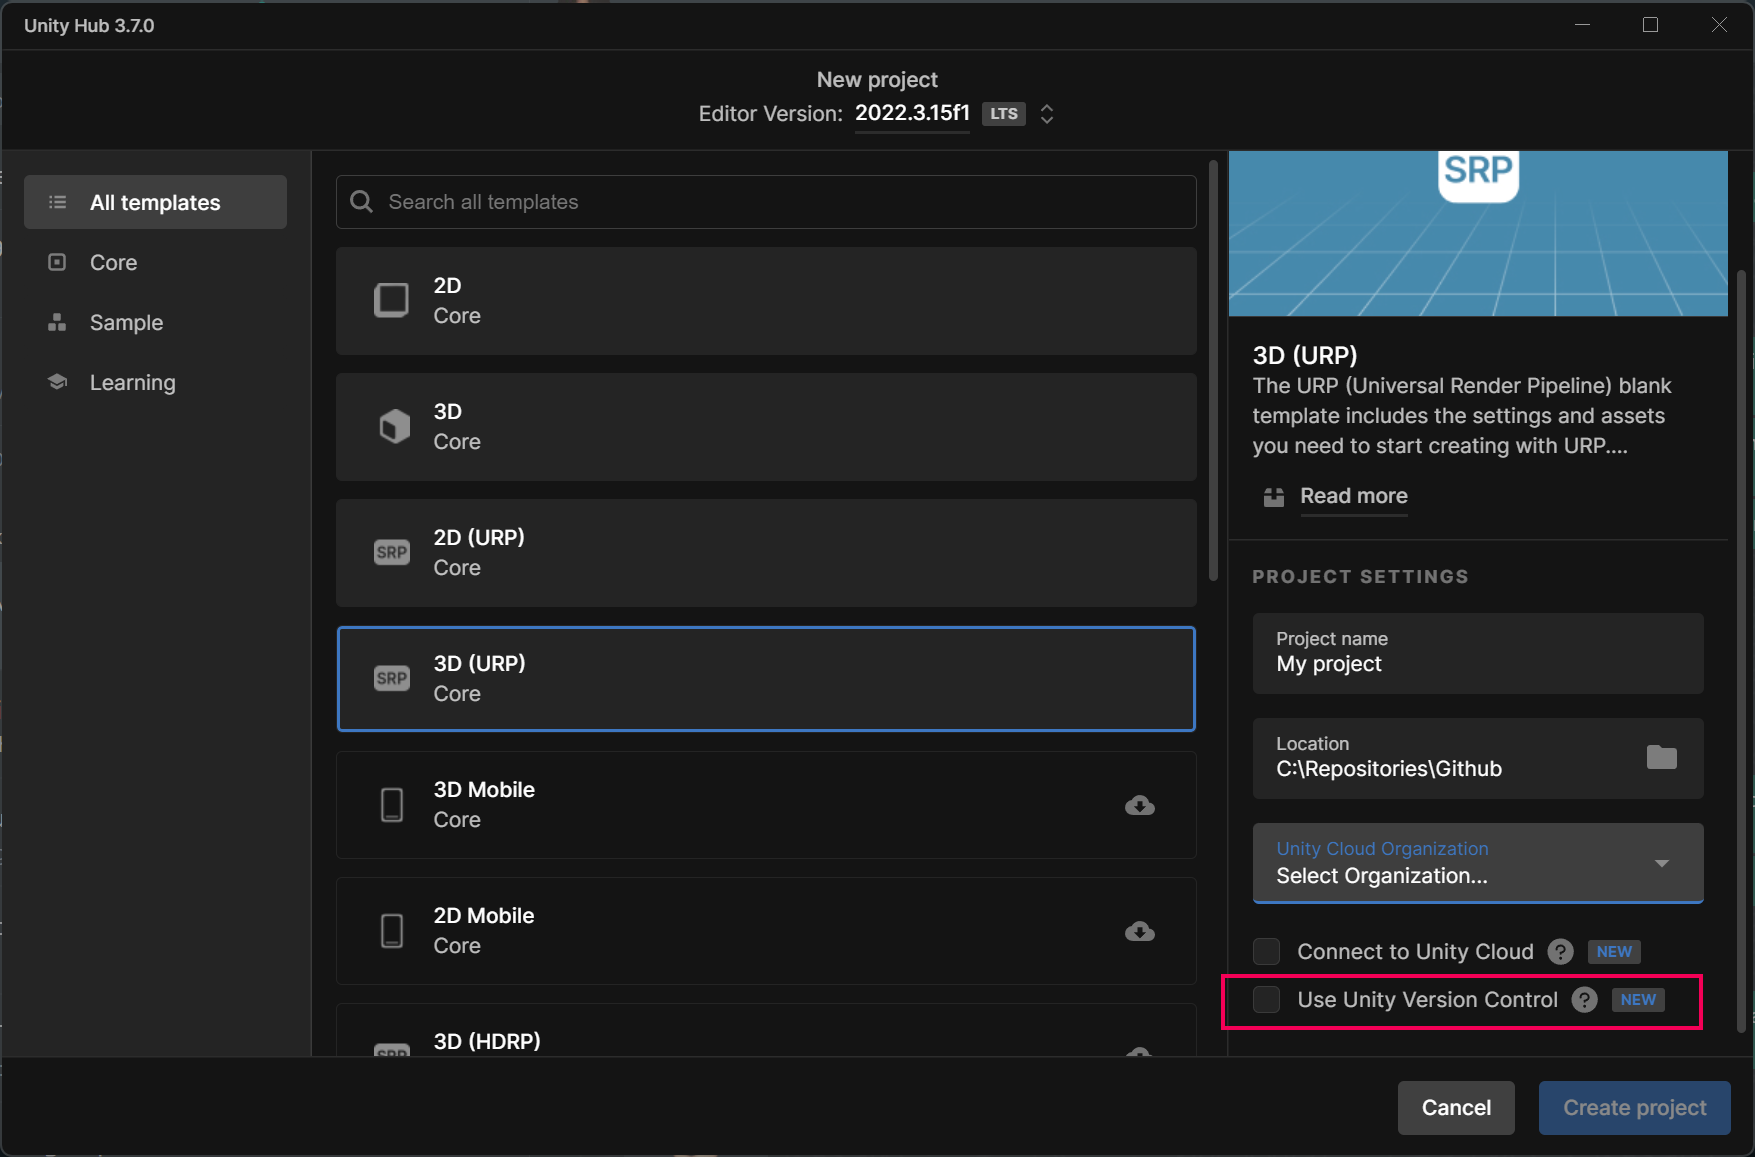
8. Select whether or not Unity Version Control should be used for the project. Unity Version Control allows you to collaborate remotely on the same project with up to three people on the Unity Personal plan.
9. Select Create project.
After the Unity Hub downloads and installs all the files, your project will open in the Unity Editor.
When you’ve completed this process, return to your learning experience.
Default scene
Depending on the template you select, you might see sample content. If you don’t want to use this content, you can create a new scene and select from different scene templates; for example, the Basic URP option that contains only a Directional Light and Main Camera.
For instructions on creating a new scene, continue to the step below.
6. Create a new scene
Follow these instructions to create a new scene in any project:
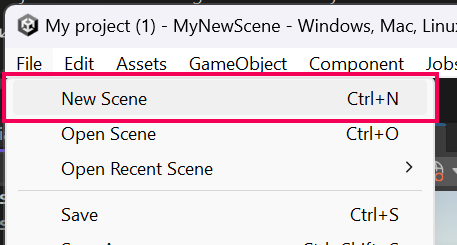
1. In the Unity Editor main menu, go to File > New Scene.
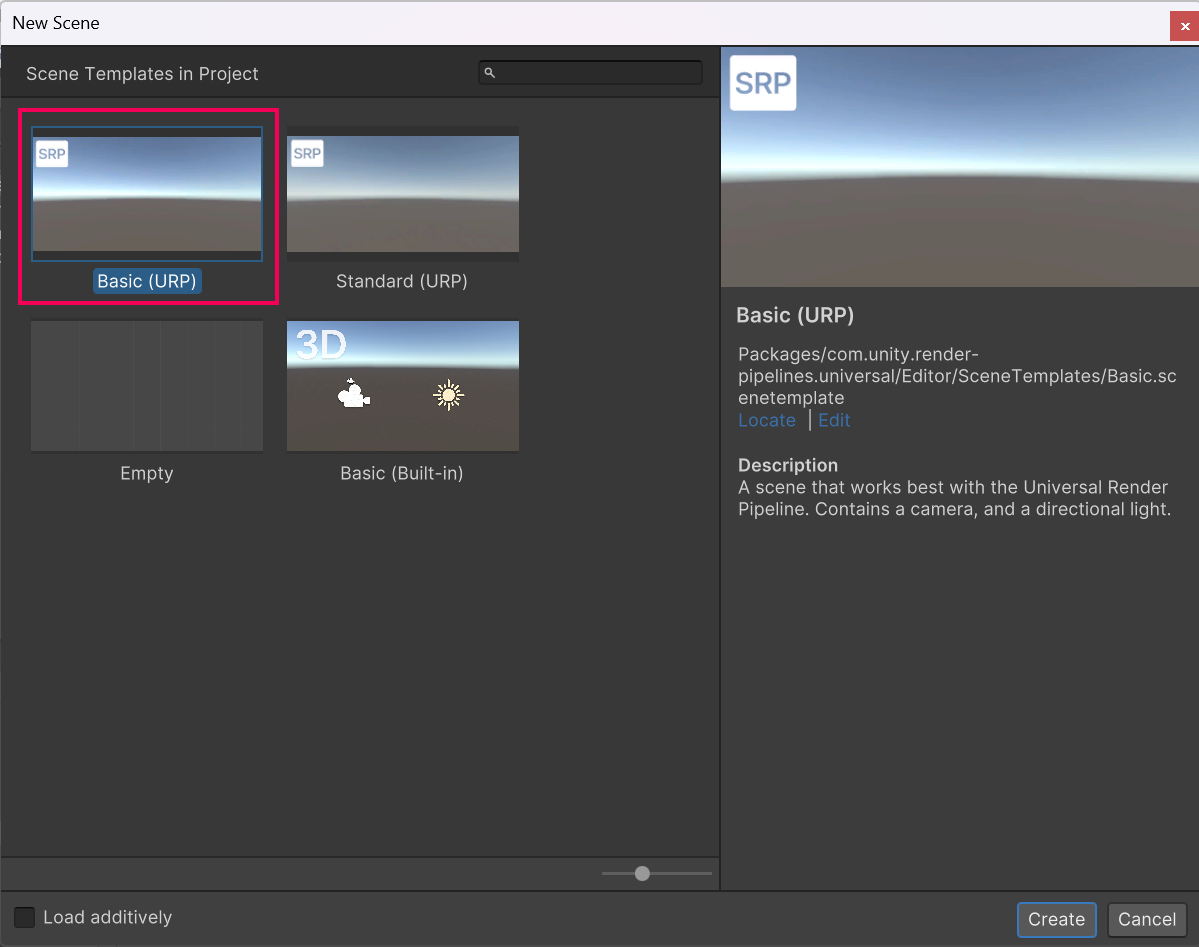
2. Select your preferred scene template.
The available scene templates will depend on the project template you chose. If you are unsure which one to use, the Basic (URP) or Basic (HDRP) scene templates are probably the best choice. In the image below, you can see the scene templates that are available in the 3D (URP) project template.
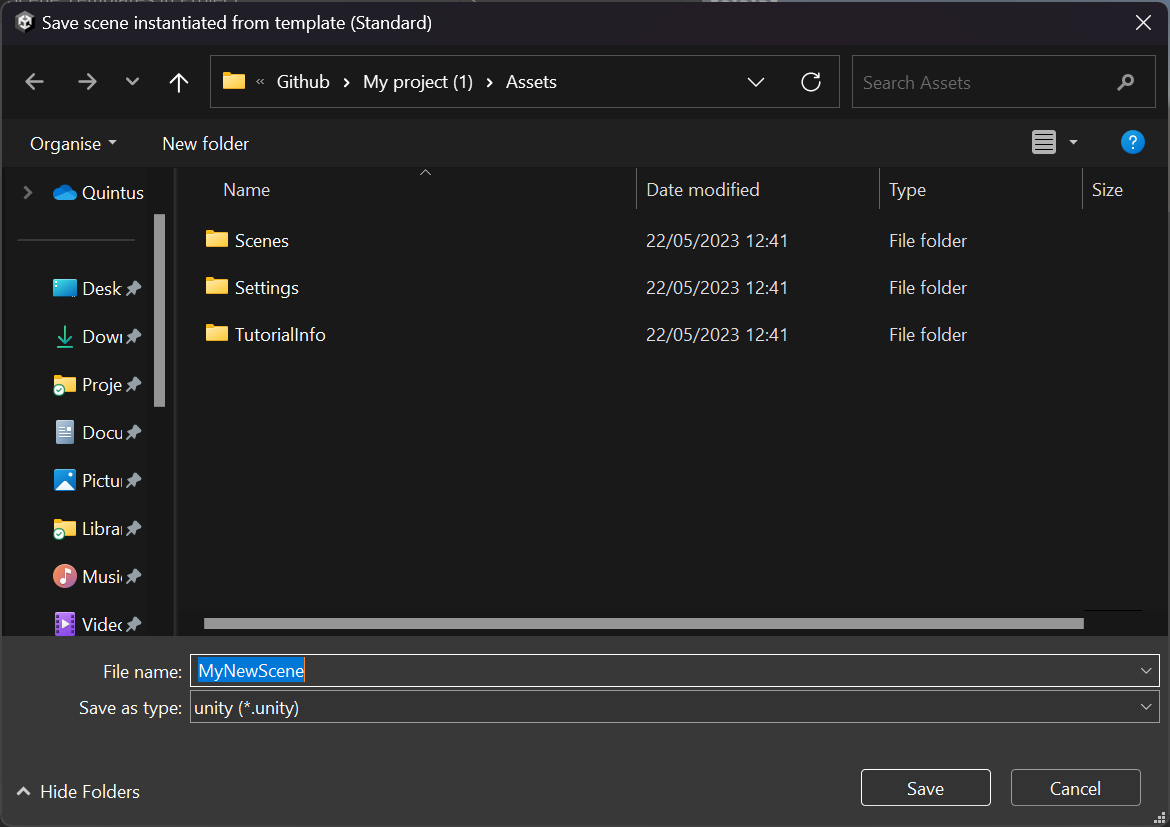
3. Give your new scene a name and select a location to save it.
Saving your new scene in the Scenes folder inside your project is the best option to keep everything neat and easy to manage.
GameObjects and icons in your scene
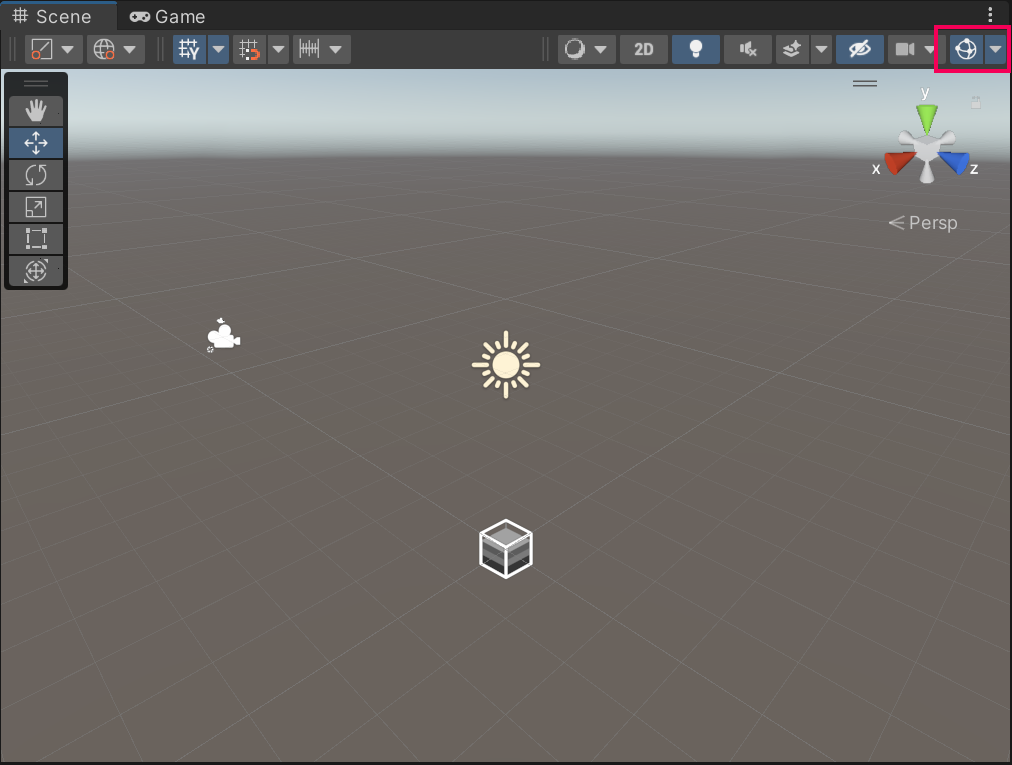
Your new scene contains a camera (Main Camera) and a default sun (Directional Light) in the Hierarchy. If you chose a scene template other than the Basic one, you may have additional objects in the Hierarchy. These GameObjects also have icons that represent them in the scene. You can adjust the size of the icons or switch them off by using the Gizmo visibility toggle in the upperright corner of the Scene view window.
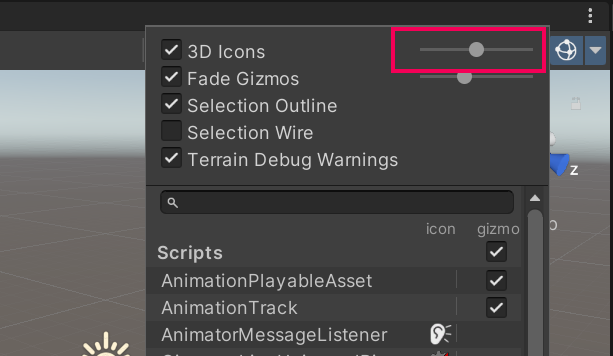
If you wish to keep the Gizmos but adjust their size, open the Gizmos dropdown and use the 3D icons slider.
When you’ve completed this process, return to your learning experience.
7. Install a package via the Package Manager
To install a package, follow these instructions:
1. Open the Unity Editor, if you haven’t already done so.
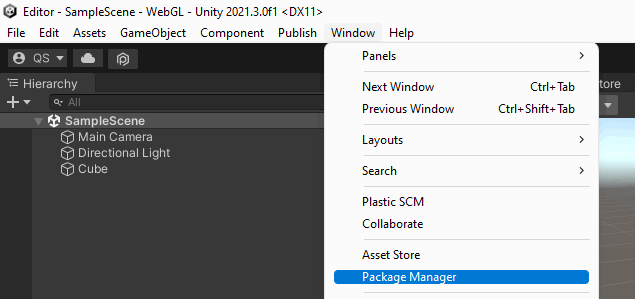
2. From the main menu, select Window > Package Manager.
3. Browse the Unity Registry (default view) or use the search bar to find the package that you want to install.
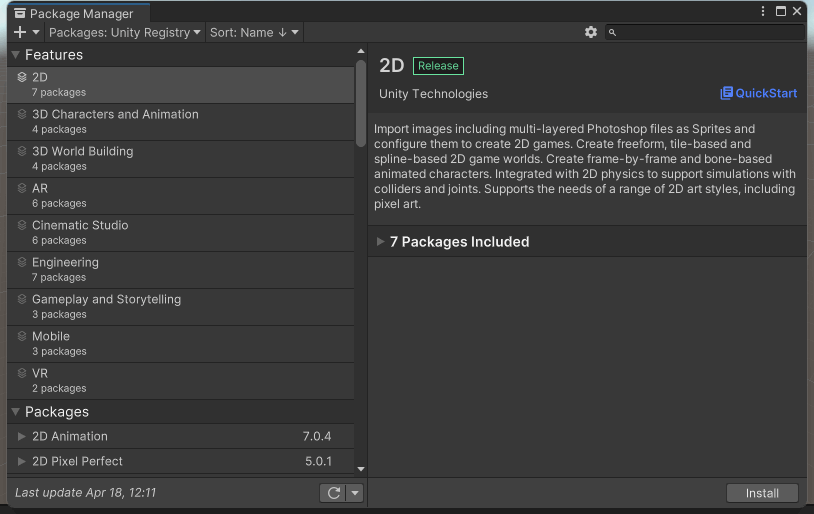
4. When you’ve found your required package, select Install to install it in your Unity project.
5. Remember to save your changes by selecting File > Save or with the shortcut Ctrl+S or (macOS: Cmd+S).
When you’ve completed this process, return to your learning experience.
8. Install a Unity package by name
To add a new Unity package by name, follow these instructions :
1. Open the Unity Editor, if you haven’t already done so.
2. From the main menu, select Window > Package Manager.
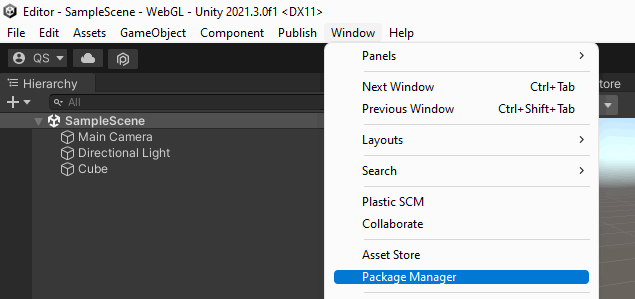
3. Select the Add (+) menu in the upper-left corner of the Package Manager and select Add package by name.
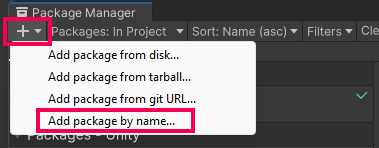
4. Enter the name of the Unity package you wish to add.
This name is always in the format of com.unity.packagename. Optionally, you can add the version number of the package you wish to download. If you leave this empty, the latest version will be installed.
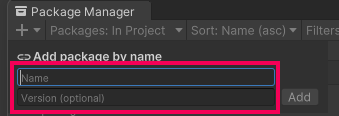
5. Select Add to start the installation process.
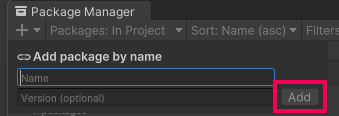
When you’ve completed this process, return to your learning experience.
9. Update a package in your Unity project
To update a package in your Unity project, follow these instructions:
1. Open the Unity Editor, if you haven’t already done so.
2. From the main menu, select Window > Package Manager.
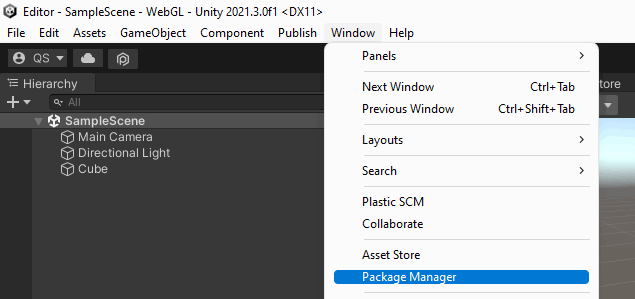
3. In the upper left corner of the Package Manager window, select the Packages dropdown menu and select In Project.
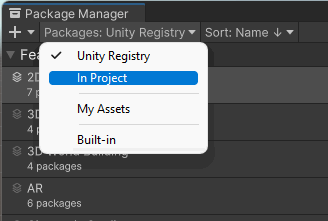
The In Project view lists all the packages that are currently in your Unity project.
4. Select the relevant package from the list available.
Tip: An arrow icon indicates packages with an update available.
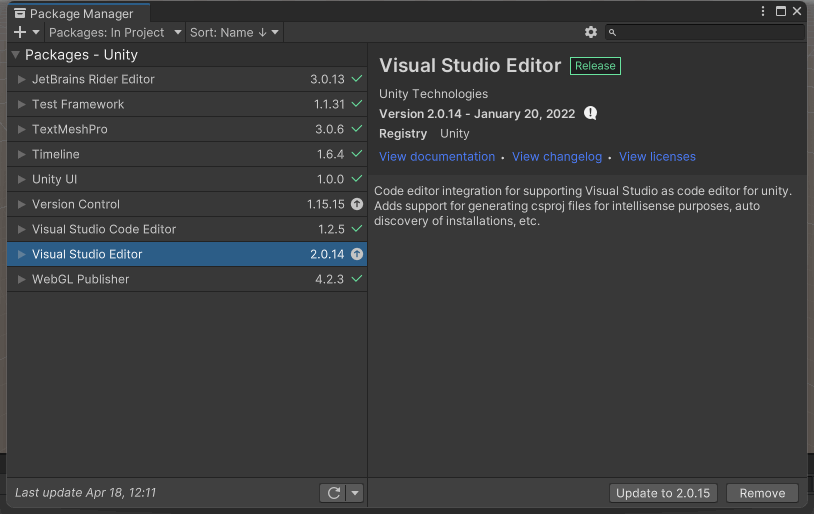
5. Select Update to [version number].
When you’ve completed this process, return to your learning experience.
10. Import assets from the Asset Store
To import assets into your project from the Unity Asset Store, follow these instructions:
1. Open the project in the Unity Editor.
2. In your internet browser, go to the Asset Store and find the package you want to download.
3. Select Add to My Assets.
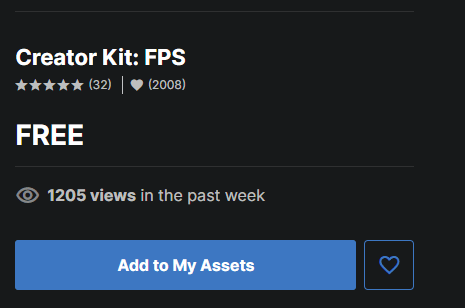
4. When the completion dialog window opens, select Open in Unity.

The package will open in the Package Manager window.
5. Select Download.
If you previously downloaded the assets, you will go straight to the next step in this process.
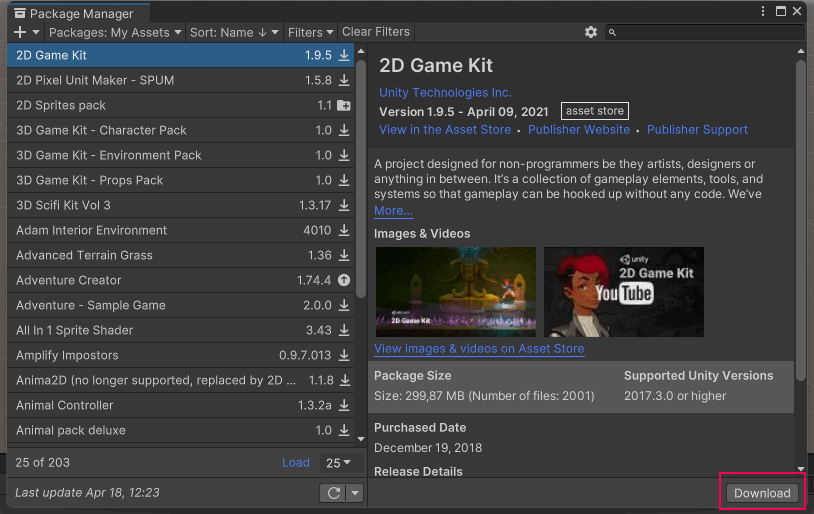
6. Select Import.
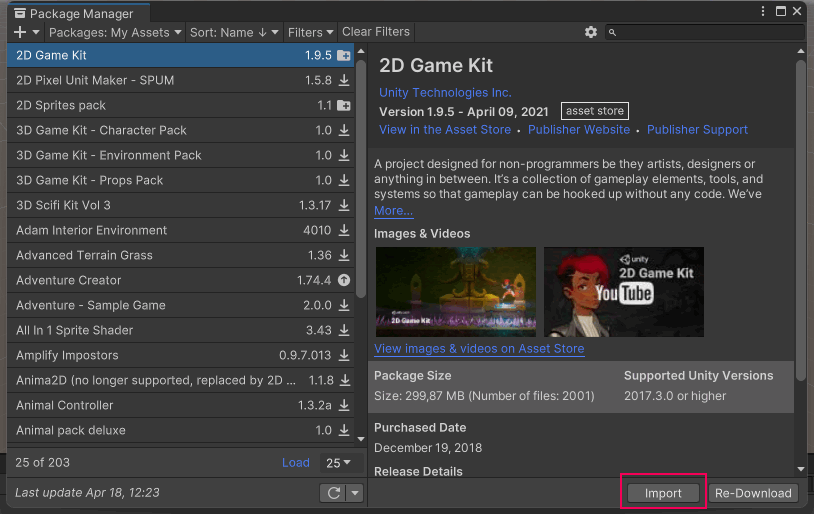
7. A dialog window will warn you about overwriting your project settings — if you haven't customized your project settings, you can ignore this warning. To proceed, select Import.
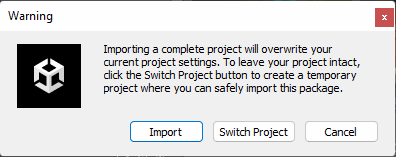
8. Another dialog might warn you that there are Package Manager dependencies — if so, select Install/Upgrade.
The Import Unity Package window will open, listing the contents of the package. In most cases, you will want to keep all of the contents of the asset package selected.
9. In the lower right corner of the window, select Import.
The assets will be added to the Assets folder of your Unity project. When this process is completed, close the Package Manager window and return to your learning experience.
Note: This is the basic set-up process. If you are importing assets into a complicated project, you can review Importing an Asset Store package in the Unity Manual for a more detailed overview of the options available.
11. Import a local asset package
To import a local asset package into your project, follow these instructions:
1. Open the project in the Unity Editor.
2. From the main menu, select Assets > Import Package > Custom Package.
3. In the file browser window, navigate to the .unitypackage file you want to import and select Open.
4. Select Import to import the assets to your project.
You can find these assets by going to the Project window and opening the Assets folder.
When you’ve completed this process, return to your learning experience.
Note: You can review Importing local Asset packages in the Unity Manual for a more detailed overview of the options available in this process.
12. Import individual assets from your computer
To import individual simple assets into a Unity project, follow these instructions:
1. In your file browser window, navigate to the file that you want to import.
2. Open your project in the Unity Editor.
3. Drag the file from the file browser into the Project window in the Editor.
This will copy the file into the Unity project’s Assets folder.
Note: You can also save or export files directly to that Asset folder.
When you’ve completed this process, return to your learning experience.
Note: You can review Importing in the Asset workflow section of the Unity Manual for a more detailed overview of importing files into Unity projects. Importing more complex assets that require configuration requires a different process. If you need to do this, you will be guided through it step by step in your specific learning experience.
13. Open projects from the Learn tab in the Unity Hub
Important: This guidance is included for completeness, but we do not recommend you download learning projects using this process. Your specific learning experience will guide you on the best approach.
To open a project from the Learn tab in the Unity Hub, follow these instructions:
1. Open the Unity Hub.
2. Select the Learn tab on the leftmost side of the window.
3. Find and select your chosen learning content from the list available.
4. If the content contains a downloadable Unity project, select Download project.
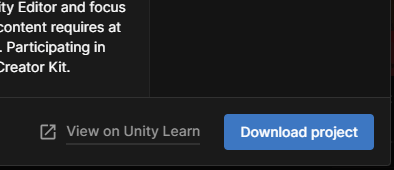
5. When the download is complete, select Open.
The Unity Editor will open, import the project, and update any necessary packages.

6. From the main menu, select File > Save to save your version of the project. Alternatively, you can use the shortcut Ctrl+S (macOS: Cmd+S).
When you’ve completed this process, return to your learning experience.
14. Save a project opened via the Learn tab in Unity Hub
Important: This guidance is included for completeness, but we do not recommend you download learning projects via the Unity Hub. Your specific learning experience will guide you on the best approach.
If you have opened a project via the Learn tab of Unity Hub, save it using the following steps:
1. From the main menu, select File > Exit.
2. In the Keep Project? dialog, select Keep.
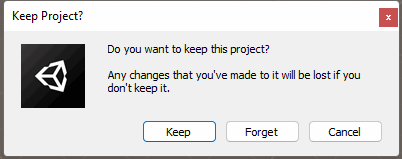
3. Save your project using your operating system’s saving window.
Choose an easily accessible location for your project, such as a dedicated Projects folder or your Documents folder.
4. Once the project is saved, re-open the Unity Hub.
5. Select Open to add your project to the Projects tab in the Hub and open it in the Unity Editor.
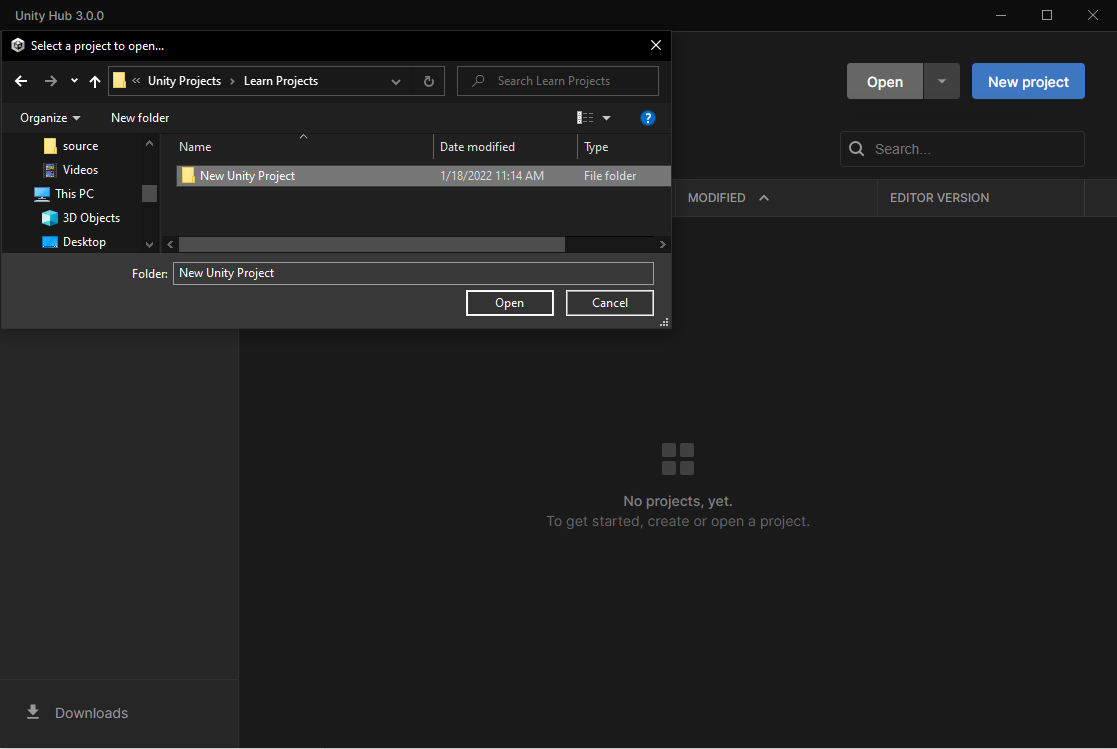
15. Change your Scene view background
If you want to change the contrast between the default background and primitives with the default material, follow these instructions to change the background color:
1. In the toolbar above the Scene view, select the skybox, fog, and various other effects toggle to turn these off in the Scene view.
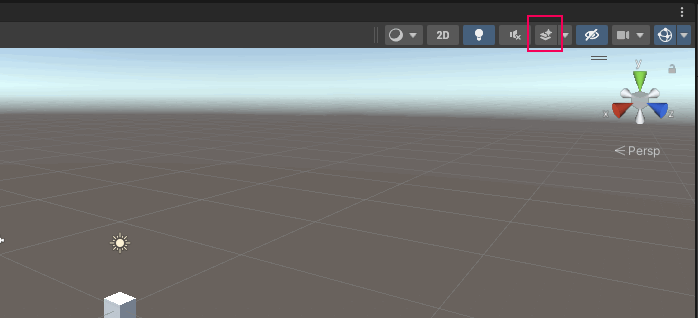
2. From the main menu, select Edit > Preferences.
3. Select the Colors tab in the navigation bar.
4. Under the Scene heading, find the Background property. Use the color picker for this property to choose the background color that suits you.
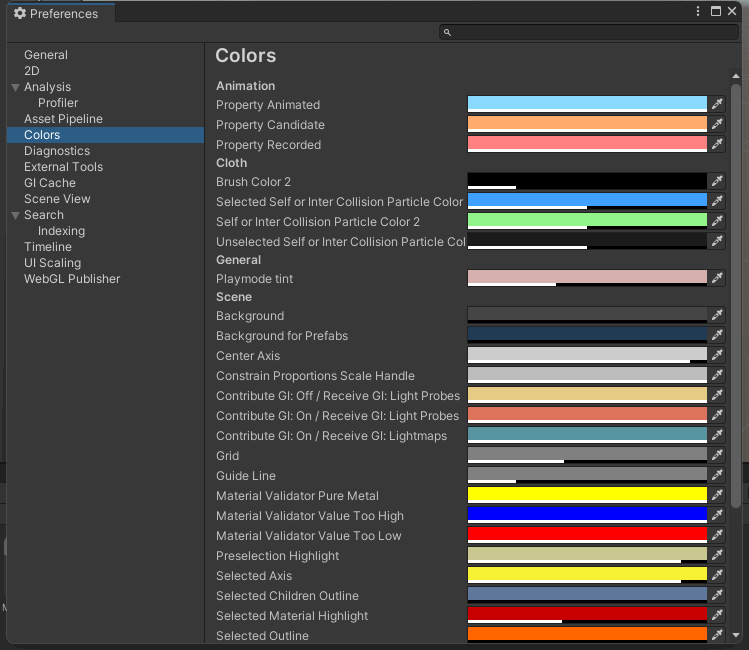
If you like, you can also change Grid property in the same way to adjust the color of the grid.
5. Close the Preferences window.
Important: To return to the usual default sky in the Scene view, select the skybox, fog and various other effects toggle again to turn this back on.