Experiment with VFX Graph
Tutorial
·
Beginner
·
+10XP
·
20 mins
·
(469)
Unity Technologies

VFX Graph is a powerful feature that allows users to create incredibly complex effects and simulations, which are still highly optimized. In this tutorial, you will add a few new VFX Graph effects to your scene and play around with their properties in the VFX Graph editor.
By the end of this tutorial, you'll be able to:
- Understand the differences between Unity's Particle System and VFX Graph in order to select the appropriate tool for a given use case.
- Recognize whether a particle effect has been created using the Particle System or the VFX Graph.
- Add a new VFX Graph to the scene.
- Explain the role of each of the four default context nodes in a VFX Graph: Spawn, Initialize Particle, Update Particle, and Output Particle.
- Navigate in the VFX Graph editor window by using the keyboard and mouse.
- Perform simple edits to an existing VFX Graph, such as changing the emission rate or particle lifetime.
Languages available:
1. Overview
You’ve learned how to create environmental and gameplay visual effects (VFX) using Particle Systems in Unity.
However, there is an entirely different workflow for creating VFX in Unity called VFX Graph, which is capable of producing the same types of amazing effects and more.
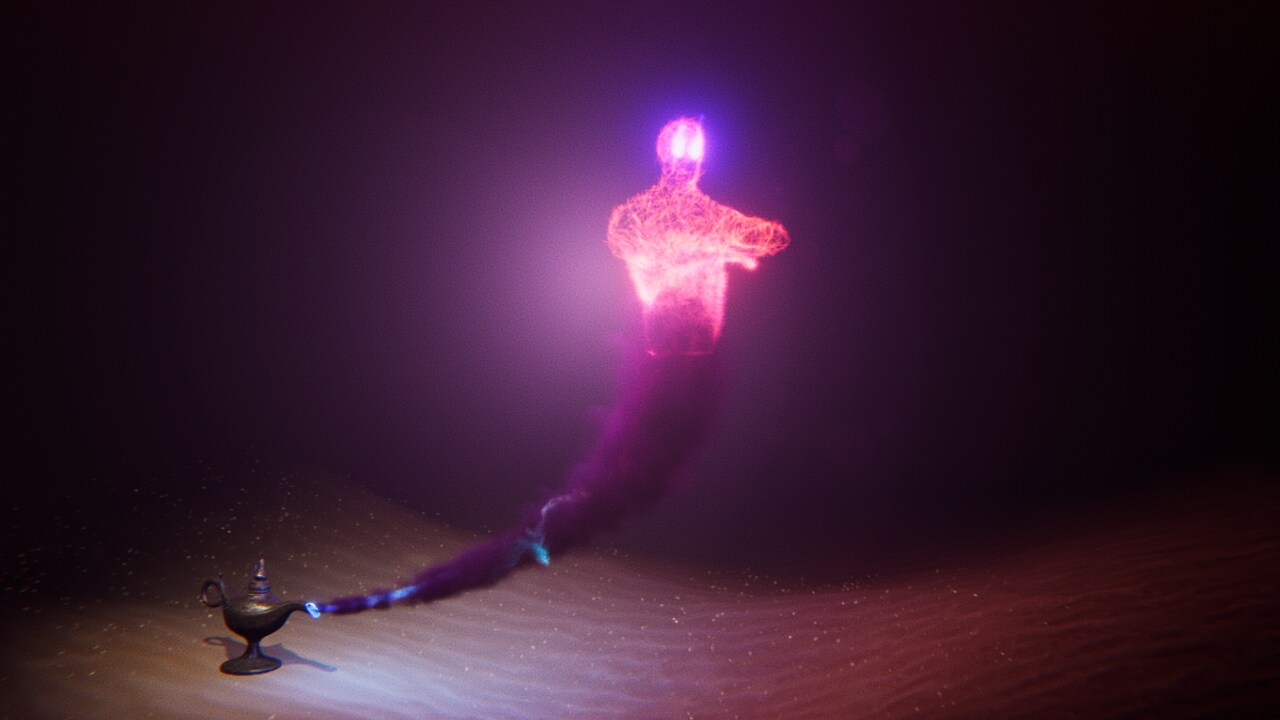
Image from VFX Showcase video.
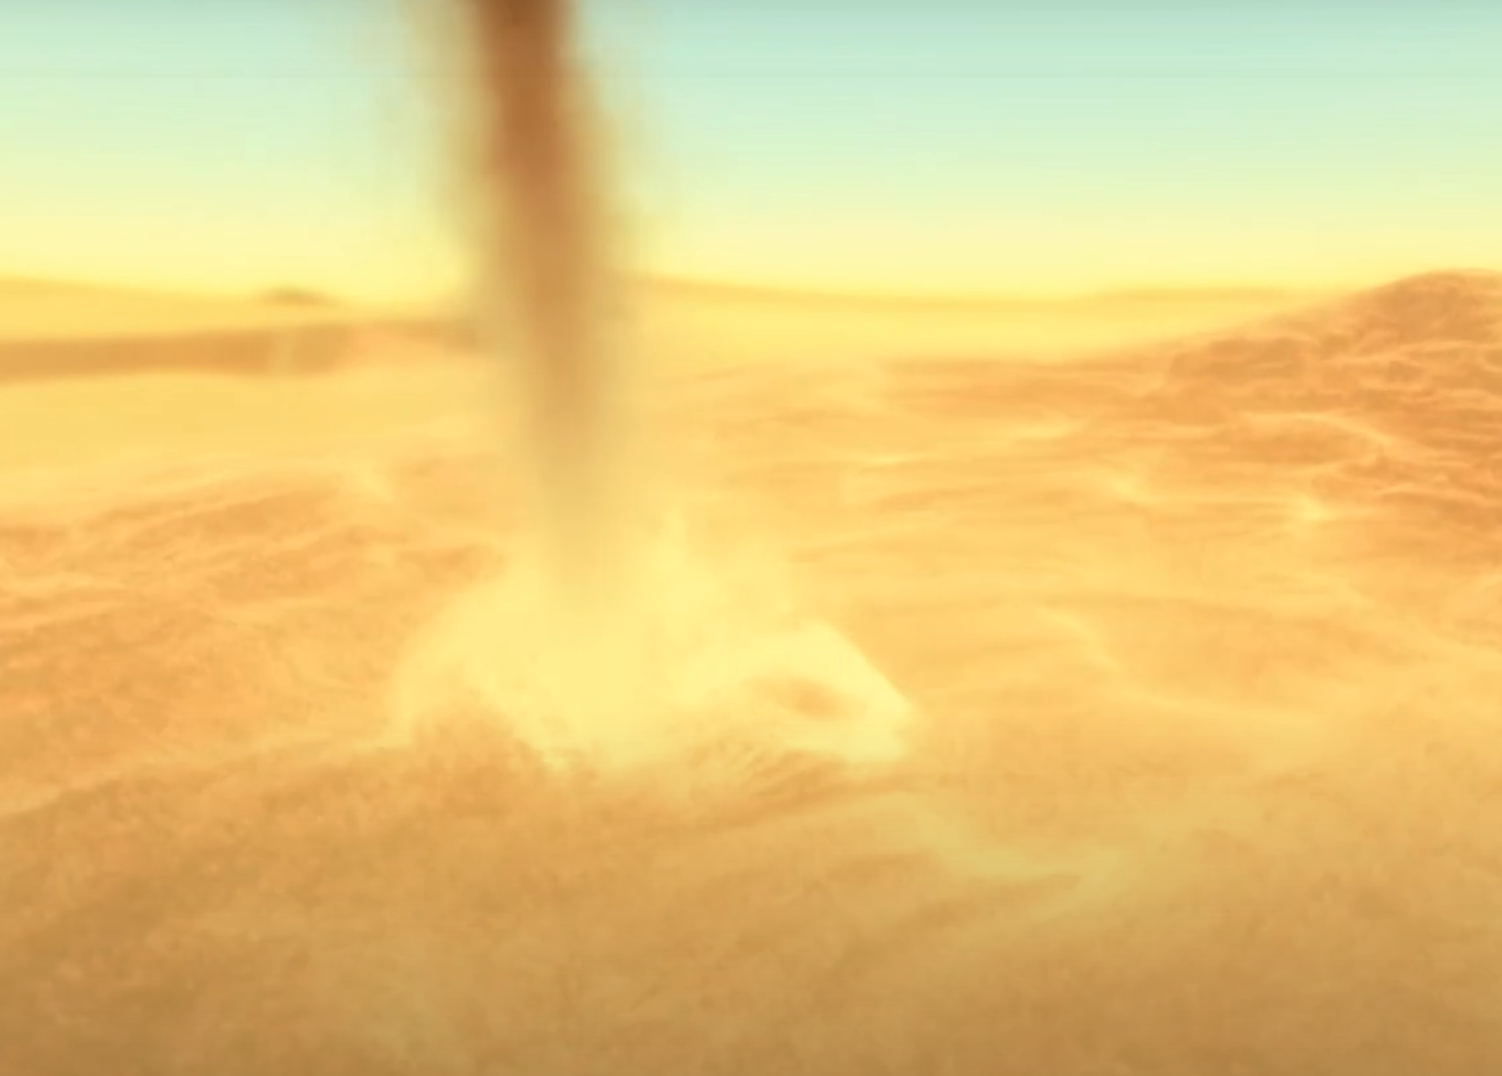
Image from VFX Showcase video
One major advantage of VFX Graph over the Particle System is that it is capable of simulating many more particles, while still maintaining good performance in your application. One of the responsibilities of a VFX Artist is ensuring that their effects do not interfere with the overall usability and framerate of the application, so optimized performance is really important.
In this tutorial, you will replace the weather effect Particle System you created in the previous tutorial with one made in VFX Graph. This will allow you to experiment with the structure, features, and differences of the VFX Graph compared to the Particle System.
2. How is VFX Graph different from the Particle System?
VFX Graph is a node-based editor for creating effects in Unity. Here is an example of what a VFX Graph might look like for a more complex effect:
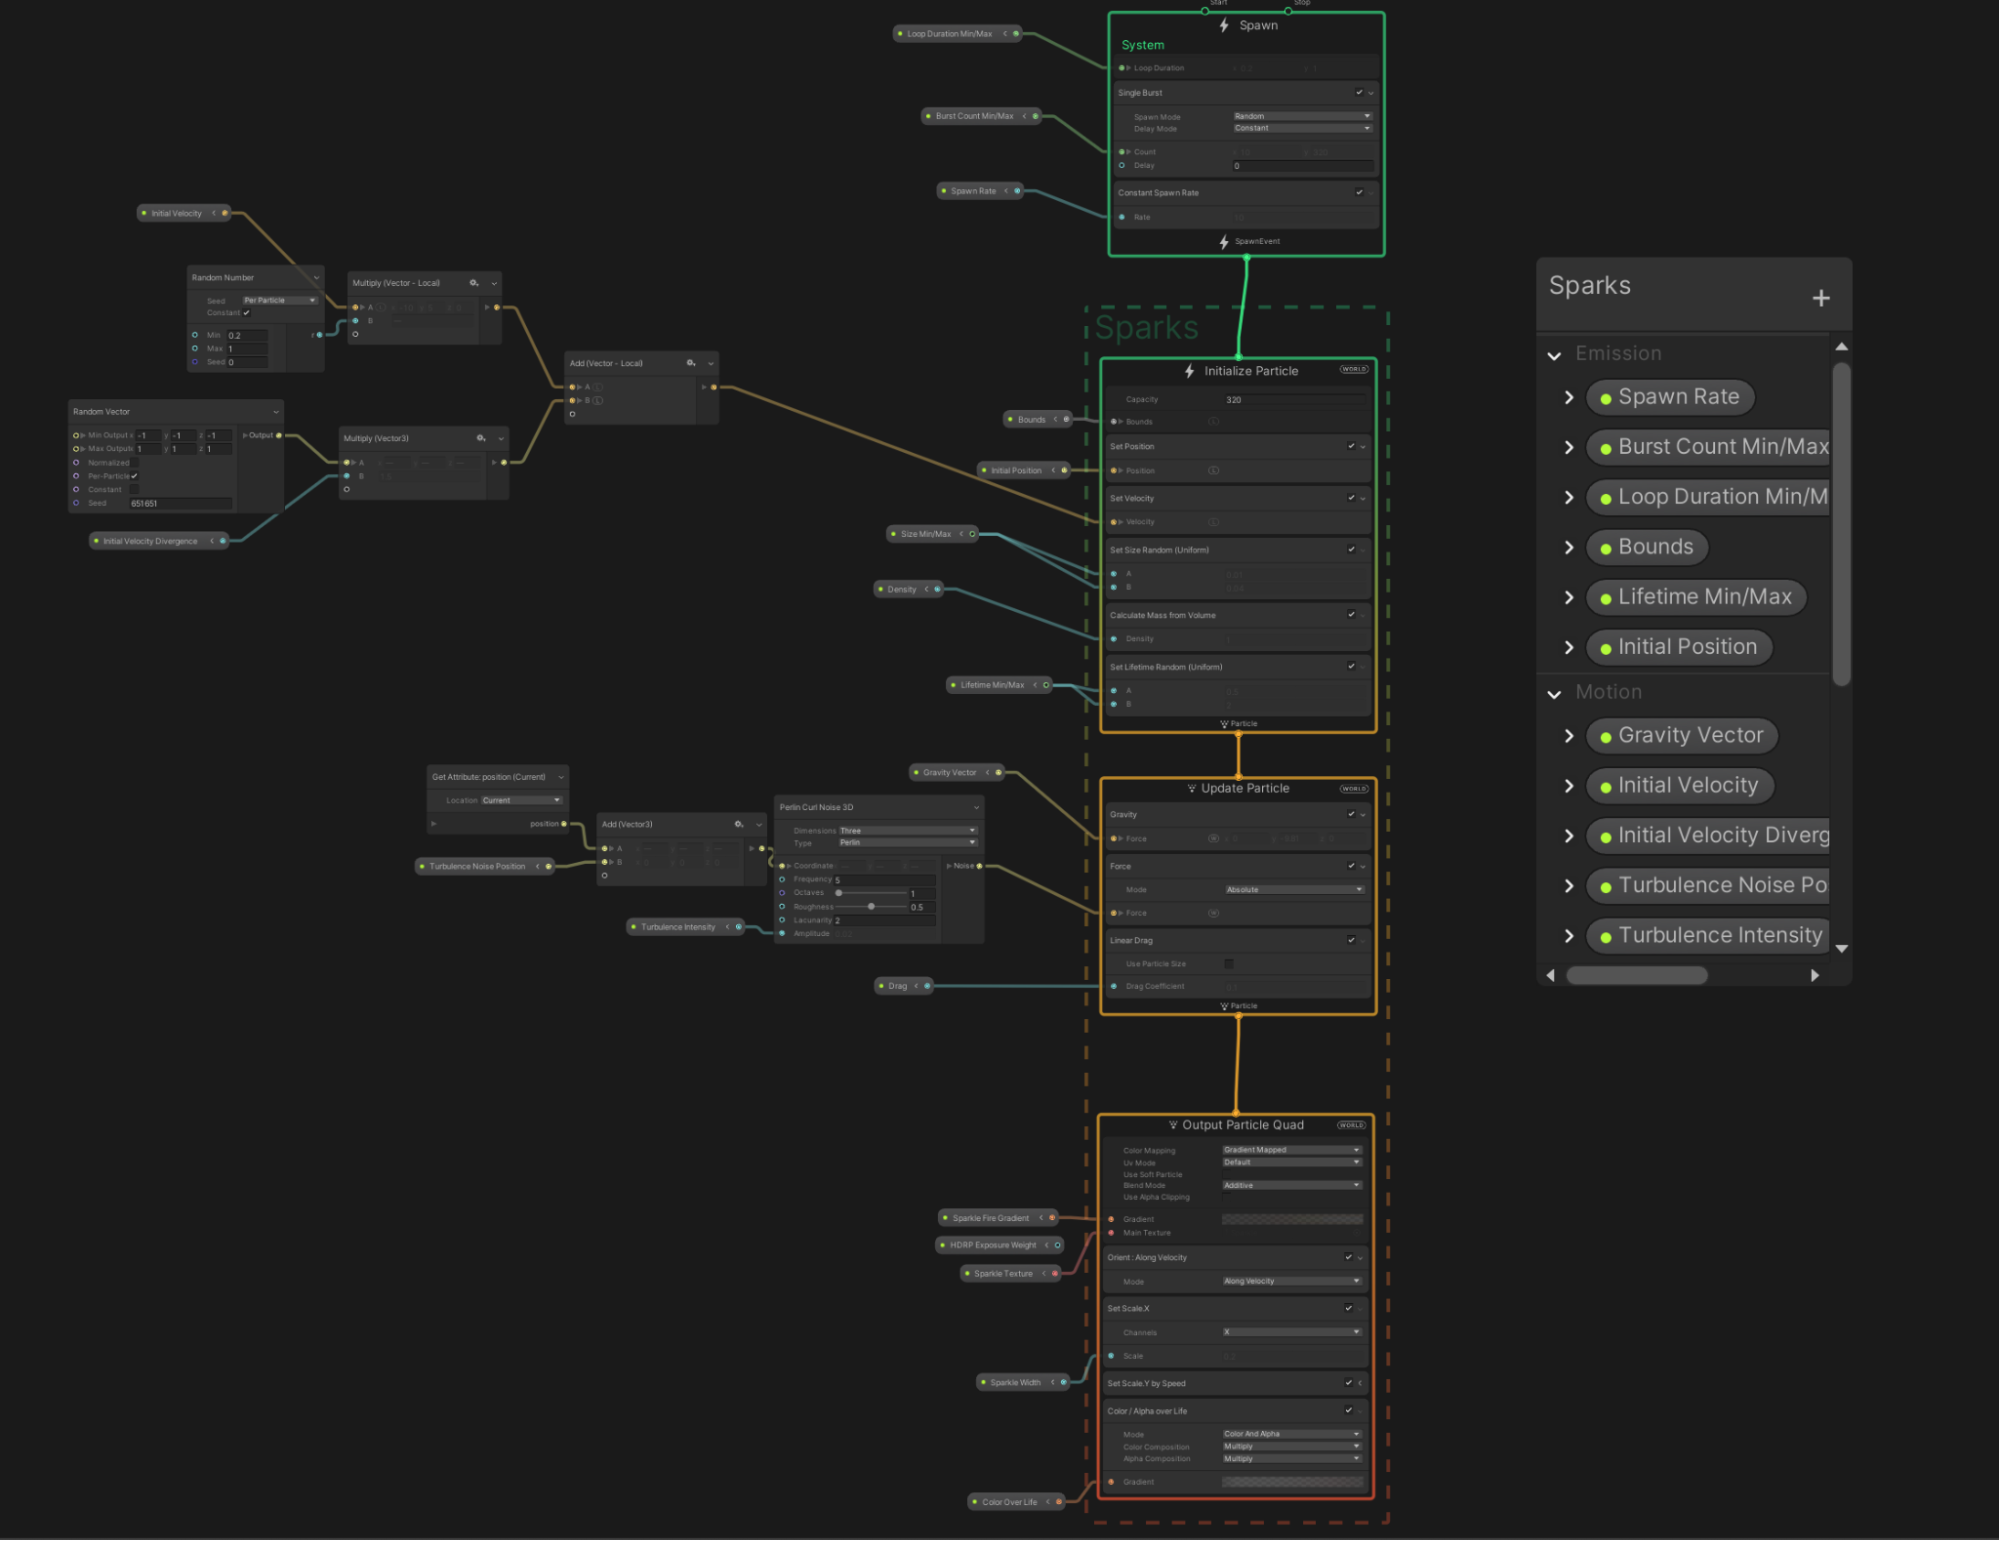
This node-based workflow is completely different from the component-based Particle System you’ve used up to this point.
It also has clear advantages and disadvantages.
Advantages of VFX Graph
- VFX Graph can process millions of simultaneous particles, while Particle Systems can only process thousands.
- VFX Graph can produce more complex simulations, such as the genie shown above, which would not be feasible using a Particle System.
Disadvantages of VFX Graph
- VFX Graph is a bit more challenging for beginners to learn than Particle Systems.
- VFX Graph has stricter hardware requirements than Particle Systems, preventing it from running successfully on certain target devices.
- Since VFX Graph runs on the GPU and Unity physics calculations are done on the CPU, VFX Graph particles cannot interact with the rest of your app’s physics (collide with the ground, for example). Particle Systems run on the CPU, so they can interact with other physics-based components.
Choosing between VFX Graph and Particle Systems
So how do you choose whether to use VFX Graph or the Particle System?
- If you’re pretty experienced and want to create something really complex or something that requires millions of particles, you might want to use VFX Graph.
- If you’re not an expert and want to create something simple, something that runs on all devices, or something that can interact with other physics-based objects in your scene, use a Particle System.
In the case of the weather effect in the scene, we may want a higher number of particles.
Take a look at the two screenshots. The first shows a Particle System simulating one million particles. It has an abysmal frame rate of around 5fps.
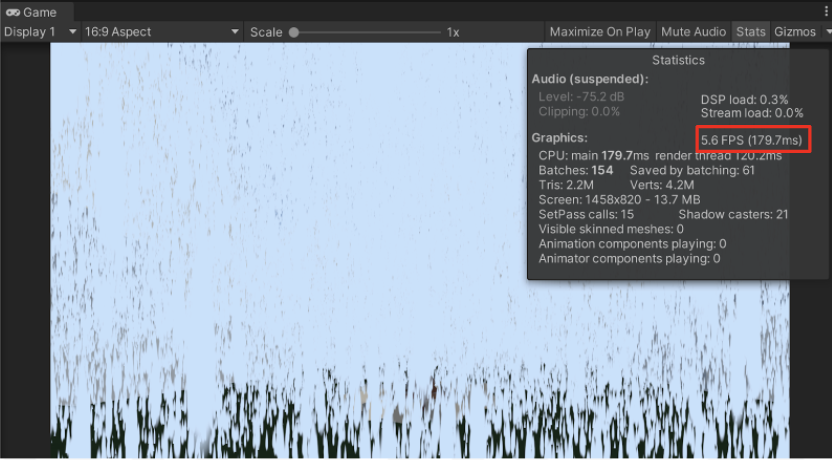
Compare that to this effect, which uses VFX Graph to simulate one million particles, and still has an excellent frame rate of around 100 frames per second.
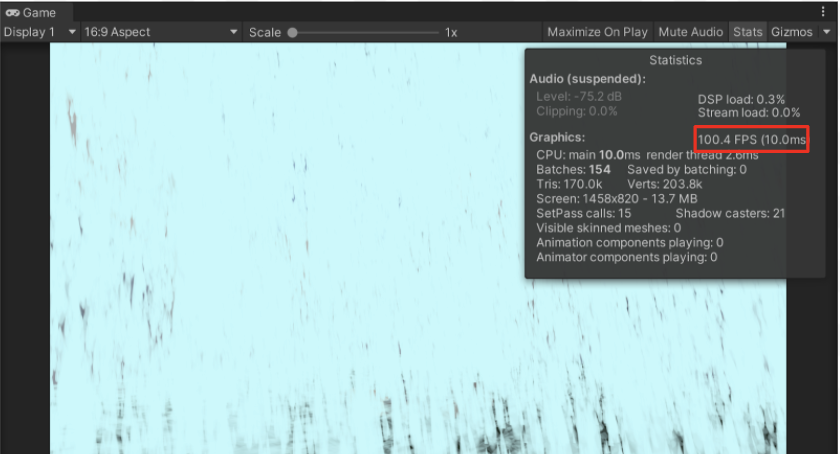
Let’s take advantage of VFX Graph’s superior maximum particle count and experiment with more extreme weather.
3. Position a VFX Graph effect in the scene
Now that you know how much more performant VFX Graphs can be for simulating a large number of particles, let’s replace that weather effect Particle System.
1. Mark the environment particles you already have in your scene (snow or rain) as inactive.
2. From Assets > CreativeCore_VFX > VFX > Samples, open the folder matching the effect you’d like to preview, and then move one of the weather VFX Graph Prefabs into the Hierarchy to add it to your scene.
3. Position the object appropriately in the sky so that it looks like it’s raining or snowing.
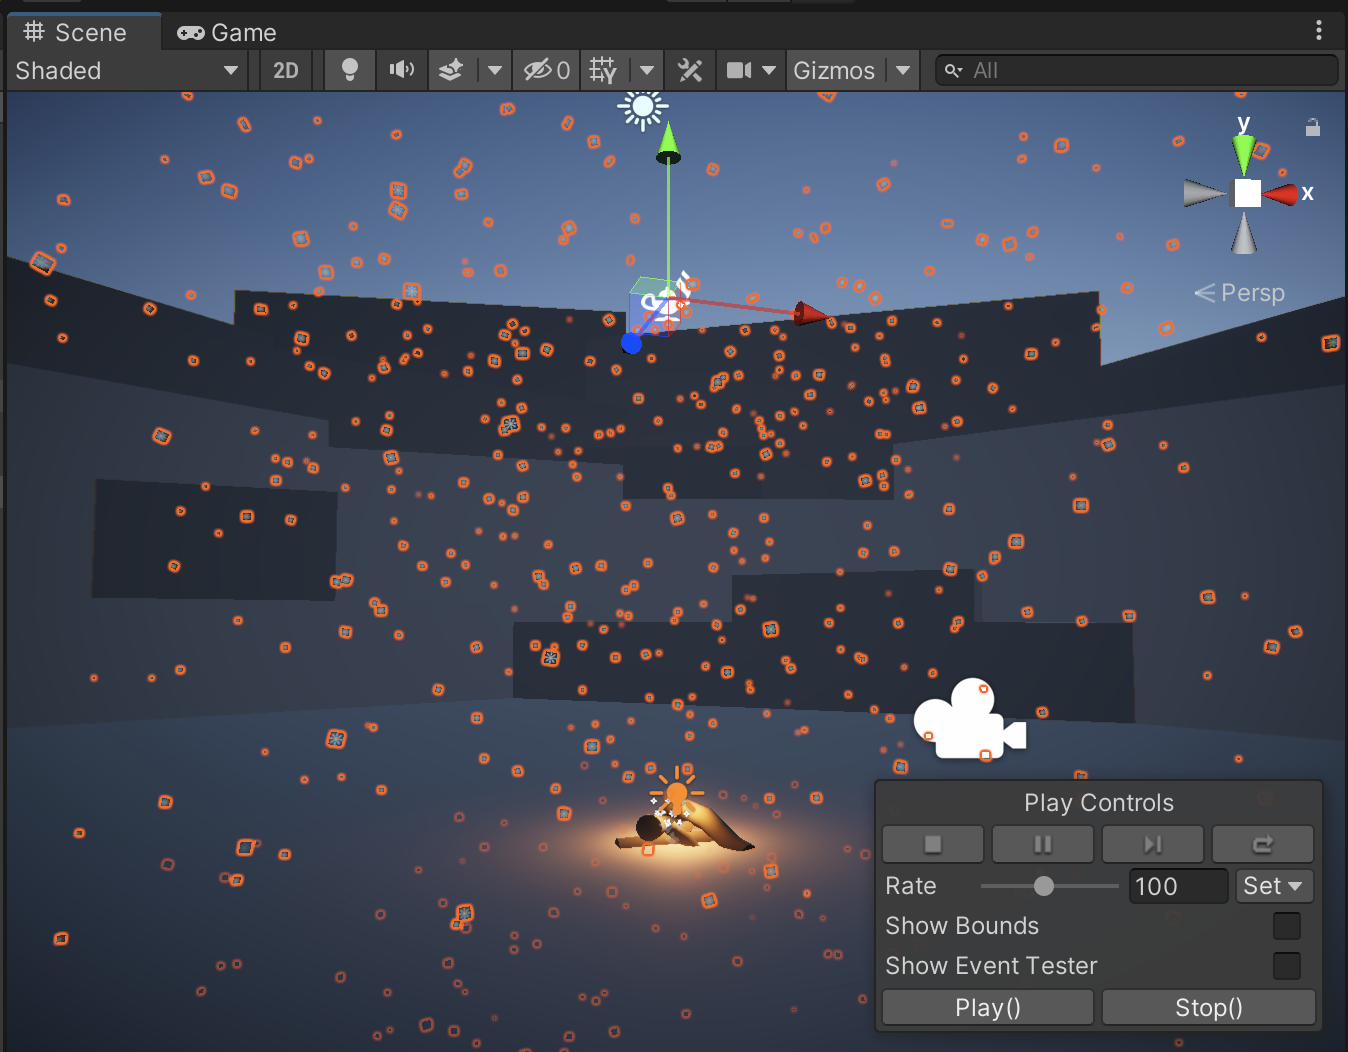
4. Open the VFX Graph editor window
Now that you have the VFX Graph object in the scene, let’s open the actual graph in the editor window.
1. With the VFX Graph object selected, locate the Visual Effect component. Notice the little lamp icon next to the component’s name – that is the icon for VFX Graph.
2. Select the Edit button to open the VFX Graph editor window.
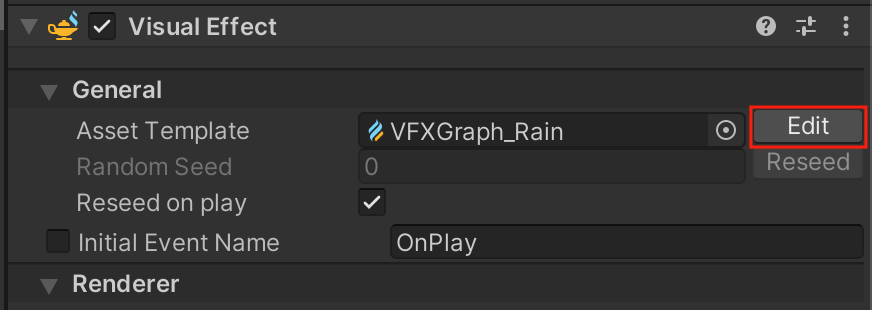
3. Rearrange your editor layout so that you can see VFX Graph and the Scene view window at the same time.
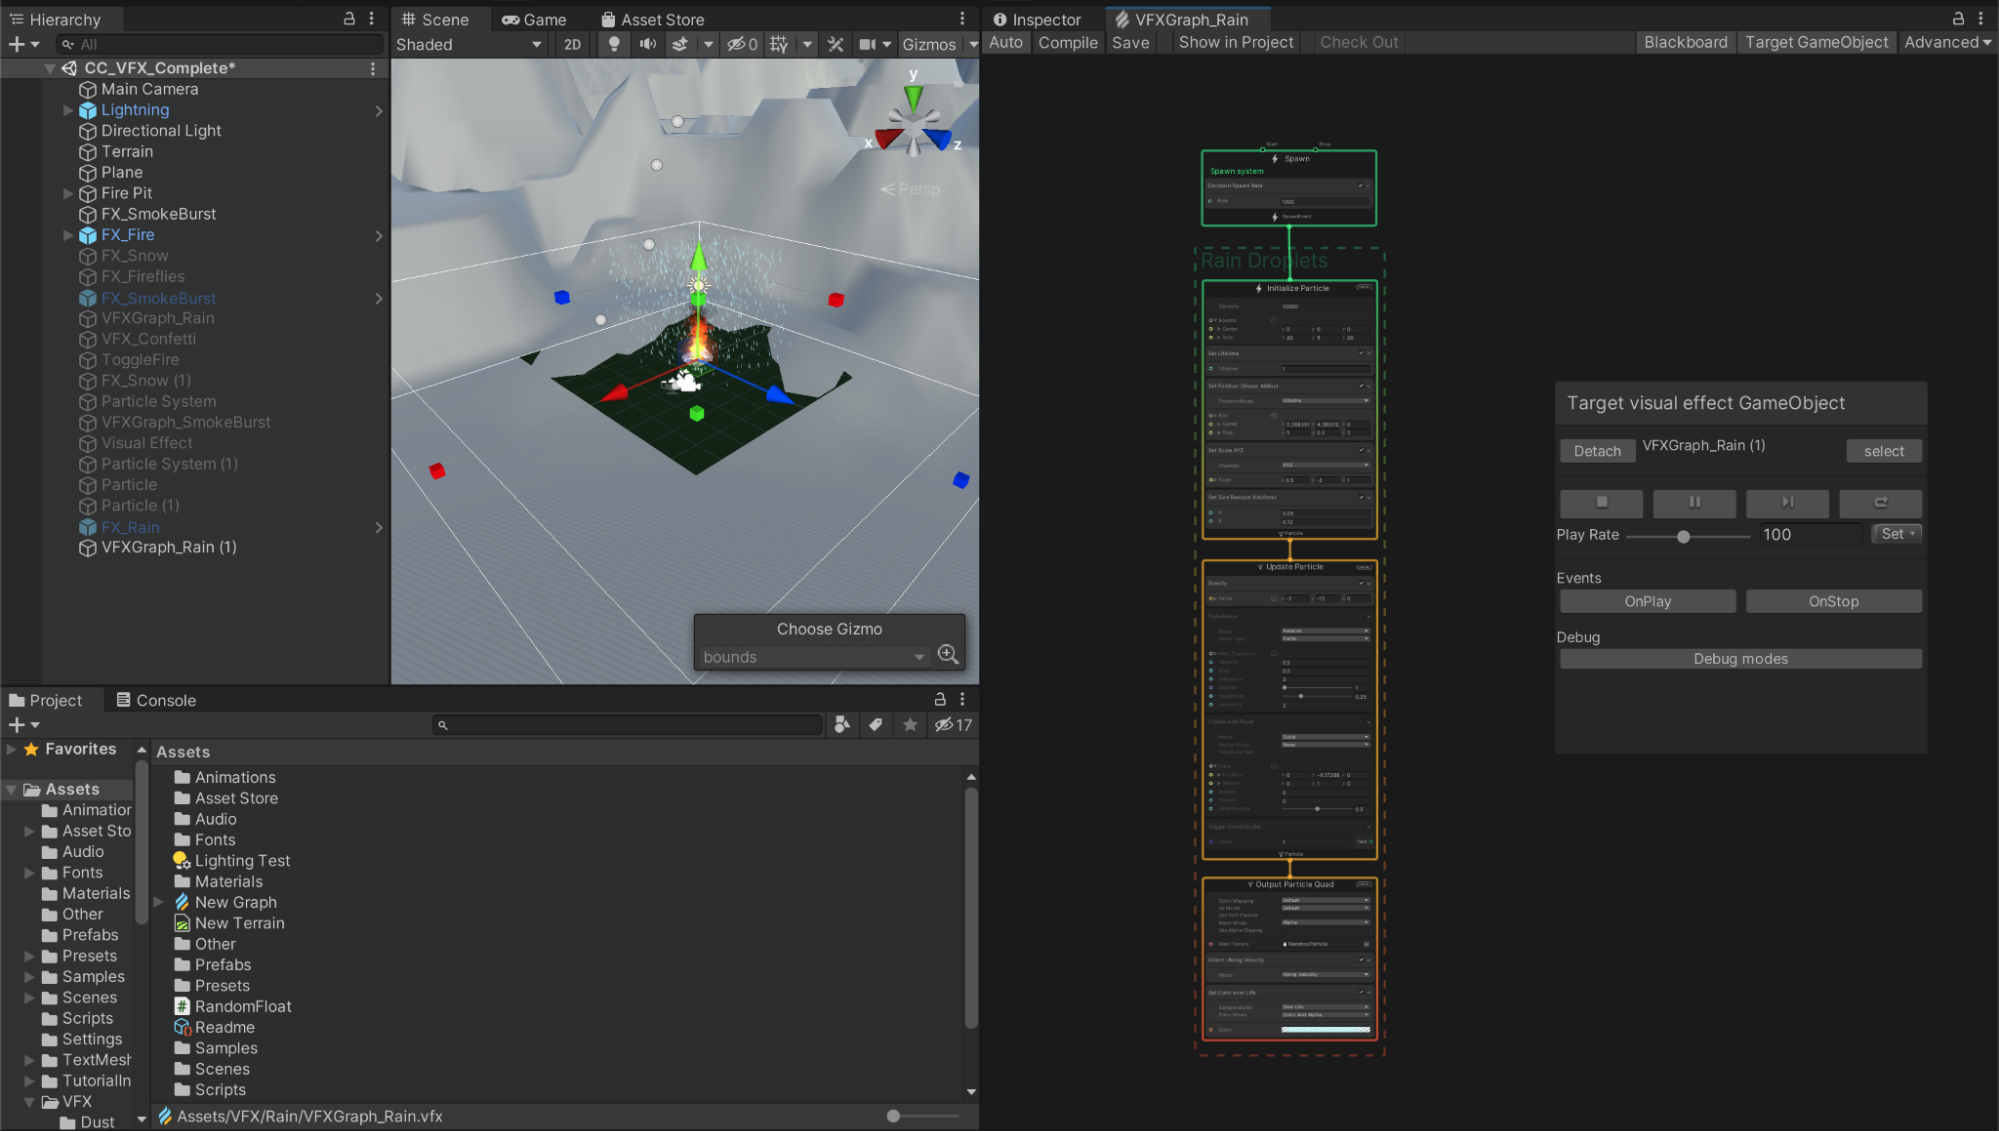
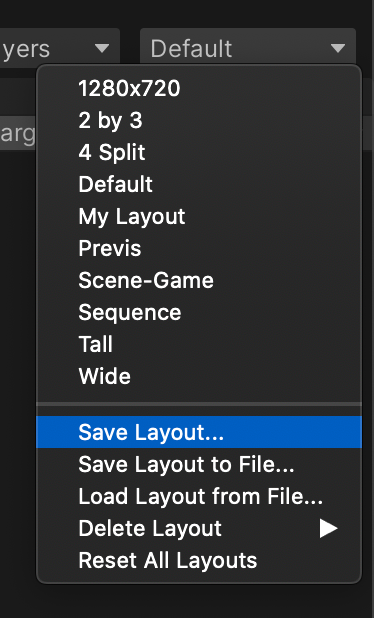
4. If you’re happy with the new layout, save it as a new custom layout using the Layout dropdown, named something like “VFX Graph”.
5. Navigate the VFX Graph window
Before you start editing anything, it will be helpful to get comfortable moving around in the editor area (even if you don’t know what any of it means quite yet).
Practice moving around in the graph:
- Pan: Middle-click and drag, or hold Alt (Windows) or Option (macOS) and click and drag.
- Zoom: Rotate the wheel or use your trackpad zoom.
- Focus and zoom in: Select an element and press the F key.
- Fit to window: Press the A key.
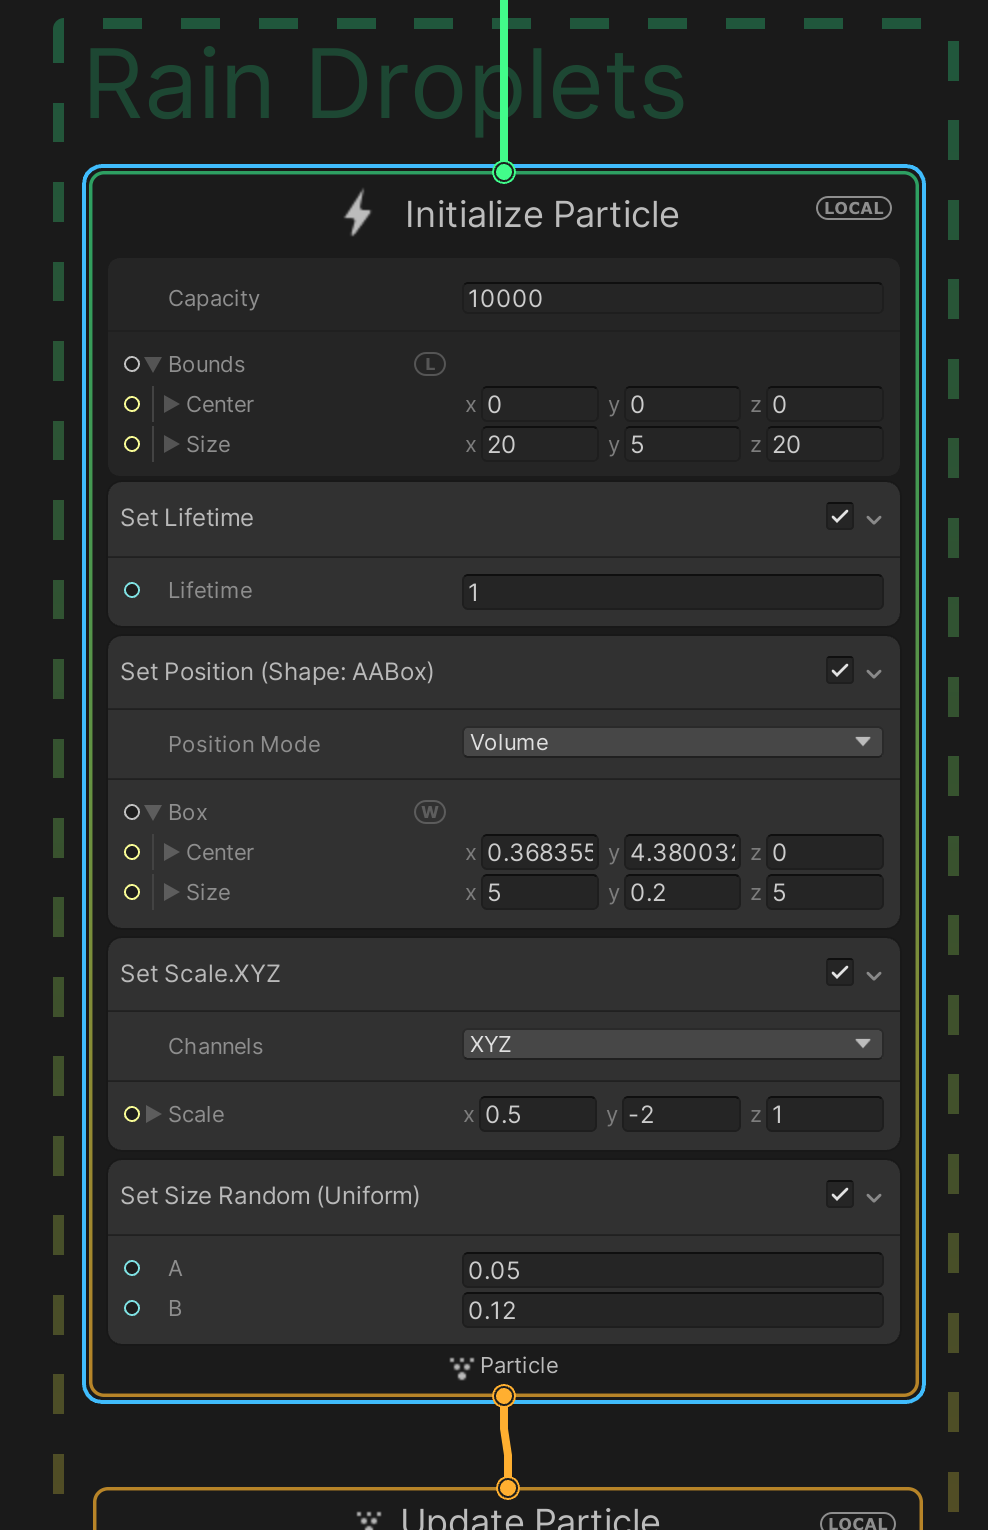
With the full VFX Graph in view, the first thing you’ll notice is that it is made up of four main nodes, which are stacked vertically on top of each other.
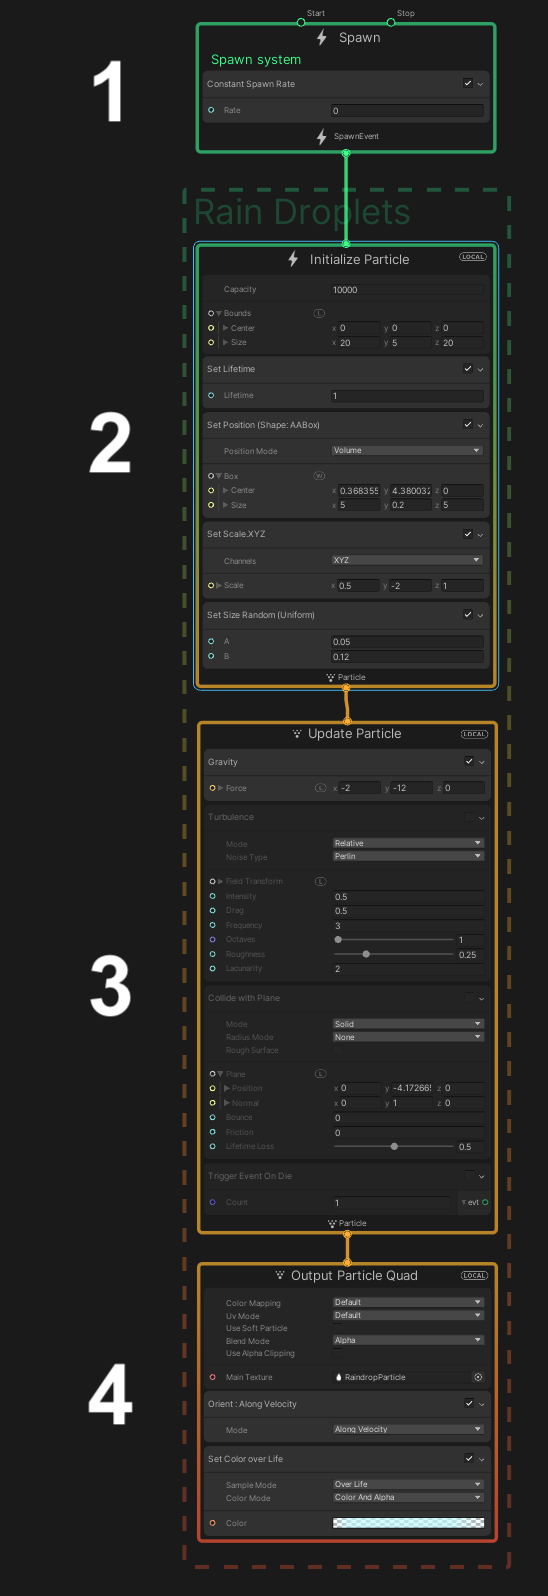
These four default nodes are called the Context Nodes (or “Contexts” for short) and are read from top to bottom. We’ll go through those in detail in the next step.
6. Explore the VFX Graph contexts
Let’s go through each of the four default contexts and what they do, tweaking some values along the way to see them in action.
Spawn Context
This first context controls the spawning of particles, similar to the Emission module for a Particle System. To quickly frame the Spawn context in view, select it and press F.
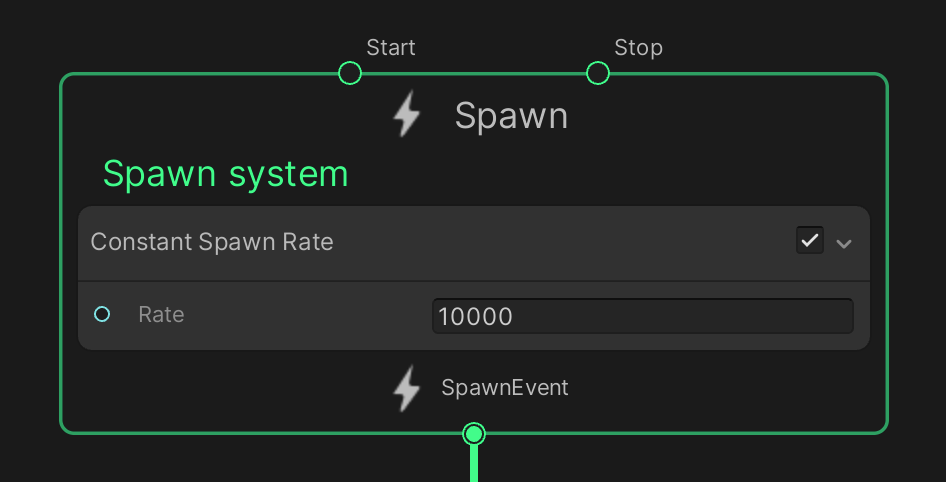
By default, a new VFX Graph uses a constant spawn rate, but you can set up variable, periodic, or bursts of particles, just like you did with the smoke burst effect.
1. Adjust the Rate property so that the VFX Graph version of the effect matches your original Particle System effect.
You can increase the spawn rate to a very high value without much of an impact on frame rate.
Initialize Particle Context
The Initialize Particle context controls where and how the particles first appear. This includes many of the same properties as the Particle System’s main module, including the particles’ initial size, shape, velocity, lifetime, and maximum capacity. It also includes the equivalent of the Shape module, which defines the volume from which the particles are generated.
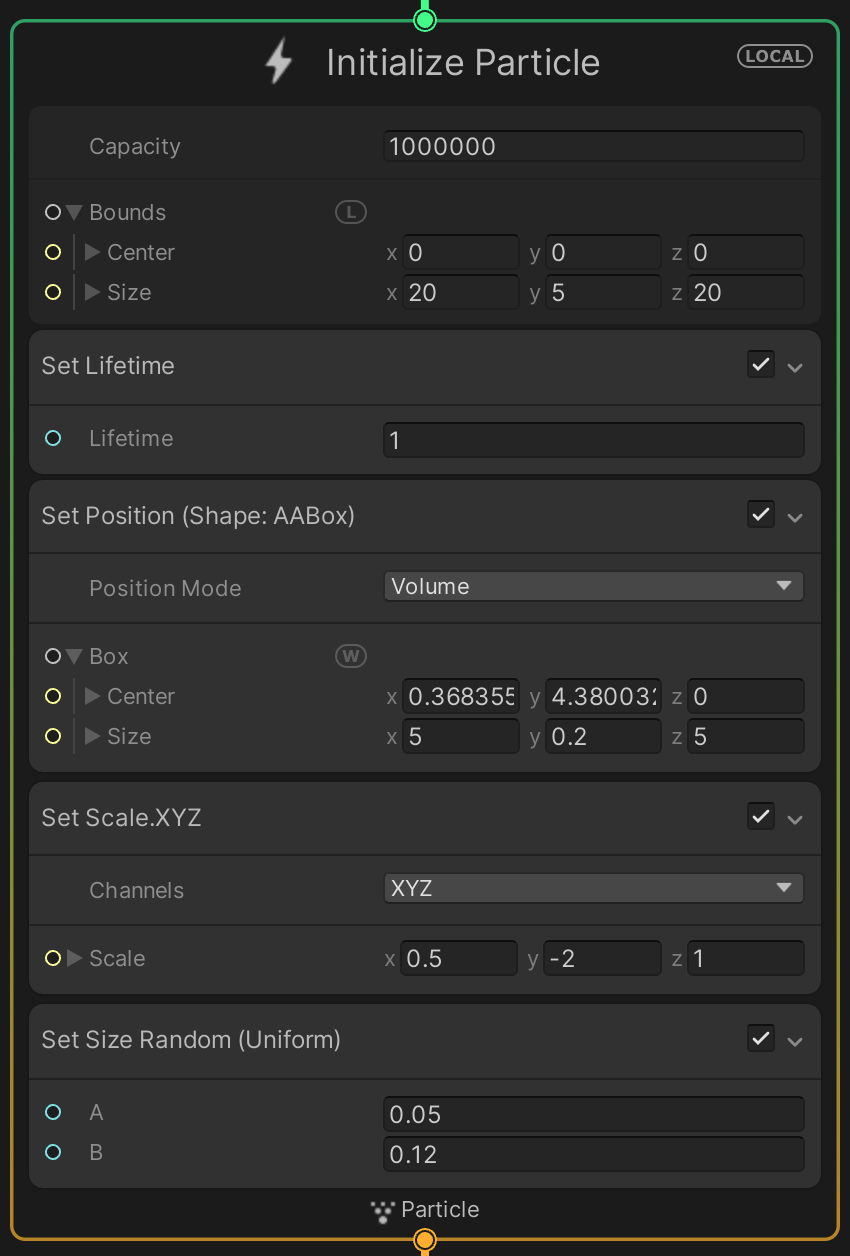
2. Configure the properties within the Initialize Particle context so that the VFX Graph version of the effect matches your original Particle System effect.
Update Particle Context
The Update Particle context controls any changes to the particles from the moment they are generated until the moment they die (disappear). This updates the particles and runs each frame. This includes properties similar to the Particle System’s Color over Lifetime, Size over Lifetime, Noise (called Turbulence in VFX Graph), and Texture Sheet Animation (called Flipbook Player in VFX Graph).
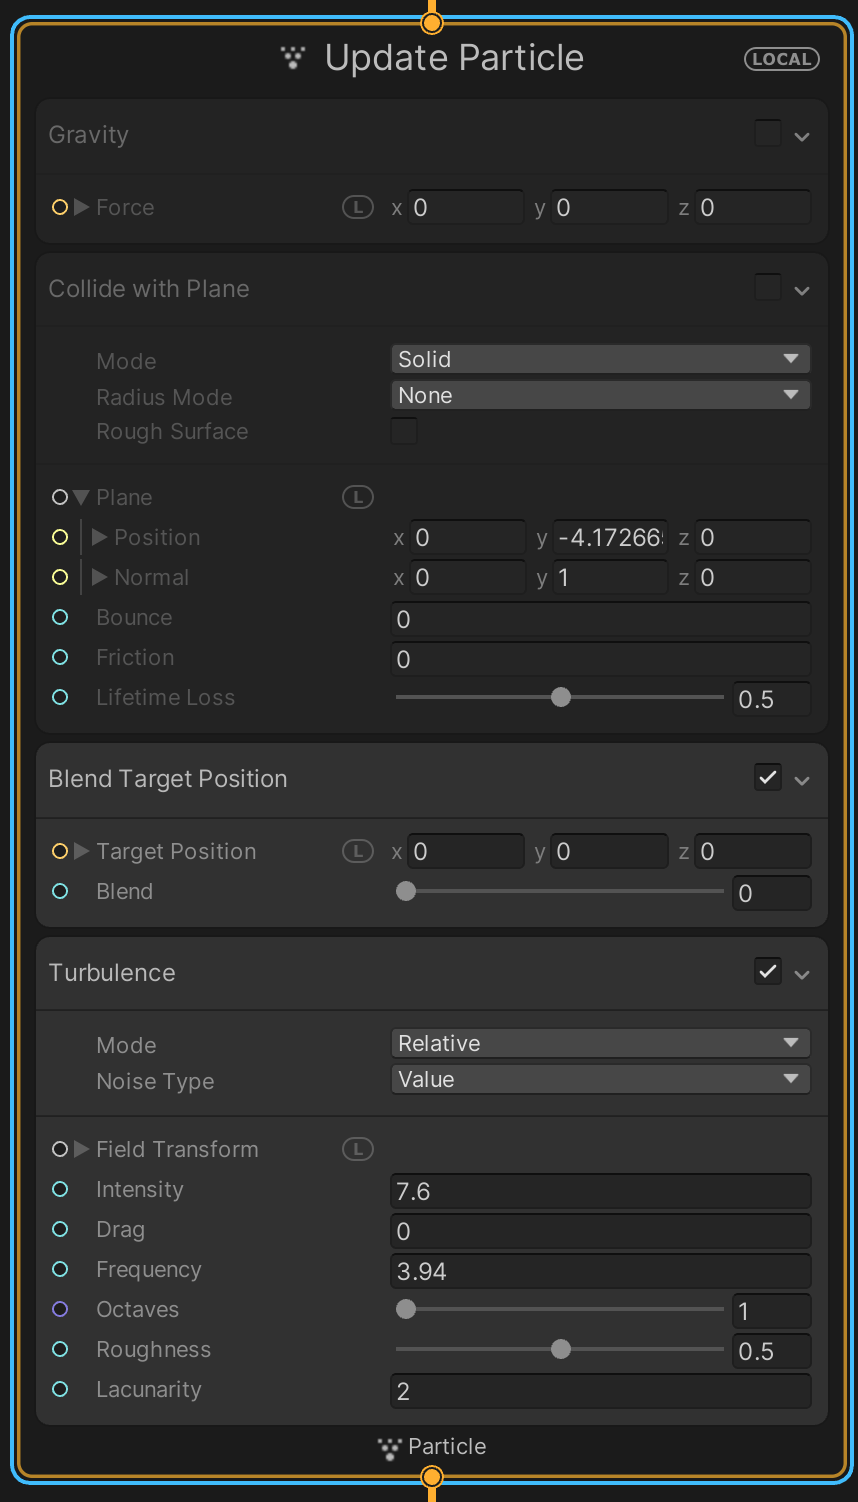
Each of these behaviors can be added as a new Block in the context. In the screenshot above, for example, Turbulence is a Block.
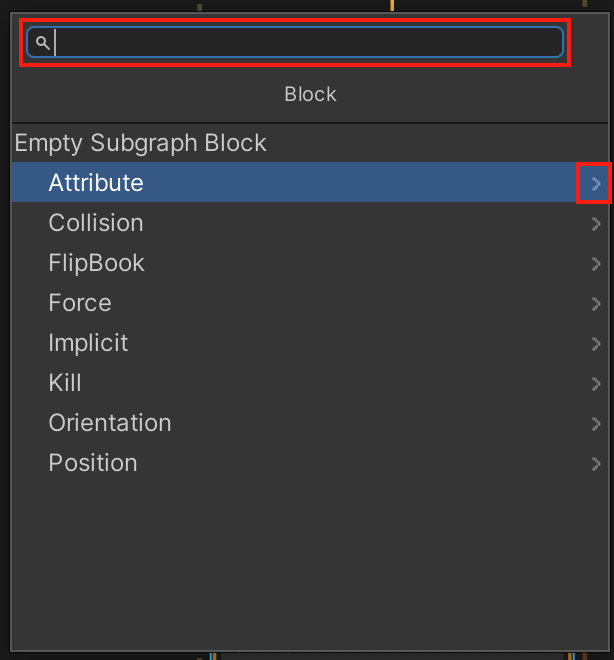
3. Experiment with new Blocks by right-clicking in the Context and selecting Create Block. Then either browse through the sub-menus or use the search bar to explore.
Output Particle Context
The Output Particle context controls the appearance of each of the particles, very similar to the Renderer module of a Particle System. This is where you assign a material for your particles.
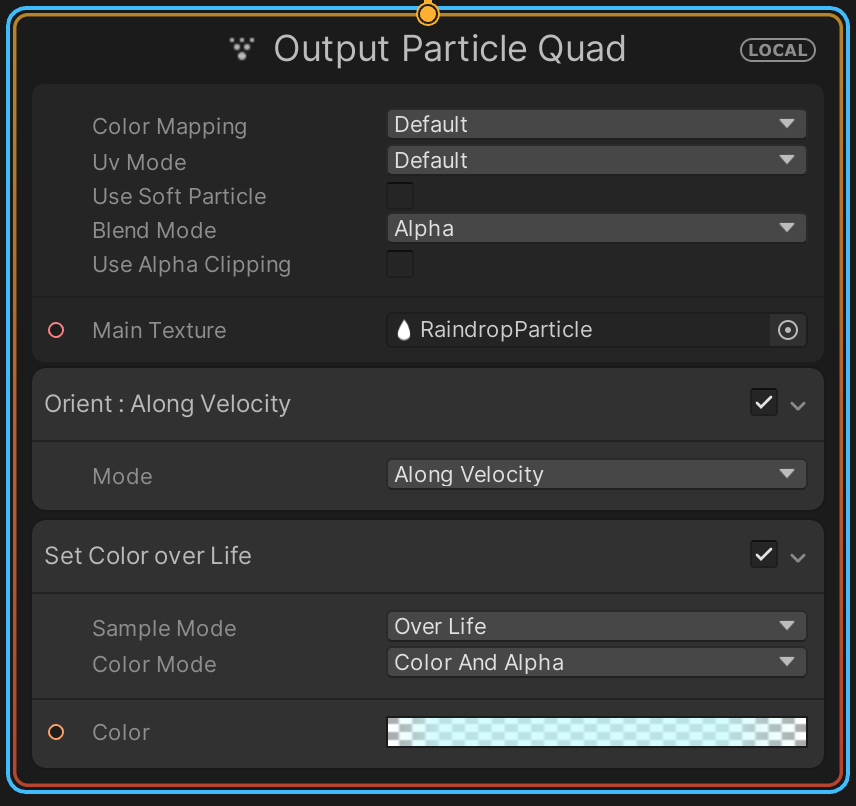
4. Configure the properties in the Output Particle context so that the VFX Graph version of the effect matches your original Particle System effect.
Your VFX Graph weather effect should now look similar to (or better than!) what you achieved with the Particle System.
5. Press Ctrl/Cmd+S in the VFX Graph editor window to save your work.
Note: The VFX Graph has a dedicated Save button within its interface. This is similar to the Prefab window save functionality. Make sure you save your VFX Graph often as you work on it, or that you enable the auto saving functionality.
7. Create a brand new VFX Graph\
You’re now familiar with what a VFX Graph might look like for a simple environmental particle like rain or snow, but that’s only scratching the surface of this tool’s potential.
Before looking at the types of complex graphs a professional VFX artist could make, you should know how to make a new graph from scratch.
1. In the Project window (not the Hierarchy), right-click > Create > Visual Effects > Visual Effect Graph, then move the new VFX Graph into the Hierarchy to add it to your scene. Move the object, represented by its lamp icon, somewhere you can see it easily.
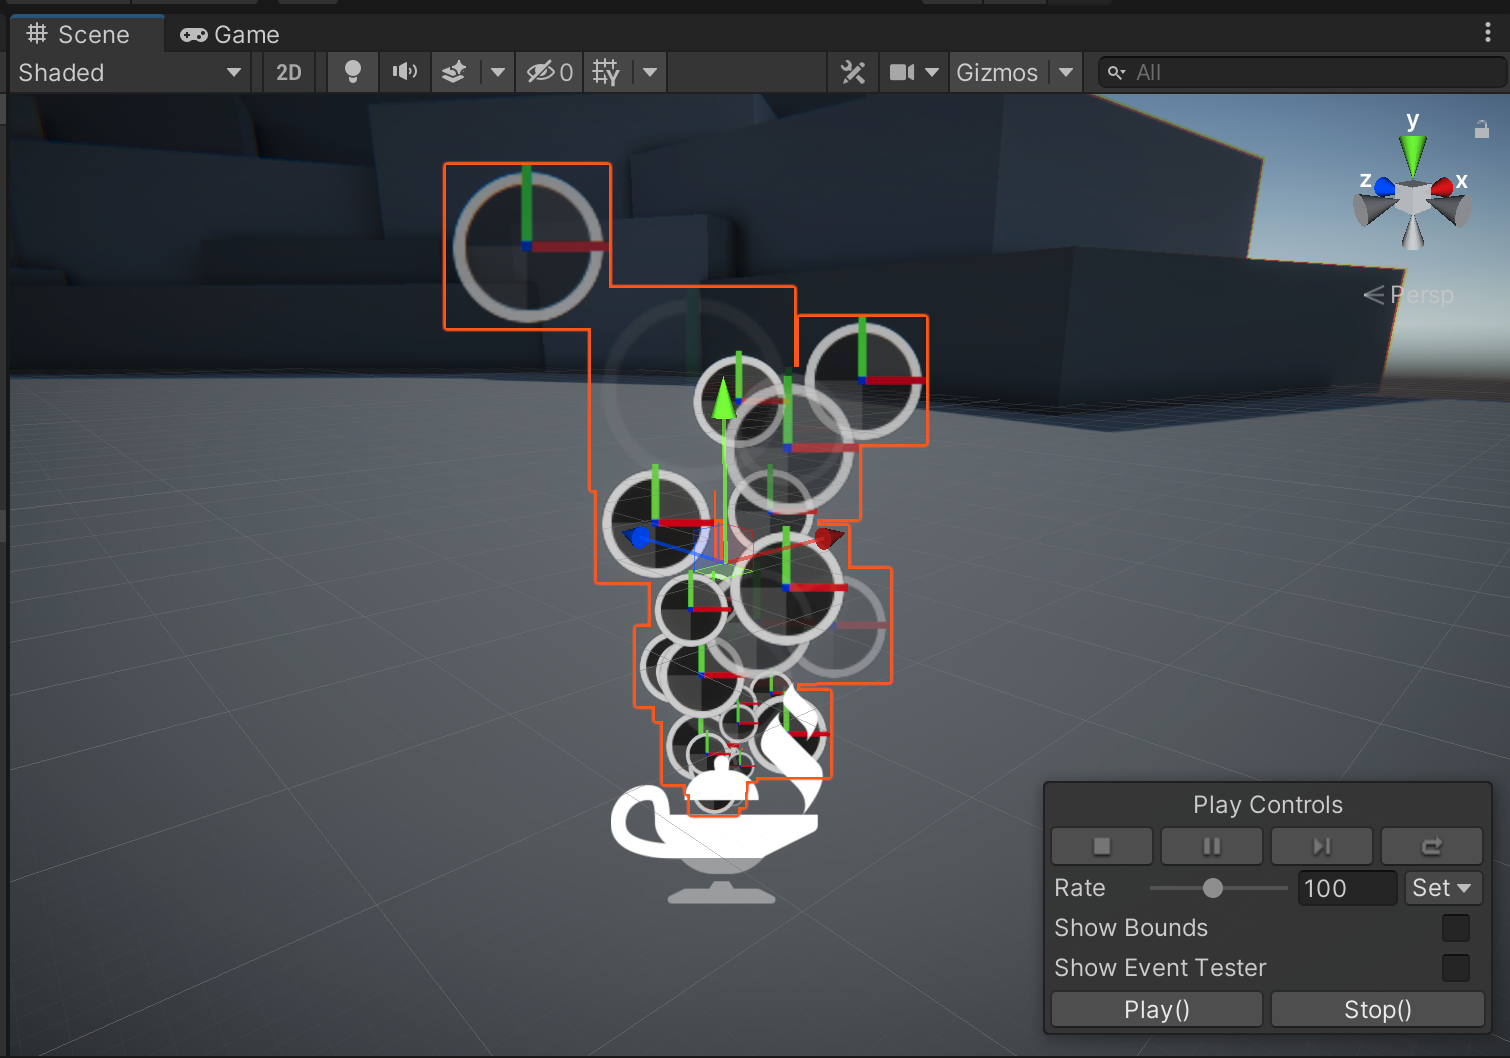
You’ll notice that, rather than the default white dot particle used by Particle Systems, VFX Graph’s default asset provides a very helpful circle with XYZ axis indicators on it to allow you to more easily visualize the particles’ transform properties.
2. Double-click on the VFX Graph asset in the Project window to open it in the VFX Graph editor window.
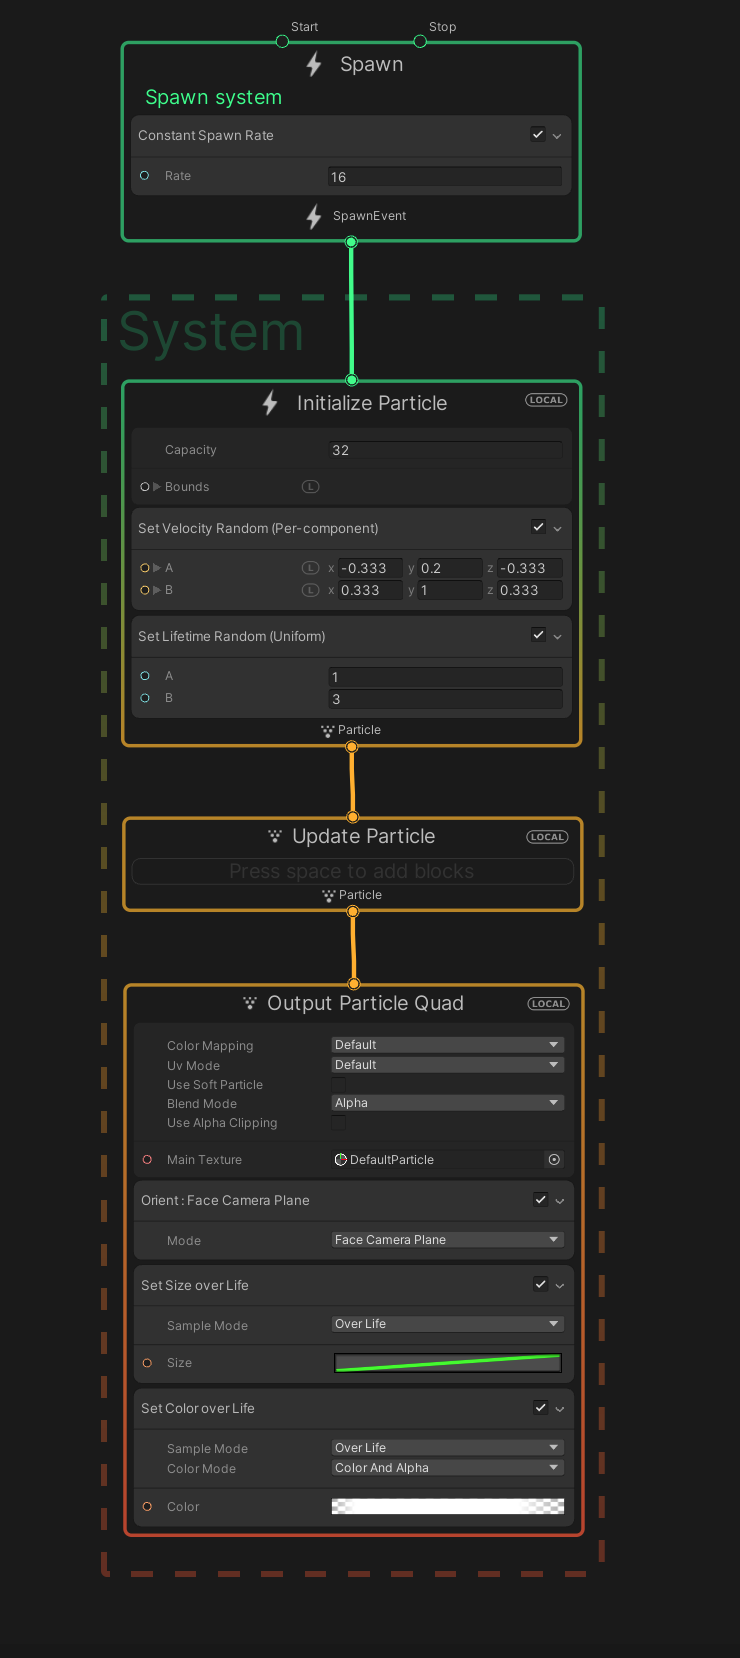
You’ll now probably be able to understand what is happening in each of the Blocks within the context nodes.
3. Try playing with some of the Blocks to see if you can make the particles do something interesting, like spin around in circles as they float upwards.
Hint: Add a Set Angular Velocity Block to the Update Particle context.
8. Examine a complex VFX Graph
Now that you know how VFX Graphs start out, let’s import a professional-level sample to see how far you can take them.
1. From the main menu, select Window > Package Manager, then from the list of packages in the left panel, select Visual Effect Graph. From the right panel, expand the Samples fold-out, then select Import to add the VisualEffectGraph Additions.
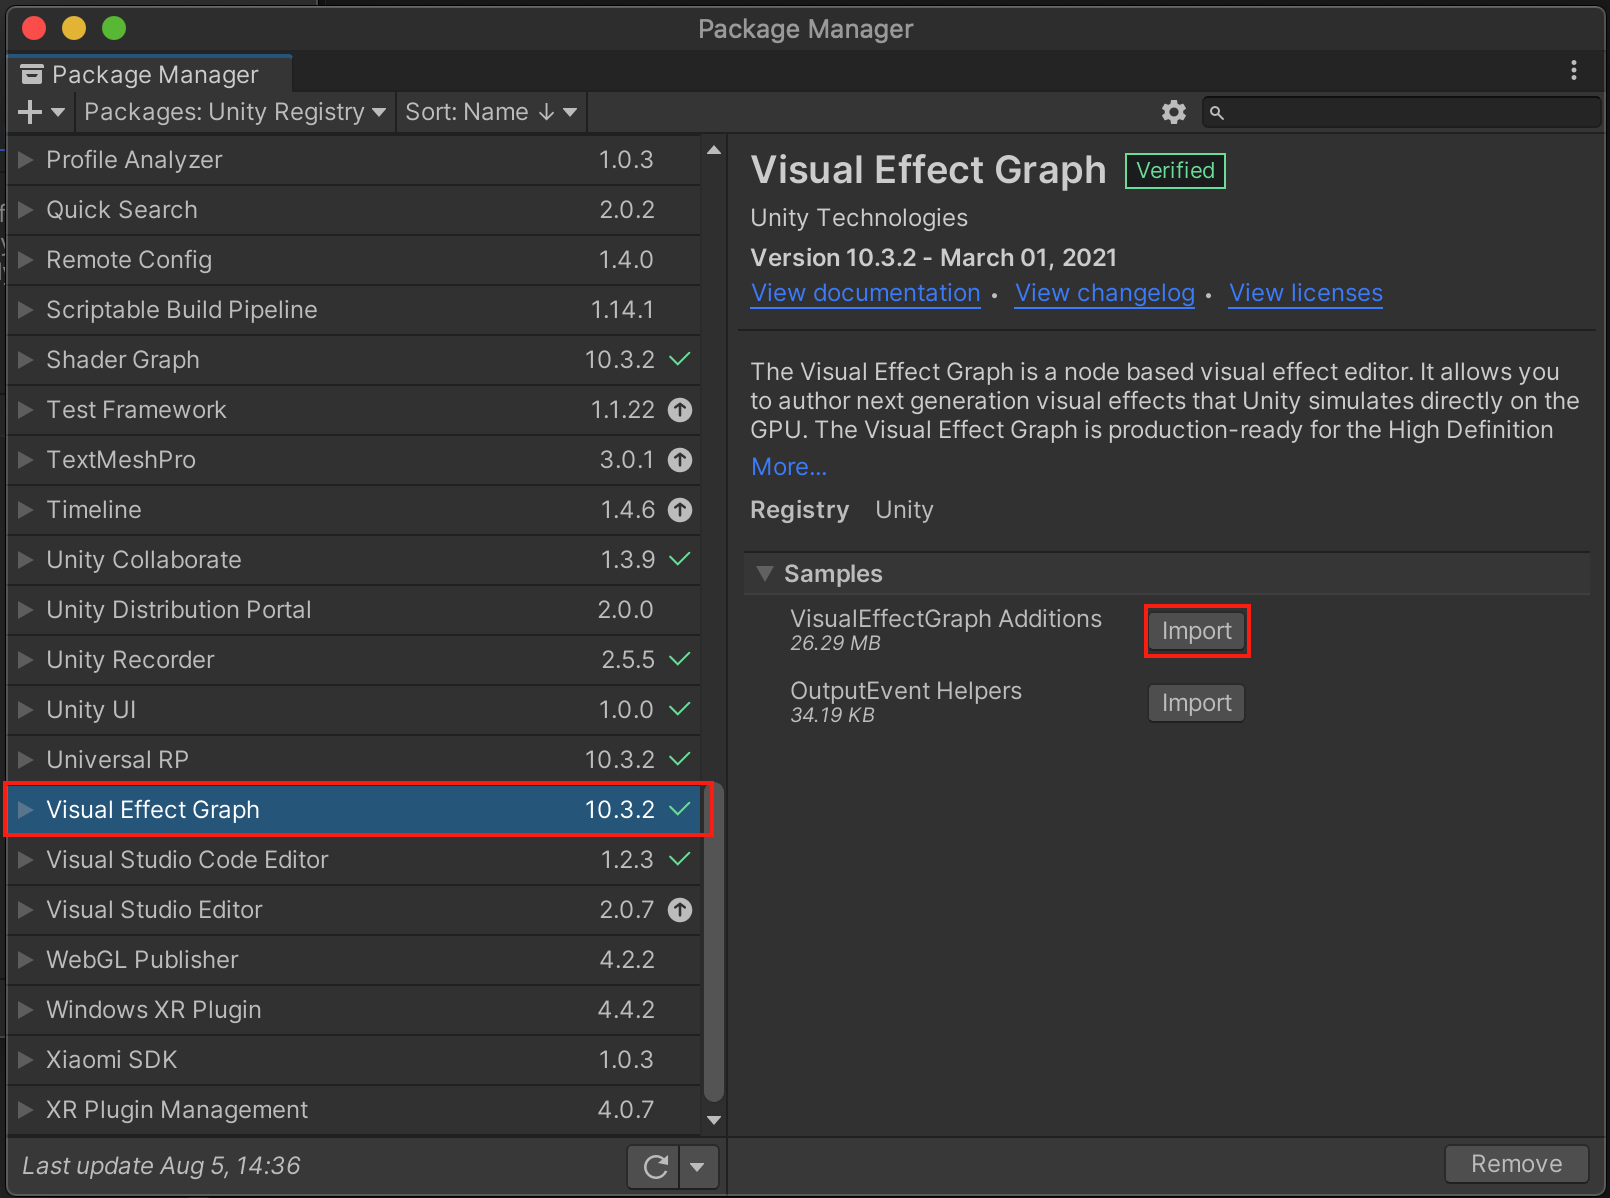
This will import some VFX Graph samples into your project.
2. The Samples will be automatically imported into whatever folder you had open in the Project window. From Assets > Samples > Visual Effect Graph > [version] > VisualEffect Graph Additions > VFX, drag the Bonfire VFX Graph from the Project window into the Hierarchy to add it to your scene. If the Samples folder was imported into another directory, you can search for it in the Project window.
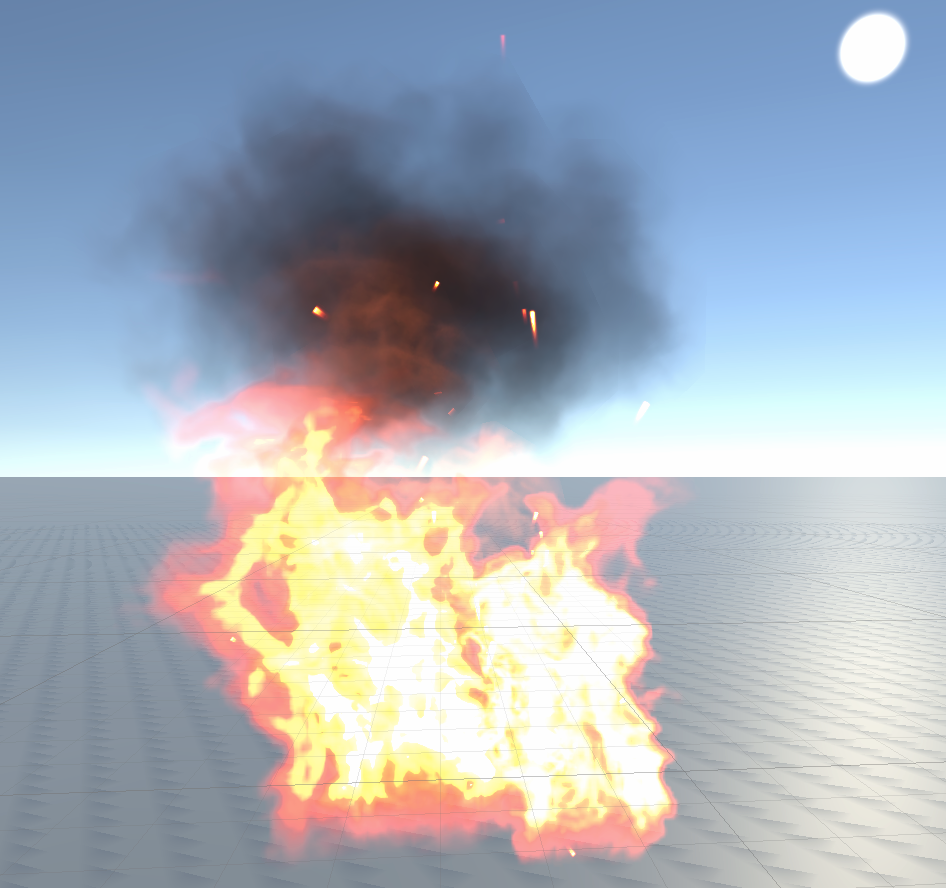
3. Double-click on the Bonfire VFX Graph in the Project window to open it in the VFX Graph editor window, then explore the graph.
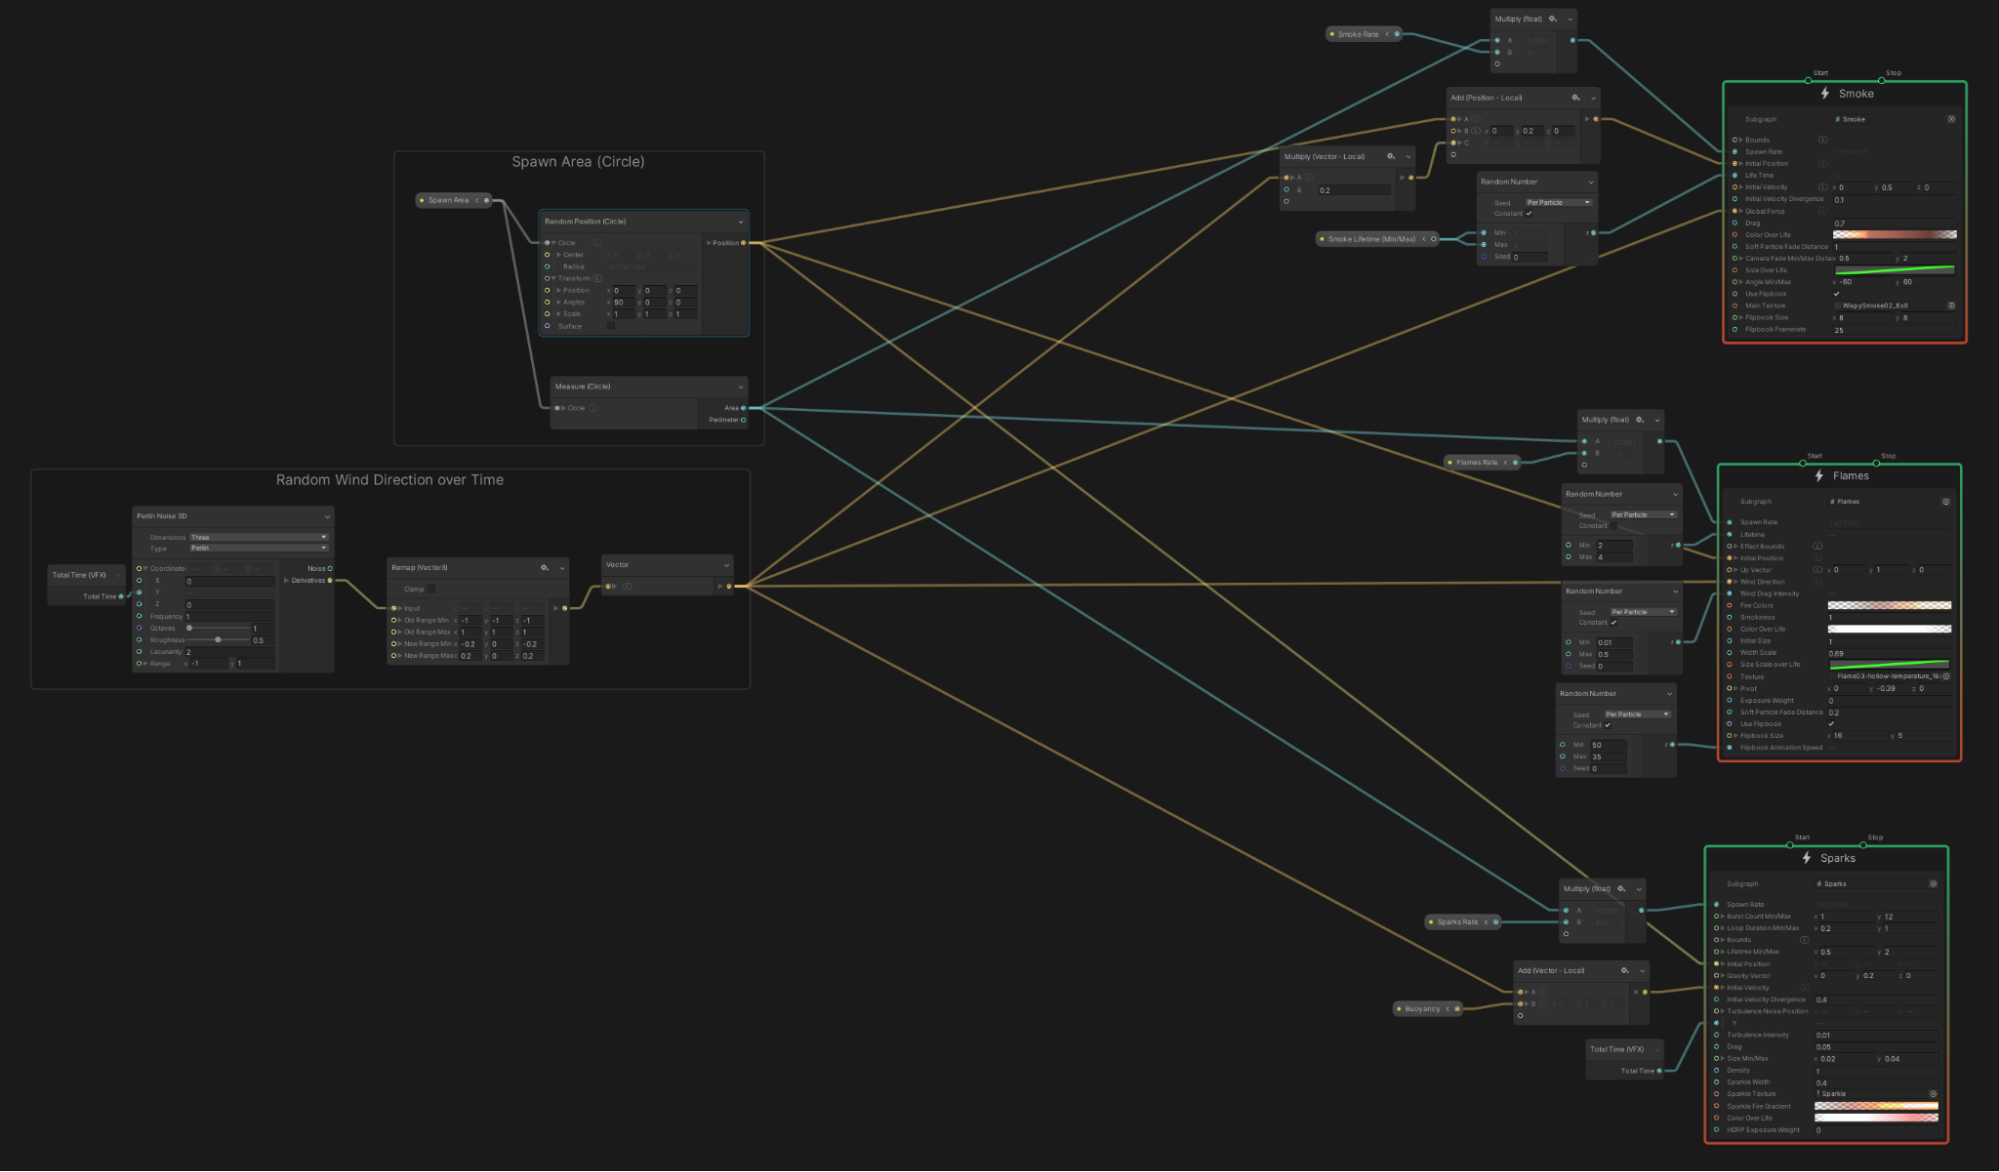
Just like the original fire Particle System you worked with, which was made of several sub-systems, this bonfire is made up of several subgraphs: Smoke, Flames, and Sparks. Each of these subgraphs is also tied together by a node group, which adds random wind direction over time.
You will also see that these VFX Graphs make use of Operators, which are the smaller nodes connected to the main contexts.
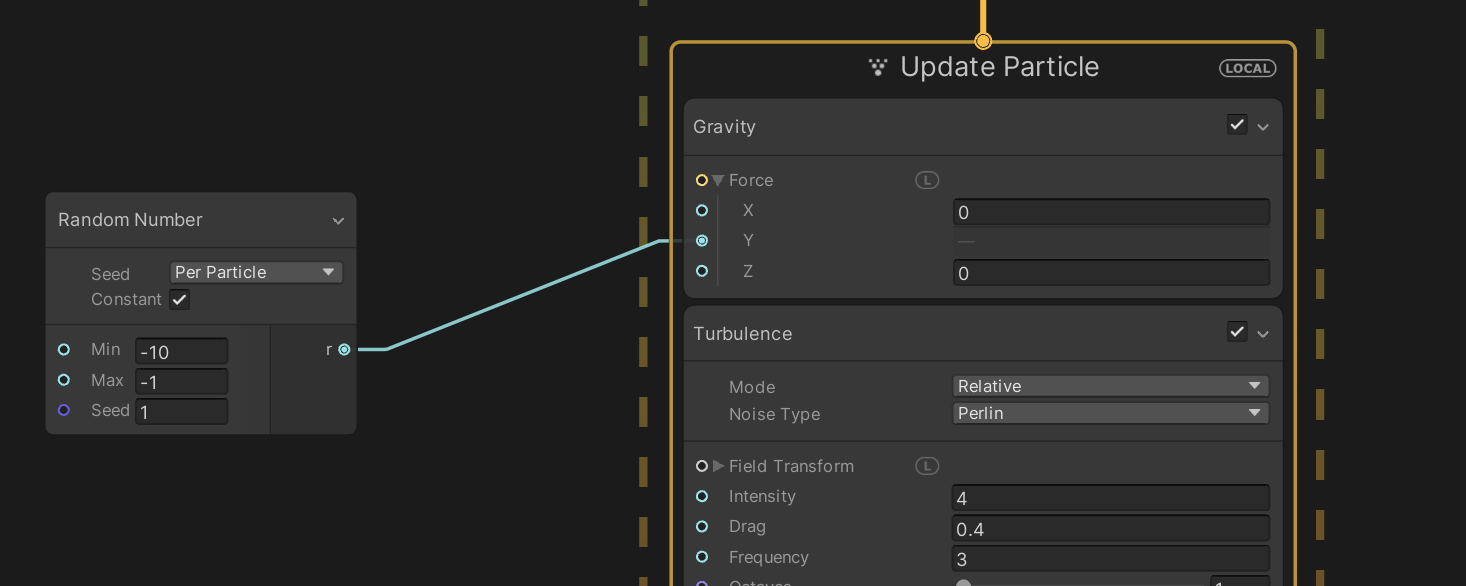
Operators allow you to use mathematical calculations and logic for custom behaviors, which are critical for more complex simulations.
VFX Graphs can get pretty complicated pretty quickly. But as the complexity increases, so can the awesomeness. If you want to dive even deeper into even more complex VFX Graph samples, you should check out Unity’s VFX Samples Github repo or Unity’s Spaceship Demo, which both contain some really cool VFX.
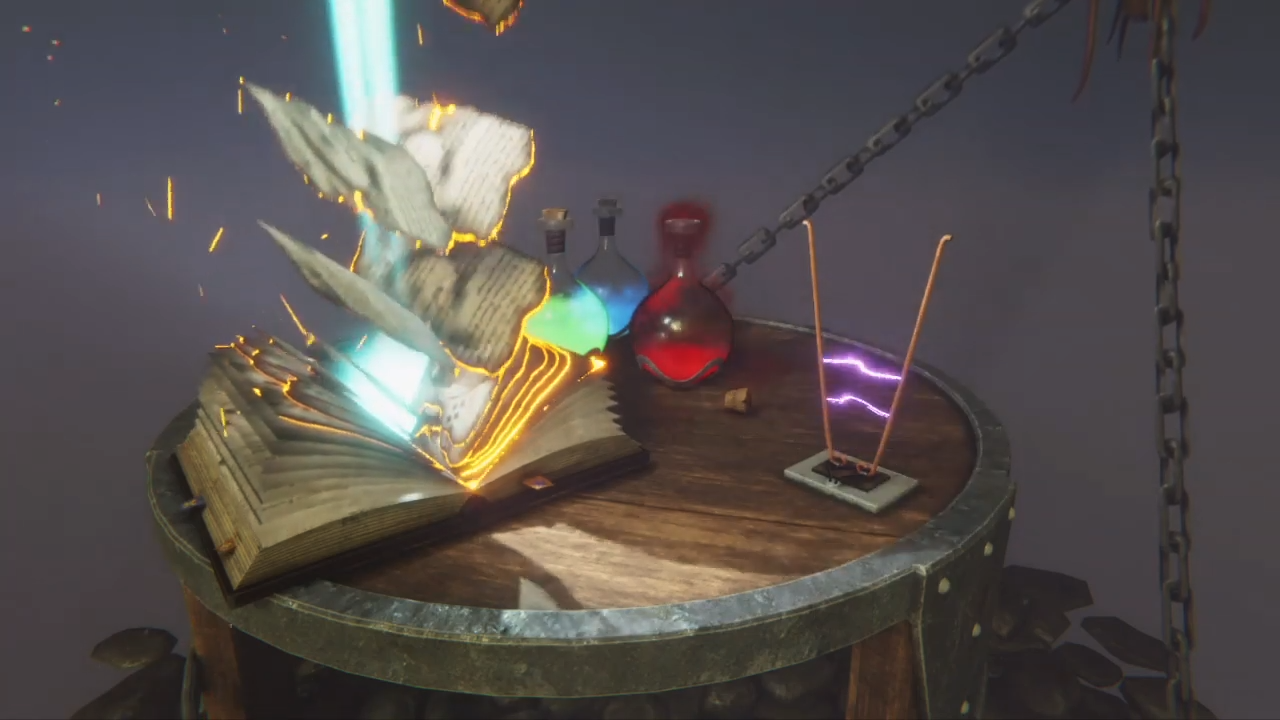
Image from VFX Showcase video.
Morphing face sample
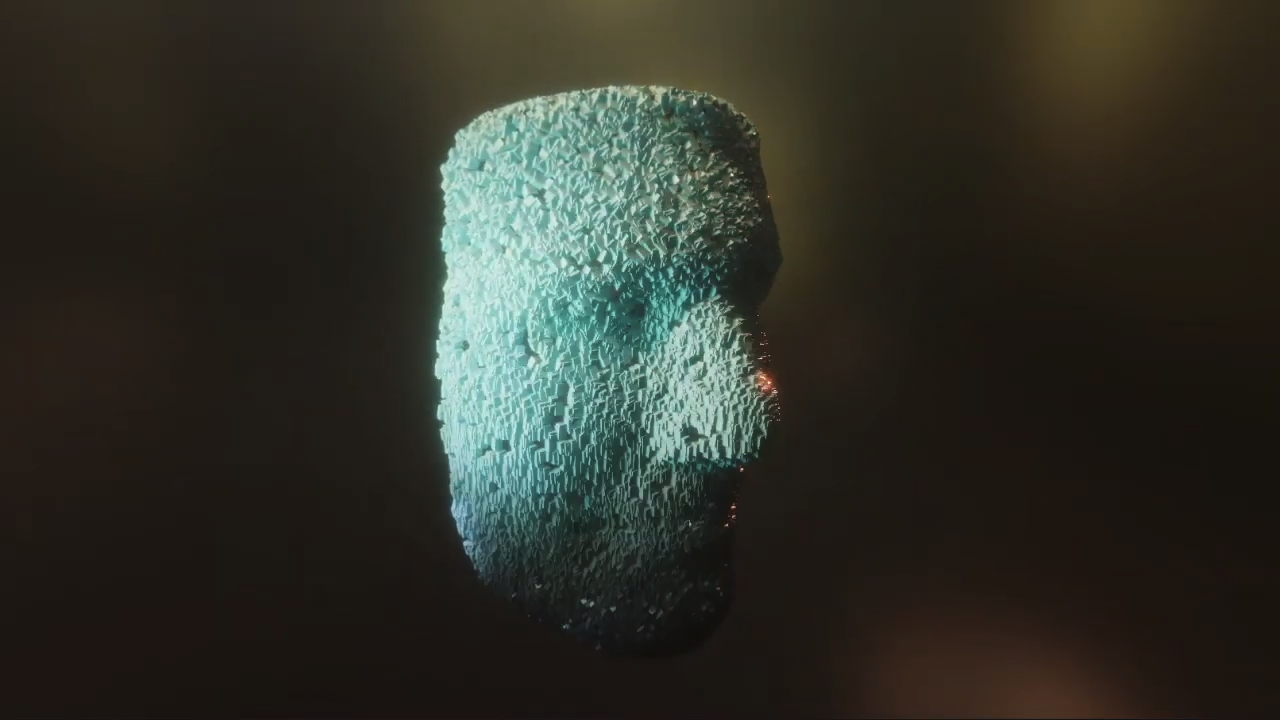
Image from VFX Showcase video.
Spaceship demo
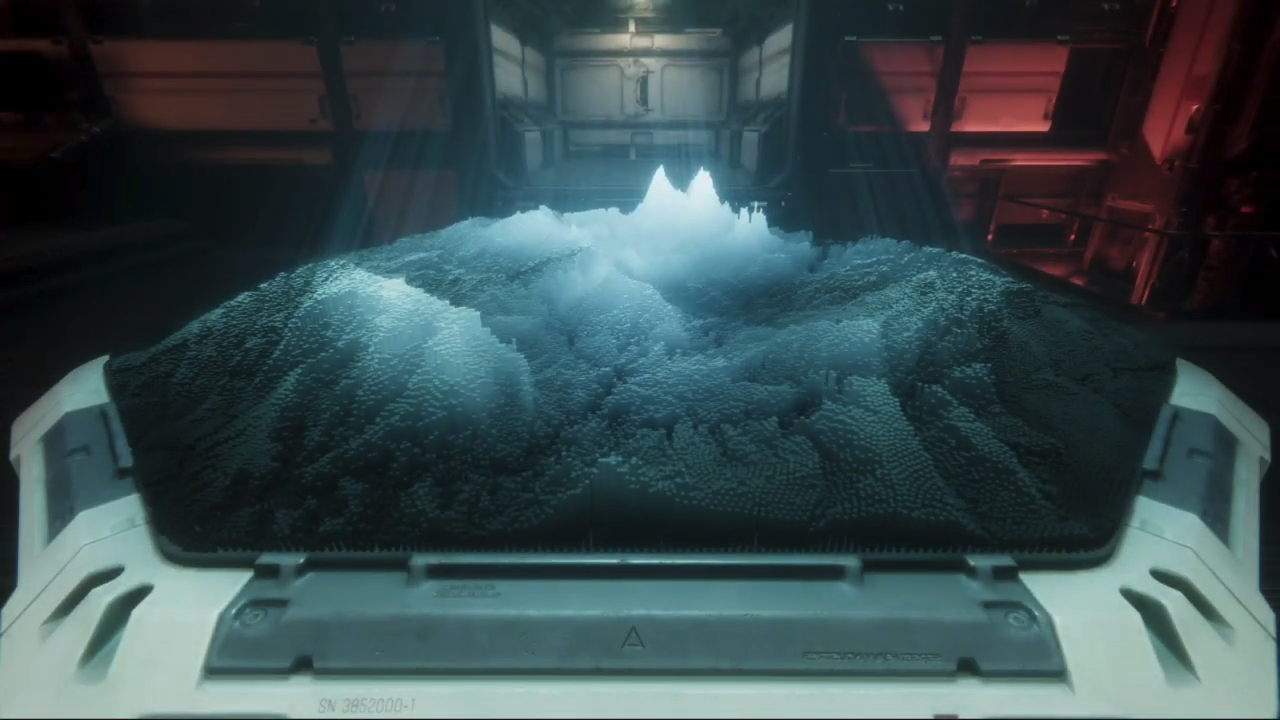
Image from VFX Showcase video.
9. Explore: Recreate the fire using VFX Graph
You are now familiar with how VFX Graphs are set up, but you have not yet attempted to create an effect with VFX Graph from scratch.
Try to recreate the fire using VFX Graph.
For more specific guidance on how to make edits in the VFX Graph, check out the VFX Graph documentation.
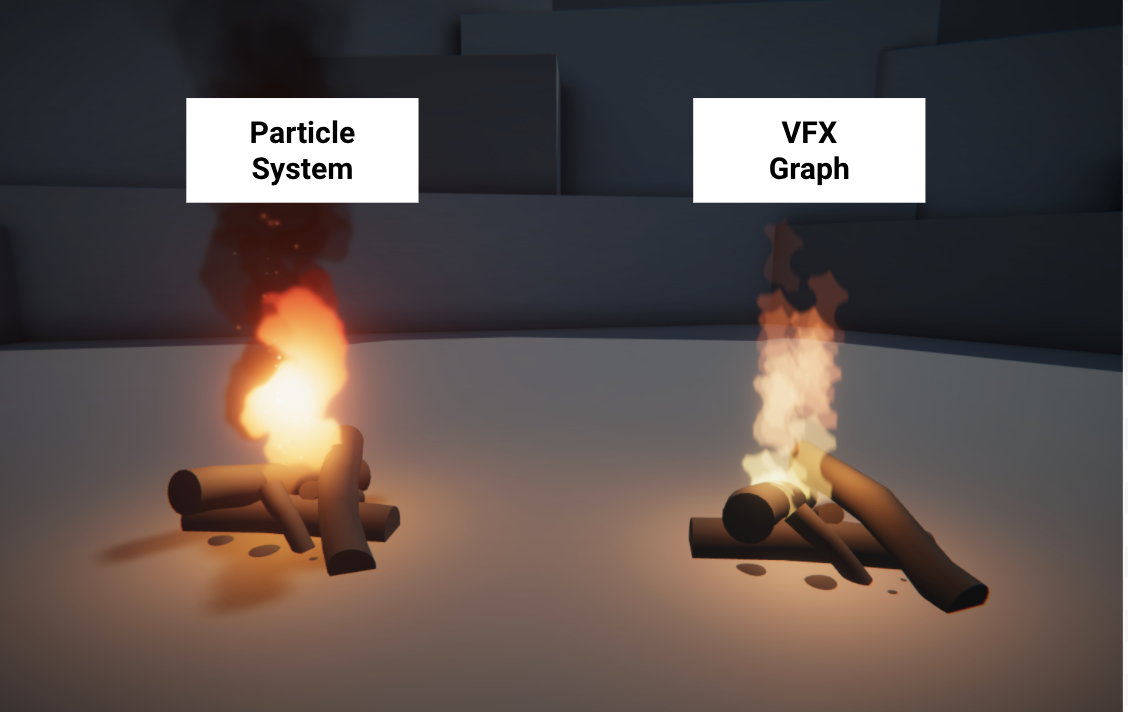
You may not be able to get it perfect; but if you get anything close, that’s quite an accomplishment!
10. Next steps
You now have an understanding of what a VFX Graph is, how it’s structured, and how it compares with the Particle System. In the next tutorial, you will apply your knowledge of VFX in a challenge to create some magical fireflies or shooting stars.