
Export your final cut
Tutorial
Beginner
+5XP
10 mins
(242)
Unity Technologies
In this final tutorial, you’ll export your final cut to a video file. You’ll also see how to export other types of data for extended editorial tasks through other software.
Languages available:
1. Overview
You’ve now created your own short cinematic animation within the sample movie. In this final tutorial, you’ll use the Recorder to export a video of the Sequence you edited.
Then, you’ll export other types of data from the movie:
- An Alembic animation file of the MICH-L character
- Arbitrary Output Variables (AOVs), such as albedo, normals, depth, and motion vectors
2. Export a video of your Sequence
To export your edited Sequence to a video file:
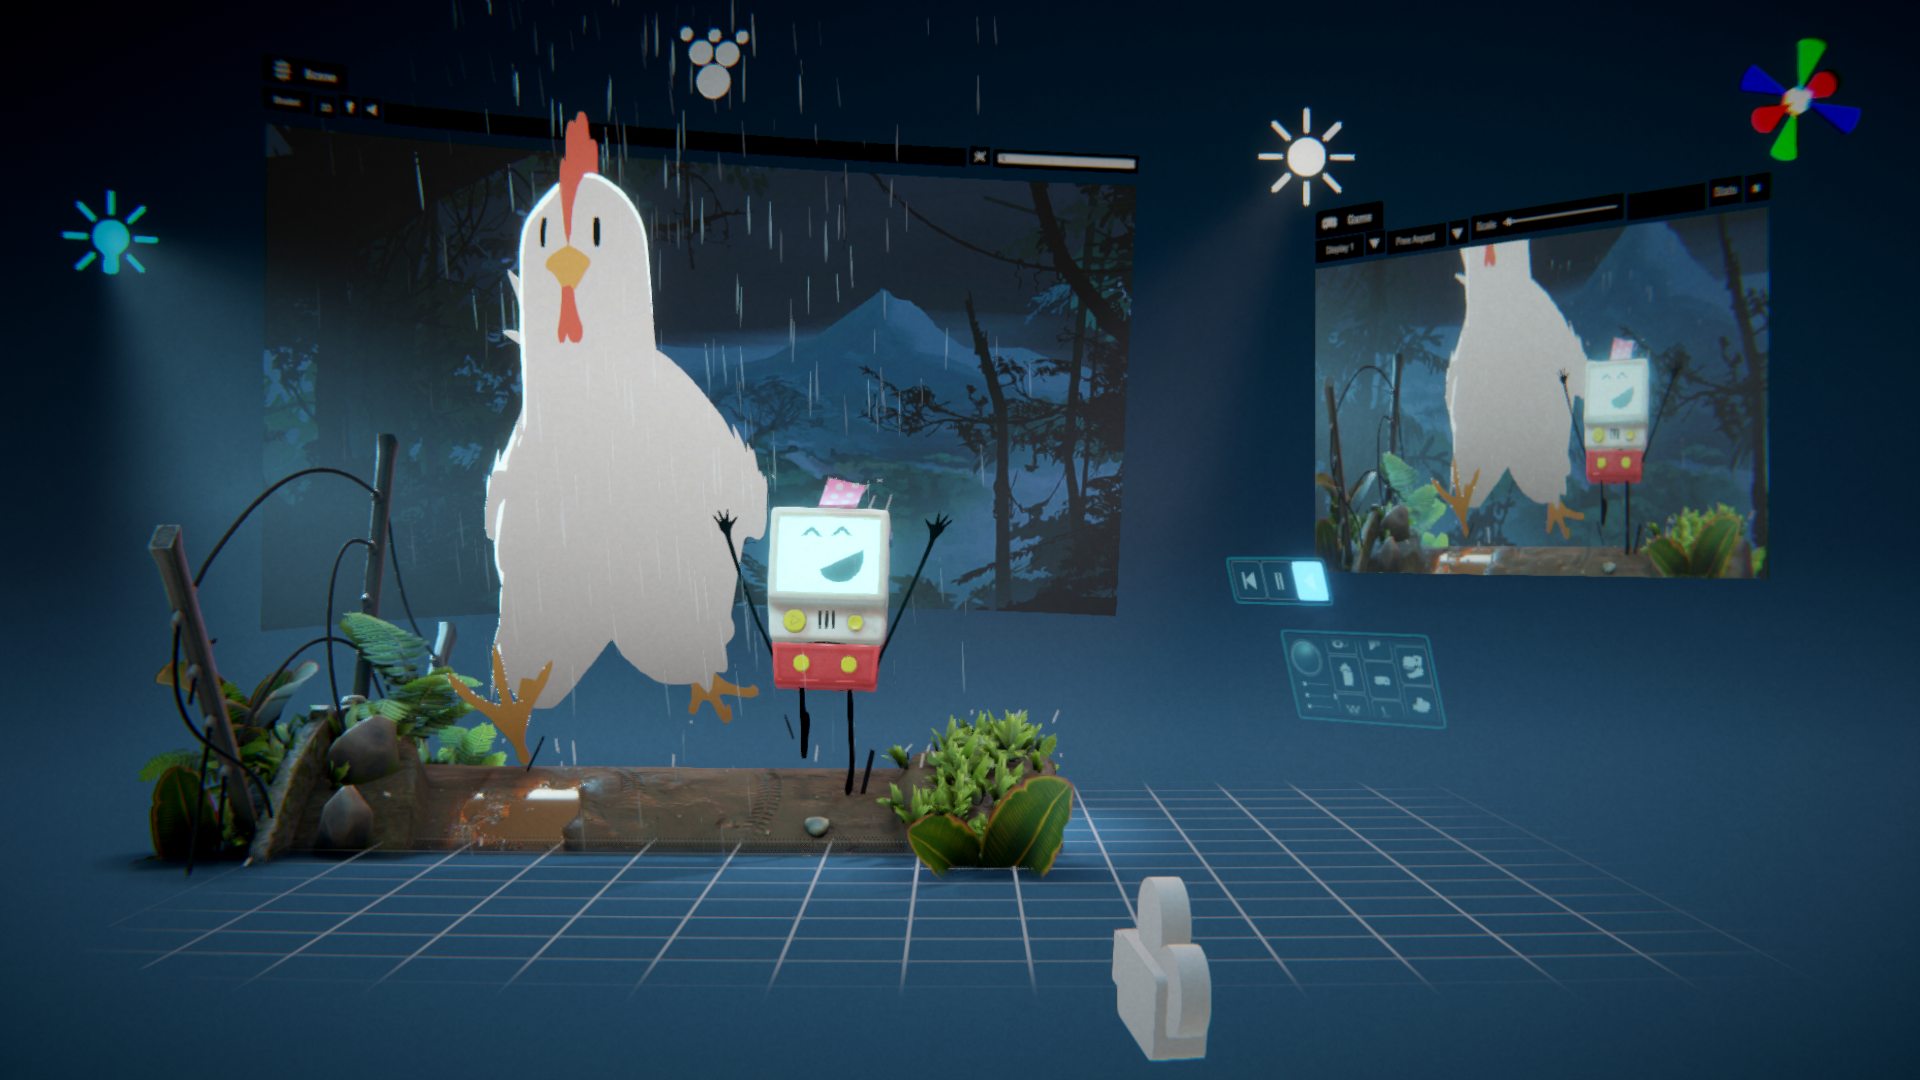
1. From the Sequences window, open the Recorder: right click on S01 and choose Record As.
2. In the Recorder Window, ensure to clear the Recorder list if it is not empty: in the left pane, click on the option menu and select Clear Recorder List.
3. Click on Add Recorder and select Movie.
4. In the Movie Recorder Settings, in the Format section, select the Media File Format you want to export the Sequence to.
5. Select the Start Recording button.
The Editor starts to play back the cinematic in Play mode from its beginning, but the actual recording starts when the playback reaches the targeted Sequence (S01). The recording automatically stops at the end of the targeted Sequence, and the Editor exits the Play mode.
6. In the Movie Recorder Settings, in the Output File section, select the output location button at the right of the Path section.
7. Locate the output file in the file system window and play it with your video player.
If you used the default settings, the file name should be “movie_001.mp4”.
3. Export an Alembic animation file
To export the Mich-L character animation from the S01 Sequence to an Alembic file:
1. From the Sequences window, open the Recorder: right click on S01 and choose Record As.
2. In the Recorder Window, ensure to clear the Recorder list if it is not empty: in the left pane, click on the option menu and select Clear Recorder List.
3. Click on Add Recorder and select Alembic Clip.
4. In the Alembic Recorder Settings, in Output File > Capture Settings > Scope, select Target Branch.
5. In the Hierarchy, expand the S01 GameObject, and then expand the MICH-L_S01 Prefab.
6. Drag and drop the 01_RIG_ch_Mich-l01 Variant Prefab to the Recorder window, in the Target field.
7. Click on the Start Recording button.
The Editor starts to play back the cinematic in Play mode from its beginning, but the actual recording starts when the playback reaches the targeted Sequence (S01). The recording automatically stops at the end of the targeted Sequence, and the Editor exits the Play mode.
8. In the Movie Recorder Settings, in the Output File section, select the output location button at the right of the Path section, and locate the output file in the file system window.
4. Export Arbitrary Output Variables (AOVs)
You can export various AOVs from your movie content. This mainly includes data related to the material, geometry, depth, motion, or lighting response of the elements present in the movie.
Note: This step shows you how to do the export in JPEG, so that you can see the result more easily through any basic image viewer.
For example, to export an image sequence of the albedo (the true colors) from the S01 Sequence:
1. If you closed the Recorder window, reopen it from the Sequences window: right click on S01 and choose Record As.
2. In the Recorder Window, ensure to clear the Recorder list if it is not empty: in the left pane, click on the option menu and select Clear Recorder List.
3. Click on Add Recorder and select AOV Image Sequence.
4. In the AOV Recorder Settings, in Capture > Aov to Export, select Albedo, and in Format > File Format, select JPEG.
5. Click on the Start Recording button.
The Editor starts to play back the cinematic in Play mode from its beginning, but the actual recording starts when the playback reaches the targeted Sequence (S01). The recording automatically stops at the end of the targeted Sequence, and the Editor exits the Play mode.
6. In the AOV Recorder Settings, in the Output File section, select the output location button at the right of the Path section.
7. Locate in the file system window the series of image files corresponding to the recording and open one of them to see the result.
8. To test another AOV, select a different value in Capture > Aov to Export, and start another recording. For more information about the available AOVs, see the Recorder documentation.
Output example for Normals:
Output example for Depth:
Output example for Motion Vectors:
5. Next steps
In this short tutorial series, you’ve started exploring what you can create with Sequences through the Cinematic Studio Template. We hope you enjoy using it, and we can’t wait to see what you create!
Keep in touch
For the latest updates and to discuss the Cinematic Studio Template, join us in the Unity Forum.