
Game Commands with Pressure Pads
Tutorial
Beginner
+10XP
60 mins
(300)
Unity Technologies
Game commands are a way for GameObjects in your Scene to communicate with other GameObjects, allowing you to add more complex behaviours to your Scene. This communication happens through events in scripts, which you can control via components in Unity. We’ve provided the relevant components for you in this tutorial.
Languages available:
1. Connecting GameObjects that have Interactables
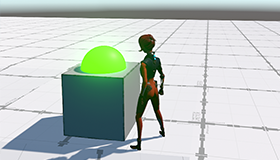
This example demonstrates how to create a pressure pad that activates the MovingPlatform. It walks through how to create a PressurePad Prefab, and how to make it communicate with the MovingPlatform Prefab you made in the MovingPlatforms tutorial.
To prepare the MovingPlatform for interaction with the PressurePad, disable the Simple Translator’s Activate check box.
Go to the Project view and navigate to 3DGamekitLite > Prefabs > Interactables. Drag and drop a PressurePad from the Project window into the Scene view near the MovingPlatform.
The PressurePad has a Send On Trigger Enter component. Navigate to the PressurePad’s Inspector window to view it.
Send On Trigger Enter allows you to connect the PressurePad to other GameObjects, and trigger an interaction when your player touches the PressurePad. There are a lot of settings here, but for now you only need to think about the first two:
- Interaction Type defines what happens when the PressurePad interacts with the connected GameObject.
- Interactive Object is the GameObject that the PressurePad is connected to.
For this example, let’s link the PressurePad to the MovingPlatform:
- Set Interaction Type to Activate.
- Click the Interactive Object’s Selection button (the circle to the right of the field), and select MovingPlatform.
These settings mean that the PressurePad is connected to the MovingPlatform, and when the two GameObjects interact, the PressurePad activates the MovingPlatform.
The Scene view should now display a line with directional arrow heads connecting the PressurePad and the MovingPlatform. This visualises the relationship between the two GameObjects, and shows the flow of Sender to Receiver for Game Commands. Here, the PressurePad is the Game Command Sender, and the MovingPlatform is the Game Command Receiver.
Play your game and walk on the PressurePad to activate the MovingPlatform and begin the looping sequence. The PressurePad should stay pressed once you’ve stepped on it.
2. Opening Doors with Switches
Now that you know how to connect GameObjects and send Game Commands,, let’s look at some other ways you can use this ability.
In this example, let’s add a door, and a Switch to activate it:
- In the Project window, go to Assets > 3DGamekitLite > Prefabs > Interactables.
- Find the DoorSmall Prefab and drag it into the Scene.
- Position DoorSmall somewhere in your level.
Tips for moving the GameObject:
- There are 3 Transform tools in the Inspector window for DoorSmall; you should use Position to move it around.
- DoorSmall has several child GameObjects. Always make sure that you select the parent GameObject that you want to move.
DoorSmall has a Simple Translator component. This is automatically set up to allow the door to open by sliding down into the ground when it receives an Activation message.
Let’s take a look at how to create a Switch that sends an Activation message to DoorSmall.
- In the Project window, go to Assets > 3DGamekitLite > Prefabs > Interactables.
- Find the Switch Prefab and drag it into the Scene.
- Position it near DoorSmall in the Scene for easy access while testing.
- Press Play and run up to the Switch.
- The Switch is set up to activate when Ellen collides with it. When the Switch activates, it plays an animation, changes color, and plays a sound.
Let’s set the Switch up so that when it activates, it sends a command to DoorSmall to open it.
- In the Hierarchy window, select Switch.
- Take a look at the Inspector window.
The Switch has a Send On Trigger Enter component. This can send commands to a GameObject that has a Game Command Receiver component attached to it.
DoorSmall has a Game Command Receiver component attached to it.
To send a command to DoorSmall:
- Select the Switch, then click and drag DoorSmall from the Hierarchy window into the Send On Trigger Enter component and place it in the InteractiveObject slot.
Now the Switch knows which GameObject to send a Game Command to.
You can also see this connection in the Scene view. The white arrowed line shows which GameObject it’s connected to, and which direction Send On Trigger Enter is sending the message.
- In the Switch’s Send On Trigger Enter component, click the Interaction Type drop-down.
- Set it to Open.
This sends the Open command to DoorSmall when Ellen runs into it.
- In the Switch’s Send On Trigger Enter component, tick the One Shot checkbox.
This ensures that the component only sends the Game Command once.
- Press Play to test your level.
This time, when you make contact with the Switch, the door should open.
If your door doesn’t open, check that your connection is definitely going to DoorSmall.
- On the Simple Translator, make sure the Interaction Type is set to Open.
- On the Game Command Receiver, make sure the Switch is in the list of Senders.
3. Using Counters and Switches
You can connect several GameObjects together. This section explains how to create a door that only opens after you activate three Switches.
- In the Hierarchy window, select the Switch GameObject.
- Press Ctrl + D (Cmd + D on macOS) to duplicate the Switch.
- Repeat this one more time to get another Switch.
You should see Switch, Switch (1) & Switch (2). These appear at the very bottom of the Hierarchy window. To keep your project organized, drag them next to each other in the Hierarchy window.
When you duplicate a GameObject, it appears in the Scene at the same position as the original. You won’t see it until you move it.
- In the Hierarchy window, select each of the Switches individually, and position them next to each other in the Scene so they form a row.
When you duplicate the Switch GameObject, Unity also duplicates the connection to DoorSmall. At the moment, the door opens when you collide with any one of these Switches. You can press Play and give that a try if you want to.
We want the door to open only when Ellen activates all three Switches.
- In the Project window, go to Assets > 3DGamekitLite > Prefabs > Interactables.
- Find the Counter Prefab and drag it into your Scene.
- Position it near your Switches.
The Counter GameObject has no physical presence in the Scene; all it does is contain some game mechanics.
Tip:
Because you can’t see it in the Scene, you need to use the Hierarchy window when you want to select it. Alternatively, you can add a label to make this GameObject more visible in the Scene view:
- Select the Counter.
- At the top of the Inspector window, click the blue cube.
- Select a colour label from the drop down.
This adds a label to your GameObject.
If you can’t see it, you might have your icons too small in the Scene view. Follow these steps to change this:
- At the top of the Scene view, click the Gizmos drop-down.
- Adjust the 3D Icons slider. This changes the size of the icons in the Scene view.
Now that you have a Counter in the Scene that can count a number of senders, you need to send the Counter the “Open” Game Command from each Switch.
- In the Hierarchy window, select Switch.
- Click and drag the Counter into the Send on Trigger Enter component and place it on the Interactive Object slot.
This replaces DoorSmall with Counter as the GameObject to send a command to.
The arrows in the Scene view should now be connected to the Counter instead of DoorSmall.
- Repeat the above steps with Switch (1) & Switch (2).
All 3 Switches should now point to the Counter. This means they’re set up to send messages and commands to that Counter.
To double check this, look at the Inspector for the Counter, and on the Game Command Receiver component make sure the Switches are all in the Senders list.
Now if you enter Play mode and run into each Switch, nothing happens. You still need to tell DoorSmall to open when the Counter detects that Ellen has touched all three Switches.
- In the Hierarchy window, select the Counter.
- In the Inspector window, change the following settings on the Gameplay Counter component:
- Interaction Type: Open
- Is One Shot: True (tick the box)
- Target Count: 3
This receives a command of type Open, only counts it once, and sets the target amount to fulfil the Counter at 3.
Now let’s make the Counter send a Command to DoorSmall.
- With the Counter selected input the following settings on the Send Game Command component:
- Interaction Type: Open
- Drag DoorSmall from the Hierarchy window to the Interactive Object slot
- One Shot: Enabled (tick the box)
Now each Switch sends a command to the Counter, and the Counter sends an Open Command to DoorSmall when it has received 3 commands.
Press Play to test your level. You should be able to activate each Switch, and DoorSmall opens when you have touched all 3.
You can use the Counter for many conditions that requires multiple actions to take place. The Send Game Command component has various Interaction Type options: