Get started with cameras
Tutorial
·
Beginner
·
+10XP
·
25 mins
·
(503)
Unity Technologies

In this project, you’ll learn how to work with cameras both from a technical and design perspective.
By the end of this tutorial, you'll be able to:
- Distinguish between various camera viewpoints in order to give end users the appropriate orientation to the scene.
- Explore the effects of camera setup on the user’s experience.
Languages available:
1. Overview
Few things are more ubiquitous in Unity than a camera. They are automatically included with every new scene created in the Editor, and an interactive experience cannot be tested without one. Despite their importance to a final project, cameras are often overlooked. However, careful camera design can enhance any interactive experience. Cameras can help communicate the mood and narrative of a story, indicate important visual features that the user should pay attention to, and even help the user understand their own role in the experience. In this project, you’ll learn how to work with cameras both from a technical and design perspective.
2. Before you begin
New to Unity?
This learning experience assumes that you are already familiar with the Unity Editor. If you’re new to Unity, the Unity Essentials learning pathway has been designed to help you get set up and ready to create in the Unity Editor.
Update the Unity Hub
Before you begin to set up your Unity project, consider updating your Unity Hub to the latest release. If you are using an older version of the Hub, there may be differences between the guidance provided and your experience.
Review the Unity Editor basics
If you need to refresh your memory of the Unity Editor basics, you can take a moment to review Explore the Unity Editor at any time.
Set up your Unity project
To set up your Unity project:
1. Install Unity 6, if you haven’t already done so.
2. Download the project for this learning experience.
3. Identify a suitable location on your computer and unzip the project folder there. Remove the Unity project folder from its empty parent folder.
4. Add the Unity project to the Unity Hub.
5. Open the project from the Unity Hub.
6. In the Unity Editor’s Project window, locate the Scenes folder and then open Camera_Intro_Scene.
3. Welcome to Creative Core: Cameras
What is the goal of Creative Core: Cameras?
The goal of this learning experience is to introduce you to the main features of a Unity camera and how to modify them to get a desired shot. You’ll also explore how cameras can be used to establish a mood and hint at narrative in an interactive experience. The skills you build in this project are applicable across all creative industries.
What will I do in this learning experience?
As you work your way through these tutorials, you’ll learn about the different camera features and how they’re commonly used in interactive experiences. You’ll also explore several scenes that show these different camera shots in action so you can gain a better understanding of how they work in actual in-application situations. You’ll complete this project by applying all of the skills that you will learn to recreate a camera shot from your favorite media.
What will my learning outcomes be?
By the end of this learning experience, you will have explored all of the major features of a Unity camera and will be able to confidently configure them to suit your scene needs. You will have also explored several popular camera shots and angles, and will have a foundational understanding of how mood can be established with them.
You’ll be able to apply these skills to set up your shoots in your chosen guided project and your independent project (if you are completing the Creative Core pathway) or any other prototype real-time experience created with Unity.
4. Who sets up cameras in Unity?
Unlike other areas of focus in Unity, the creation and maintenance of cameras doesn’t typically fall to a dedicated job role. Instead, the creator who is working closely with the overall vision for the experience is most likely to take on the task. For games, this might be a programmer who is creating the character controller. For animation, storyboard artists might determine their shots directly in the Editor, just like a cinematographer or director for film. Because this role can fall to anyone, it’s important that all Unity creators have a good basic understanding of how cameras work in the Editor.
5. The importance of cameras in interactive experiences
When a creator places a camera in a scene, they’re determining what a user can see, and often, how they should feel about what they’re seeing. Before exploring the different features of cameras in Unity, let’s take a moment to better understand the role of cameras in interactive experiences.
1. In the Camera_Intro_Scene, press the Play button and, using the WASD keys, try to navigate the player character to the red cube.
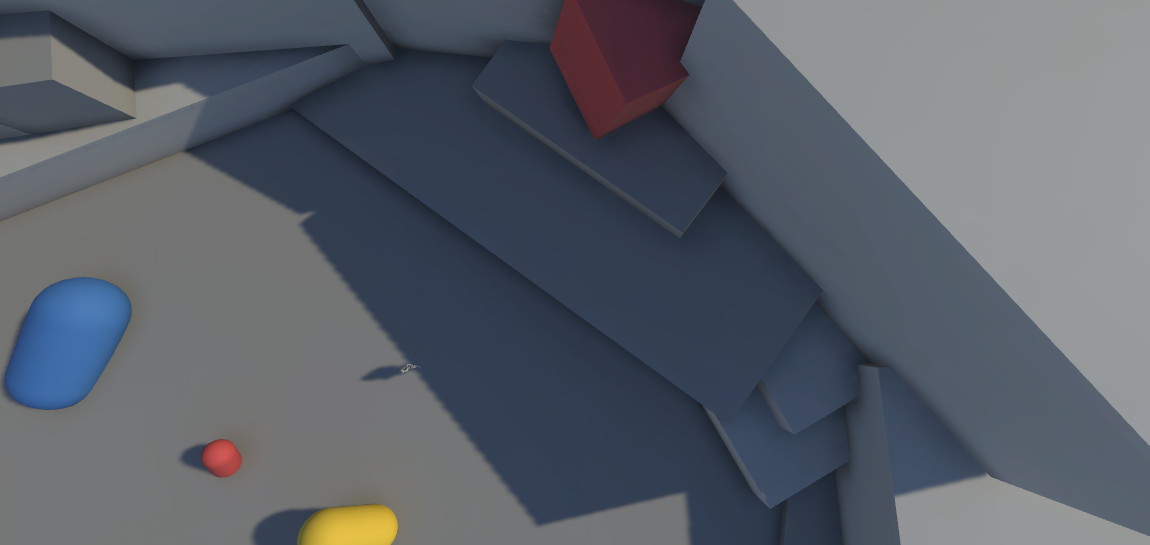
Because of the camera angle, it’s difficult to notice that the platform the red cube is on is at an angle and mostly too high for the character to jump onto. This forces the user to try and fail to jump onto it before realizing they need to navigate to the lower end of the platform first. In a static environment with no risk, this isn’t much of a problem. However, if some sort of external challenge is involved (enemies, a time limit to reach the cube, etc.), the lack of visual feedback will really frustrate the user!
2. Press C on your keyboard to change the camera view.
3. Navigate to the cube in this new view.
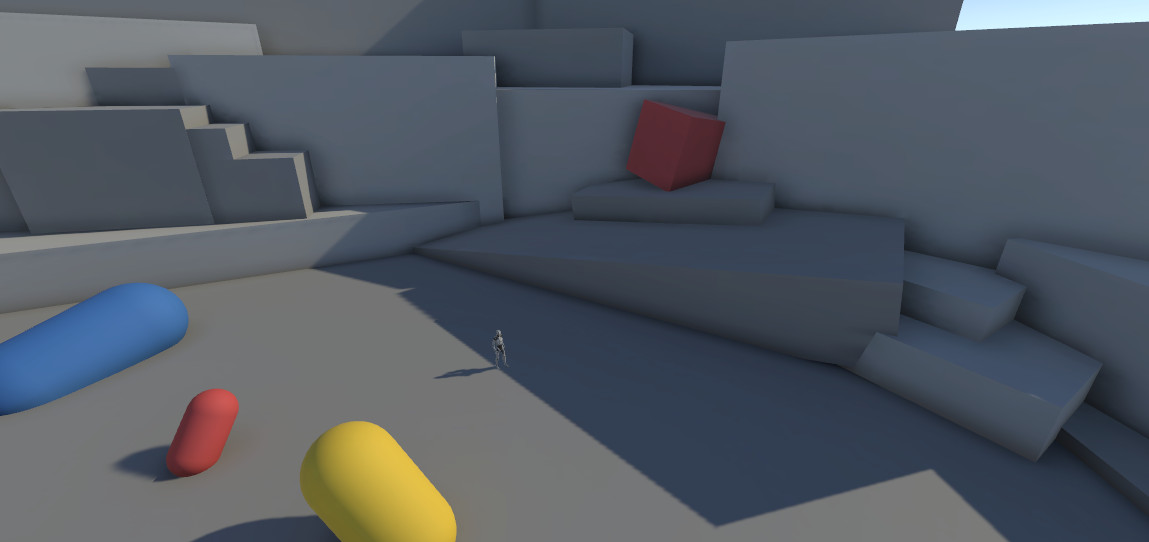
From this camera angle, it’s much easier to tell that the user will need to make use of the ramp to reach their goal.
In addition to contributing to overall ease of use, camera placement can play a large role in delivering cues about objects and characters in frame.
Note: You will not be able to move your character when using the last camera views. Instead notice how different it looks and how it can be used to achieve specific effects.
4. Press C on your keyboard to change to the next camera view.
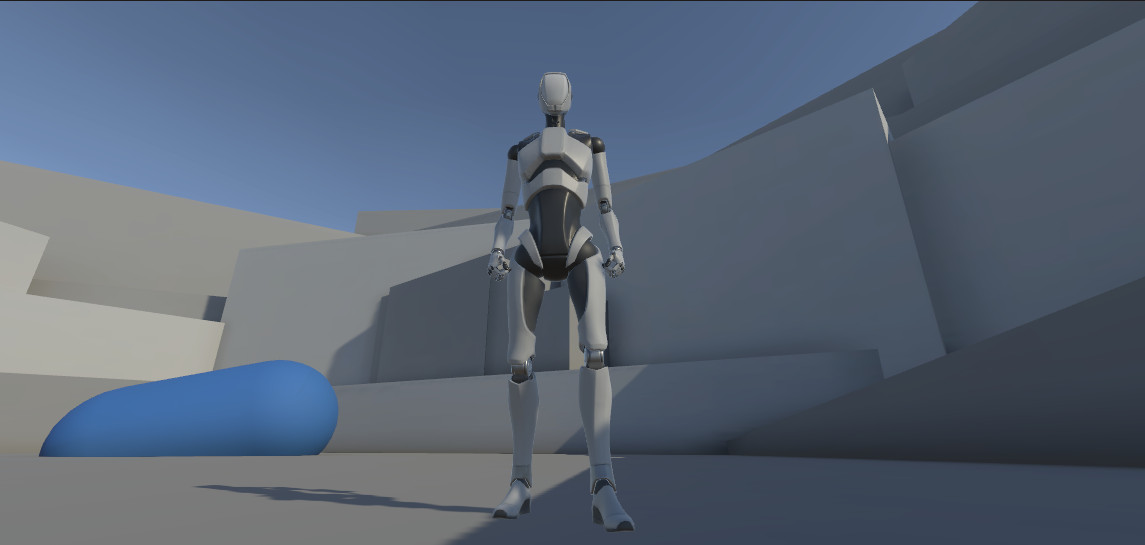
In this shot, the character is placed in the center of the frame, and the viewer is set at a low angle so that they are made to look up at the character. This automatically creates the sense that the character in shot has an important role and may be in a position of power.
5. Press C on your keyboard to change to the next camera view.
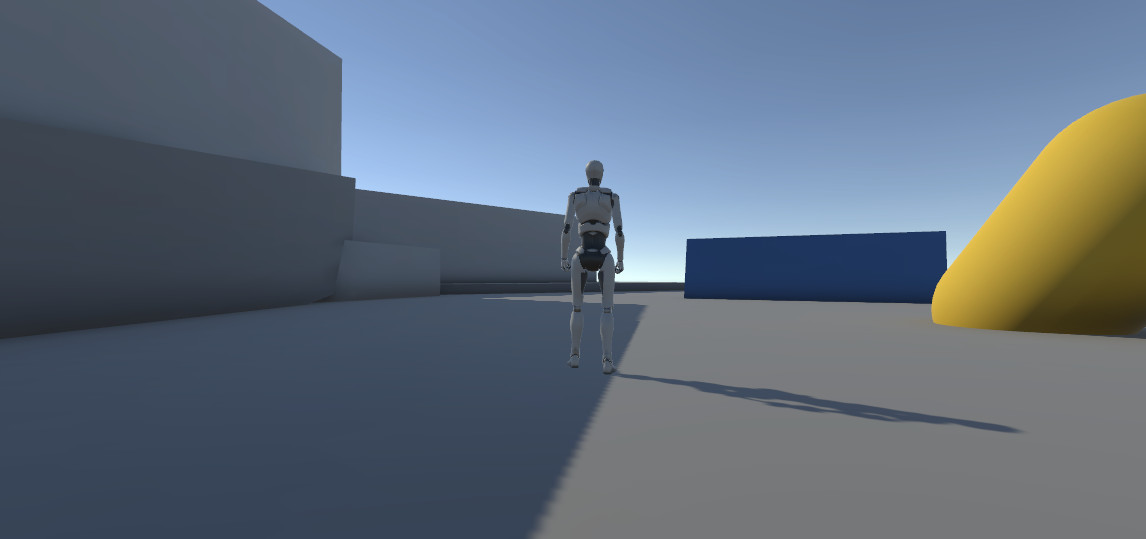
The mood is greatly changed by just the position of the camera alone. Here, the character is still in the center of the shot and viewed from a low angle, but they’re facing away and taking up much less space in the frame. This shot could indicate that there’s some sort of challenge ahead of the character, but something they feel confident about facing.
6. Press C on your keyboard to change to the final camera view.
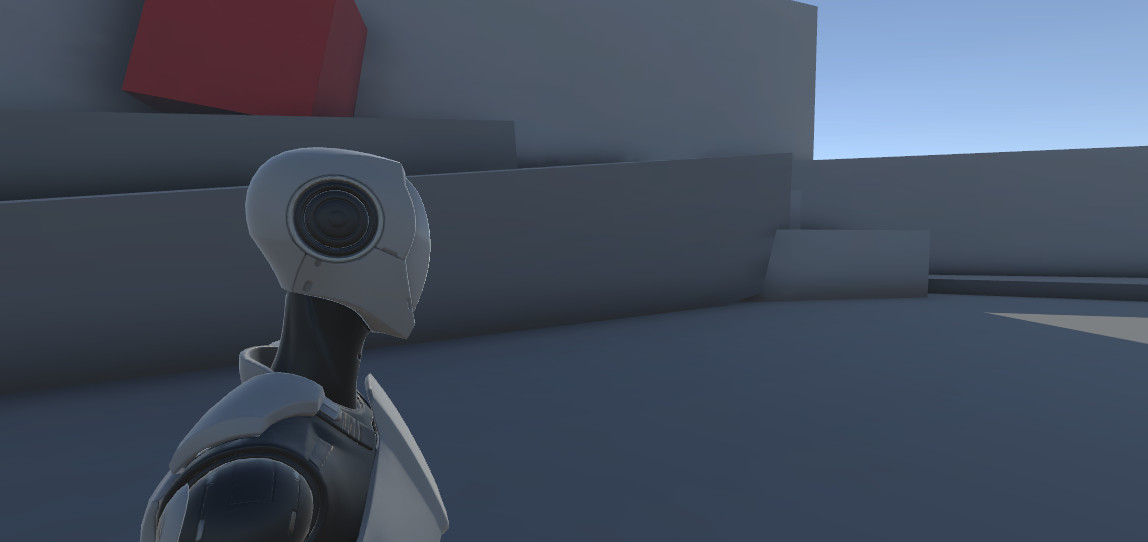
In this final shot, the camera is pulled up to a level height with the character. Despite the camera’s close proximity to the character, because the character is in the left third of the frame, this shot balances the importance of the character with that of the environment. This shot gives the viewer more of a sense of equality with the character, as if they’re perhaps a friend, or at least part of the conversation.
6. Explore: Review your favorite media
Cameras have long been understood to be an important element of creative media. Many of the rules followed in games today were adapted from film and animation, and film itself can find some of its camera framing roots in set design for theater. Even if you haven’t noticed it consciously, there are many visual cues in camera work that have been used for a long time to control not only what you see, but also what you feel within an experience.
As you begin your own work with cameras for your interactive experiences, it’s helpful to refer back to media that you find particularly engaging. Select a few of your favorite games, films, or animations, and observe what they do with their cameras. Consider the following:
- How are the cameras positioned when important characters or locations are introduced for the first time?
- When are the camera shots static? When do they move?
- Are there any camera shots that you find are particularly dynamic? What do you see on the screen in those shots?
- What are the moods of the scene when the cameras are particularly close to important subject matter? What’s the mood when they’re far away?
7. Next steps
You may be surprised to discover that a great deal of work goes into creating camera shots. If you’re interested in camera design, keep notes of shots that you find particularly interesting, and consider how you might use them in your own work!
In the next tutorial, you’ll begin to explore the various ways you can configure a Unity camera to frame your shot.