Grouping and Layout Techniques for UI Components
Tutorial
Beginner
+10XP
25 mins
154
Unity Technologies

Unity’s UI system is flexible enough for nearly any imaginable purpose. Sometimes, there are situations where we don’t know ahead of time what we’ll need to display, but rather what we have room for. In this tutorial, you will learn to create an inventory that uses different Layout Groups to arrange your UI elements.
Languages available:
1. Grouping and Layout Techniques for UI Components
This tutorial has been verified using Unity 2019.4.10f1 LTS - https://learn.unity.com/tutorial/grouping-and-layout-techniques-for-ui-components-2019-3
Unity’s UI system is flexible enough for nearly any imaginable purpose. Sometimes, there are situations where we don’t know ahead of time what we’ll need to display, but rather what we have room for. One example of this is an inventory in a role-playing game. The developer shapes what’s possible in a game, but it would be impractical to try to design a UI for every possible situation. Instead, Unity offers Layout Groups to handle arranging UI elements. In this exercise, we’ll create an inventory that uses Vertical and Grid Layout Groups. There is also a Horizontal Layout Group, which functions much like the Vertical. UI elements that are arranged by Layout Groups can optionally carry the Layout Element component for more control.
2. Creating an Inventory: Part 1 — Scripting
1. Create a new script, InventoryItemButton, and double click it in the Project window to open Visual Studio.
2. Delete Update, as we won’t need it for this exercise. Change Start to Awake.
3. On line 4, type:
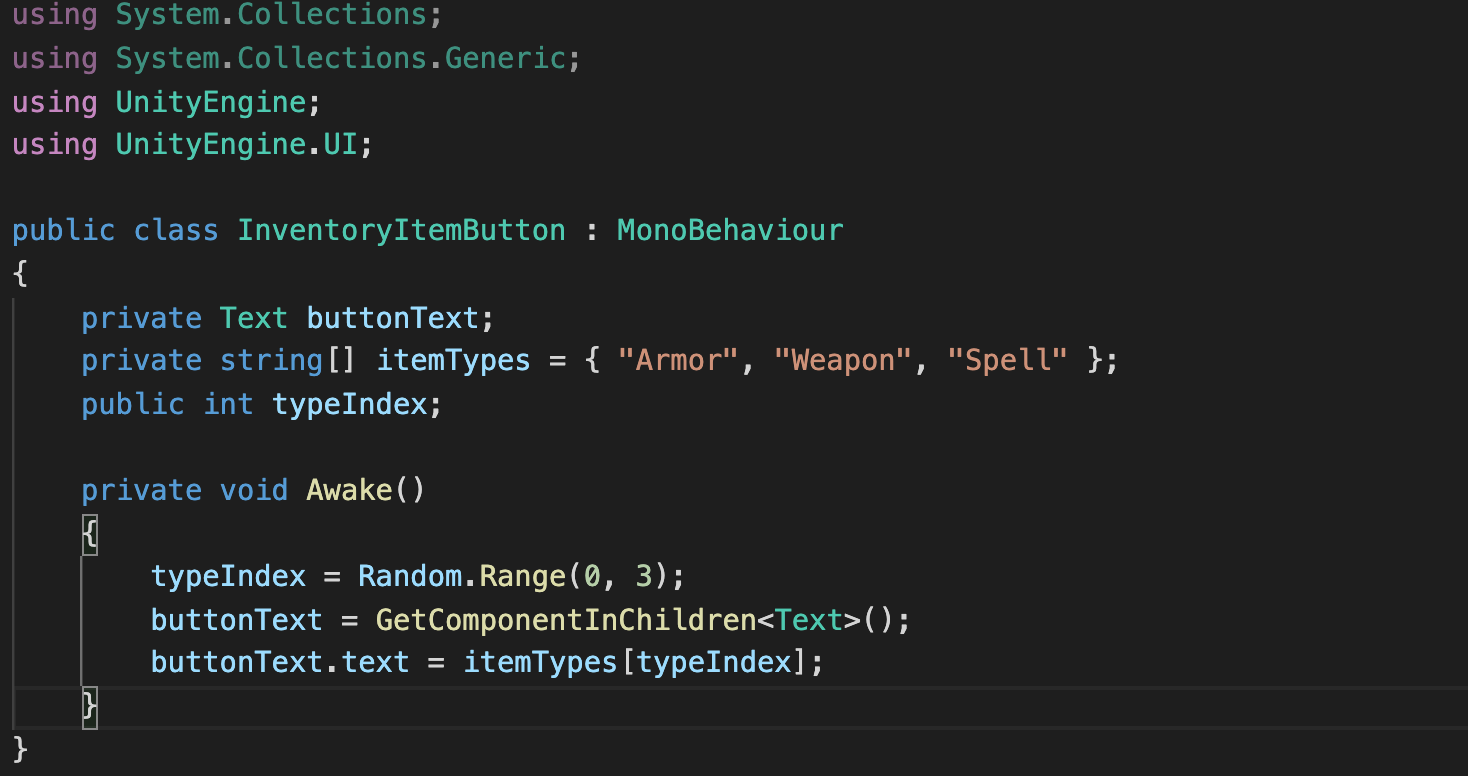
using UnityEngine.UI;4. Beginning just inside the class definition, type:
private Text buttonText;
private string[] itemTypes = { “Armor”, “Weapon”, “Spell” };
public int typeIndex;
5. In Awake, type:
typeIndex = Random.Range(0, 3);
buttonText = GetComponentInChildren<Text>();
buttonText.text = itemTypes[typeIndex];
6. InventoryItemButton is complete (Figure 01). Save your changes.
7. Back in the Unity Editor, create a new script called InventoryDisplay and open in Visual Studio.
8. Delete both Start and Update. This script will only be responsible for showing and hiding items in the inventory.
9. Starting on line 7, type:
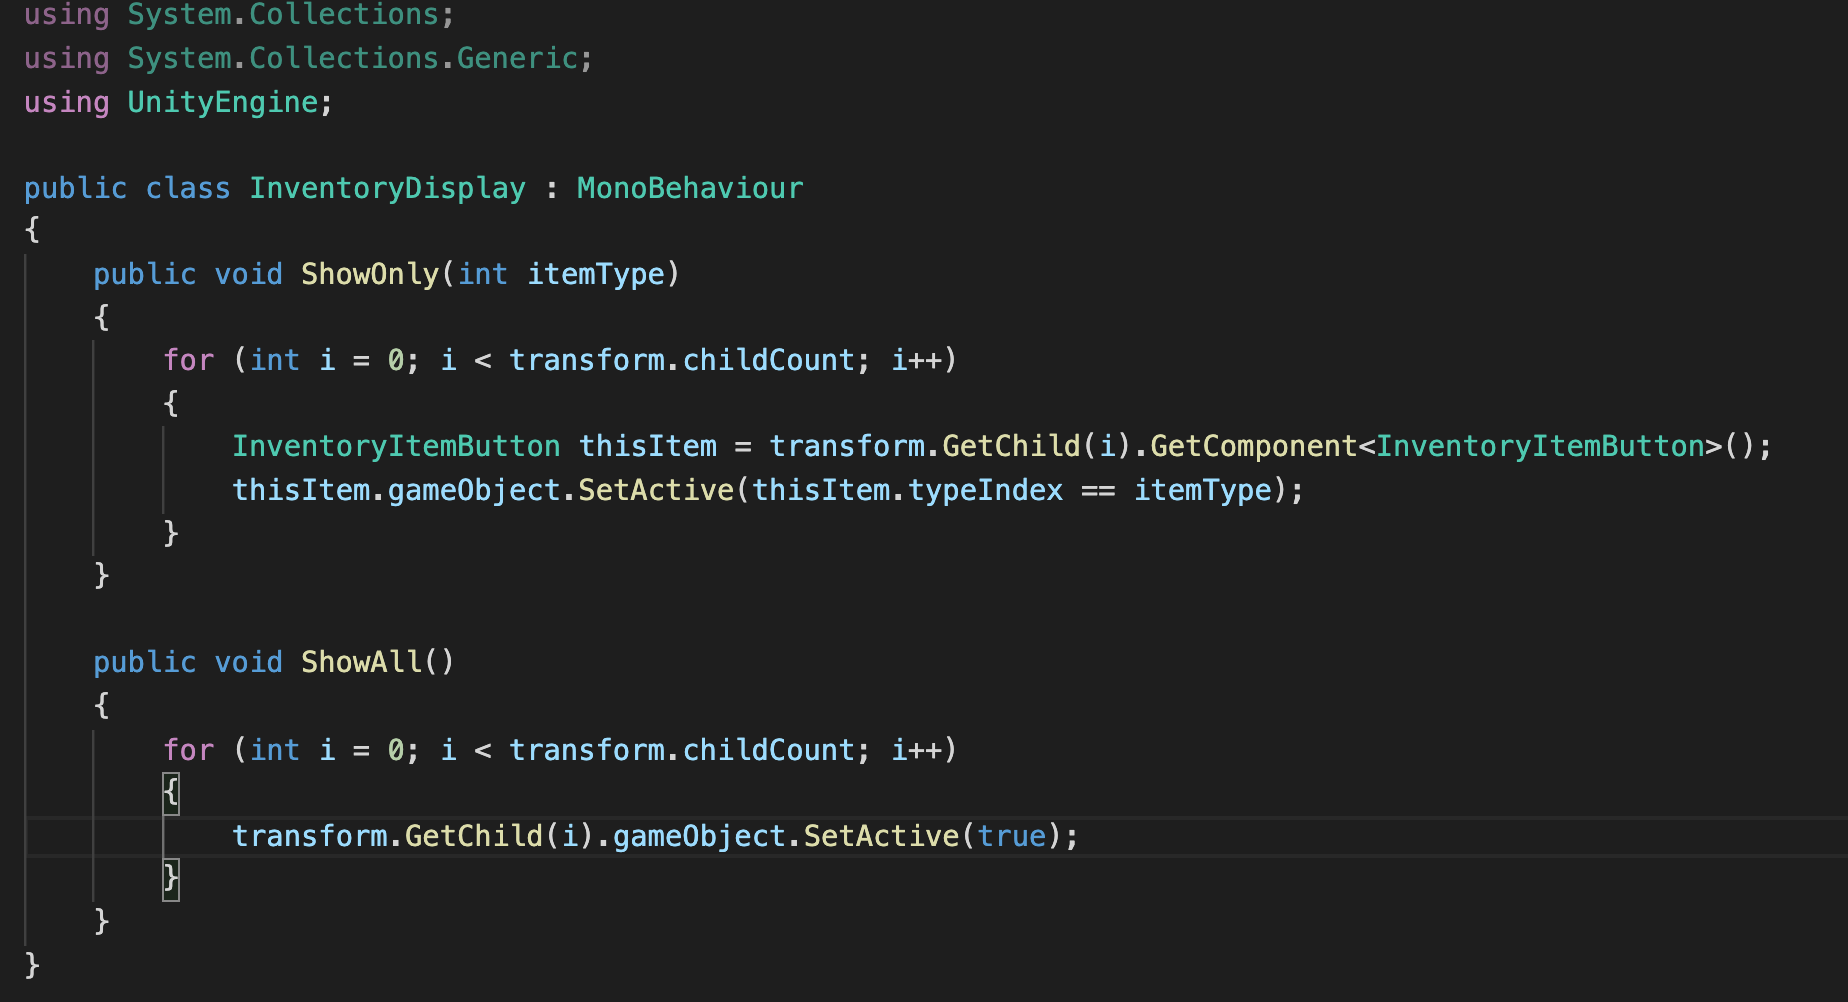
public void ShowOnly(int itemType)
{
	for (int i = 0; i < transform.childCount; i++)
	{
   	InventoryItemButton thisItem = transform.GetChild(i).GetComponent<InventoryItemButton>();
    	thisItem.gameObject.SetActive(thisItem.typeIndex == itemType);
	}
}

public void ShowAll()
{
	for (int i = 0; i < transform.childCount; i++)
	{
    		transform.GetChild(i).gameObject.SetActive(true);
	}
}
10 .Save changes. InventoryDisplay is now complete. (Figure 02)
11. Return to the Unity Editor.
3. Creating an Inventory: Part 2 — Assembling the UI
1. In a new Scene, create an empty GameObject named InventoryDisplayControl.
2. Add a Vertical Layout Group component to InventoryDisplayControl, and set the Child Alignment to Middle Center. (Figure 03)

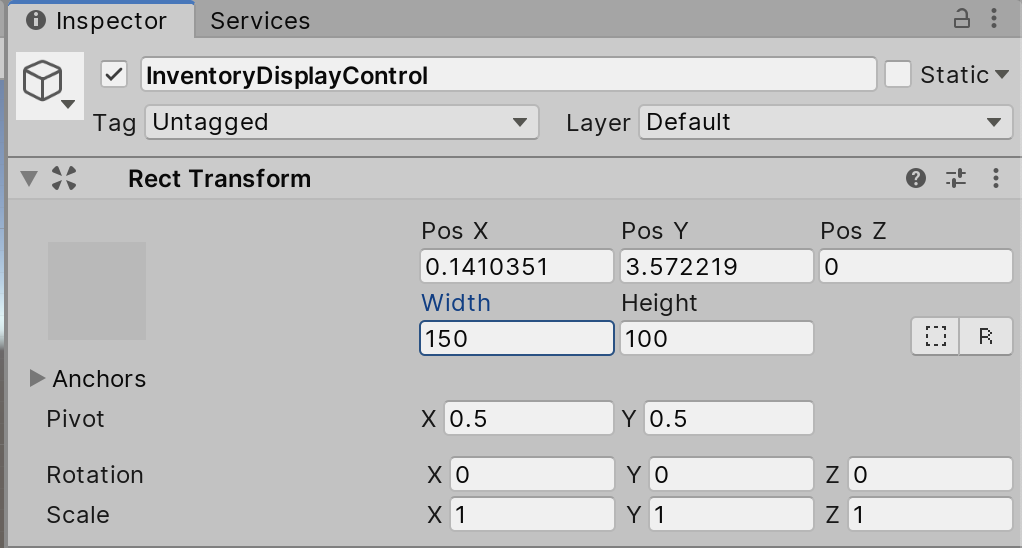
3. Note that in the Inspector, InventoryDisplayControl’s Transform has been replaced by a Rect Transform, and the Rect Transform’s position has been set to that of the original Transform. Set the size to 150x100 (Figure 04). We’ll adjust the position when the rest of the Inventory is set up.
4. From the GameObject dropdown, select UI > Button. Creating a UI element also creates a Canvas and Event System if those weren’t already in the scene. Name the button button ShowAllItems and set its size to 150x25.
5. In the Hierarchy window, click the triangle next to ShowAllItemsButton to show the child Text component. Highlight the Text GameObject and, in the Inspector, change the text from Button to Show All.
6. In the Hierarchy window, drag InventoryDisplayControl onto the Canvas and release.
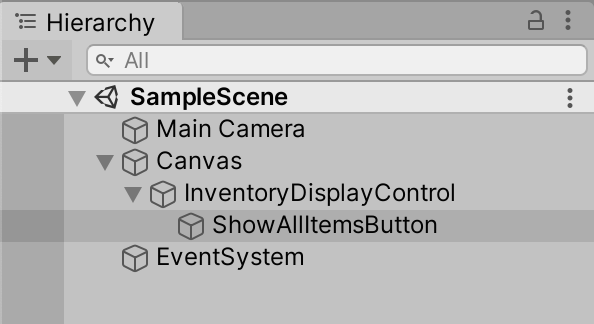
7. Drag and drop ShowAllItemsButton onto InventoryDisplayControl to put it under the control of the Vertical Layout Group. (Figure 05)
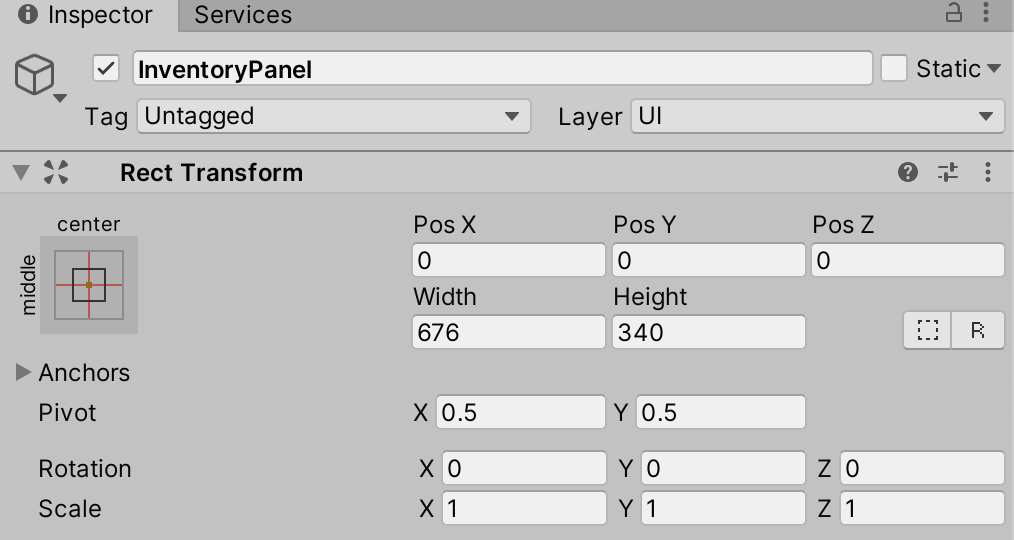
8. From the GameObject dropdown, select UI > Panel to create the background for our main inventory display. Name it Inventory Panel. Set the anchor preset to center, and the size to 676x340 (Figure 06). This size was chosen to allow for the planned layout: a maximum of 6x3 buttons at 100x100 pixels each, with 12 pixels padding in either dimension and extra room for the panel border.
9. Using either the move Gizmo, or directly entering positions into the Rect Transforms for InventoryPanel and InventoryDisplayControl, move both so that they do not overlap.
10. Highlight InventoryPanel and add the Inventory Display component created earlier.
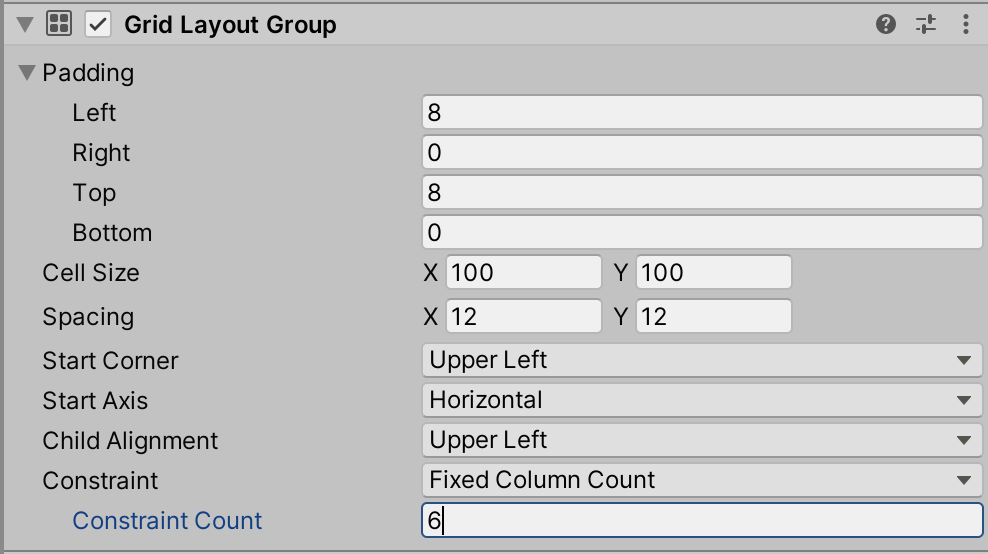
11. Add a Grid Layout Group component to InventoryPanel. Set the Left and Top padding to 8 pixels, spacing to 12x12 pixels, and set Constraint to a Fixed Column Count of 6. (Figure 07)
12. Create a Button and name it InventoryItemSample. Add the Inventory Item Button component, and drag the button onto InventoryPanel. (Figure 08)
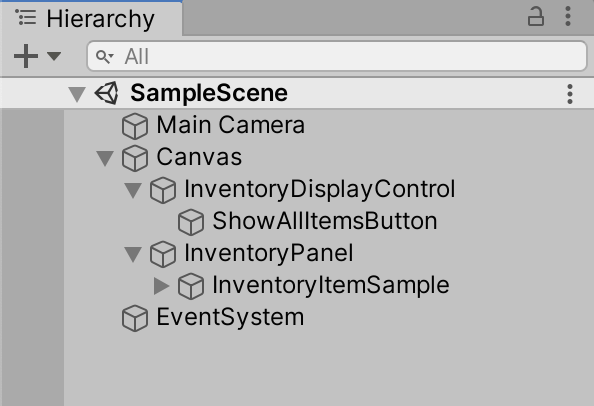
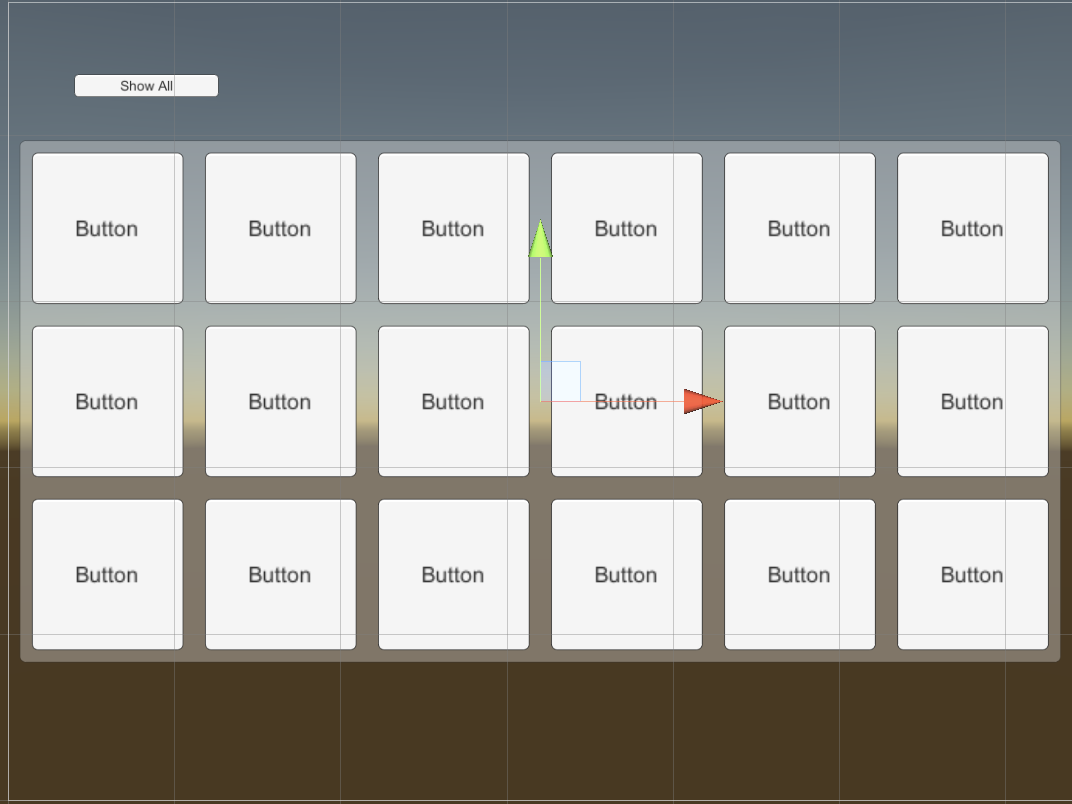
13. In the Hierarchy window, highlight InventoryItemSample and press Ctrl + D (PC) or Cmd + D (Mac) to duplicate it 17 times, for a total of 18 buttons. (Figure 09)
14. Highlight ShowAllItemsButton in the Hierarchy window. In the bottom of the Inspector section marked Button (Script), click the + to add an OnClick() event. Drag InventoryPanel into the GameObject slot, and from the Event dropdown, select InventoryDisplay > ShowAll. (Figure 10)

15. With ShowAllItemsButton still highlighted, press Ctrl + D (PC) or Cmd + D (Mac) once to duplicate it. Name the new button ShowArmorButton, and change its text to Show Armor.
16. In the OnClick() events list for ShowArmorButton, change the event to InventoryDisplay > ShowOnly (int). Leave the parameter at the default of 0.
17. Duplicate ShowArmorButton, changing Armor in the name and text to Weapons.
18. In the Inspector for ShowWeaponsButton, change the parameter for InventoryDisplay.ShowOnly to 1.
19. Duplicate ShowWeaponsButton, changing Weapons in the name and text to Spells. Change the parameter for InventoryDisplay.ShowOnly to 2. (Figure 11)

20 .Press Play. Each button is randomly assigned an item and its text is updated to reflect what it holds. (Figure 12)
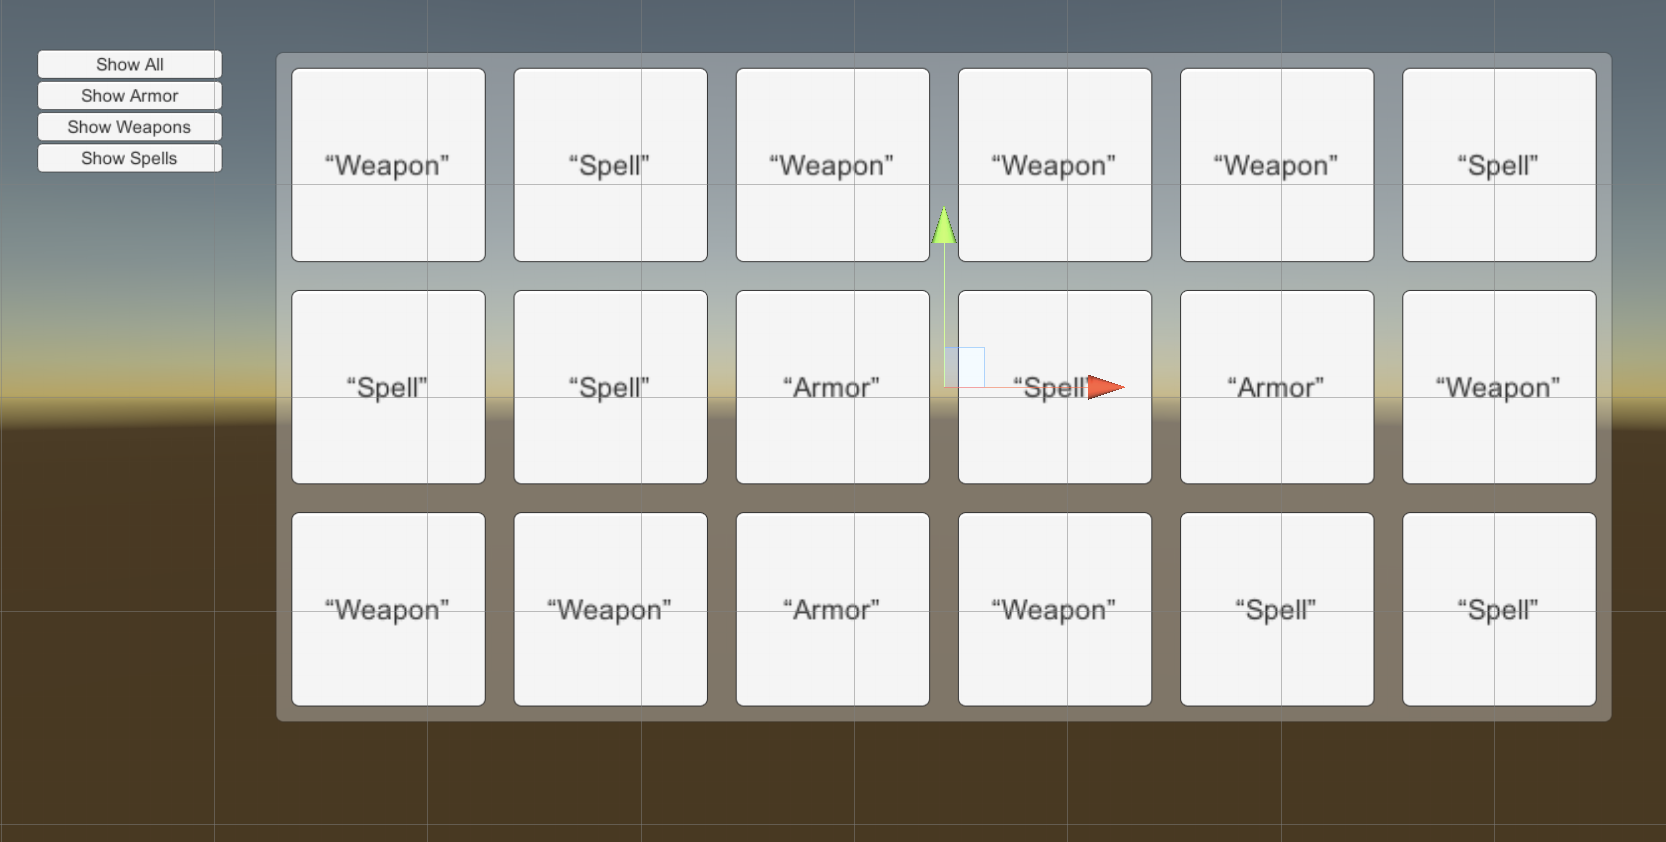
21. Try clicking Show Armor, etc. Though you can click the Inventory Items themselves, it does nothing in this demonstration. In a real game, you might enable equip/unequip actions when an item is clicked directly in the inventory.
22. When ready, exit Play mode.
4. Conclusion
Nesting UI elements in layout groups is an efficient way to automate layout and handle a wide range of situations with far less code and manual effort than would be necessary otherwise.