
HDRP Material Properties
Tutorial
Beginner
+10XP
15m
(127)
Unity Technologies
These materials are designed to target high-end PCs and consoles, prioritizing stunning high-definition visuals. The HDRP materials provide advanced features that help you produce more realistic, physically based assets.
Languages available:
1. HDRP Material Properties
This tutorial has been verified using Unity 2019.4 LTS
First released with Unity 2018.1, the High Definition Render Pipeline (HDRP) was developed to fulfill the needs of industries whose products require high-fidelity imagery.
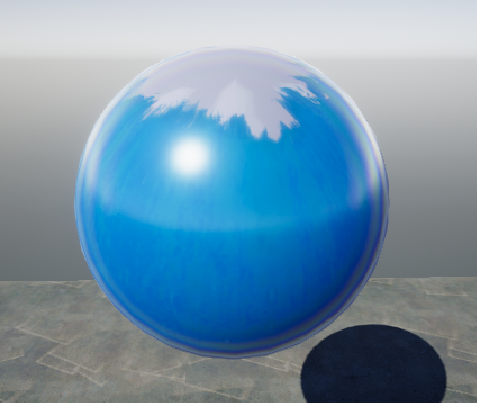
The HDRP allows you to achieve photo-real results with ease, thanks to more mathematically accurate lighting calculations and expanded Materials settings. HDRP Materials are designed to target high-end PCs and consoles, prioritizing stunning high-definition visuals (Figure 01).
2. Material Properties
Properties that make up an HDRP Material are broken down into several categories: Surface Options, Surface Inputs, Detail Inputs, Emission Inputs, and Advanced Options (Figure 02).
3. Surface Options
Use this category to change how a Material’s surface is rendered.
- Surface Type: The options are Opaque and Translucent.
- Rendering Pass: Determines in which rendering pass the Material is used.
- Alpha Clipping: Enabling this option allows you to adjust the Material’s alpha cutoff.
- Double-Sided: Selecting this tells the renderer that the Material is double-sided. A new drop-down menu gives you three choices: Flip, Mirror, and None.
- Material Type: This allows you to select a Material feature that overlays the regular Material. Standard is the default Material type. Subsurface Scattering (SSS) simulates how light interacts and penetrates translucent objects. Anisotropy simulates a surface Material that changes properties depending on its orientation. Iridescence provides parameters to create an iridescent effect on the Material’s surface. Specular Color is used to control the color and strength of specular reflections in the Material. Translucent simulates light interaction for vegetation. It uses profiles similar to SSS, except that a thickness map is used to determine how light is transmitted.
- Receive Decals: This parameter allows the Material to respond to a decal Material.
- Receive SSR: This determines if the Material receives Screen Space Reflections. SSR are reflections calculated using screen space data, and are typically used for more subtle reflections like puddles or wet floors.
- Geometric Specular AA: This reduces specular aliasing on highly dense Mesh. This is particularly useful when the Mesh doesn’t use a normal map.
- Displacement Mode: This applies a height map displacement to the selected element: Vertex, Pixel, or Tessellated Vertex. Pixel displacement must be used with flat surfaces; it’s a resource-intensive feature and typically used for paved roads.
4. Surface Inputs
With this category, you’re able to change how Materials look, such as its maps or colors. Available input properties change depending on which Material type is selected.
For a Standard Material Type:
- Base Map: Allows you to supply a base Texture and set the color and/or opacity of the Material.
- Metallic: This determines how metallic a Material appears. A value of 0 means it’s not metallic, and a value of 1 means it’s completely metallic. This affects how the light interacts with the Material.
- Smoothness Remapping: This option allows you to remap the Smoothness Channel in the Mask Map.
- Ambient Occlusion Remapping: This option allows you to remap the Ambient Occlusion Channel in the Mask Map.
- Mask Map: Within HDRP, a Mask Map is a combination of the Red Channel, which determines Metallic; Green Channel, which determines Ambient Occlusion; Blue Channel, which determines the Detail Map Mask; and the Alpha Channel, which determines Smoothness. The Mask Map takes the supplied Texture and uses mathematics to generate an output. This means the Texture must be linear and not sRGB.
- Normal Map Space: Determines if the Normal Map Space is in TangentSpace or ObjectSpace.
- Normal Map: Supplies a Normal Map Texture to add additional detail or depth to your Material. You can scale its strength with the slider within the range of 0 to 2.
- Bent Normal Map: This option takes a Normal Map and uses only indirect diffuse lighting.
- Coat Mask: This simulates a clear-coat effect on the Material, which increases the smoothness. By default, the value is 0. This can be used to mimic Materials such as car paint or plastics.
- Base UV Mapping: This determines how Textures, if any are applied, are tiled across the Material. The options are: UV0, UV1, UV2, UV3, Planar, or Triplanar. If Planar or Triplanar are selected, a new option called World Scale becomes available to adjust the tiling factor.
- Tiling: Determines how Textures, if any are applied, are tiled across the Material.
- Offset: This provides an offset to the Texture tiling if any Textures are applied.
When the Material Type is set to Subsurface Scattering, five more properties become available (Figure 06).
- Diffusion Profile: This determines which profile to use when determining the shape of the SSS/Transmission filter.
- Subsurface Mask: This determines the strength of the Subsurface Scattering effect.
- Subsurface Mask Map: This determines the strength of the Subsurface Scattering effect with a Texture supplied by the Red Channel.
- Thickness: If Subsurface Scattering is enabled, low values in areas allow some light to be transmitted through the object.
When the Material Type is set to Anisotropy, three more properties become available
(Figure 07).
- Tangent Map: This allows you to supply a Texture that provides vertex data to the Material.
- Anisotropy: Allows you to adjust the Anisotropy scale factor.
When the Material Type is set to Iridescence, two more properties become available
(Figure 08).
- Iridescence Mask: This controls the intensity of the iridescence.
- Iridescence Layer Thickness: This determines the thickness of the iridescence; low values make the iridescence thinner.
When the Material Type is set to Specular Color, two more properties become available
(Figure 09).
- Specular Color: This allows you to change the color of the specular.
- Energy Conserving Specular: This conserves energy when you’re using Specular Color mode. This means that the higher the Specular Color, the lower the Diffuse Color.
When the Material Type is set to Translucent, three more properties become available
(Figure 10).
- Diffusion Profile: This determines which profile to use when determining the shape of the SSS/Transmission filter.
Thickness: If Subsurface Scattering is enabled, low values allow some light to pass through the object.
5. Detail Inputs
The Detail Map is an amalgamation of maps that add minute detail to the Material. The various channels are used for:
- Red: Detail Map albedo value
- Green: Normal Map Y-axis
- Blue: Smoothness
Alpha: Normal Map X-axis
6. Emission Inputs
This category allows you to change Materials with an Emissive Color.
Use Emission Intensity: Determines whether to use the Emissive Color to determine Emission intensity, or (when enabled) a specified intensity value in Nits or EV100 (Figure 13).
- Emissive Color: Determines the color of the Emissive. Black will turn off the Emissive.
- Exposure weight: Determines how much of the Emission to expose.
- Emission Multiply with Base: Determines whether the Emission color is multiplied by the Albedo
Emission: Controls whether the Emission affects global illumination and, if so, how. Options are: Baked, Emission, and None. If set to Baked, the Emission is active only in Scenes where baked global illumination is enabled. Realtime Emission is active only in Scenes where realtime global illumination is enabled. None disables the Emission from interacting with global illumination.
7. Advanced Options
This category of Material properties allows you to change how the Material is rendered.
- Enable GPU Instancing: This is useful when a Scene includes multiple copies of the same Material. It uses an instance of the Material, resulting in a small number of draw calls. This is useful for drawing Materials that are applied to trees or grass, or anything that appears repeatedly in a Scene.
- Specular Occlusion Mode: This determines the mode used to calculate Specular Occlusion. Options are from the Ambient Occlusion map and the Camera’s view vector, or from the Bent Normals map.
Add Precomputed Velocity: Enabling this option uses additional per-vertex velocity information stored in an Alembic file.
8. Conclusion
HDRP enhances Materials for high-fidelity results, making it easier to mimic real-life surfaces, like car paint, and real-life objects, like trees and vegetation.