
How to install Zoe
Tutorial
foundational
+10XP
10 mins
(103)
Unity Technologies
Guide to install Zoe's package and test the example scene.
Languages available:
1. Setup Unity for XR
Create a new Unity Project with Template: 3D.
Let’s add the necessary packages to your project which allow Unity to work with Virtual Reality headsets.
Go to Edit > Project Settings.
A new window will pop up. Go to ‘XR Plugin Management’, at the bottom.
Click on the button to install the XR Plugin. Wait until Unity imports the package:
After importing, in the new interface select the hardware you are using for Unity to install also the necessary packages (make sure you wait until a process bar appears and everything has been imported). Here is the setting to use an Oculus Rift / Rift S:
Note: for HTC Vive headsets or to use SteamVR a separate plug-in needs to be installed. Check https://www.zoe.com/kb-plugin/steam-vr/ for more information.
Close the Project Settings window.
2. Downloading Zoe
If you don't own a Zoe license, create a free teacher account to access the basic version of Zoe for Unity. To use Zoe with students, teachers must own a paid school license which can be requested here.
Once your account is created, download the package here.
You will get a zoe-for-unity_vxx.zip file. Extract it on your computer.
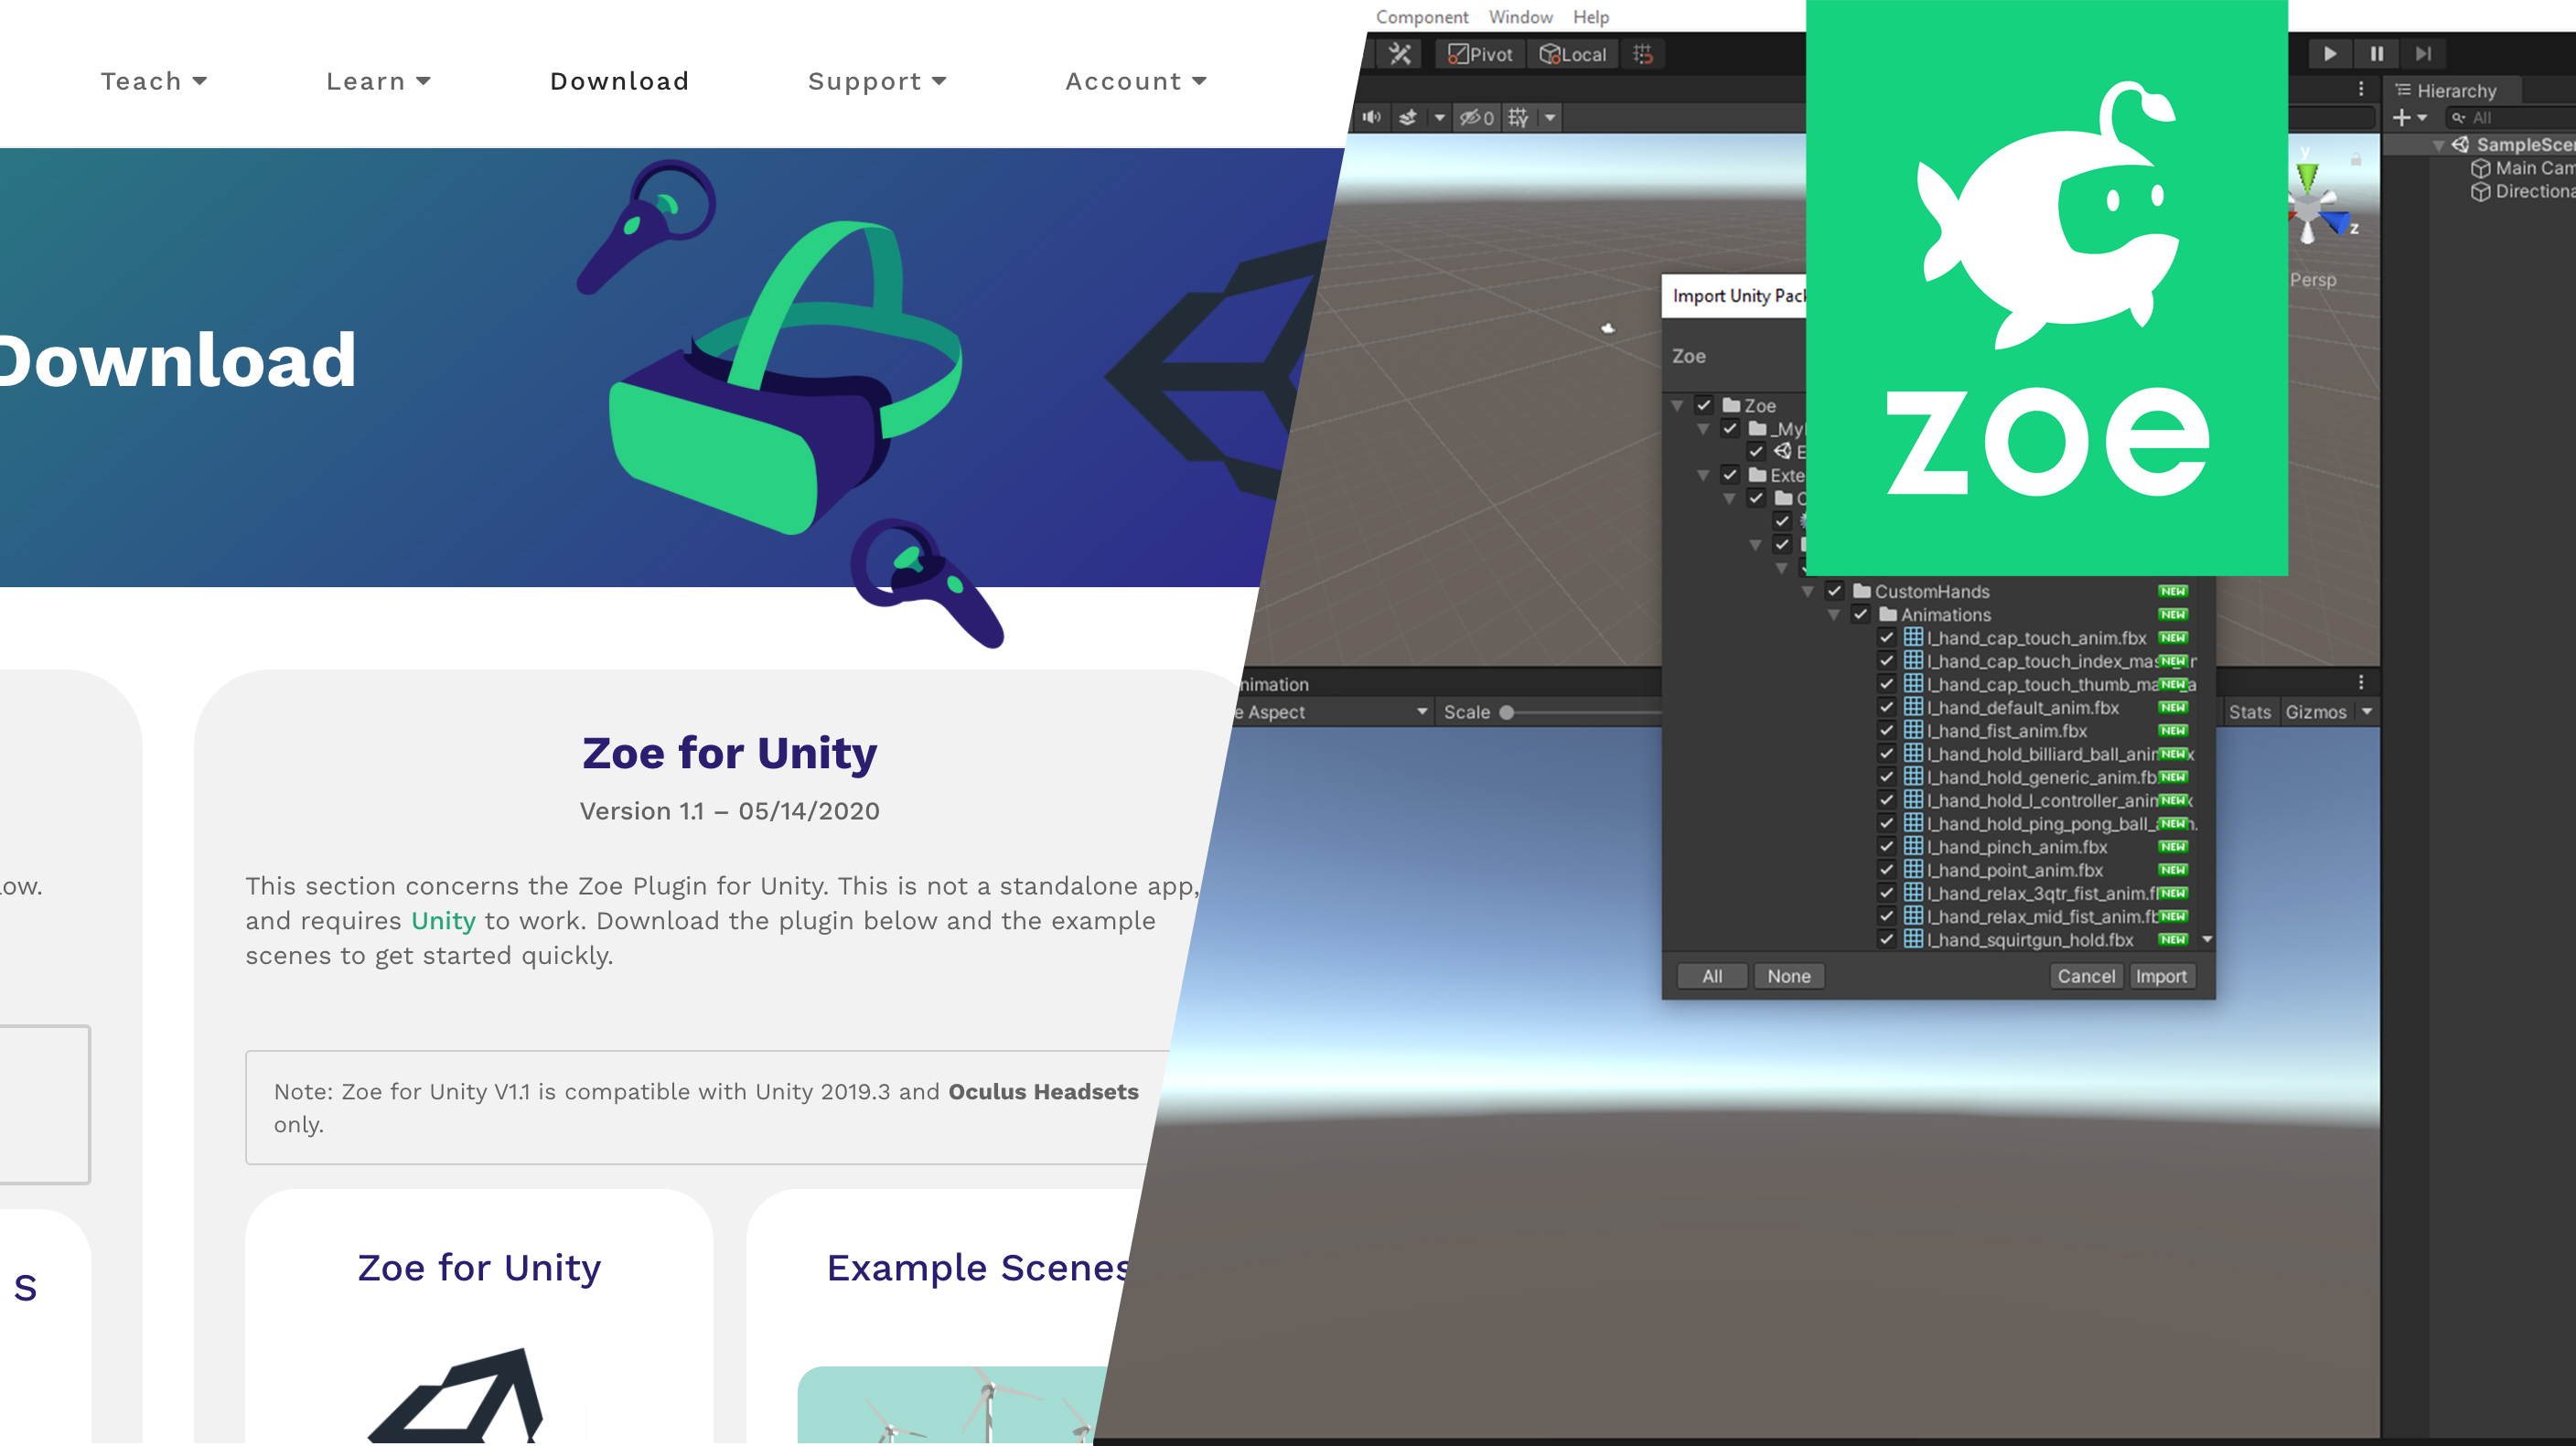
3. Import Zoe inside Unity
Look inside the extracted folder for the zoe-for-unity_vxx.unitypackage. Assuming you have Unity open, double-click on it; you should see the following Import Unity Package popup window:
Make sure everything is checked and click Import.
During the process a pop-up window will notify you of the creation of New Layers necessary to make Zoe work. Simply acknowledge.
You should see a new Zoe section in the top menu bar and when you right-click in the Hierarchy.
4. Test the Basic Scene
Now before using Zoe for Unity, make sure your headset is properly plugged in * and your controllers are charged.
*To install your headset follow one of these setup links:
- For Oculus headsets: https://www.oculus.com/setup/
- For Vive headsets: https://www.vive.com/us/setup/
- For WMR headsets: https://support.microsoft.com/en-us/help/4043101/windows-10-set-up-windows-mixed-reality
- For WMR headsets (with SteamVR): https://support.microsoft.com/en-us/help/4053622/windows-10-play-steamvr-games-in-windows-mixed-reality
Now head back to Unity and open the Basic Scene under Zoe > _BasicScene > Basic Scene. Double-click it or click Open in the Inspector. This is what you should see:
Press Play in the middle of the Unity top bar. You can put back your headset. If everything is working correctly you should see your two controllers and a Green Apple that you are able to grab (using the triggers of your controllers).
You are now ready to start working with Zoe!
If the camera does not move, or the controllers don’t work, check again all of the steps of this tutorial. In particular, make sure the XR Plugin is properly installed ('Initialize on Startup' should be checked) and that you Oculus headset and controllers are detected.