
Install Unity and the Hub
Tutorial
foundational
+10XP
45 mins
31484
Unity Technologies
In this tutorial, you’ll use the installation wizard to install Unity and select your first Microgame. We’ll also provide an overview of the manual approach to installing Unity (including creating a Unity ID and downloading the Hub), in case you’re a returning user who wants to refresh your knowledge.
In this tutorial, you’ll:
- Install Unity and the Unity Hub.
- Create a Unity ID, if you haven’t done this already.
- Download the Microgame of your choice.
Languages available:
1. Overview
This tutorial is your guide through the installation process. If you’re a new user, you’ll use the installation wizard to install the latest long term support (LTS) version of Unity. This is a good choice for beginners, and it’s what you’ll use for your first experience with Unity. (In a future tutorial, you’ll learn more about other Unity versions.)
If you’re a returning user, you can skip ahead and install Unity and the Hub without using the wizard.
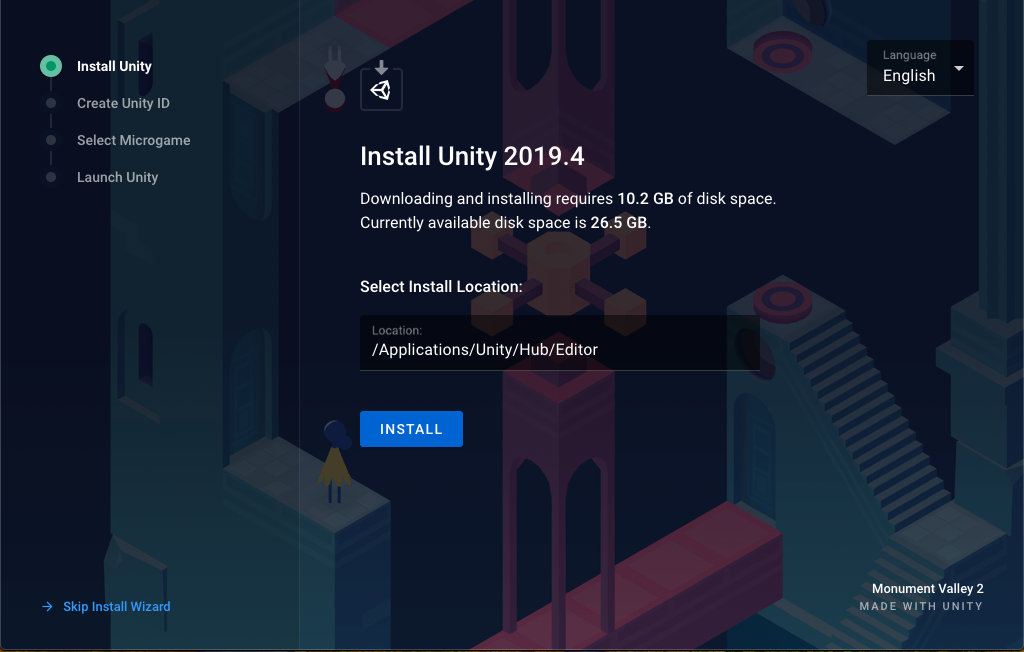
2. Install Unity 2019.4 LTS
1. Locate the UnityHubSetup.exe file you downloaded previously.
2. Launch the UnityHubSetup installer.
3. Follow your platform instructions to install the Unity Hub.
4. Open the Unity Hub application.
5. Choose an install location then select Install.
3. What is a Unity ID?
Before you create a Unity ID, let’s review what a Unity ID is and why it’s useful.
Unity ID basics
A Unity ID is your user account with Unity. You need a Unity ID to access the Unity Editor and Unity Hub — the two applications you’ll use to create and manage Unity projects.
You can use your Unity ID to access other services, including:
- Unity Play
- Unity Forums
- Unity Asset Store
this site, Unity Learn
Your Unity ID and organizations
When you create a Unity ID, you will be automatically assigned an organization that has the same name as your user name and consists only of yourself. Use this default organization to purchase plan subscriptions (for example, Unity Pro plan) for your personal use only.
If you’ve been invited by your employer to join Unity, you can be associated with their organization. They can then assign you access rights to particular features (for example, access to review revenue generated in Unity Ads for marketing team members). You can even use this feature if you set up your own studio, sometime in the future!
If you’ve already created a Unity ID, skip ahead to Select a Microgame.
4. Create your Unity ID
To create your Unity ID:
1. Complete the required fields.
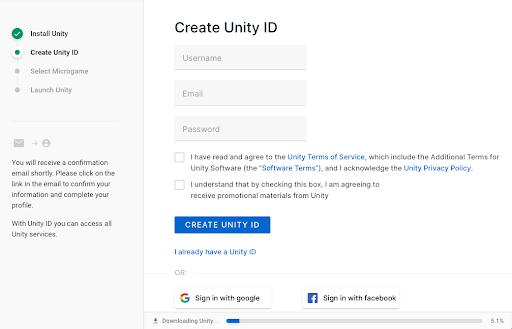
2. Review and agree to the Terms of Service.
Note: The promotional materials are useful, with lots of tips to help you on your learning journey.
3. Select Create Unity ID.
5. Select a Microgame
Next, select a Microgame for your first Unity experience. We recommend the LEGO® Microgame!
To choose your Microgame:
1. Change the default Project Name, if you’d like.
2. Select a Microgame.
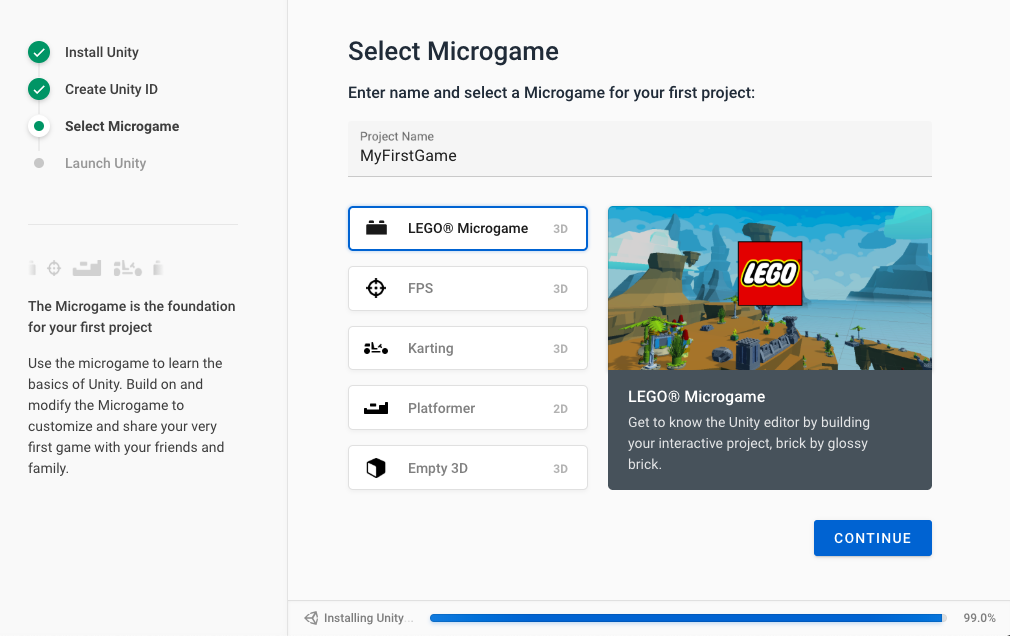
3. If you’ve selected the LEGO® Microgame, you’ll be asked to verify your age and agree to terms of use. If you’ve selected another Microgame, you won’t need to do this.
4. Select Continue.
6. Launch Unity Editor
It might take some time to install and download the Microgame — don’t worry, this is normal!
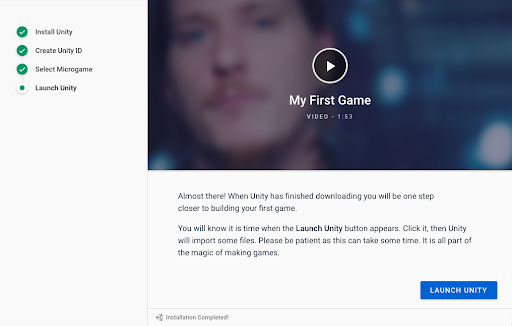
1. While you’re waiting, watch the My First Game video.
2. When Unity has finished installing, select Launch Unity. Unity might also take some time to launch, the first time you open it. That’s also completely normal.
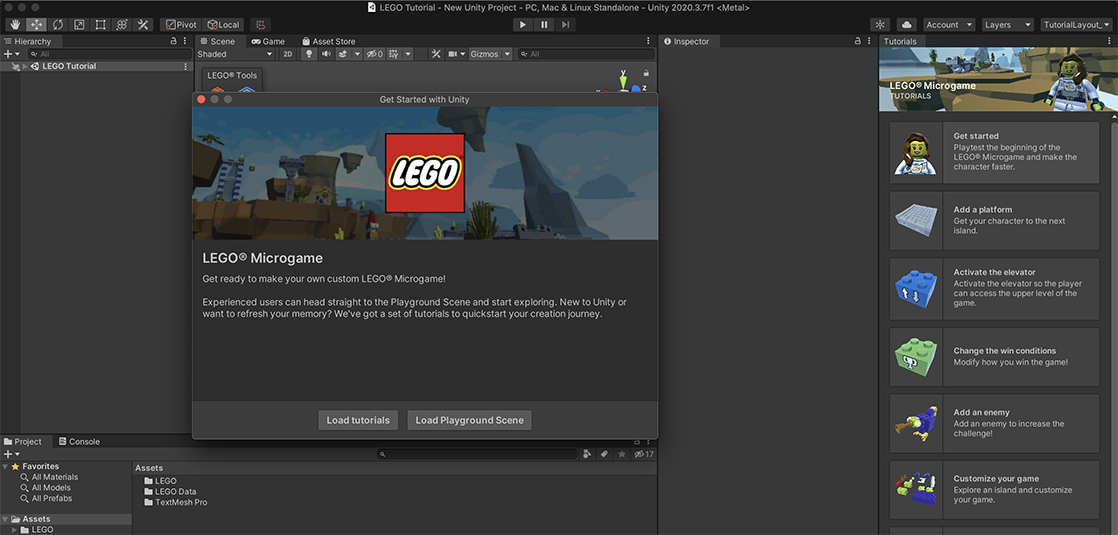
3. When the Editor opens, you’ll find a Microgame welcome dialog in the middle of the screen and a window of tutorials docked to the right of the interface. You’ll explore these soon, but wait just a little — first we’ll guide you through the basics of the Unity Editor.
Now that you have installed Unity with the wizard, skip the next step.
7. Install Unity without the wizard
Returning users
If you’re a returning user, launch the Hub installer you downloaded (from the page Get Started with Unity Personal), and follow the instructions to install Unity.
Non-standard installations
You can also install the Unity Editor:
These installations are not recommended for beginners.