
Introduction to Lighting and Rendering - 2019.3
Tutorial
Beginner
+10XP
1h
(449)
Unity Technologies
In this tutorial we will give you an overview of how lighting works with Unity's real-time Global Illumination engine. We will walk you through the different lighting techniques available, explain how to setup your project for lighting and then explore the various tools at your disposal when considering how to light a scene.
Languages available:
1. Introduction to Lighting and Rendering
This tutorial has been verified using Unity 2019.4.14f1 LTS - https://learn.unity.com/tutorial/introduction-to-lighting-and-rendering-2019-3
Modern game lighting makes extensive use of global illumination. Global illumination, or GI, is a term used to describe a range of techniques and mathematical models that attempt to simulate the complex behavior of light as it bounces and interacts with the world. Simulating global illumination accurately is challenging and can be computationally expensive. Because of this, games use a range of approaches to handle these calculations beforehand, rather than during gameplay (Figure 01).
This tutorial provides an overview of how GI works in Unity. We’ll walk through different lighting techniques, explain how to set up a project for lighting, and explore the various tools at your disposal when lighting a Scene.
2. Choosing a Lighting Technique
Broadly speaking, lighting in Unity can be either realtime or precomputed; both approaches can be combined to create immersive Scene lighting.
In this section, we’ll give a brief overview of what opportunities the different techniques offer, their relative advantages, and individual performance characteristics.
Realtime Lighting
By default, lights in Unity — Directional, Spot and Point — are realtime. This means that they contribute direct light to a Scene and update every frame. As lights and GameObjects move within the Scene, lighting is updated immediately. This can be observed in both the Scene and game views (Figure 02).
Realtime lighting is the most basic way of lighting objects and is useful for illuminating characters or other movable geometry.
Unfortunately, the light rays from Unity’s realtime lights do not bounce when they are used by themselves. In order to create more realistic Scenes, we need to enable Unity’s precomputed lighting solutions.
Baked GI Lighting
When baking a lightmap, the light effect on static objects in a Scene is calculated and the results are written to the Textures that overlay Scene geometry (Figure 03).
These lightmaps can include the direct light that strikes a surface and the indirect light that bounces off other surfaces within the Scene. Lighting Textures can be used with surface information like the color (albedo) and relief (normals) by the Shader associated with an object’s Material.
With baked lighting, lightmaps cannot change during gameplay and are referred to as “static.” Realtime lights can be used additively with a lightmapped Scene, but cannot interactively change the lightmaps themselves.
With this approach, we trade the ability to move our lights at gameplay for a potential increase in performance, suiting less powerful hardware such as mobile platforms.
3. The Precompute Process
In Unity, precomputed lighting is calculated in the background as an automatic process, or it is initiated manually. Either way, it’s possible to continue working in the Editor while these processes run behind the scenes.
When the precompute process is running, a blue progress bar will appear in the bottom right of the Editor (Figure 04). Information on the current process is shown on the progress bar.
The various stages of baking include:
Probes
- Ambient Probes
- Baked/Realtime Reflection Probes
Baked GI
- Create Geometry
- Atlassing
- Create Baked Systems
- Baked Resources
- Baked AO
- Export Baked Texture
- Bake Visibility
- Bake Direct
- Ambient and Emissive
- Create Bake Systems
- Bake Runtime
- Upsampling Visibility
- Bake Indirect
- Final Gather
- Bake ProbesSet
- Compositing
4. Starting a Precompute
Only static geometry is considered by Unity’s precomputed lighting solutions. To begin the lighting precompute process, you need at least one GameObject marked as Static. This can be done individually or by shift-selecting multiple GameObjects from the hierarchy panel.
From the Inspector panel, the Static checkbox can be selected via Inspector > Static. This will set all of the GameObject’s static options, or flags, including navigation and batching, to Static, which may not be desirable. For more fine-grained control, individual static options can be set from the drop-down list accessible to the right of the Static checkbox. Objects can also be set to Static in the Object area of the Lighting window.
If your Scene is set to Auto Lighting > Scene > Auto, Unity’s lighting precomputes will begin automatically. Otherwise, the precompute stage will need to be initiated manually, as described below.
5. Auto/Manual Precompute
If Auto Generate is selected at the bottom of Unity’s Lighting panel, then the precompute will begin automatically as a background process whenever changes are made to static geometry.
However, if Auto Generate is not selected, you will need to manually start a precompute by clicking the Generate Lighting button (Figure 05). This will give you control over when this process starts.
Manually initiating a precompute will cause all aspects of your Scene lighting to be evaluated and (re)computed. To selectively recalculate Reflection Probes, click the arrow on the Generate Lighting button to display the drop-down.
6. GI Cache
In Baked GI, Unity “caches” (stores) data about your Scene lighting in the GI cache and will try to reuse this data whenever possible to save time during precomputing. The number and nature of the changes you’ve made to your Scene will determine how much of this data can be reused, if at all.
This cache is stored outside of your Unity project and can be cleared by going to Preferences > GI Cache > Clean Cache. Clearing the cache means that all stages of the precompute will need to be recalculated from the beginning. This can be time-consuming; however, in some cases where you might need to reduce disk usage, this may be helpful.
7. Choosing a Rendering Path
Unity supports a number of rendering techniques or paths. Which path to use is an important early decision you’ll need to make when starting a project. Unity’s default is Forward Rendering.
Forward Rendering
In Forward Rendering, each object is rendered in a pass for each light that affects it. Therefore, each object might be rendered multiple times, depending on how many lights are within range.
The advantage of this approach is that it can be very fast, meaning hardware requirements are lower than alternatives. Additionally, Forward Rendering offers a wide range of custom shading models and can handle transparency quickly. It also allows for the use of hardware techniques like multi-sample anti-aliasing (MSAA) that are not available in other rendering paths, such as Deferred Rendering; these additional options can have a great impact on image quality.
However, a significant disadvantage of the forward path is that we have to pay a render cost on a per-light basis. So, the more lights affecting each object, the slower rendering performance will become. For games with lots of lights, this may be prohibitive. But if it’s possible to manage light counts in your game, Forward Rendering can actually be a very fast solution.
Deferred Rendering
Deferred Rendering defers the shading and blending of light information until after a first pass over the screen when positions, normals, and materials for each surface are rendered to a geometry buffer, or G-buffer, as a series of screen-space Textures. We then composite these results together with the lighting pass. The advantage to this approach is that the render cost of lighting is proportional to the number of pixels the light illuminates, instead of the number of lights themselves. As a result, you are no longer bound by the number of lights you wish to render on screen. For some games, this is a critical advantage.
Deferred Rendering offers consistent performance but generally requires more powerful hardware. It’s also not supported by certain mobile hardware.
For more information on the Deferred, Forward, and the other available rendering paths, please see the Unity User Manual.
8. Choosing a Color Space
In addition to selecting a rendering path, you’ll need to choose a Color Space before lighting your project. Color Space determines the math used by Unity when mixing colors in lighting calculations or reading values from Textures. In many cases, the decision over which Color Space to use will likely be determined by the hardware limitations of your target platform.
Linear Color Space
The preferred Color Space for realistic rendering is Linear. This can be selected via Edit > Project Settings > Player.
A significant advantage of using Linear Color Space is that the colors supplied to Shaders within your Scene will brighten linearly as light intensities increase. With the alternative, Gamma Color Space, brightness will quickly begin to turn to white as values go up, which is detrimental to image quality (Figure 06).
Another benefit of Linear is that Shaders can sample Textures without Gamma (mid-tone) compensation. This helps ensure that color values remain consistent throughout their journey through the render pipeline. The result is increased accuracy in color calculations and improved realism in the eventual screen output.
Gamma Color Space
Unfortunately, Linear Color Space is not supported by some mobile hardware and even certain games consoles. In these instances, Gamma must be used instead. Linear is currently supported on PC, newer mobile hardware, and current generation consoles.
It’s important to confirm that your target platform supports your selected Color Space before proceeding. For more information on Color Space please see the Unity User Manual.
9. High Dynamic Range (HDR)
As well as Color Space, the dynamic range of your camera needs to be configured. Essentially, this defines how extremely bright or dark colors are captured by Scene cameras. HDR can be enabled from the Camera component in the Inspector by selecting the HDR checkbox. Note that HDR is unsupported by some mobile hardware. It’s also not supported in Forward Rendering when using techniques such as multi-sample anti-aliasing (MSAA).
HDR is best used in combination with Linear Color Space in order to preserve accuracy when handling very bright colors.
By default, cameras in Unity use Low Dynamic Range (LDR). Colors are stored using 8-bits per channel — red, green and blue. This means that color data is stored with eight values of either 1 or 0, offering 256 possible unique combinations for each color channel. 256 x 256 x 256 colors per channel means that by storing values using 8 bits, we are able to uniquely reference more than 16 million color variations ranging in intensity from black to white.
In reality, colors extend far outside this 16 million color range. There are infinite color possibilities, and brightness goes beyond what our eyes can even see. Similarly, Unity is capable of handling extremely bright lights that produce colors beyond what can be displayed on an LDR device, such as your computer screen. However, despite this potential limitation, extreme light values still remain useful in a number of applications.
By enabling HDR on your Scene camera, colors will be stored with much greater precision (using the floating-point representation). Many more unique colors over a much brighter range of luminance can be handled.
HDR allows us to preserve the differences in brightness between, say, outdoor lighting and shaded areas. We can also apply effects like blooms or glows to these bright colors. Special effects like these can add realism to particles or other visible light sources. However, extreme color values also need to be properly represented in a way that avoids simply clamping them to white.
10. Tonemapping
Using the analogy of photography, if we were to photograph a Scene using different exposure settings, we’d start to see extreme color details that otherwise might have been lost. Light tones in the brightest areas of an image that have been lost to white can be recovered; so, too, can dark tones that have been lost to black. This is analogous to tonemapping in computer graphics, where we take colors outside of the range reproducible by our target device (computer screen, for example) and shift them mathematically into a range that can be reproduced. The resulting output still makes sense perceptually, because colors remain relative to one another. They are correct in context.
In order to use Tonemapping, you will need to import the Post Processing package from the Package Manager by going to Window > Package Manager. Tonemapping provides control over how extreme colors recorded by your camera are converted into colors that can be displayed.
For more information on Color Space please see the Unity User Manual.
11. Reflections
Reflection Source
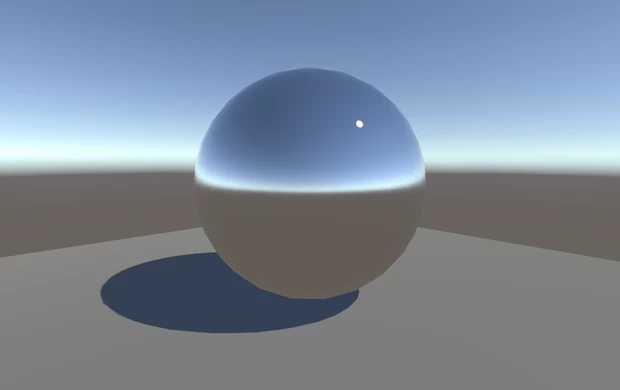
By default, objects in a Scene are rendered using Unity’s Standard Shader. The Standard Shader is a Physically Based Shader (PBS) that attempts to accurately represent the behavior of light on Materials by mimicking physical properties, such as reflectivity and the principles of energy conservation that exist in the real world.
When using the Standard Shader, every Material has a degree of reflectivity based on its specularity or “metalness” (Figure 07). Without hardware powerful enough to ray trace reflections in realtime, we have to rely on pre-rendering reflections. We do this with a cubemap — a six-sided image of the world derived either from the sky or from a Reflection Probe, which renders the environment from a specific point in space, writing the results to a Texture. This is then blended with other lighting and surface data by a Material’s Shader in order to approximate the reflectivity we see in the real world.
By default, objects in a Unity Scene will reflect the Skybox. However, this behavior can be changed globally in the Lighting window using the Reflection Source property. The Skybox, or alternatively, a custom cubemap, may be used. The Reflection Source can be thought of as a Scene-wide cubemap used by all objects in the Scene unless overridden by a Reflection Probe.
Reflection Probes
Often, it’s undesirable for objects to simply reflect the Skybox. In many instances, objects may be blocked or occluded. They may be indoors or underneath an architectural feature, like a bridge or tunnel. To create more accurate reflections, we need to sample what objects see using a Reflection Probe. These probes render the world from their position in 3D space and write the results to a cubemap. This can then be used by nearby objects to give the impression that they are reflecting the world around them.
A Reflection Probe can be added via GameObject > Light > Reflection Probe.
The position of a Reflection Probe will determine what the generated cubemap looks like and what is reflected. Generally, for performance reasons, it’s better to use as few probes as possible. Remember, Reflection Probes are not meant to give physically accurate results, but instead give the impression of reflections in the game world. A few well-placed probes throughout your Scene will be sufficient in most cases (Figure 08).
In the Inspector panel for a Reflection Probe, we can set the Type property of the probe to Baked, Custom or Realtime. Realtime is extremely detrimental to performance, as it renders the Scene an additional six times for each probe. There are specific cases where a realtime Reflection Probe is required, and this expense is justified, but as a general rule, baked Reflection Probes are preferable.
Note that GameObjects are only visible to baked Reflection Probes if marked as Reflection Probe Static from the Static drop-down at the top of the Inspector panel. Conversely, realtime probes render all visible GameObjects unless a culling mask is applied.
12. Ambient Lighting
An important contributor to the overall look and feel of a Scene is ambient lighting, which illuminates objects from every direction.
Depending upon your chosen art style, ambient lighting can provide a bright, cartoon-like rendering or where lighting is perhaps hand-painted into Textures. Ambient light is also useful if you need to increase the overall brightness of a Scene without adjusting individual lights.
Without using one of Unity’s precomputed lighting solutions, ambient light will not be occluded and therefore will not be physically accurate. However, if Baked GI is enabled in your Scene, then this light will be blocked by objects, providing a more realistic look.
Ambient light is cheap to render, making it particularly useful for mobile applications where you might want to minimize the number of lights in a Scene.
In the standard rendering pipeline, ambient lighting can be controlled in the Environment Lighting section, which can be accessed via Window > Rendering > Lighting Settings > Source.
By default, the Source property is set to Skybox. The Skybox, in this case, is the default procedural Skybox that — with default settings — contributes a blue tint to the Scene’s ambient lighting. The other options for Source include Color, which is a solid color, or Gradient, which seamlessly blends multiple colors.
Note that changing the color of the ambient source does not affect the visible Skybox; instead, it only affects the color of the lighting within the Scene.
13. Light Types
At this point, you should have your project configured appropriately for your target platform (generally Baked GI and Gamma Color Space for mobile and Linear Color Space for standalone PC or recent games consoles).
Let’s move on to the tools available for achieving the lighting you want in your game.
Directional Lights
Directional Lights are useful for creating effects like sunlight. They can be thought of as distant light sources that exist infinitely far away.
Light rays emitted from Directional Lights are parallel to one another and do not diverge like those from other light types (Figure 11). As a result, shadows cast by Directional Lights look the same, regardless of their position relative to the source. This is useful when lighting outdoor Scenes.
Because Directional Lights don’t have a source position, they can be placed anywhere in a Scene without changing the effect of the light. Rotating the light, however, changes the visual result.
With light types where there is an obvious source position, such as Spotlights, character shadows will change as the character moves closer to the light source. This can be a problem when trying to generate character shadows in interior levels. Directional Lights are advantageous in these situations as shadows remain consistent regardless of a character’s proximity to the light source.
Directional Lights do not diminish over distance. As they affect all surfaces in your Scene (unless culled), they pose a performance cost when using Deferred Rendering. However, despite the cost, performance will at least be consistent.
By default, every new Unity Scene contains a Directional Light. In Unity 2019.3, this is linked to the procedural sky system defined in the Environment Lighting section of the Lighting Panel. You can change this behavior by deleting the default Directional Light and creating a new light or simply by specifying a different GameObject from the Sun Source parameter (Window > Rendering > Lighting Settings > Sun Source).
Rotating the default Directional Light causes the Skybox to update. Angling the light to the side, parallel to the ground, creates sunset effects. Pointing the light upwards causes the sky to turn black as if it’s nighttime. With the light angled from above, the sky will resemble daylight.
If the Skybox is selected as the ambient source, Ambient Lighting will change in relation to these colors.
Point Lights
A Point Light can be thought of as a point in 3D space from which light is emitted in all directions. These are useful for creating effects like light bulbs, weapon glow, or explosions where you expect the light to radiate out from an object.
The intensity of Point Lights diminishes quadratically from the full intensity at the center of the light to zero at the limit of the light’s reach, which is defined by the Range property (Figure 12). Light intensity is inversely proportional to the square of the distance from the source. This is known as “inverse square law” and is similar to how light behaves in the real world.
Enabling shadows for Point Lights can be expensive and should be used sparingly. Currently, Point Lights do not support indirect bounce light shadowing. This means that the light created by Point Lights will continue through objects and bounce on the other side unless attenuated by range. This can lead to light leaking through walls and floors; lights must be carefully placed to avoid such problems. This, however, is not a problem when using Baked GI.
Spotlights
Spotlights project a cone of light in their forward (+Z) direction (Figure 13). The width of this cone is defined by the light’s Spot Angle parameter. Light will diminish from the source position towards the extent of the light’s range, where it will eventually disappear. Light also diminishes at the edges of the Spotlight’s cone. Widening the Spot Angle increases the width of the cone and, with it, increases the size of this fade, known as the penumbra (Figure 14).
Spotlights have many useful applications for Scene lighting. They can be used as street lights, wall downlights, or for creating effects like a flashlight. As their area of influence can be precisely controlled, Spotlights are extremely useful for creating a focus on a character or for creating dramatic stage lighting effects.
Light produced by Spotlights will travel through geometry and bounce on the other side. Placement, therefore, needs to be carefully considered.
Area Lights
Area Lights can be thought of as similar to a photographer’s softbox (Figure 15). In Unity, they are defined as rectangles from which light is emitted in all directions, but only from one side. There is no manual control for the range of an Area Light; however, the intensity will diminish at the inverse square of the distance as it travels away from the source.
Area Lights are useful in situations where you wish to create soft lighting effects. A common use for this might be a ceiling strip light or a backlit panel.
In calculating the contribution of an Area Light to the Scene, we must fire a number of rays from each lightmap texel, back towards the light in order to determine whether the light can be seen. This means that Area Lights can be computationally expensive and can increase bake times. But when used well, Area Lights can add realism to your Scene and justify the extra precomputation. Note that as they are baked only, gameplay performance is not affected.
14. Emissive Materials
While Area Lights are not supported by Precomputed Realtime GI, similar soft lighting effects are still possible using Emissive Materials. Like Area Lights, Emissive Materials emit light across their surface area. They contribute to bounced light in a Scene and associated properties, such as color and intensity, can be changed during gameplay.
Emission is a property of the Standard Shader, which allows static objects in a scene to emit light. By default, the Emission value is set to zero. This means no light will be emitted by objects that are assigned Materials using the Standard Shader. You can use the HDR color picker to select colors with intensities beyond the 0-1 range in order to create bright light effects similar to those of Area Lights.
There is no range value for Emissive Materials, but the light emitted will again fall off at a quadratic rate. The emission will only be received by objects marked as Static or Lightmap Static in the Inspector. Similarly, Emissive Materials applied to dynamic geometry, such as characters, will not contribute to Scene lighting.
However, Materials with emission above zero will still appear to glow brightly on screen, even if they are not contributing to Scene lighting. This effect can also be produced by selecting None from the Standard Shader’s Global Illumination property. Self-illuminating Materials like these are a useful way to create effects such as neon (Figure 16).
Emissive Materials affect only static geometry. If you need dynamic geometry, such as characters, to pick up light from Emissive Materials, you’ll need to use Light Probes. Changing emission values at gameplay will update Light Probes interactively and the results will be visible on any objects receiving light from those probes.
15. Light Probes
Only static objects are considered by Unity’s Baked or Precomputed Realtime GI systems. In order for dynamic objects, such as interactive Scene elements or characters, to pick up some of the rich bounced light that our static geometry receives, we need to record this lighting information into a format that can be quickly read and used in our lighting equations during gameplay.
We do this by placing sample points in the world and then capturing light from all directions. The color information these points record is then encoded into a set of values (or coefficients) that can be quickly evaluated during gameplay. In Unity, we call these sample points Light Probes (Figure 17).
Light Probes allow moving objects to respond to the same complex bounced lighting that is affecting our lightmaps. An object’s Mesh renderer will look for the Light Probes around its position and blend between their values. This is done by looking for tetrahedrons made up by the position of Light Probes and then deciding which tetrahedron the object’s pivot falls into. This allows us to place moving characters in Scenes and have them appear properly integrated. Without Light Probes, dynamic objects would not receive any global illumination and would appear darker than surrounding lightmapped geometry.
By default there are no Light Probes in a Scene, so these will need to be placed using a Light Probe Group: GameObjects > Light > Light Probe Group.
If the Auto box is checked at the bottom of your Scene precompute settings (Window > Rendering > Lighting Settings > Auto Generate), Light Probes will update whenever changes are made to the Scene lighting or static geometry. Otherwise, they will be updated when the Build button is clicked.
16. Conclusion
In this tutorial, we’ve covered the considerations you’ll need to make before setting up a Scene for lighting, and briefly looked at the tools available for creating various lighting effects.