Introduction to Sprite Masks
Tutorial
Beginner
+10XP
15 mins
121
Unity Technologies
The Sprite Mask is a useful tool in making unique effects such as character cards or portraits. It’s also useful in making detective, strategy and even some logic based games.
In this tutorial, you'll learn how to create and use Sprite Masks.
Languages available:
1. Introduction to Sprite Masks
Verified in 2019.4
Verified in 2019.3 - https://learn.unity.com/tutorial/introduction-to-sprite-masks-19-3
The Sprite Mask is a useful tool in making unique effects such as character cards or portraits. It’s also useful in making detective, strategy, and even some logic based games. Having the ability to create Sprite Masks within the Unity Engine also relieves the need to have duplicate art assets for creating custom item effects, unique character cards, and more.
Sprite Masks are used to hide, reveal parts of a Sprite, or a group of Sprites. The Sprite Mask only affects objects using the Sprite Renderer Component that have been configured to be used with Sprite Masks.
2. Creating a Sprite Mask
1. To create a Sprite Mask you simply go GameObject > 2D Object > Sprite Mask. This will add a Sprite Mask to the Hierarchy (Figure 01).
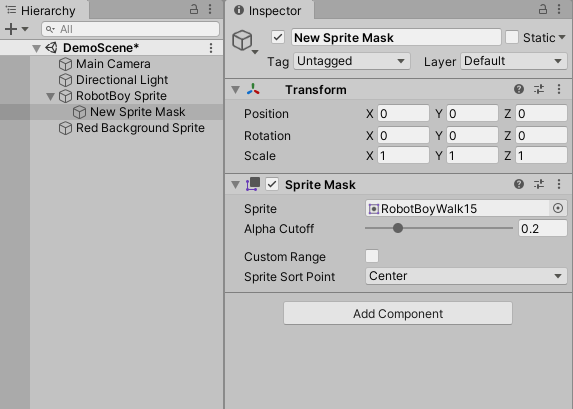
You will have the following properties you can change:
- Sprite: The Sprite that will be used as a mask. Go ahead and assign the Sprite you wish to use as the mask here. In this example, the Sprite Mask is parented to the Sprite named RobotBoy, so that the mask will move along with the character sprite.
- Alpha Cutoff: If the alpha contains a blend between transparent and opaque areas, you can manually determine the cutoff point for which areas will be shown. Adjust the slider to change the cutoff. For now, just leave it at it’s default setting.
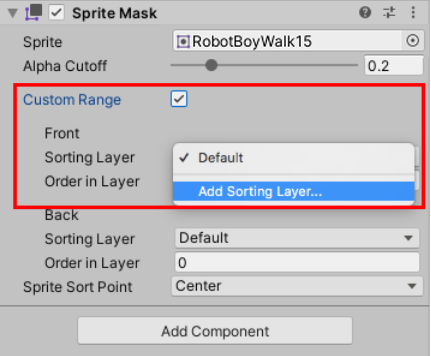
- Custom Range: A checkbox that when toggled on, will display additional properties for the Front and Back Sorting Layers. You will then have the option to Add a Sorting Layer, by selecting the Sorting Layer’s Default dropdown menu (Figure 02).
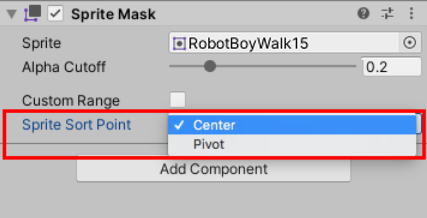
- Sprite Sort Point: The Sort Point options for the given Sprite Mask (Figure 03).
- Center (Default). Unity measures the distance from the camera to the sprite, calculating the rendering order of sprites
- Pivot - to set a different sort point. You then edit the sprite’s pivot position in the sprite editor.
3. Working with a Sprite Mask
1. Add two Sprites you wish to mask with the Sprite Mask to your scene. In this example, two Sprites are shown, the RobotBoy character, and a Red Background Sprite.
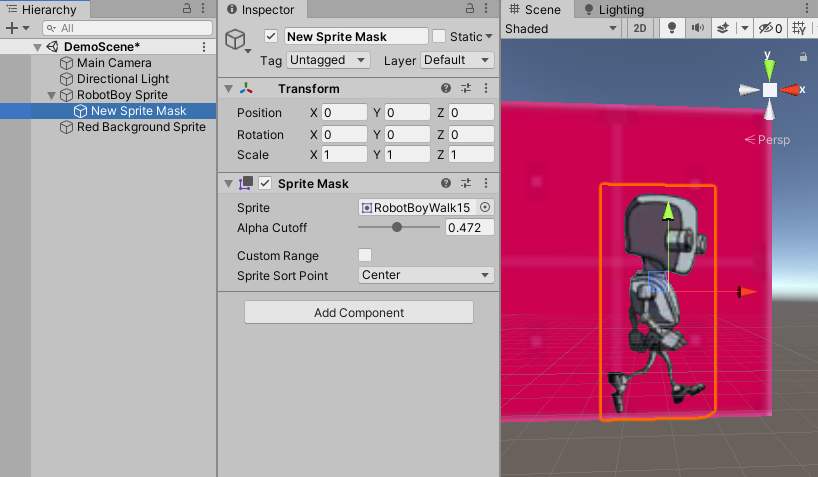
Note: With the two Sprites showing in the scene, you will notice that the Sprite Mask GameObject itself will not be visible in the scene. Only the resulting interactions between the Mask and the Sprites will be visible. If you select the Sprite Mask in the Hierarchy window, you will still be able to make transform and scale adjustments, with the Sprite Mask outlined in orange (Figure 04).
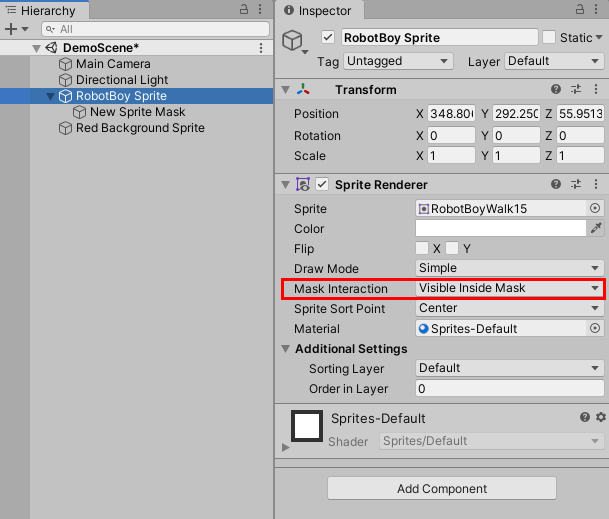
2. In order for the Sprites to work with the Sprite Mask, select what you added to the scene and adjust the settings in their respective Sprite Renderer Components. You will see you can set the Mask Interaction to Visible Inside Mask, Visible Outside Mask, or None, go ahead and select Visible Inside Mask (Figure 05).
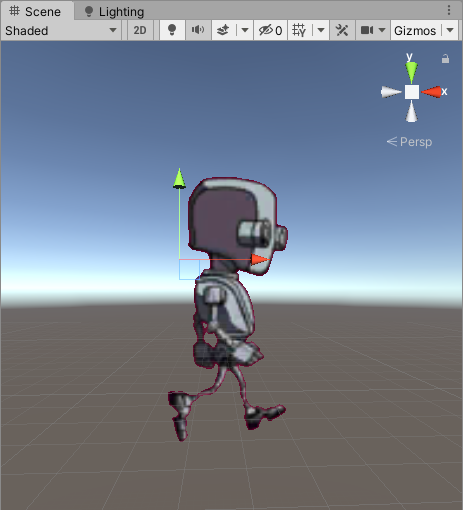
When these settings are set to Visible Inside Mask, only the overlapping Sprites of the Sprite Mask will be rendered (Figure 06).
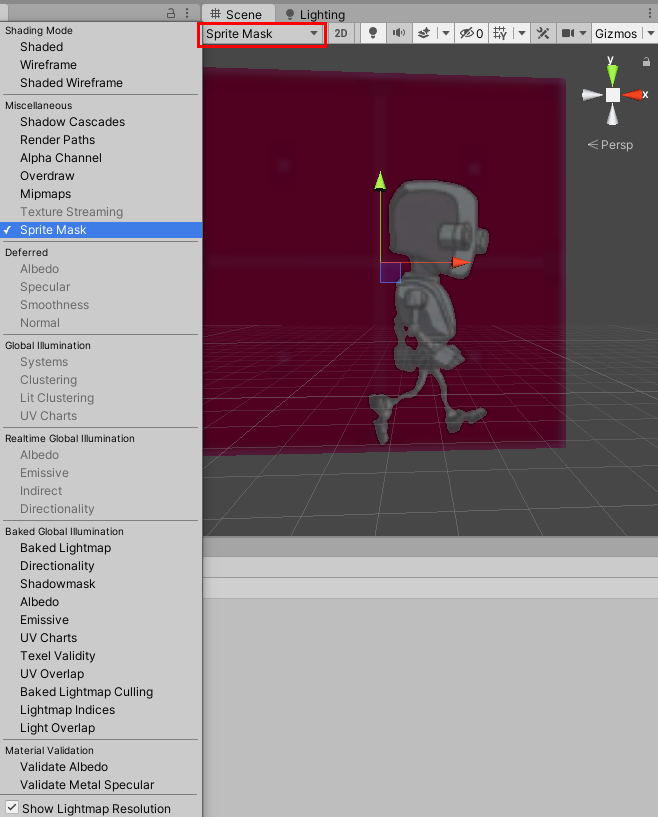
Normally you cannot see the masked sprites in the scene, but if you go up to the Draw Mode settings in the Scene window and set it to Sprite Masks (Figure 07). You will be able to see the Sprite Mask and the hidden background Sprite.
4. Sorting Groups
Sprite Masks are always in effect and by default, the Sprite Mask will affect any Sprite in the scene that has their Mask Interaction set to Visible Inside Mask or Visible Outside Mask. You may want the Sprite Mask to only affect a particular Sprite or group of Sprites. One method of achieving this is to create a Sorting Group. A Sorting Group is only necessary when you have multiple Sprites parented to one Game Object. You would add the Sorting Group Component to the parent Game Object.
1. Right-click in your Hierarchy and select Create Empty, and name it.
2. With this custom GameObject, parent two or more Sprites to it by dragging and dropping them onto the custom Game Object in the Hierarchy window .
3. Add the Sorting Group Component to the parent custom Game Object, by selecting the Add Component Button, and adding the Sorting Group Component (Figure 07).
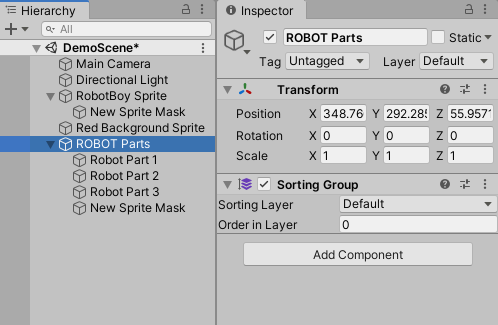
4. Once the Sorting Group is created, add the Sprite Mask and any additional Sprites as children. This will make it so the Sprite Mask only affects the images within the Sorting Group.
Another method is using the Custom Range property (Figure 02). A Sprite Mask with a Custom Range setting ensures the mask will only affect Sprites in the specified Sorting Layer or Order in Layer range. This prevents multiple Sprite Masks from overlapping each other and showing the masked Sprites in the wrong order.
5. Conclusion
With this knowledge, you’ll now be able to go and create new special effects using your existing Sprites. This isn’t just limited to character cards but special revealing masks or cut away effects using the Sprites. You can now use your existing assets to take your project a step forward and find new ways to create interesting visuals within your project.