Introduction to Tilemap Scriptable Brushes
Tutorial
intermediate
+10XP
20 mins
89
Unity Technologies
Scriptable brushes for Tilemaps supercharges the efficiency of an already easy-to-use system. With scriptable brushes, you can create tiles that automatically adjust their appearance based on where they've been placed in the level, change the way a line is placed on the grid, and even apply interactive components for the user when the application is being used. In this tutorial, you'll learn the basics of creating your own scriptable brushes.
Materials
Languages available:
1. What are Tilemap Scriptable Brushes?
Scriptable brushes for Tilemaps supercharges the efficiency of an already easy-to-use system. With scriptable brushes, you can create tiles that automatically adjust their appearance based on where they've been placed in the level, change the way a line is placed on the grid, and even apply interactive components for the user when the application is being used. In this tutorial, you'll learn the basics of creating your own scriptable brushes.
This tutorial assumes that you know how to create tiles and create/load and populate a Tile Palette. For more information on these topics, see Creating Tiles in the Unity Manual.
- Download the 2D Extras kit from GitHub and extract 2d-extras-master into your Assets folder.
- Right click in the Hierarchy window and select 2D Object > Tilemap.
- From the Window dropdown, select 2D > Tile Palette.
- Create or load your tile(s). If you don’t have any tiles, you can find a few in the 2D Game Kit. Be warned: this kit is heavy and may take a bit to fully build once downloaded.
2. Introduction to Tilemaps: Scriptable Brushes
This tutorial has been verified using Unity 2019.4.11f1 LTS and 2D Tilemap Editor 1.0.0
Scriptable brushes for Tilemaps supercharges the efficiency of an already easy-to-use system. With scriptable brushes, you can create tiles that automatically adjust their appearance based on where they've been placed in the level, change the way a line is placed on the grid, and even apply interactive components for the user when the application is being used. In this tutorial, you'll learn the basics of creating your own scriptable brushes.
This workflow assumes that you know how to create tiles and create/load and populate a Tile Palette. For more information on these topics, see Creating Tiles in the Unity Manual.
3. Installing the Tilemap Editor
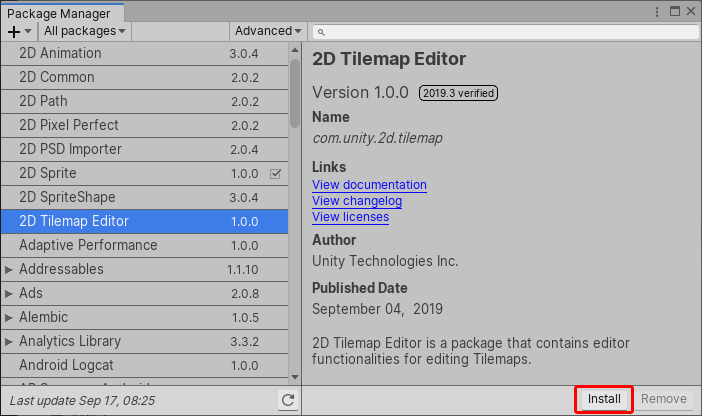
The Tilemap Editor is installed via the Package Manager.
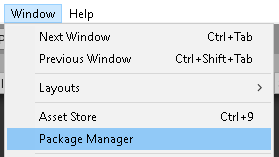
1. From the Window dropdown, select Package Manager (Figure 01).
2. In the left column of the Package Manager, click 2D Tilemap Editor, then click Install in the lower right corner (Figure 02).
4. Installing the 2D Extras Kit
The example Scriptable Brushes we’ll be exploring are part of the 2D Extras kit available on GitHub.
1. Download the 2D Extras kit from GitHub and copy 2d-extras-master into your Assets folder.
2. Right-click in the Hierarchy window and select 2D Object > Tilemap.
3. From the Window dropdown, select 2D > Tile Palette.
4. Create or load your tile(s). If you don’t have any tiles, you can find a few in the 2D Game Kit. Be warned: this kit is heavy and may take a bit to fully build once downloaded.
5. Exploring the Line Brush
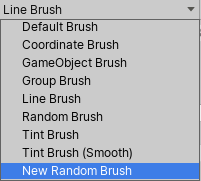
1. You can either load and use a Line Brush from the default model in the Tile Palette, or create a new one. For now, click the brush dropdown in the lower-left corner of the Tile Palette and select Line Brush (Figure 03).
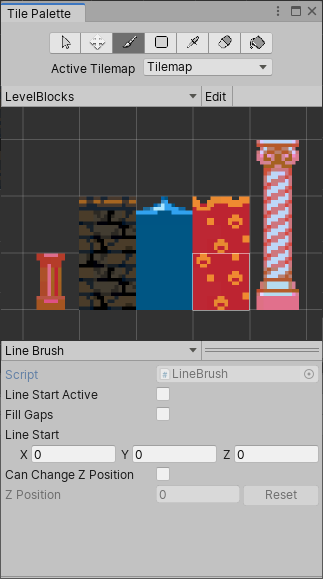
2. At the top center of the Tile Palette window, click the default brush if it isn’t already selected (Figure 04).

3. Click once on the Tilemap to start a line. Notice that the Line Start Active box is checked (Figure 05).
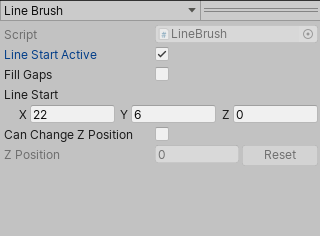
4. Move the mouse and click elsewhere on the Tilemap to complete the line. Line Start Active is once again unchecked.
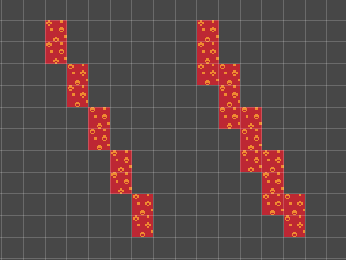
5. Check the Fill Gaps box and draw another line the same way. With this option unchecked, lines are single-cell width. With Fill Gaps checked, the line never breaks from one cell to the next, from start to finish. With the default option, the line is drawn using Bresenham's line algorithm.
6. The line on the left was created with Fill Gaps unchecked, and the right with it checked (Figure 06).
7. Navigate to a clear spot on the Tilemap or delete the tiles you’ve drawn.
6. Exploring the Random Brush
1. In the Project window, right-click and select Create > 2D > Brushes > Random Brush. Name it if you’d like, or press Enter to accept the default name.
2. Just as you did in Exercise 1, click the brush dropdown in the lower-left corner of the Tile Palette and select your New Random Brush (Figure 07).
3. In the bottom of the Tile Palette window, enter a value for Number of Tiles, and assign a tile to each slot. Try painting with the regular, filled box, and flood fill brushes (B, U, and G are the respective keyboard shortcuts). Notice that the filled box and flood fill both just use the currently selected tile, ignoring the Random Brush’s random tile selection.
4. To fill a large area with random tiles, hold CTRL/Command to drag out a box the size of your desired brush. Using the regular Paint tool, you can cover a large area at once with a non-repeating distribution of randomly selected tiles.
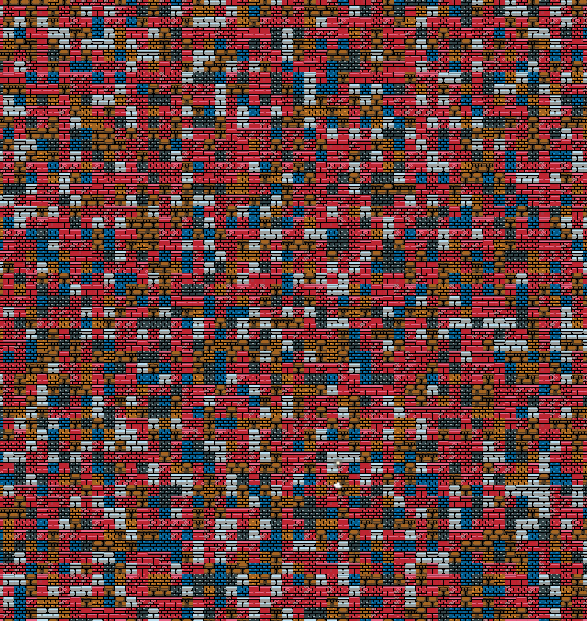
5. Press U or click on the icon to switch to the filled box brush and hold Shift, clearing the Tilemap a rectangle at a time until it’s empty, or just navigate to another empty area of the Tilemap.
7. Exploring the Prefab Brush
The Prefab Brush is a lot like the Random Brush, except it paints prefabs rather than tiles.
1. Create some Prefabs that are 1x1 Unity units in size.
2. Right-click in the Project window and select Create > 2D > Brushes > Prefab Brush.
3. In the bottom of the Tile Palette, or in the Inspector, set the Prefabs you wish to use as you did the sprites in the last brush.
4. Paint as before.
These are just three examples of Scriptable Brushes. It’s possible to create your own custom Scriptable Brush. If you’d like to explore how they’re programmed, create any of the four brushes available from the Create context menu in the Project window and, in the upper-right corner of the Inspector, click the gear and select Edit Script (Figure 09).

8. Conclusion
The possibilities with a custom-scripted Tilemap Brush — especially when combined with rule tiles — are endless.