Lesson 3.4 - Exploring Emissive Materials
Tutorial
·
Beginner
·
+10XP
·
10 mins
·
(348)
Unity Technologies

In this lesson, you’ll learn about emissive Materials and how to adjust their color property.
Recall from the last lesson how when the sky is dark in our Scene, the windows of the buildings appear illuminated. This is because the buildings’ Materials include an emissive Material. Emissive Materials, as the name implies, emit light as if they were a light source. As with other light sources, they generally become visible when they aren't competing with more intense light sources, such as the Directional Light (which effectively acts as the sun).
Languages available:
1. Lesson Overview
2. Changing the Window Colors
Let's demonstrate how we can use emissive Materials by changing the colors of the windows.
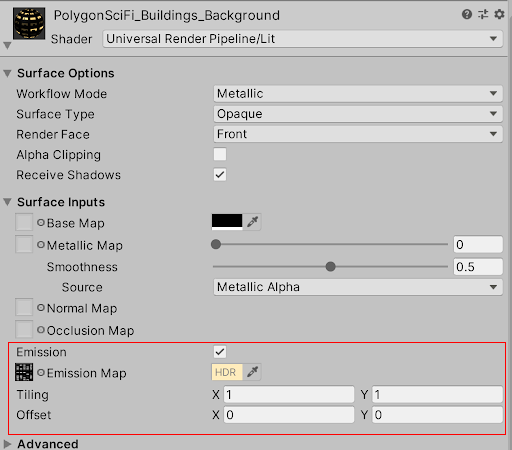
1. Select one of the large highrises in the Scene view, then navigate to and expand its Material component in the Inspector (Figure 01).

You need three things to create emissive Materials in your Scene: First, you must enable the Emission toggle to tell Unity that this Material is emissive.
Next, you must select a Texture to be used as an Emission Map. This Texture is a grayscale (black and white) image that functions as a mask: white areas of the mask emit light, while black areas of the mask do not.
Last is the Emissive Color property. Currently it’s set to yellow, which is why the windows emit a yellow tint. Let's change the color.
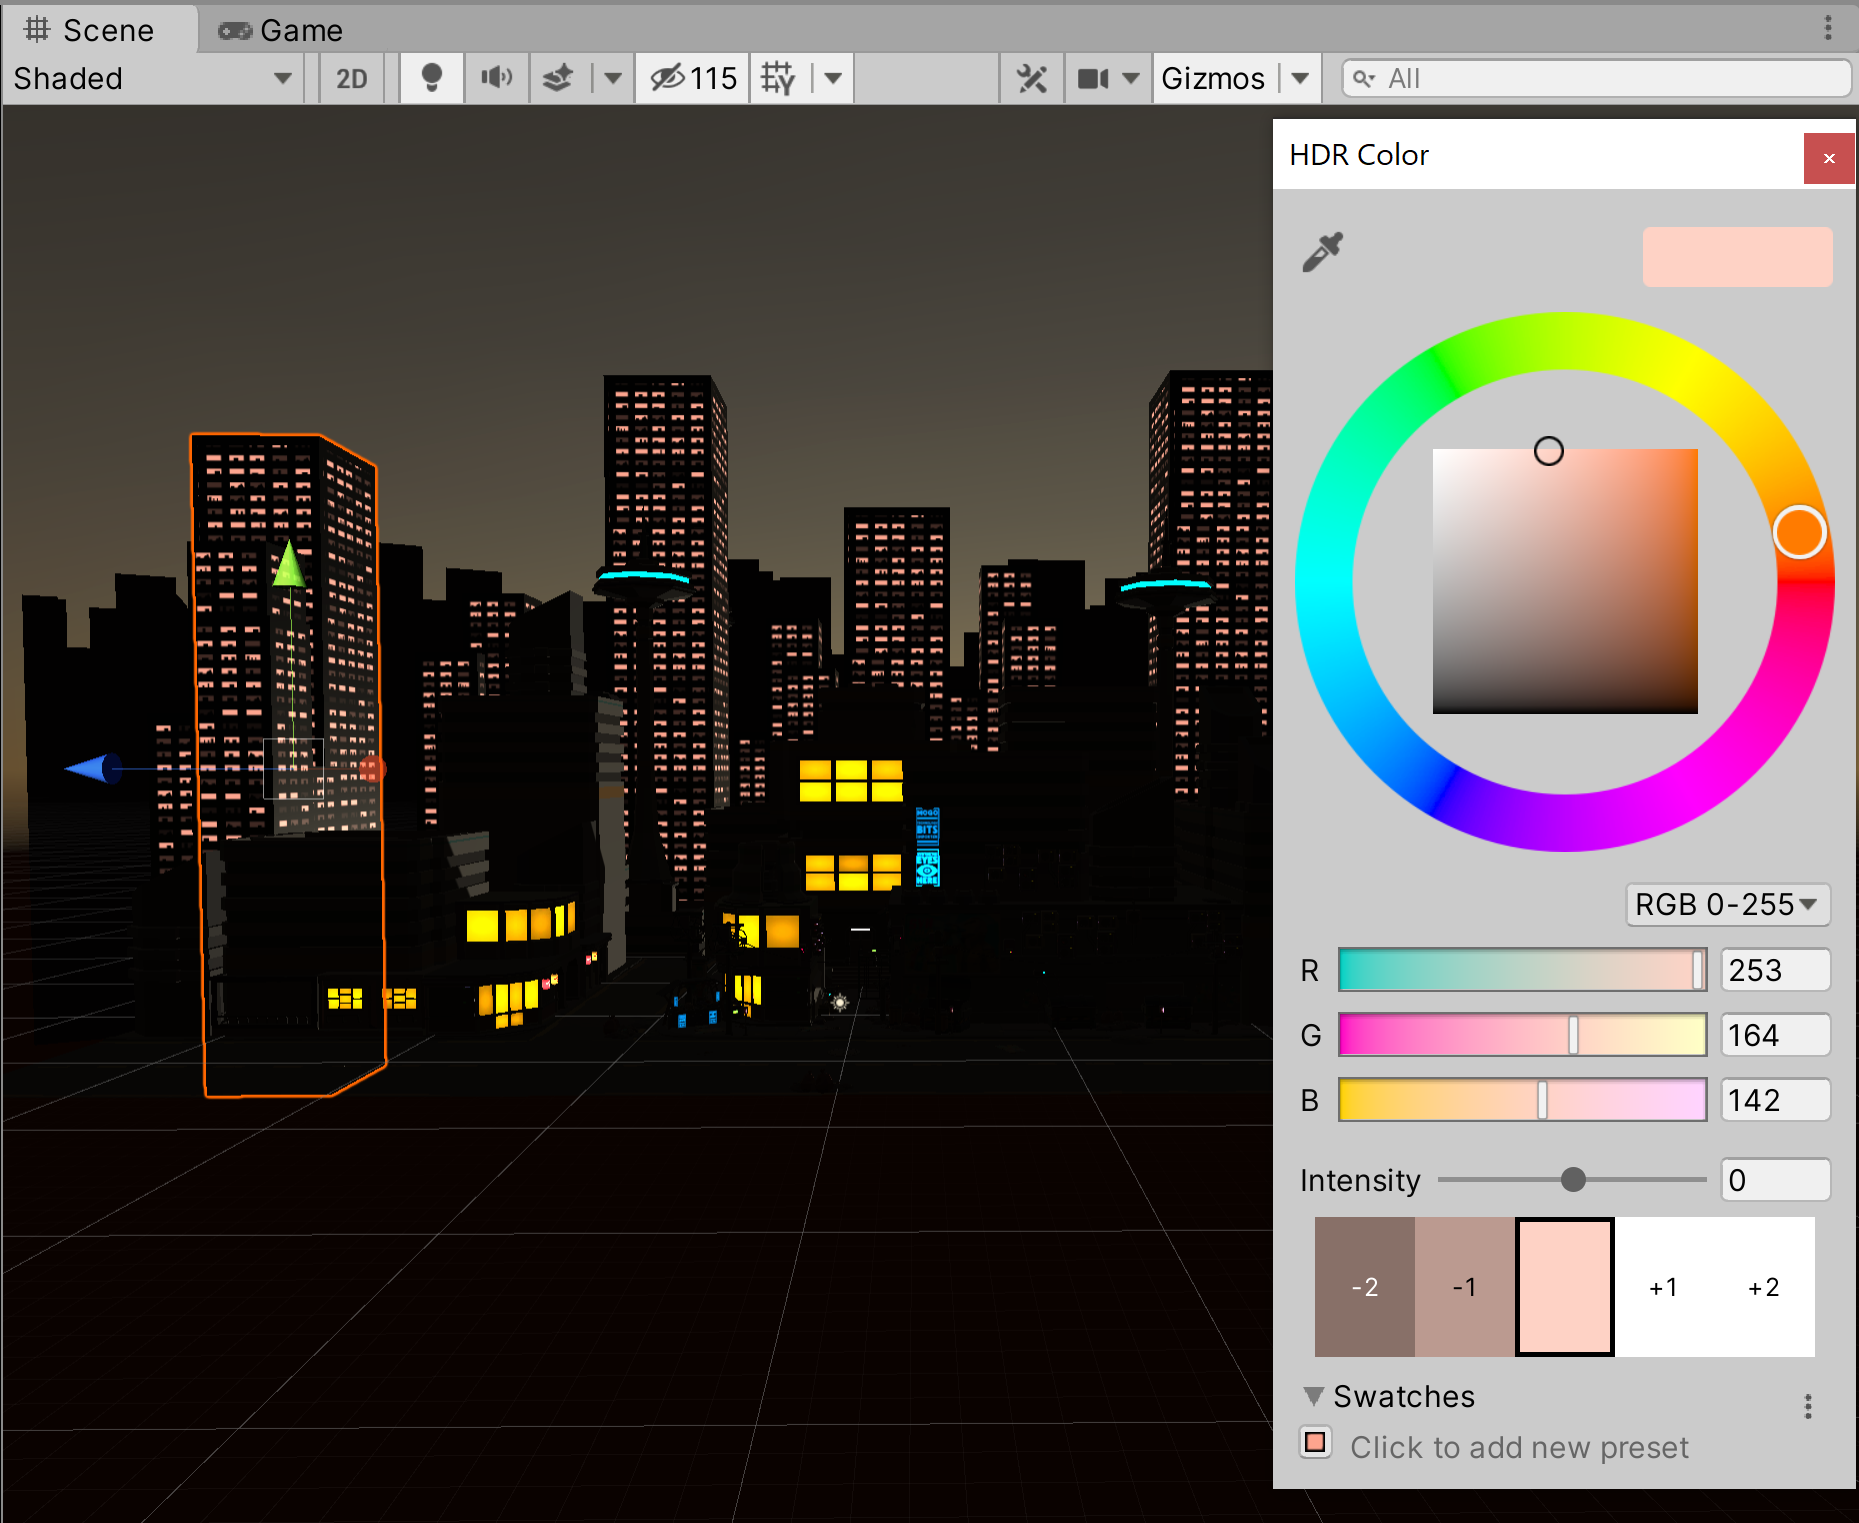
2. Click the color bucket next to the Emission Map, then pick a new color (Figure 02).

This particular emissive Material is shared across all of the buildings, which is why it affects all of the windows.
3. Recap
In this lesson, we briefly explored how to set up emissive Materials in Unity and change their color. Emissive Materials help create more dynamic lighting scenarios in your Scenes and can form the basis for lighting setups in low-light environments.