Lesson 7.2 - Working with Audio
Tutorial
Beginner
+10XP
45 mins
136
Unity Technologies

In this lesson, you’ll learn to add audio to your Timeline, including music and sound effect tracks.
Working with audio in Unity is a straightforward process, similar to adding other types of media Assets, adjusting their properties, and arranging them along the Timeline.
With Unity, you can import most standard audio file formats and enhance sound with post-processing effects, like reverb or echo. You can develop audio GameObjects with features such as spatial and sonic direction for a 3D environment and apply the doppler effect to simulate the sound of a moving object.
For the example project’s Chase Scene, the audio elements will include a background music track and individual sound effects. You’ll arrange and layer the tracks along various locations in the Timeline, in the same manner as a multi-track mixing session.
Languages available:
1. Lesson Overview
2. Adding Background Music
In real life, sounds are emitted by a source, move through the air, and are heard by a listener. A listener is able to discern the sound’s location, direction of travel, velocity, distance, loudness, and pitch. The surrounding environment can dampen or reflect a sound and affect the way it’s perceived. The sound of a dog barking, for instance, is very different in a semi-enclosed alley versus an open-air stadium. In Unity, we can apply properties to sounds to recreate these types of scenarios.
When working with sound design in Unity, it’s best to have already recorded and edited your sound files in an external audio editor to make sure their levels are consistent and normalized. Additionally, you should import and save your audio files in the project’s Assets folder. For our example project, audio files are included in a folder named SFX, saved inside the project’s Assets folder.
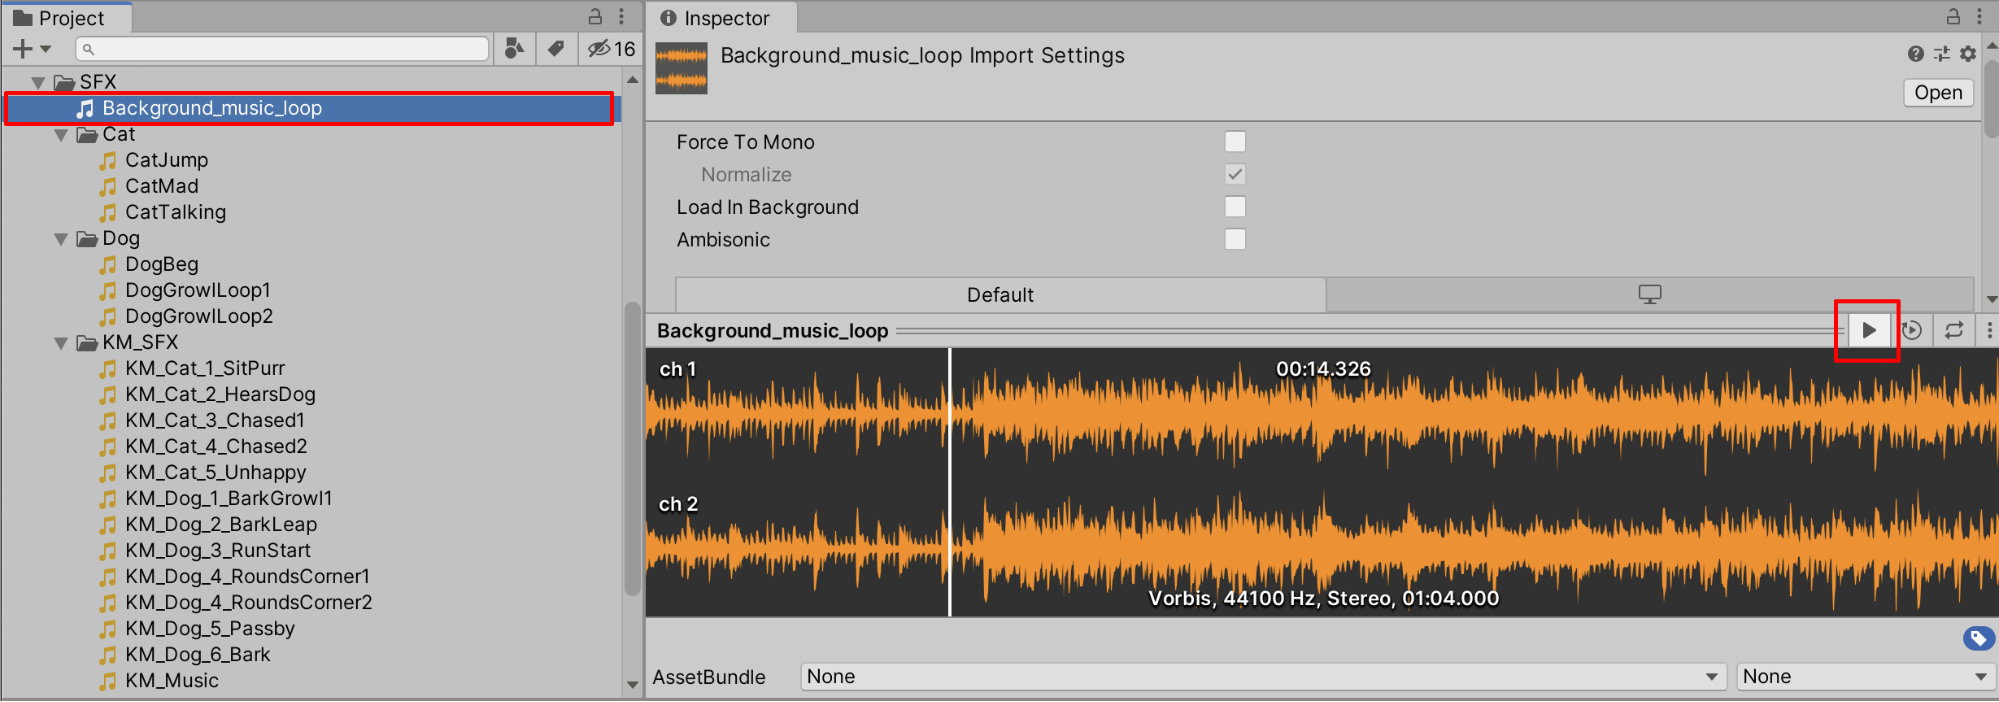
1. Select the Background_music_loop audio file in the Assets folder to preview its properties in the Inspector. Click Play to preview the sound (Figure 01).
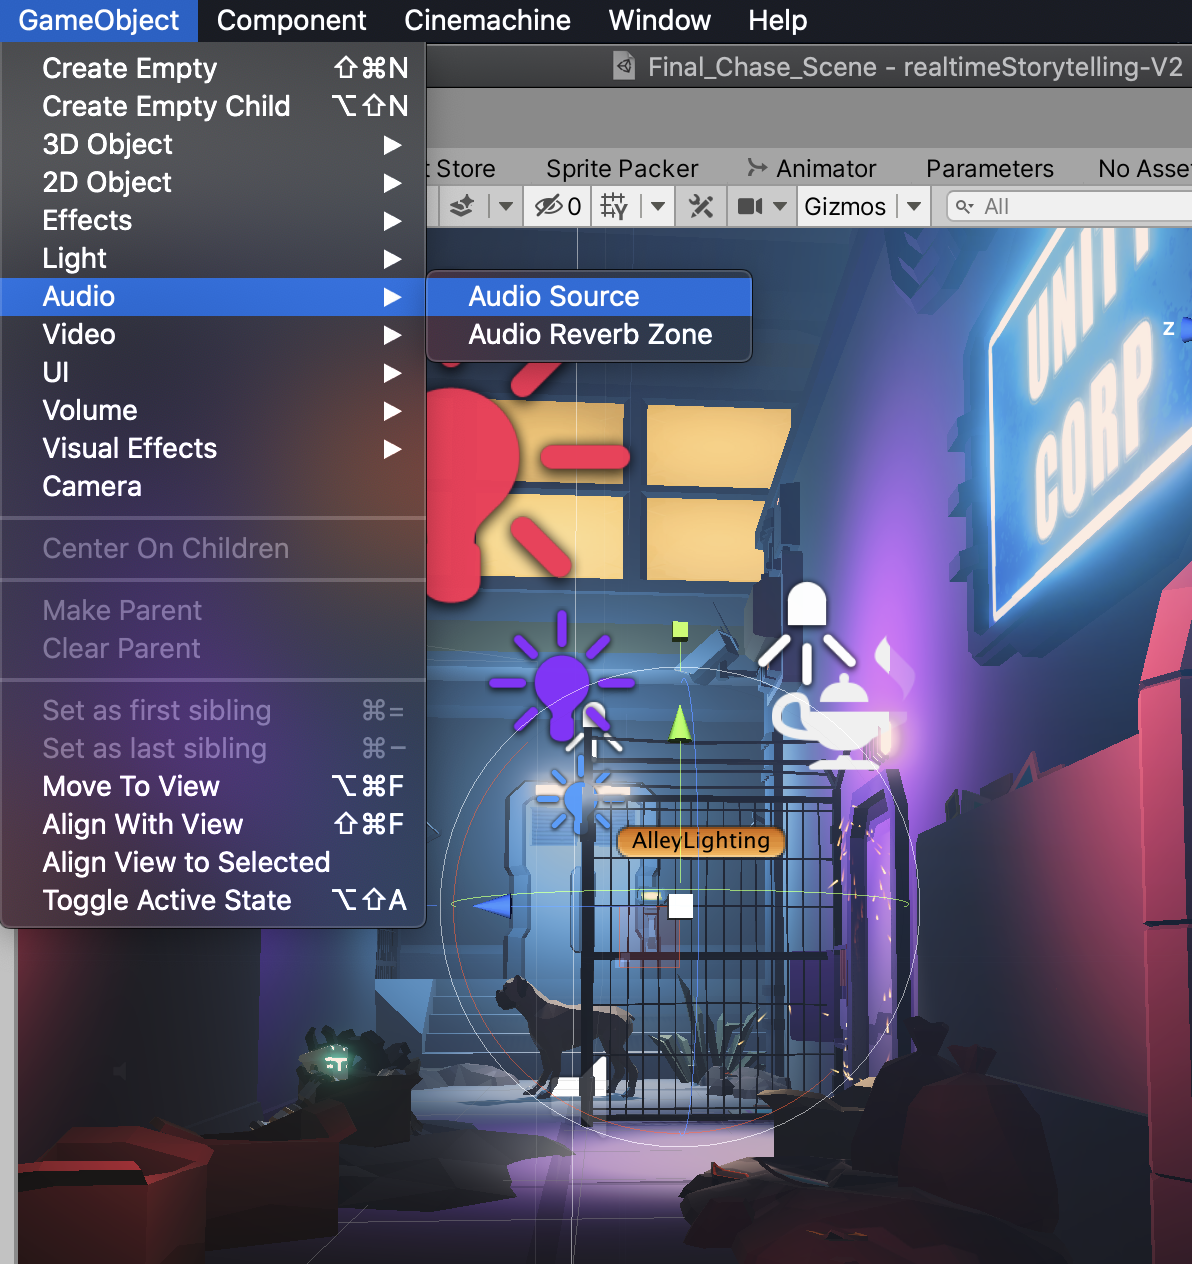
2. Create an Empty GameObject in the Hierarchy window. Name it SFX and zero the X, Y, and Z Position coordinates. Create an Audio Source GameObject by selecting GameObject > Audio > Audio Source from the top menu drop-down (Figure 02).
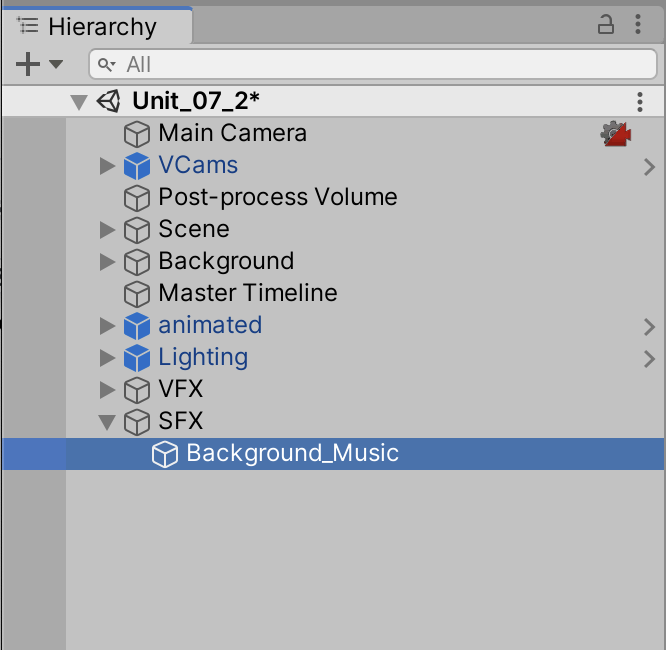
3. Parent the Audio Source within the SFX Hierarchy and rename it Background_Music (Figure 03).
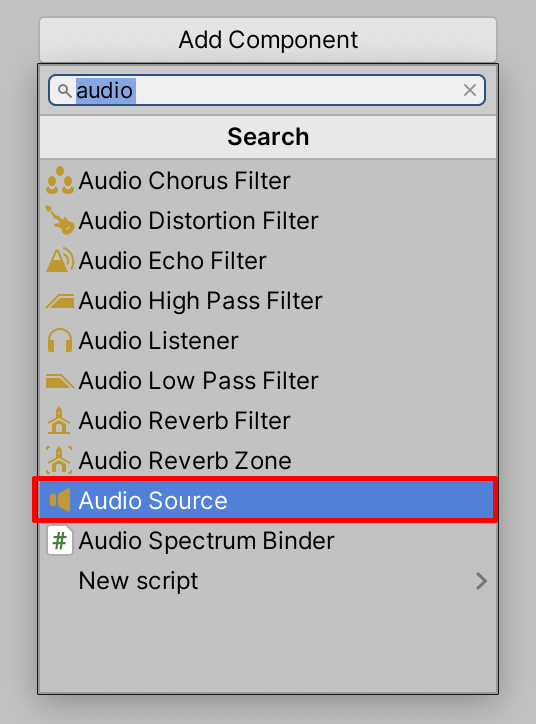
4. An Audio Source can also be added onto other GameObjects as a component. You can do this by selecting Add Component in the Inspector and searching for Audio Source (Figure 04).
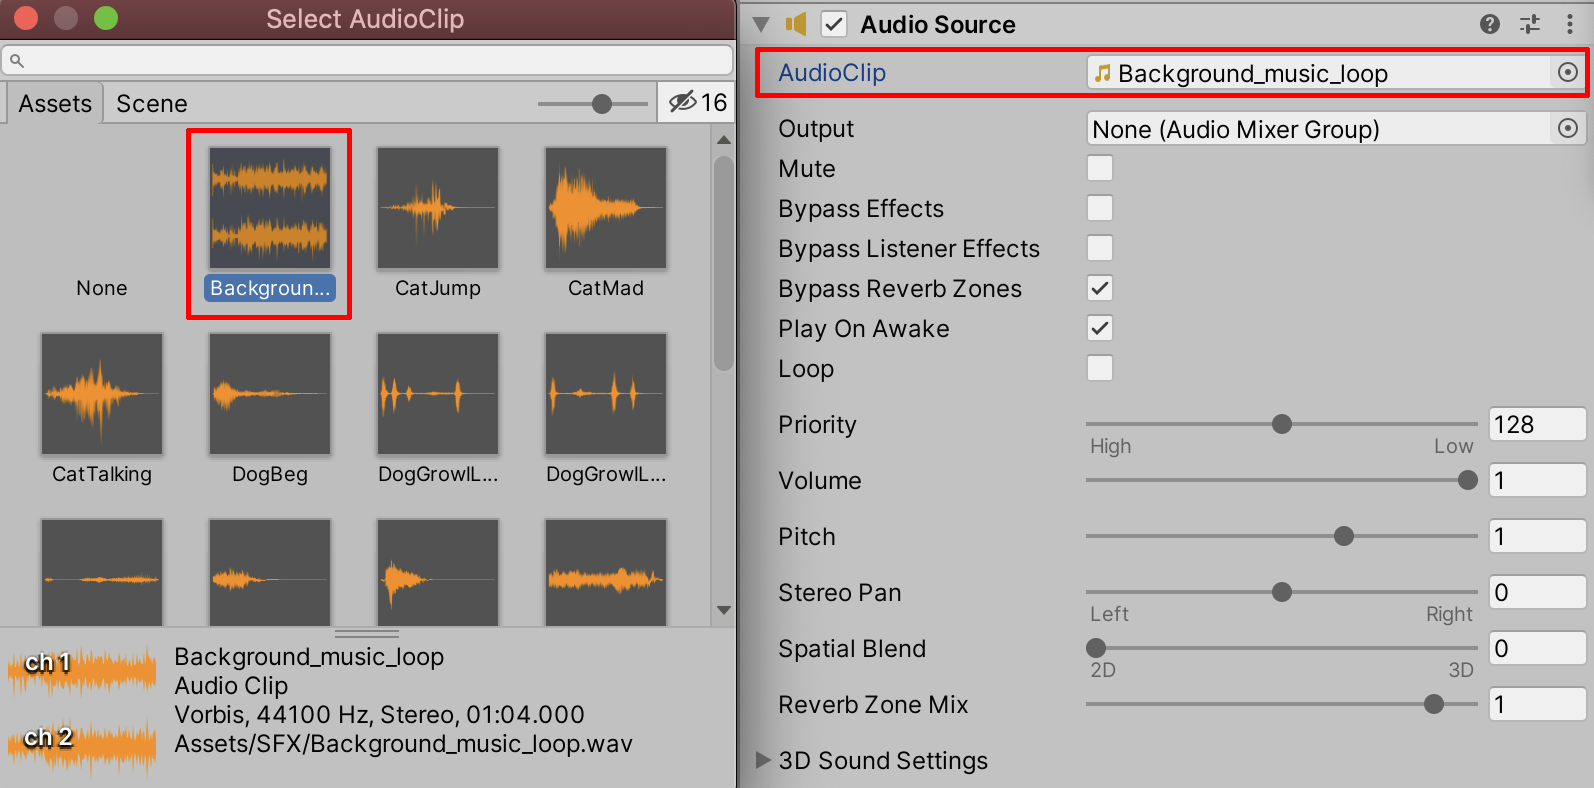
5. With the Background_Music GameObject selected in the Hierarchy, link an audio file into the AudioClip field in the Inspector by first selecting the Object Loader Circle button next to the AudioClip property in the Inspector, and then selecting the Background_music_loop audio file (Figure 05). (Alternatively, select the audio file in the Project window and drag and drop it into the AudioClip field.)
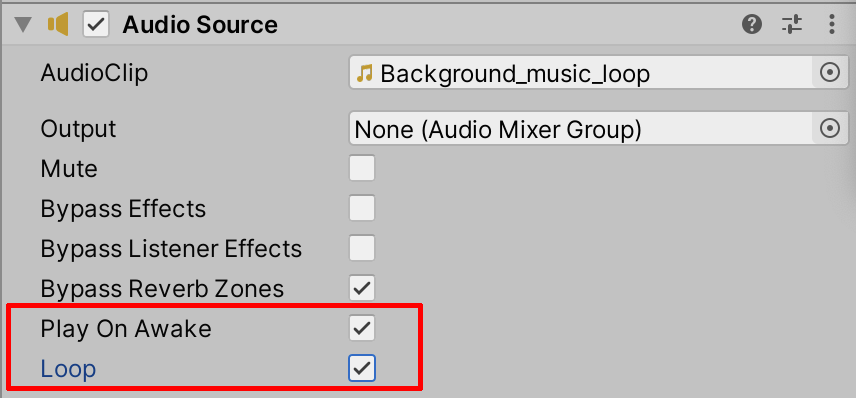
6. Enter Play Mode to preview the audio now in your Scene. You will be able to hear the music immediately if Play On Awake is enabled. You can also loop the sound file if Loop is enabled (Figure 06).
3. Working with Audio Using the Mixer
The Unity Audio Mixer gives you further flexibility to mix various audio sources. You can use the Mixer to master your audio, route audio channels, and add effects.
1. Select Window > Audio > Audio Mixer (Figure 07).
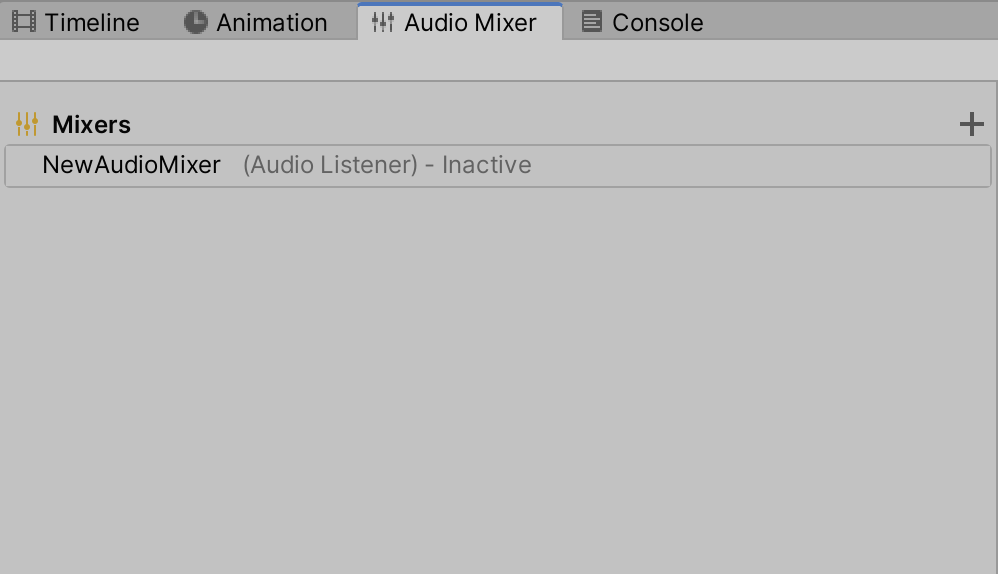
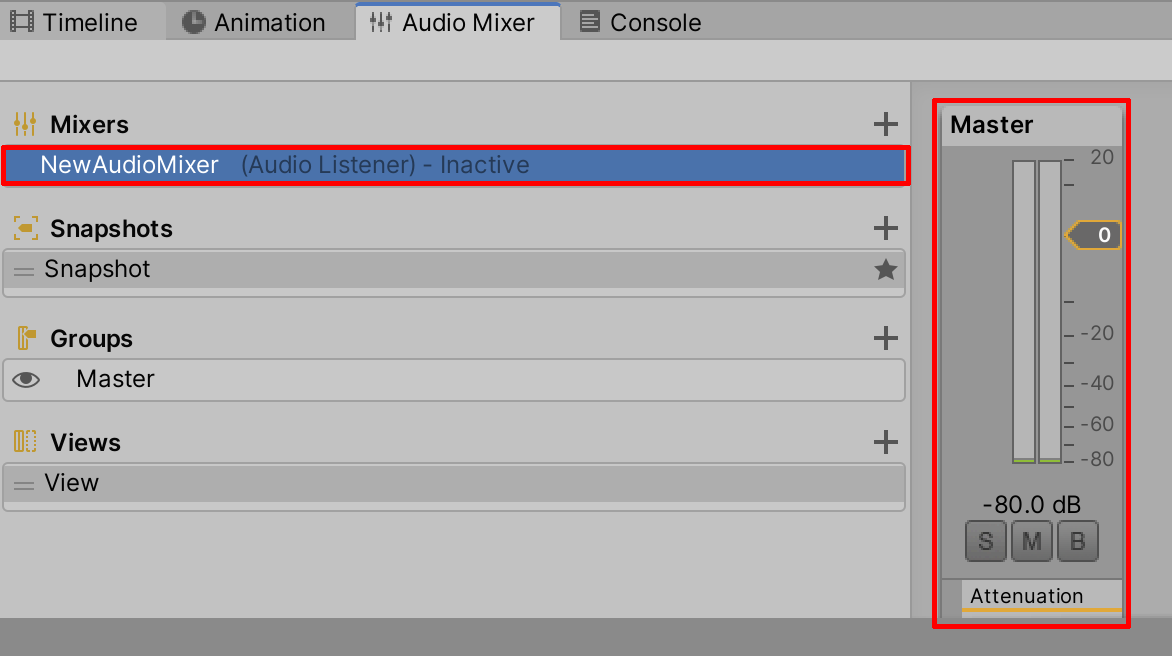
2. Beneath Mixers, select NewAudioMixer (Audio Listener) - Inactive to open up the Master side panel (Figure 08).
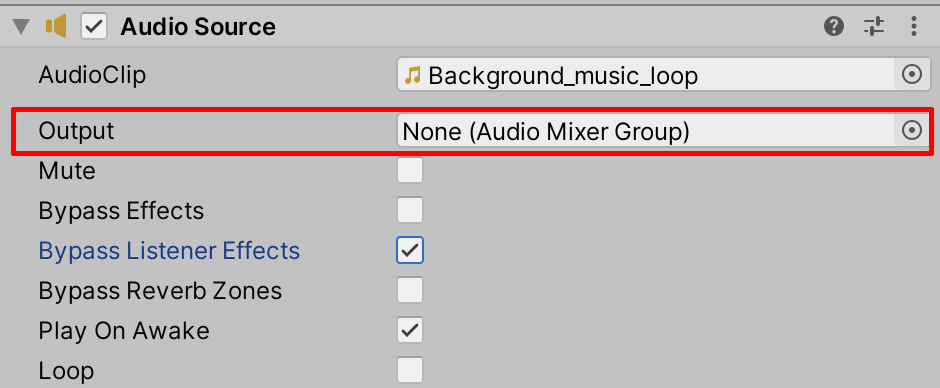
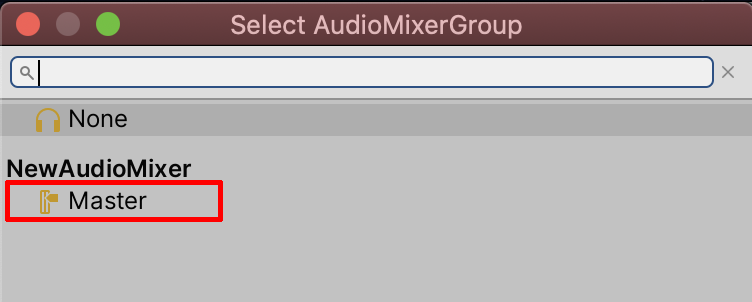
3. To send audio to the Mixer, you must first select the Audio Source GameObject in the Hierarchy and click the Output’s Object Loader Circle (Figure 09). Next, set the AudioMixer to Master in the AudioMixerGroup window (Figure 10).
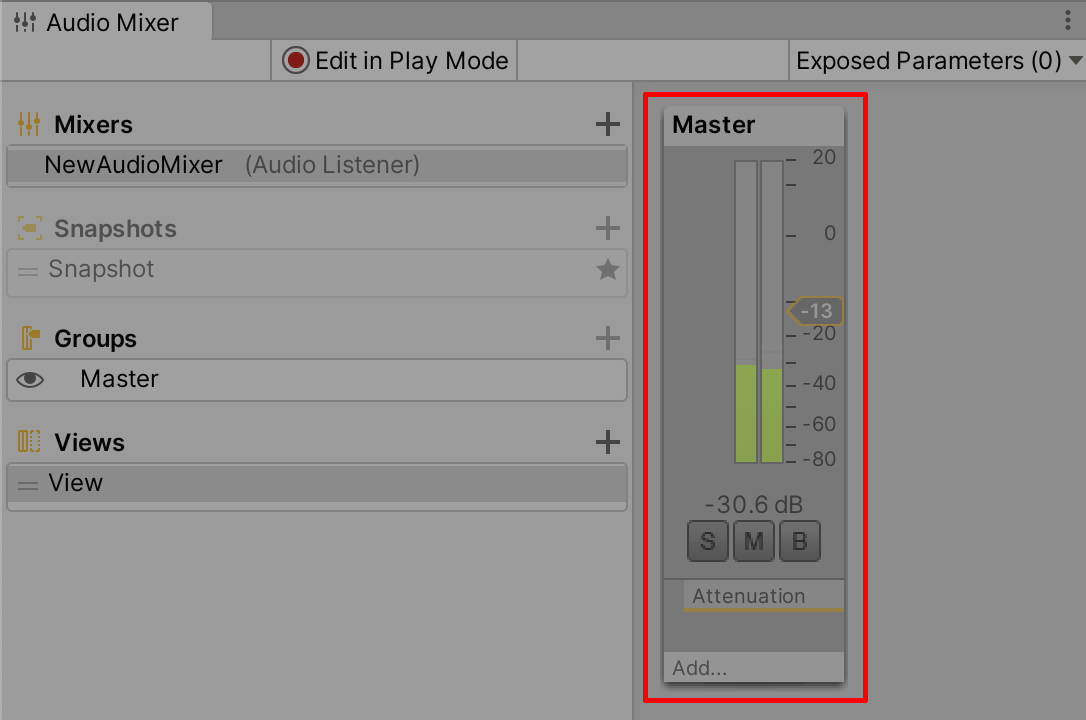
4. Now, when you enter Play Mode, you’ll be able to preview the audio signal through the Audio Mixer (Figure 11).
4. Applying Audio Effects Using the Mixer
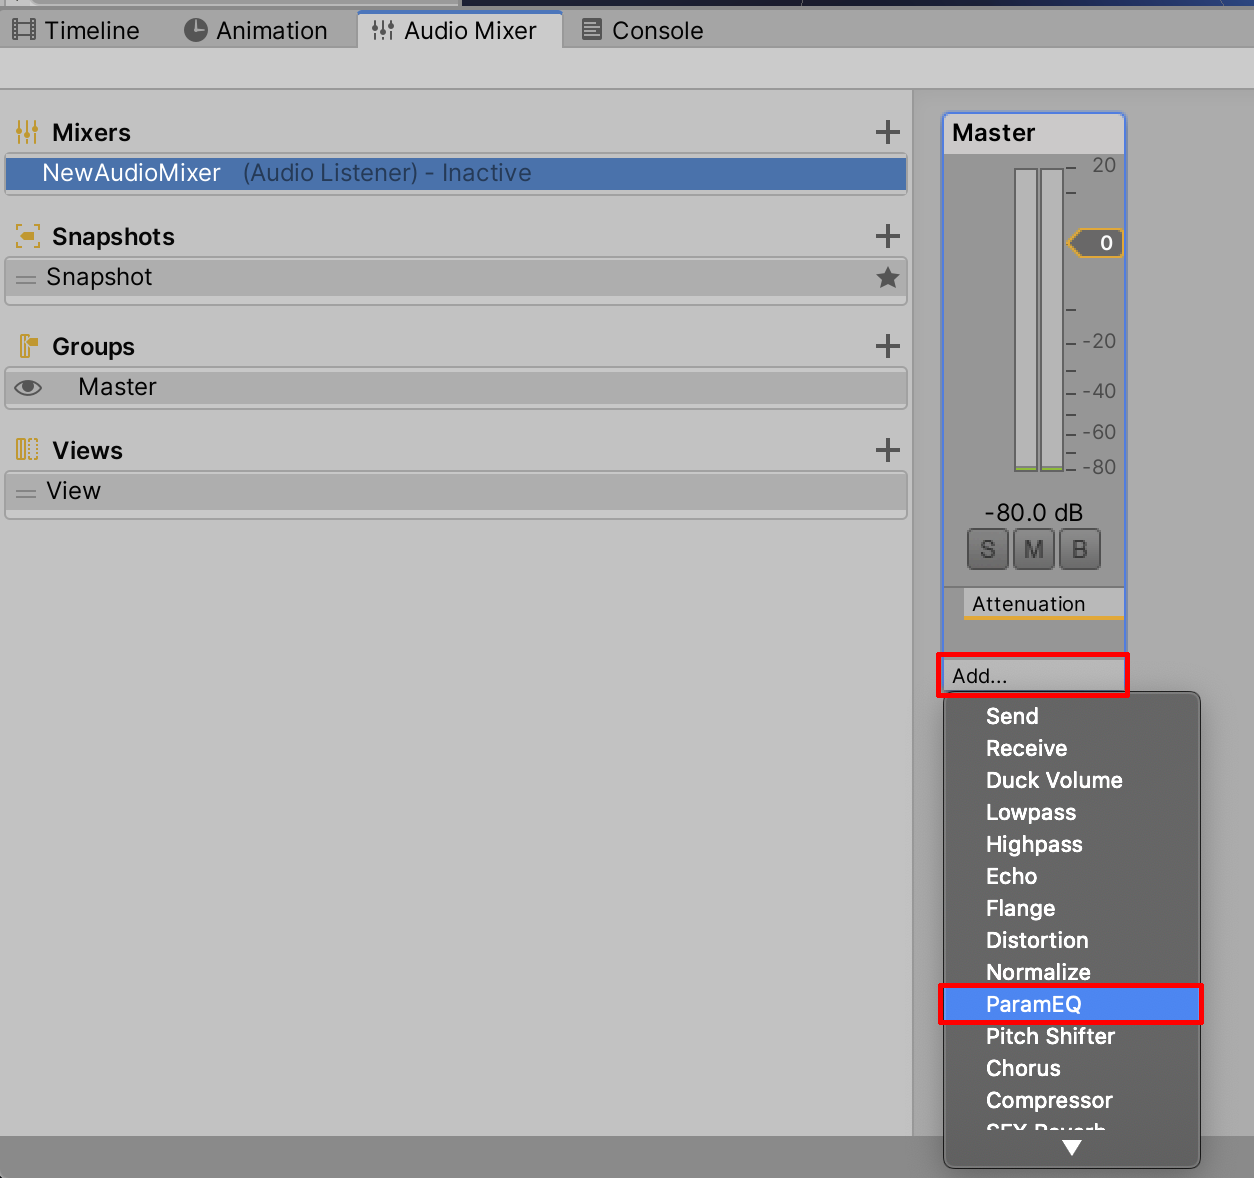
Enhancing audio is possible through the Audio Mixer. Normalize, for example, keeps an audio signal’s levels more consistent. You would apply this effect if your audio source had varying volume levels that you wanted to even out. Or, you could use a Flange effect to simulate an acoustic environment where a listener is traveling out of an enclosed space into the open. You might also want more bass in your source audio, in which case you would use ParamEQ to adjust the audio equalizer. You can add these effects, as well as others, in the Audio Mixer window. Let’s add the ParamEQ effect now.
1. Select Add in the Audio Mixer window and then select ParamEQ from the drop-down (Figure 12).
2. With the ParamEQ, you can start to make adjustments in the Inspector window (Figure 13).
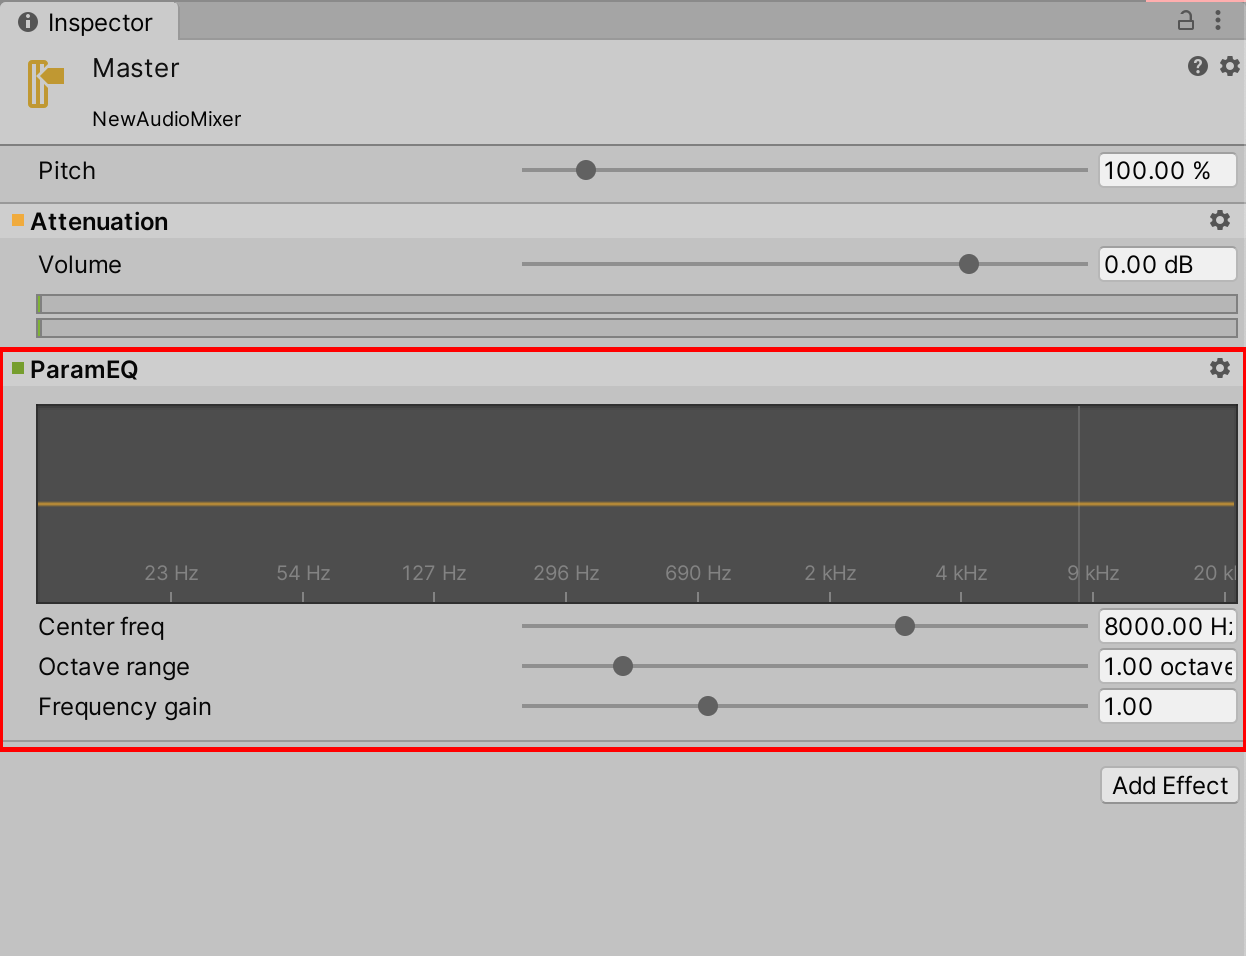
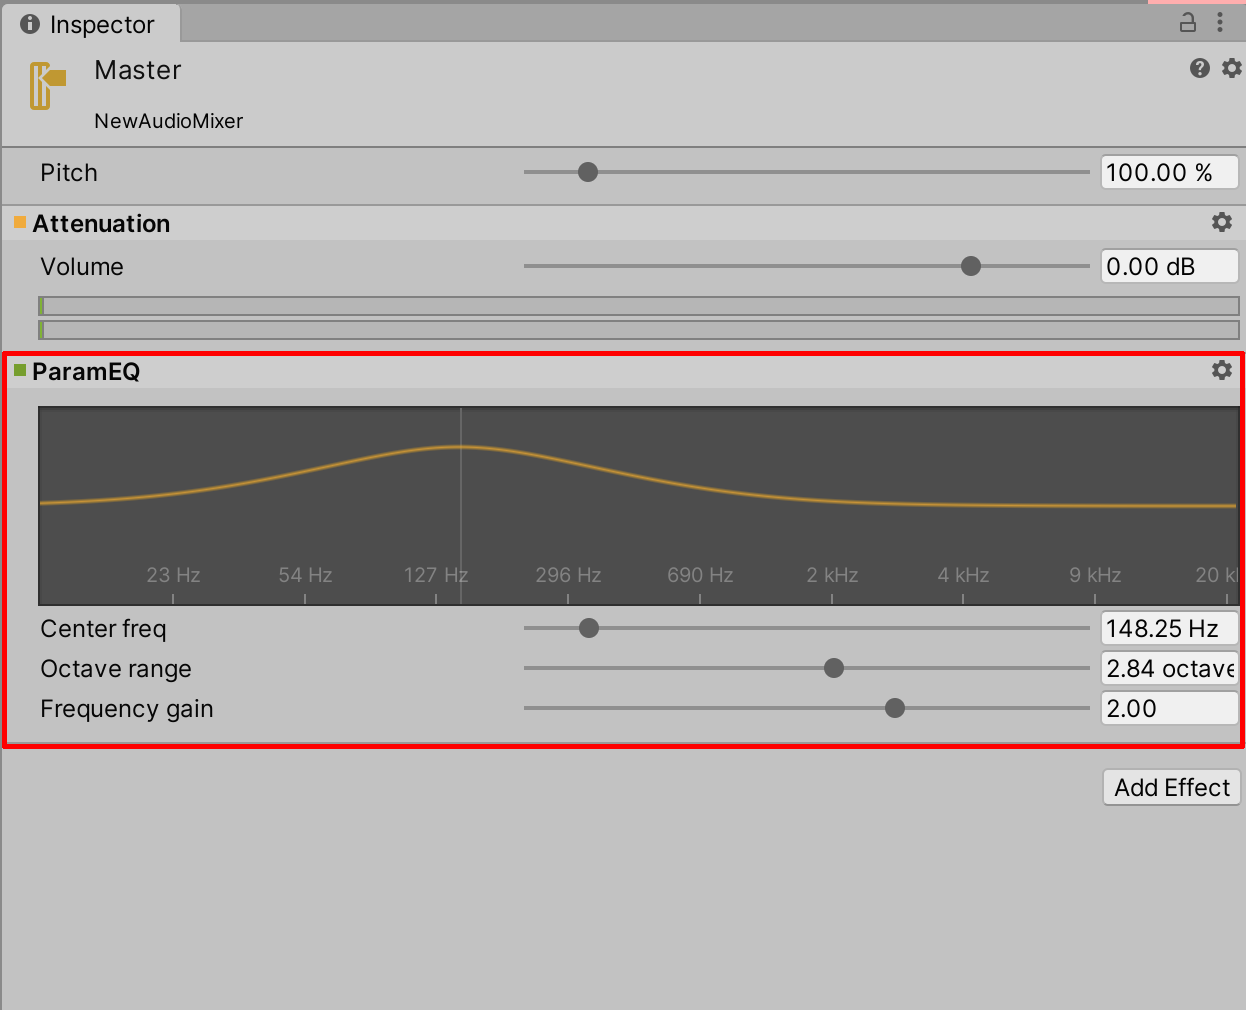
3. Select at a location on the graph by clicking and holding the mouse and dragging a curve upward to enhance a specific frequency range. Drag the slider for Center freq to adjust the curve left and right for a lower or higher frequency. Adjust the Octave range slider to narrow or widen the range of the curve. Adjust the Frequency gain slider to raise or lower the curve. Practice matching your curve to the example below, in which the lower bass frequencies are enhanced (Figure 14).
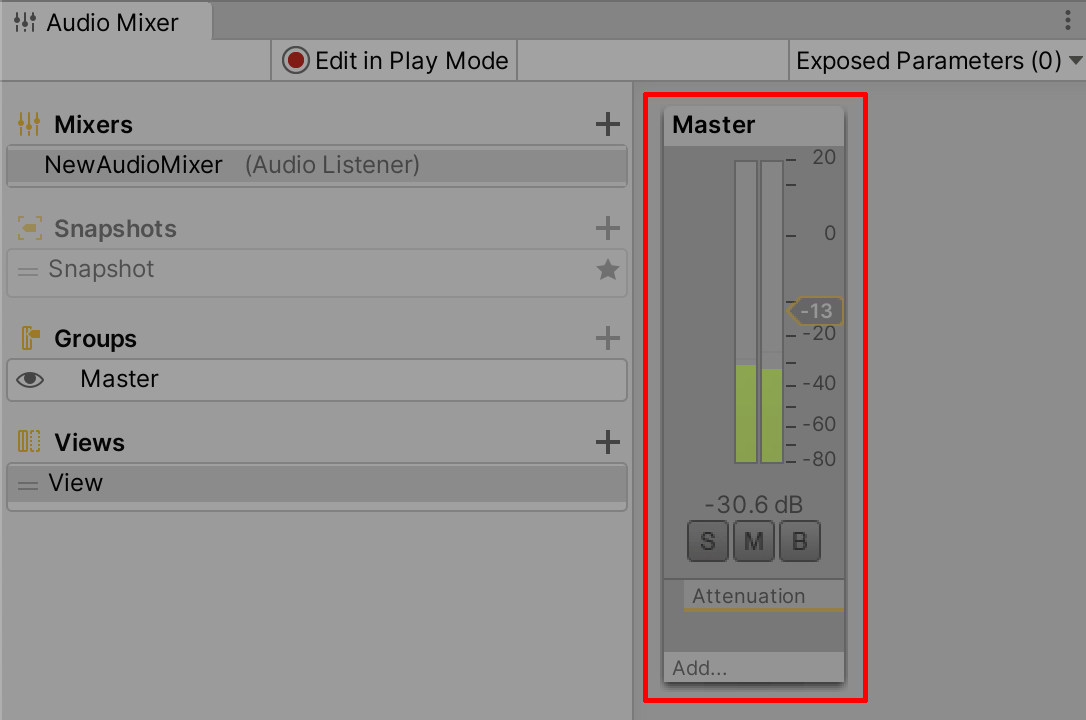
4. Enter Play Mode to play back your audio track. To make adjustments to the audio effects in real time, first enter Play Mode and then select the Edit in Play Mode button in the Audio Mixer window, (Figure 15). While the audio is playing, make adjustments to the effect in the Inspector window. Try not to amplify the bass too much for the Background_Music audio source.
5. Delete any unnecessary or overused effects by right-clicking the effect and selecting Remove This Effect.
5. Applying Audio Effects Using the Inspector
You can also adjust audio in the Inspector. The Reverb sound effect, for example, adds a level of depth to an audio source, giving it a spatial quality.
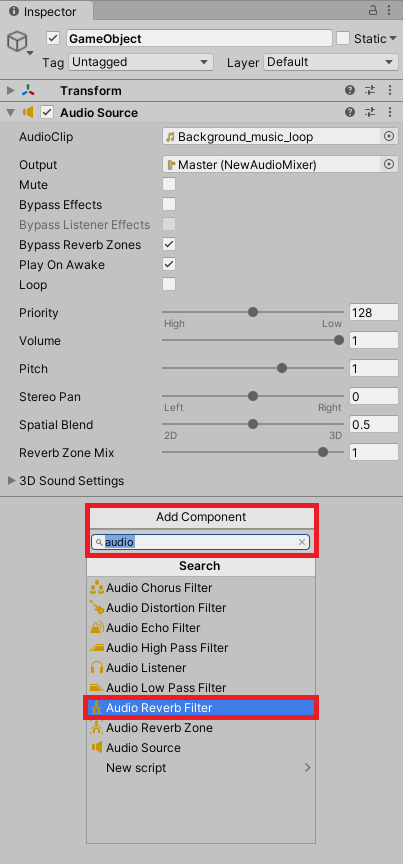
1. With the Background_Music GameObject selected in the Hierarchy, click Add Component in the Inspector, type in “audio,” and select Audio Reverb Filter (Figure 16).
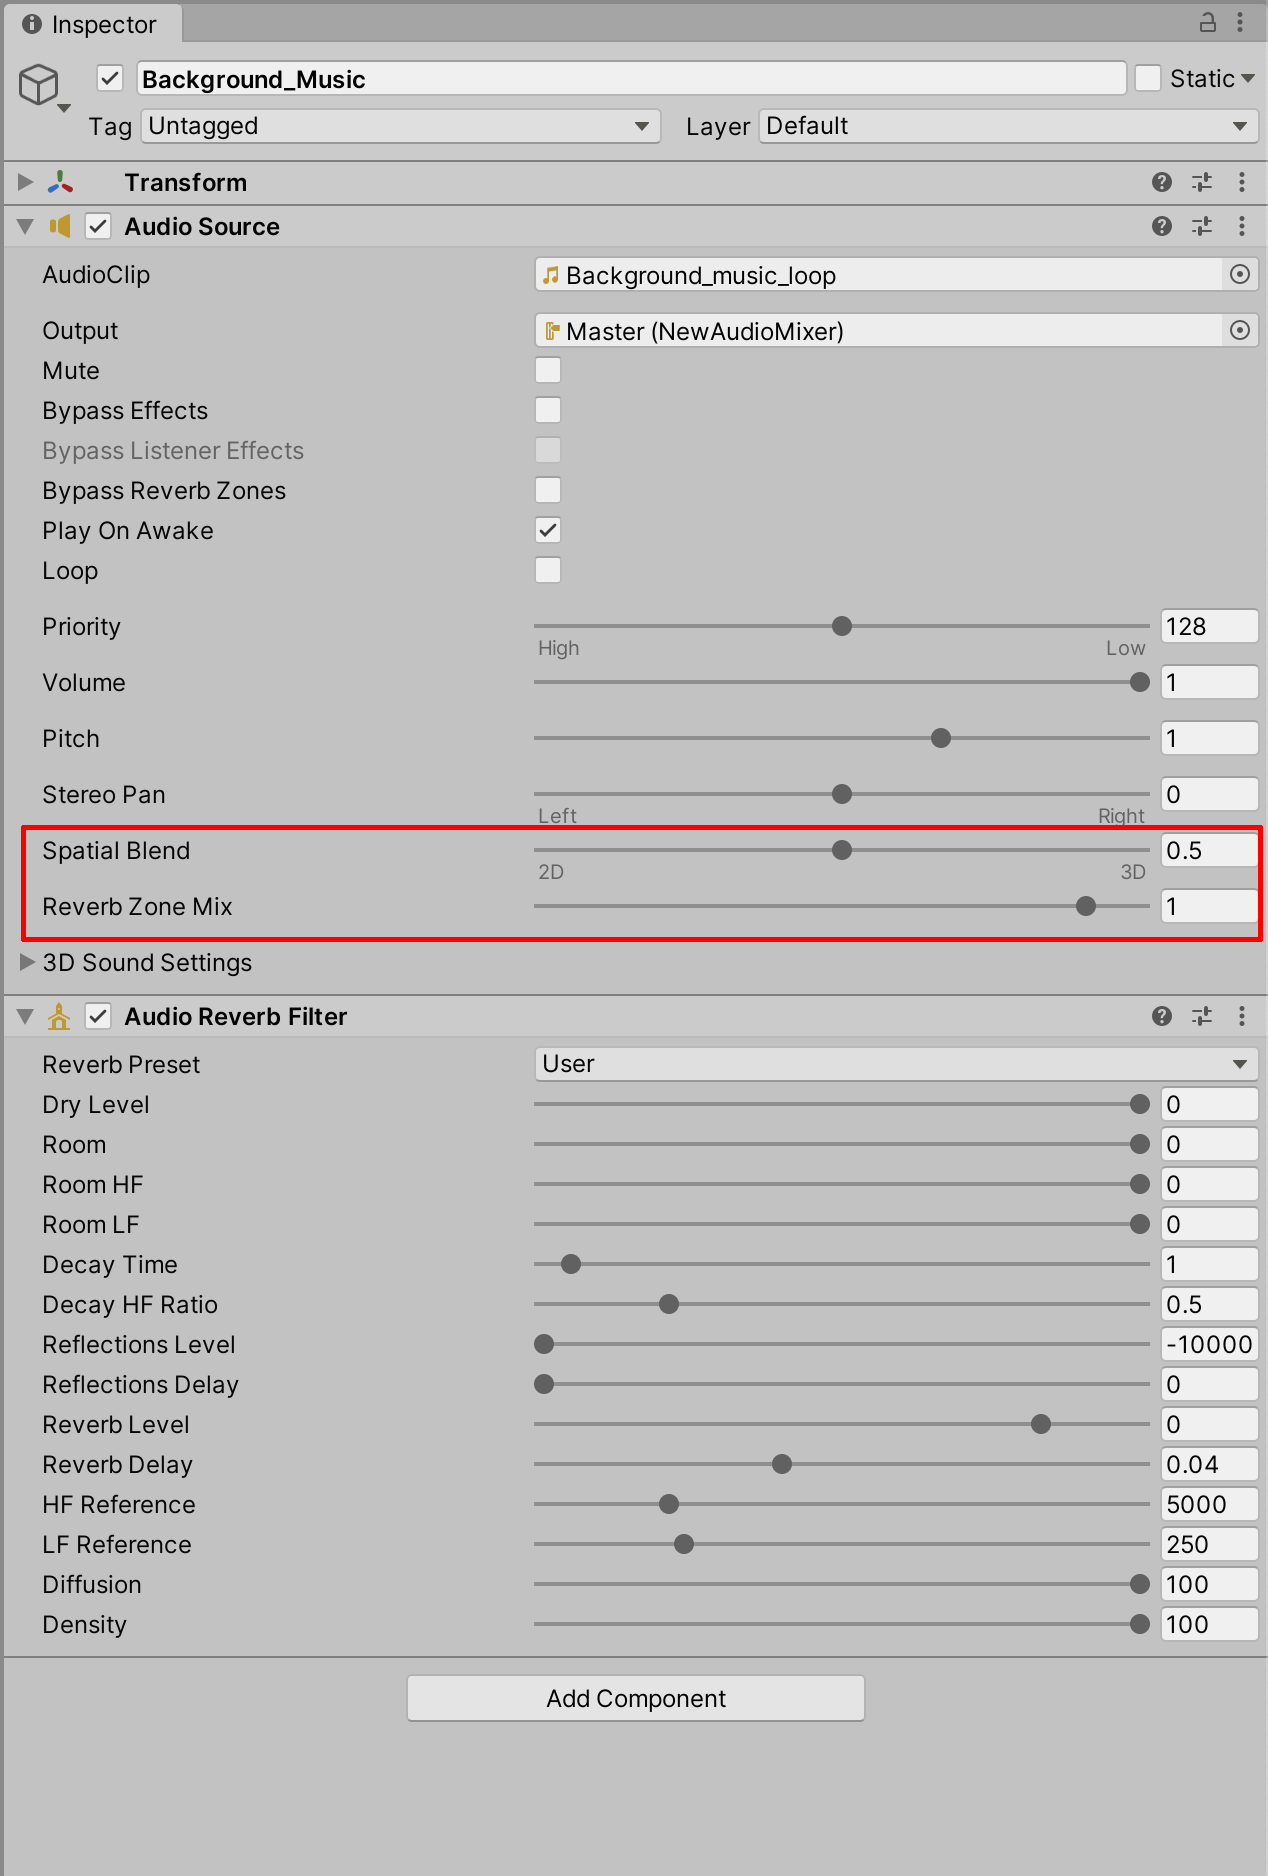
2. In the Inspector’s Audio Source component, drag the slider for Spatial Blend from 2D to halfway through, or enter a value of 0.5 to enable and mix the 3D sound environment. Next, increase the Reverb Zone Mix slider to 1, such that we will be able to hear the Reverb settings when they are changed (Figure 17).
3. Now we’re able to preview the Reverb effect. Enter Play Mode and select the Reverb Preset field labelled User to open up a list of options (Figure 18).
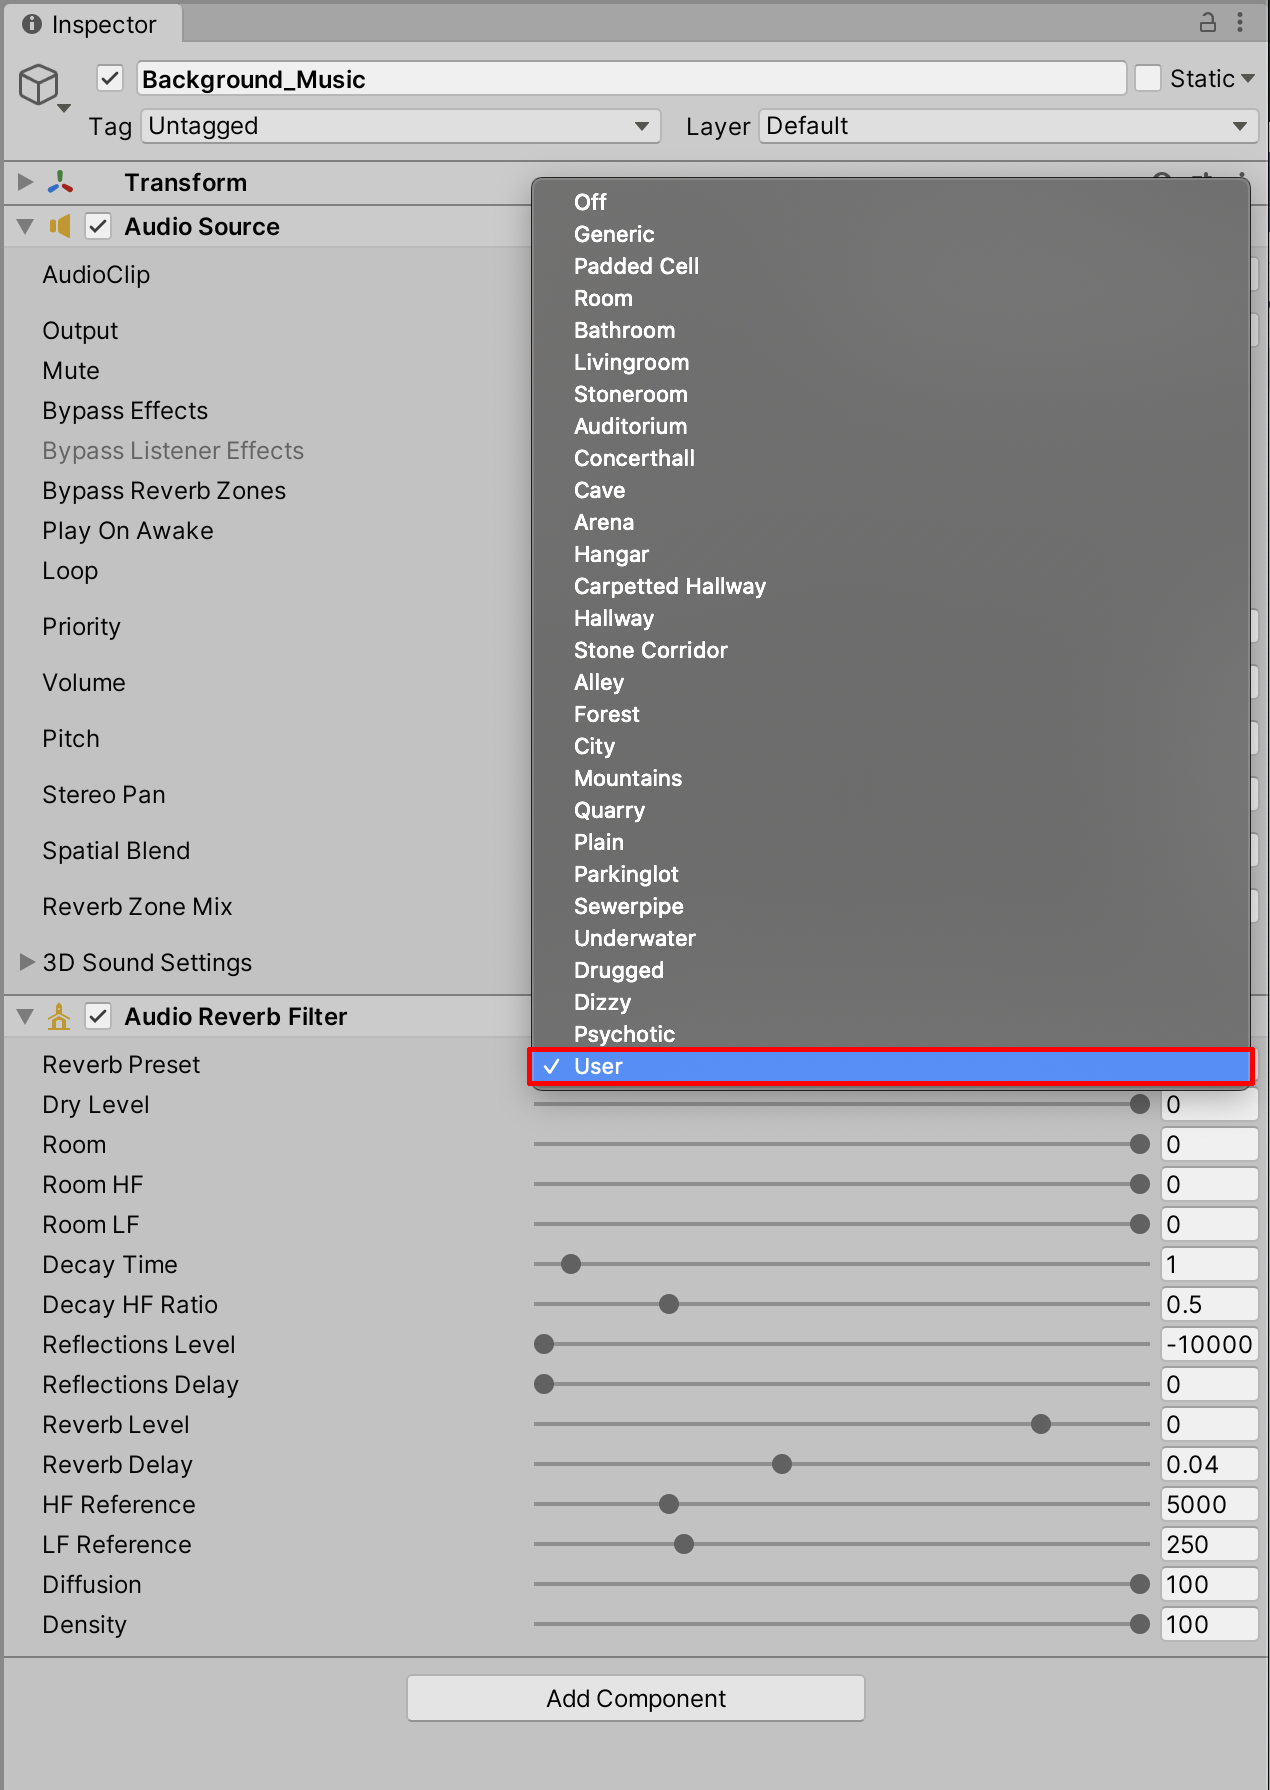
4. Select any of the presets to preview its 3D spatial effect. You might not readily notice the difference between subtle Reverb Presets like Livingroom or Stoneroom. Experiment with changing the Reverb Presets to more dramatic options, like Cave or Concerthall. Finally, select Alley for an effect that resembles sound being emitted within a semi-enclosed 3D space.
The Unity Editor will not store any of the changed values in Play Mode. When you stop Play, the settings will revert back to their original state. Set the values after Play Mode has stopped if you want them saved.
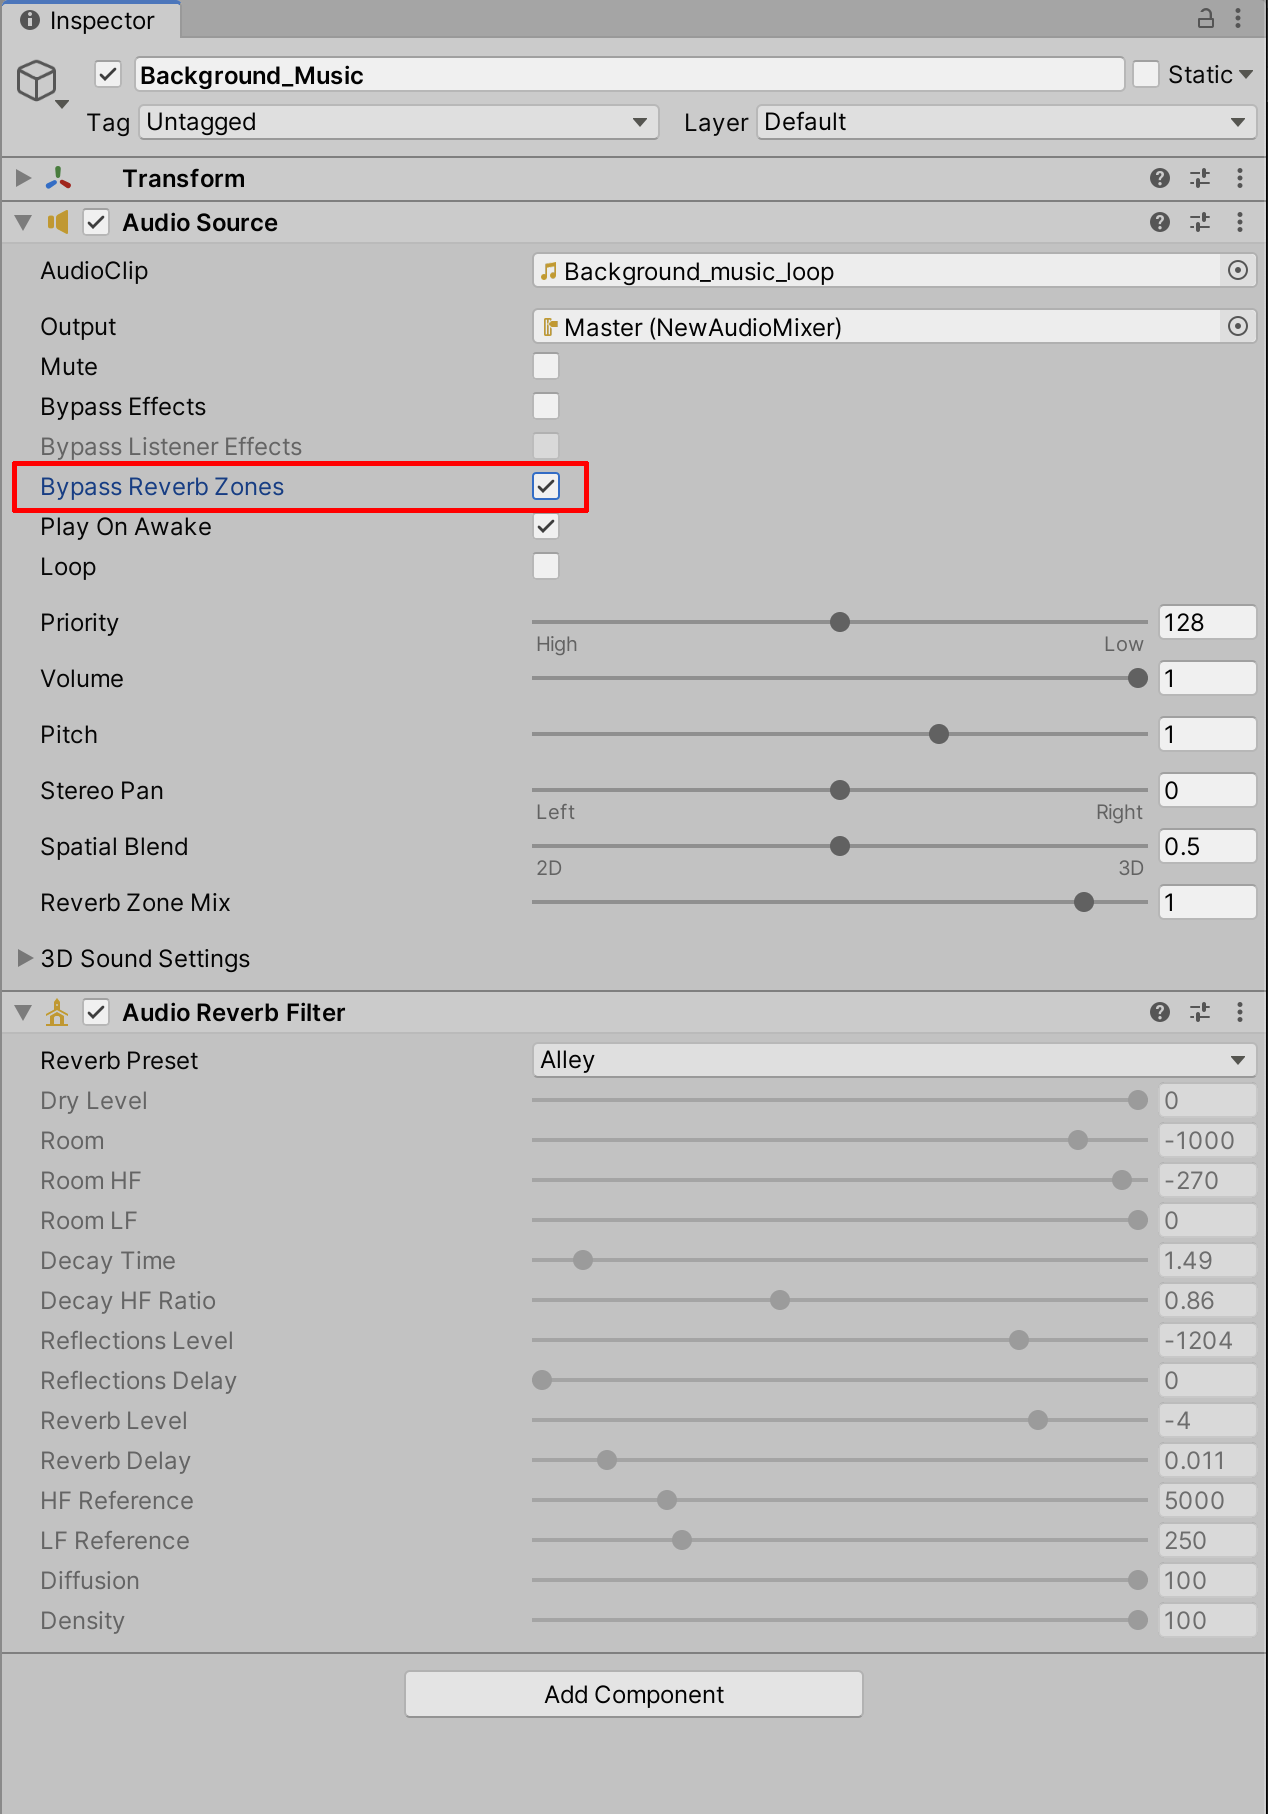
Hint: When previewing subtle effects, it’s helpful to toggle the Bypass Reverb Zones checkbox in the Audio Source component (Figure 19).
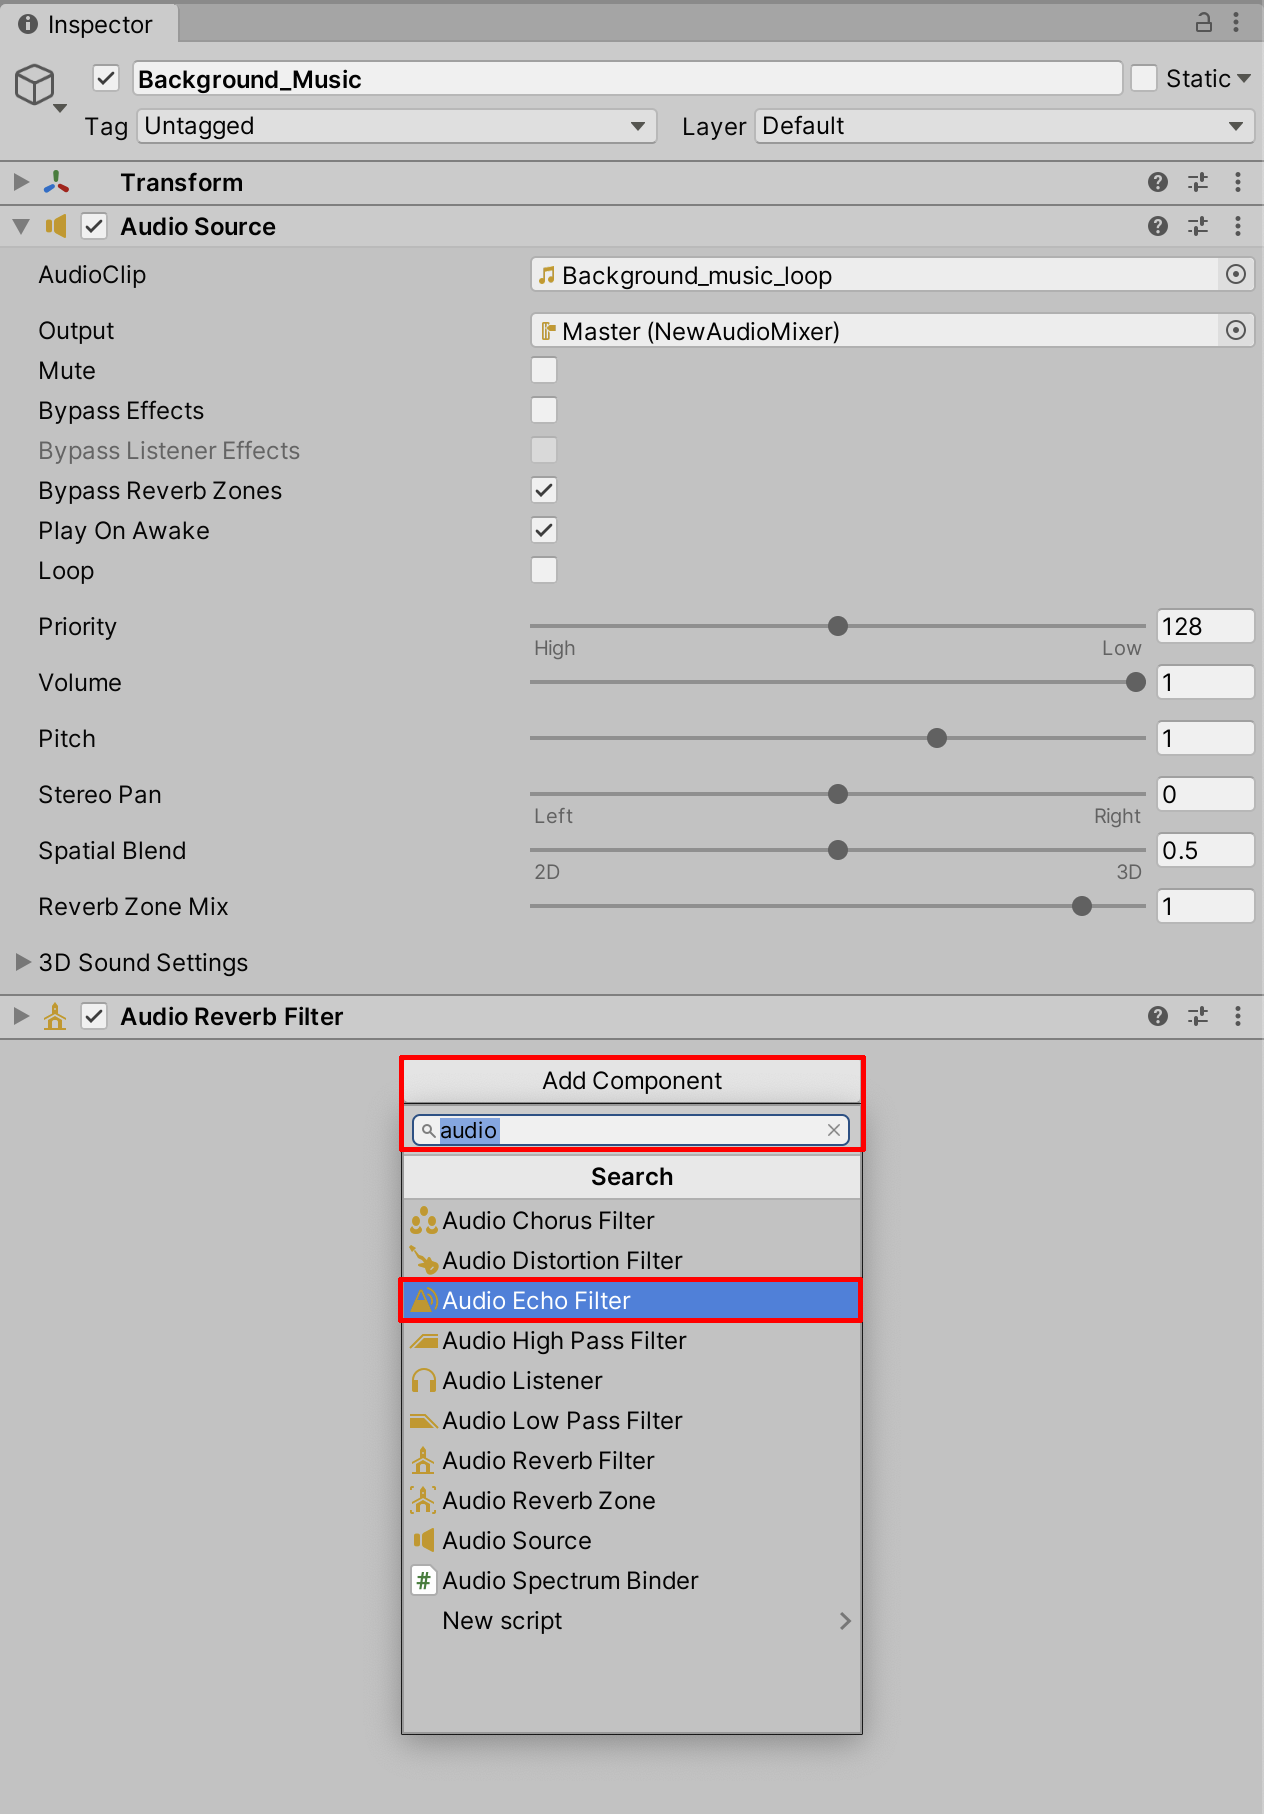
5. Additional audio effects are available as separate components. If you’re going for a more rhythmic sound, add echo, which produces a stylistically unique effect. Click Add Component in the Inspector, search by typing “audio,” and then select Audio Echo Filter (Figure 20).
6. Experiment applying the Echo Filter values while in Play Mode to fine-tune the effect in real time (Figure 21).

When working with sound, certain effects can be carefully balanced and fine-tuned. As a general best practice, avoid maxing out, overusing, or exaggerating any sound effect unless it’s intentional. The audio effects won’t necessarily improve the quality of our Background_Music track; they’re merely illustrated here to show examples of applying sound effects to an audio source.
6. Applying Audio to the Timeline
Just as we’ve used Timeline to add lights, cameras, and visual effects, we’ll use the same principles to add audio to our Scene. With Timeline, we can enable audio to play during a designated interval, or begin playing at a specific time in the animation.
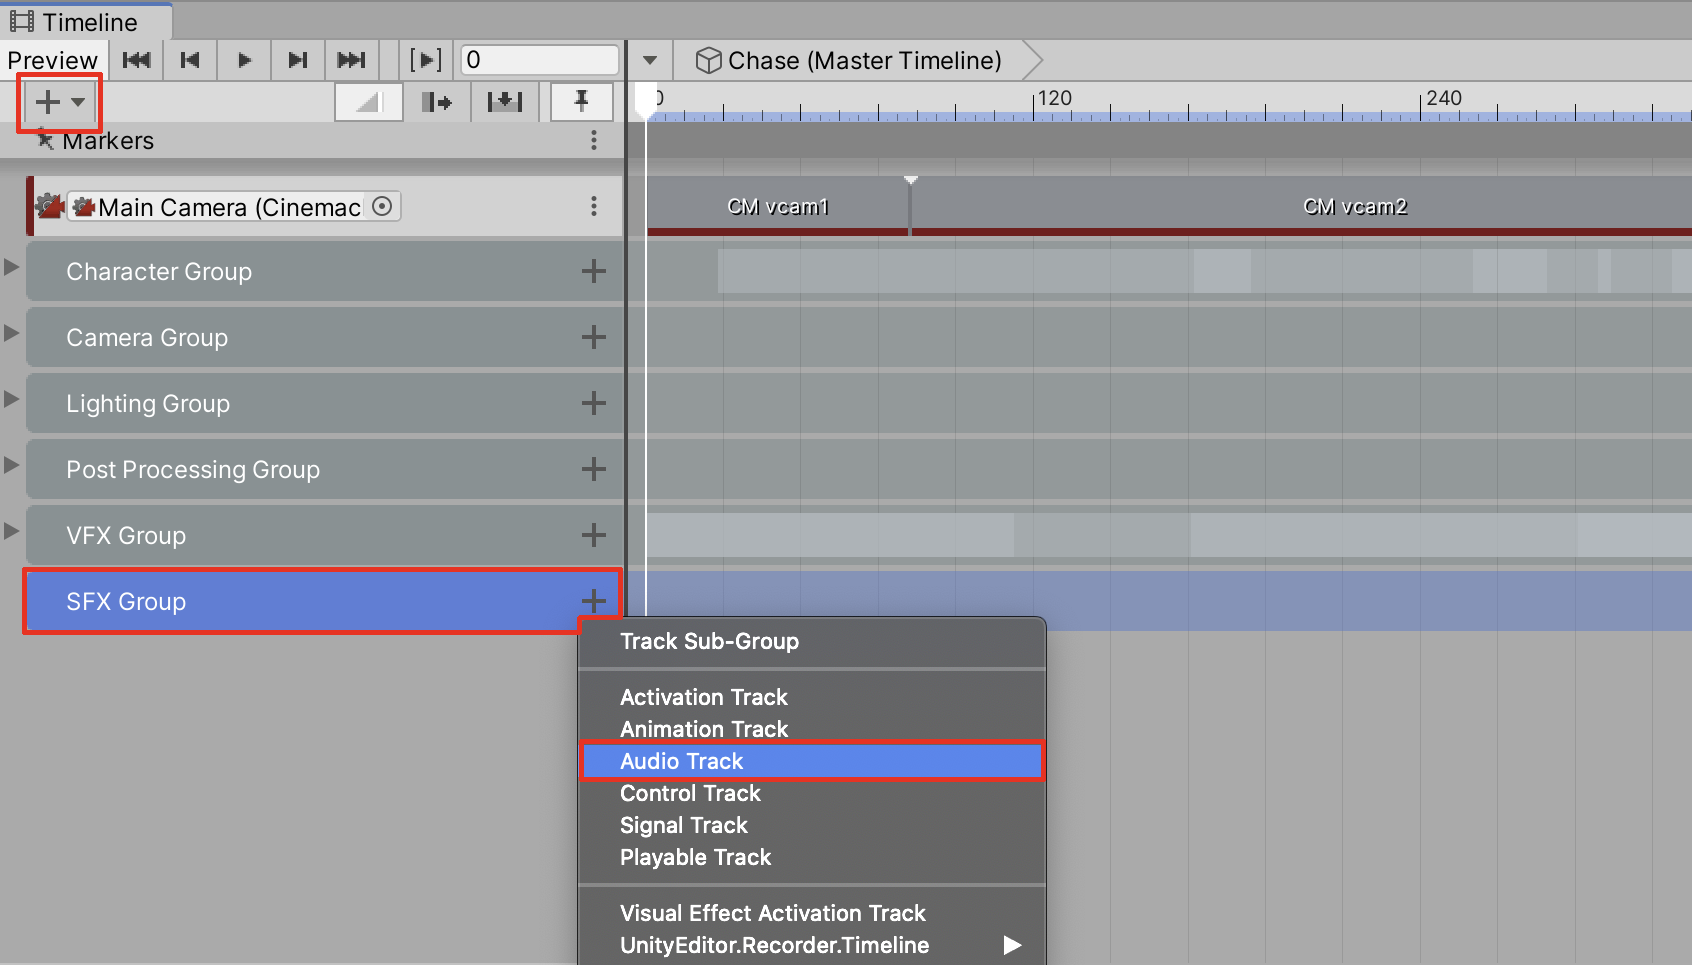
1. In the Timeline window, select + to create a New Track Group and name it SFX Group. Then, select + again in the newly created SFX Group to add a New Audio Track (Figure 22).
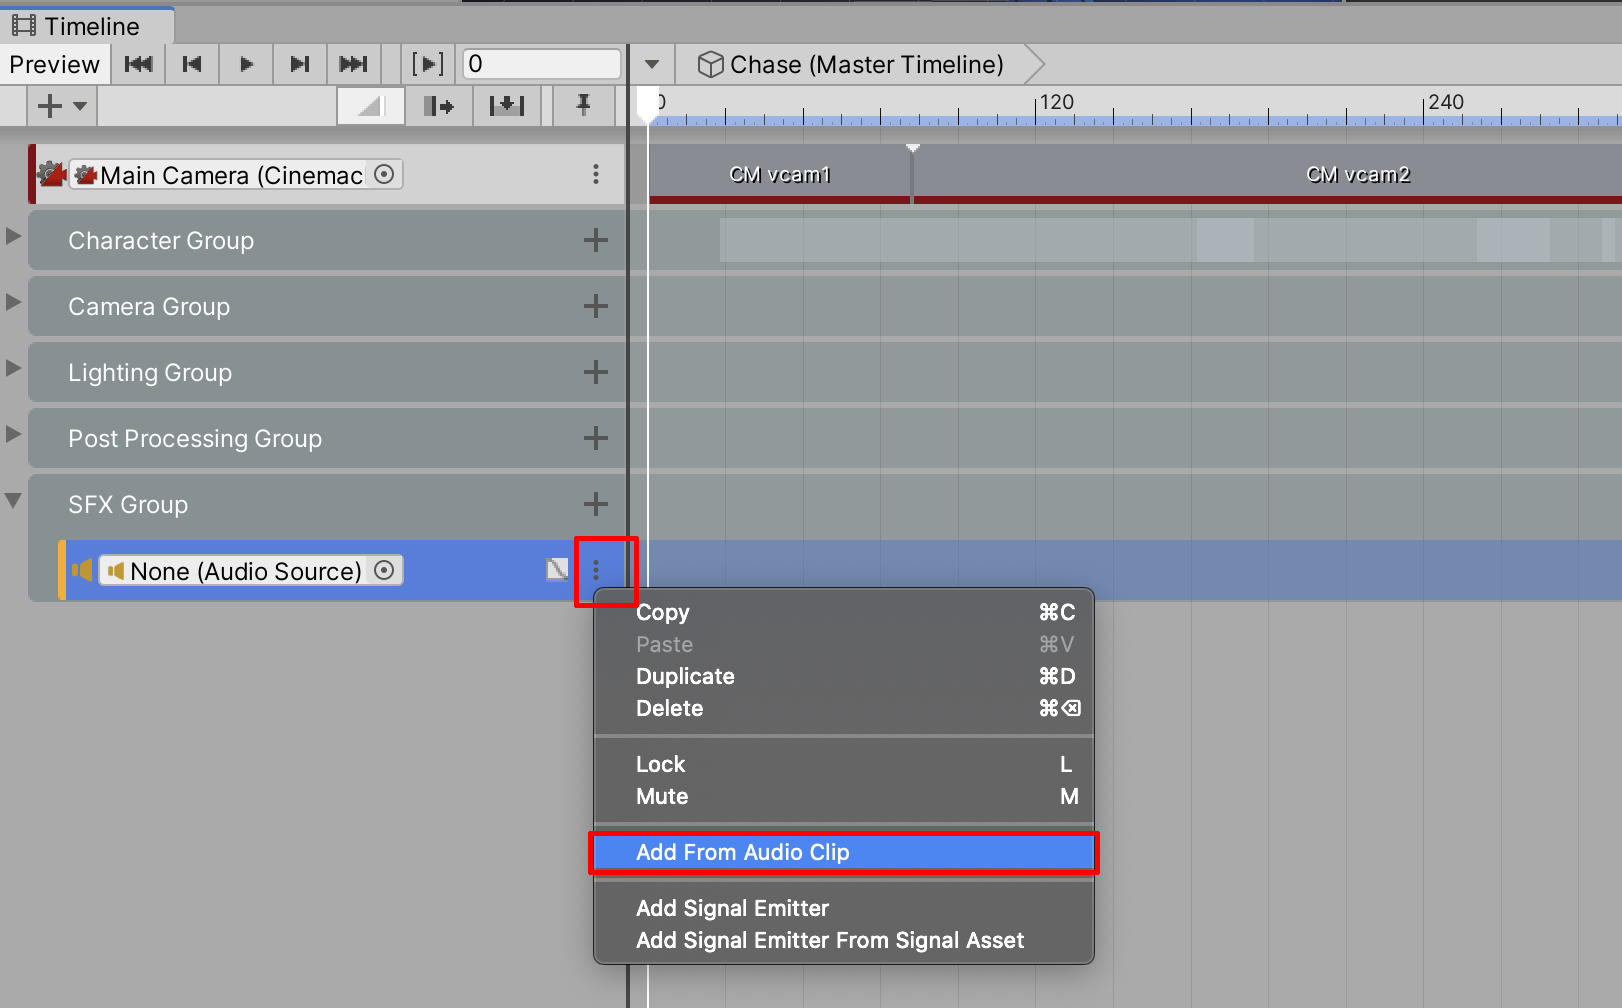
2. With the Audio Track highlighted, select its menu options button and then select Add From Audio Clip (Figure 23).
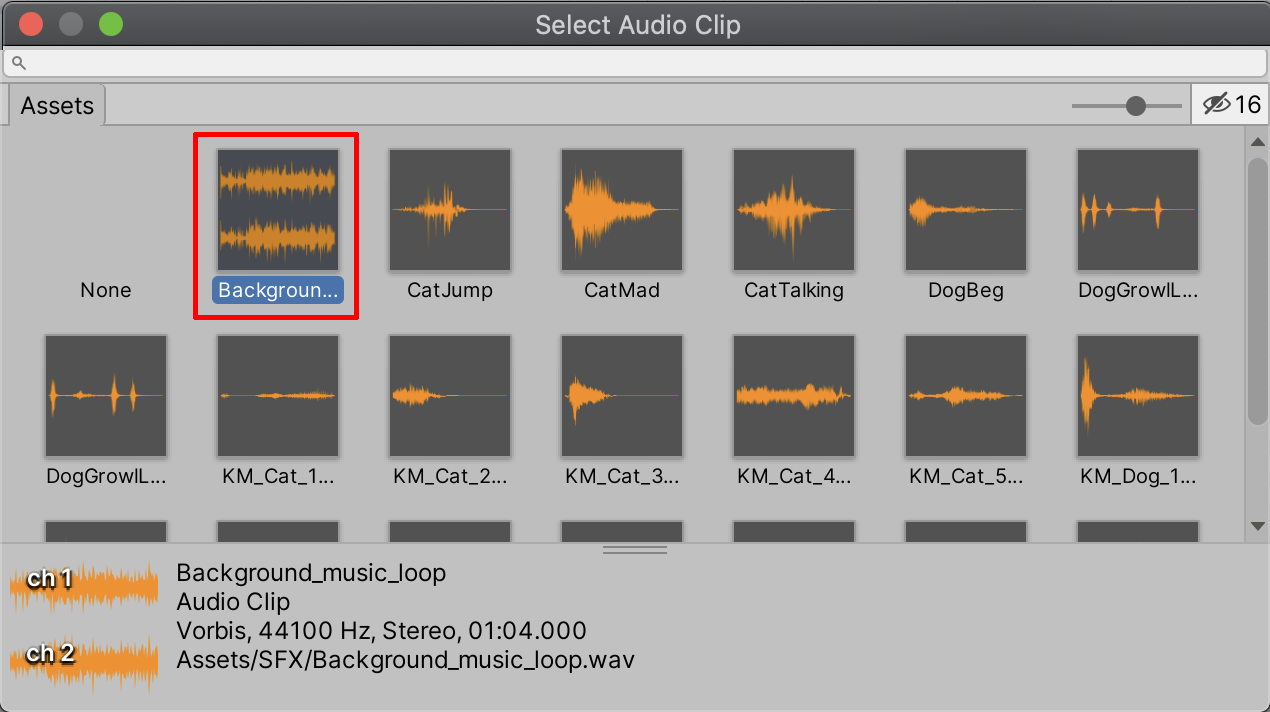
3. Select the Background Music audio file from the Audio Clip window (Figure 24).
The Audio Track is now displayed in the Timeline. You can position it, as well as trim the beginning or end as you’d do when working in the Timeline (Figure 25).

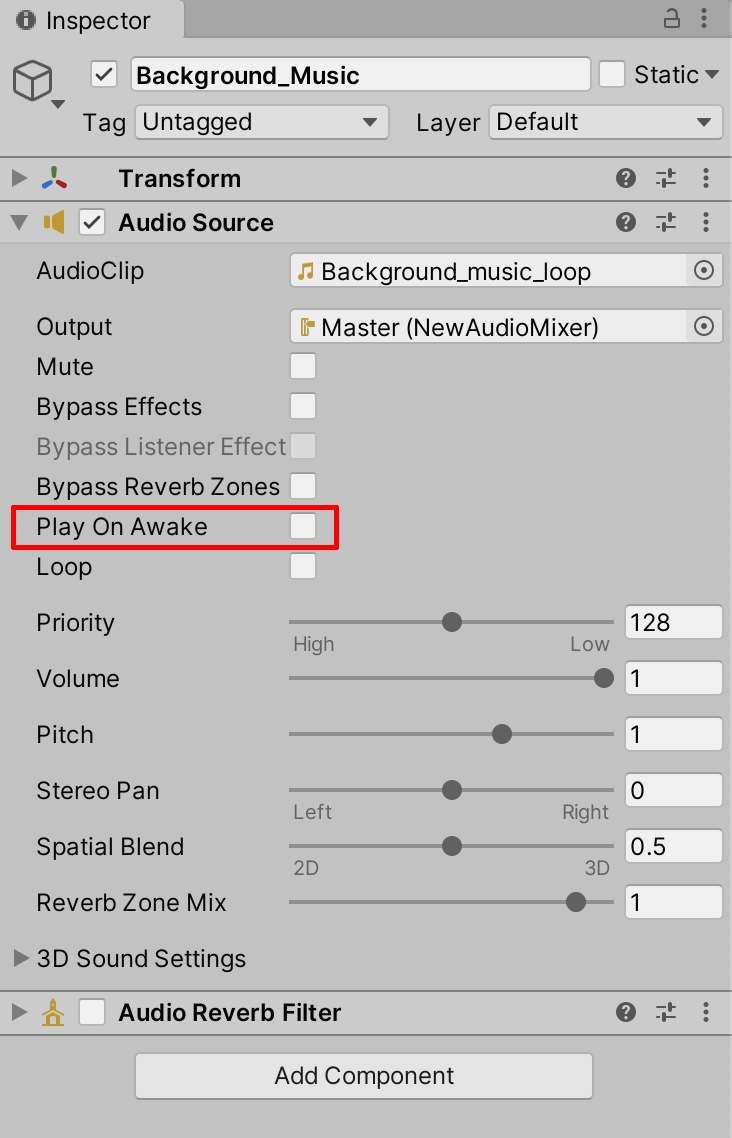
4. Because the Background_Music GameObject audio in the Hierarchy will play over the newly created track in the Timeline, we’ll need to turn off its Play On Awake setting. Select the Background_Music GameObject in the Hierarchy and then disable the checkbox for Play On Awake (Figure 26).
Note that when entering Play Mode to preview your Background Music audio, the very beginning may clip. If so, drag the track to the right so that it starts at Frame 5 (Figure 27).

5. Create an Audio Track in the Timeline for the cat by selecting + in the SFX Group to add a New Audio Track. With the Audio Track highlighted, right-click and select Add From Audio Clip, then select the audio file titled KM_Cat1_SitPurr.
6. Create another Audio Track in the SFX Group for the dog. Select + in the SFX Group to add a New Audio Track. With the Audio Track highlighted, right-click and then select Add From Audio Clip. Select the audio file titled KM_Dog1_BarkGrowl1 (Figure 28).
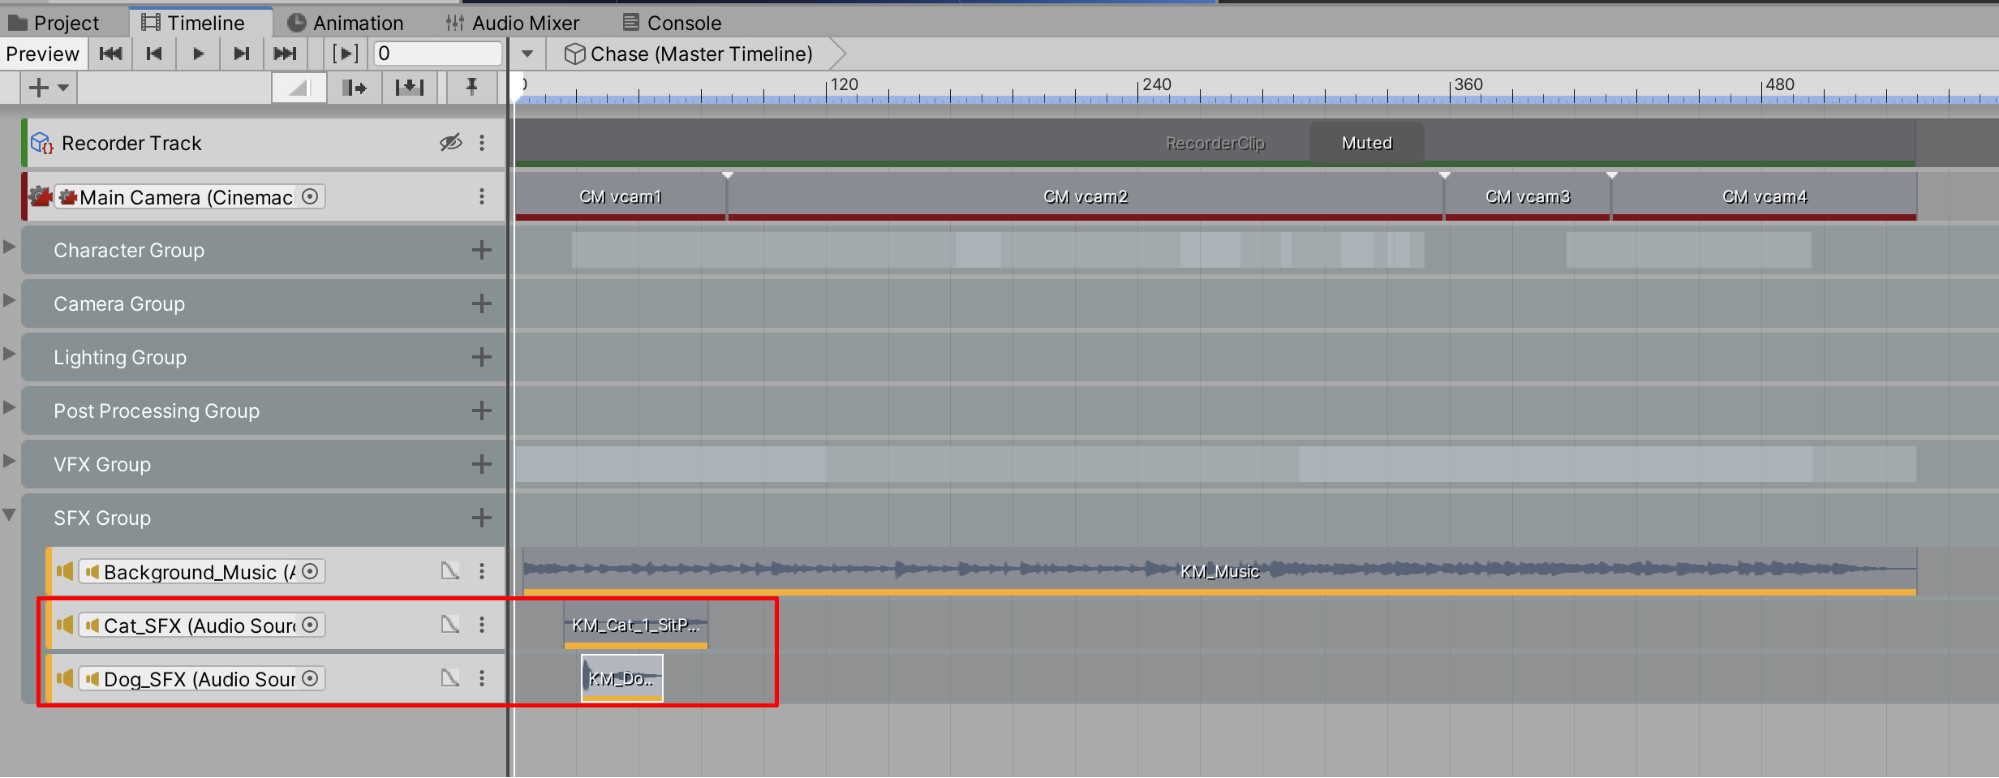
7. Now that the audio clips are added to the Timeline, let’s arrange each clip’s position by moving them into their proper places. Set the Timeline’s Frame Playhead Cursor to Frame 163. Move and drag the cat’s audio clip to start at Frame 163, and the clip will snap into place (Figure 29).
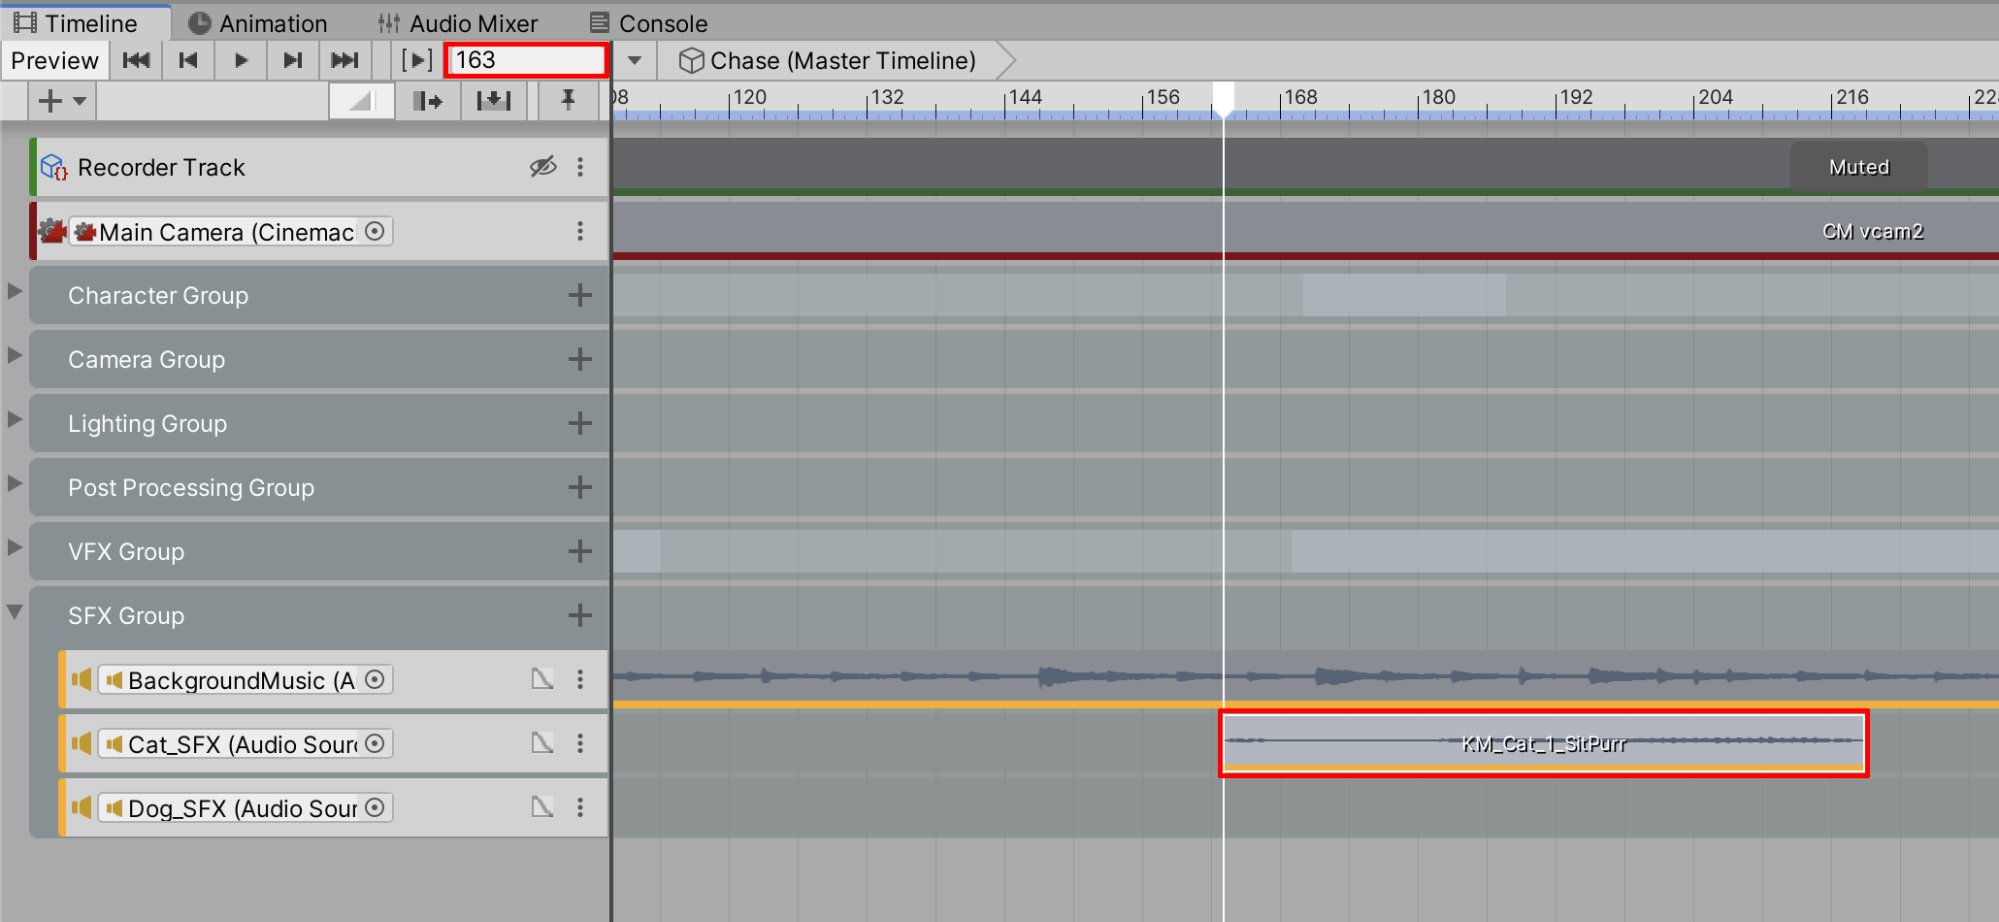
8. Position the Timeline’s Frame Playhead Cursor to Frame 237. Move the dog’s audio clip to snap it into place at Frame 237 (Figure 30).
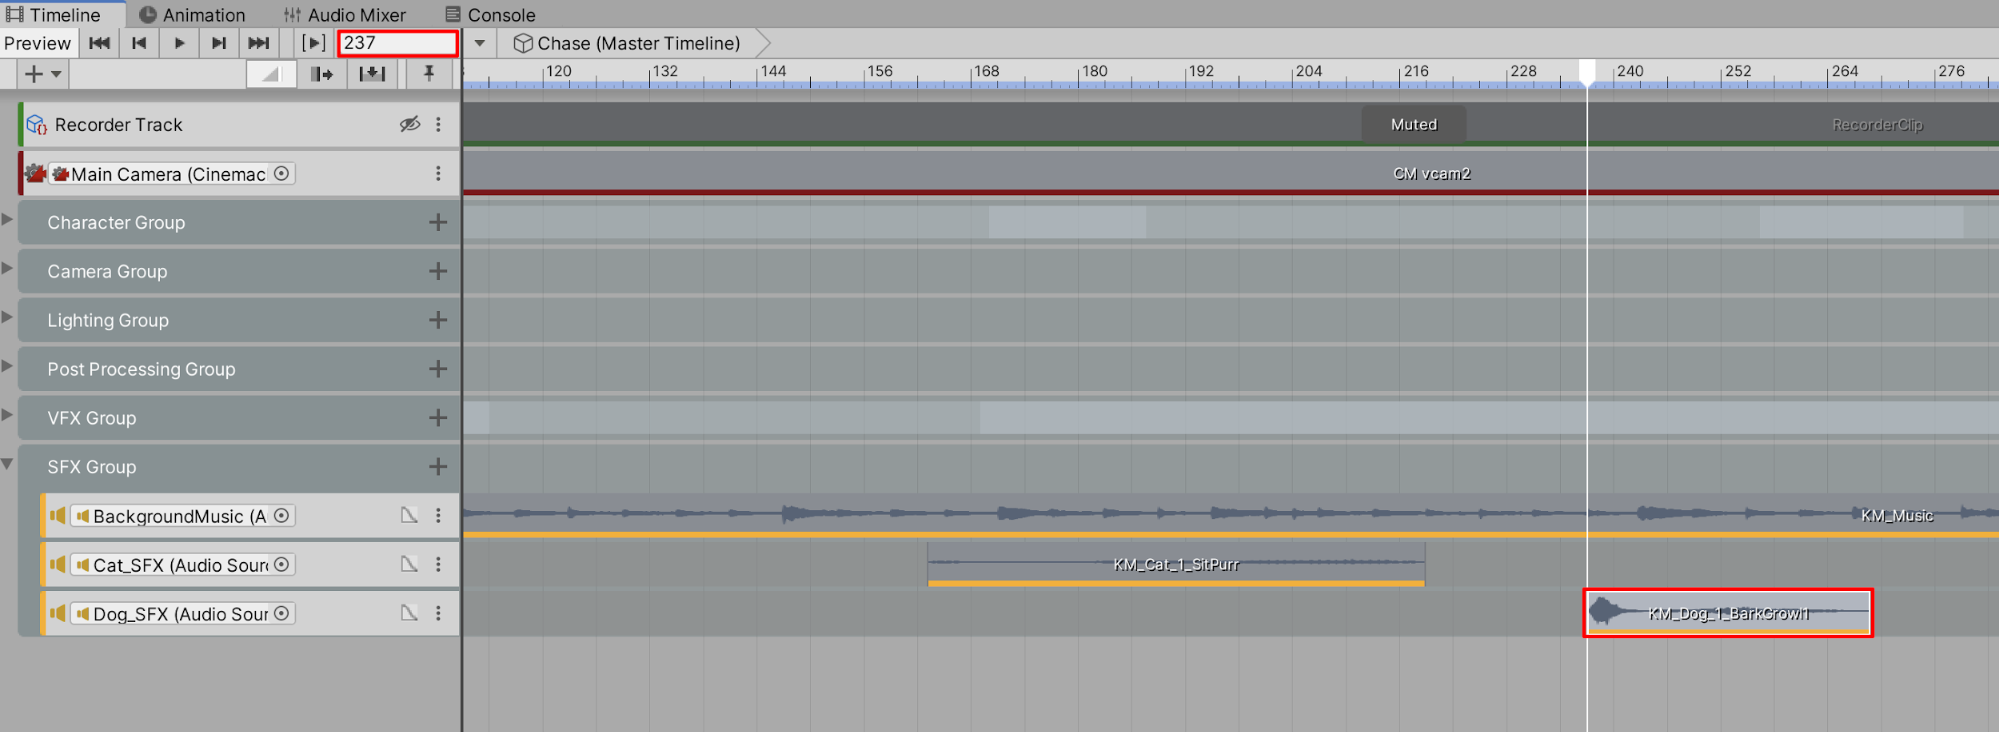
9. Add another cat sound effect by right-clicking on the cat’s Timeline track and selecting Add From Audio Clip. Then select the audio file titled KM_Cat_2_HearsDog. Drag the clip to begin playing at Frame 263 (Figure 31).
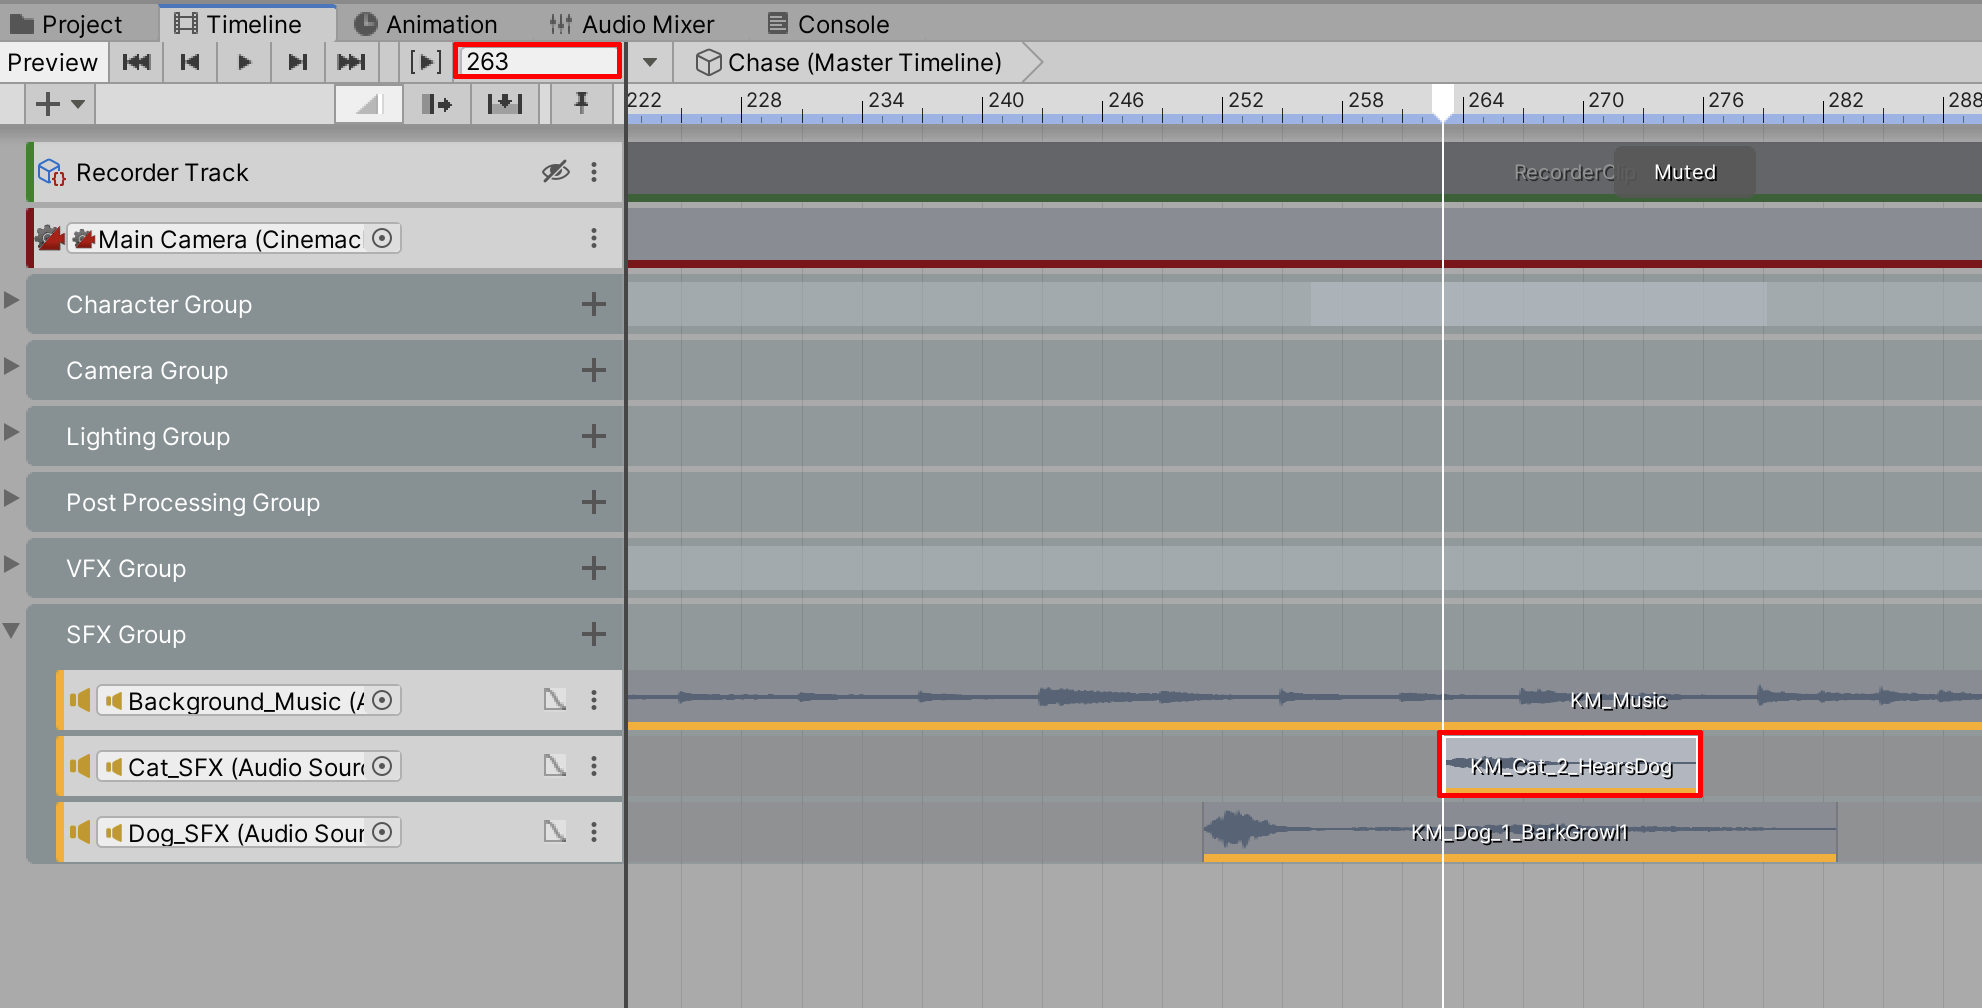
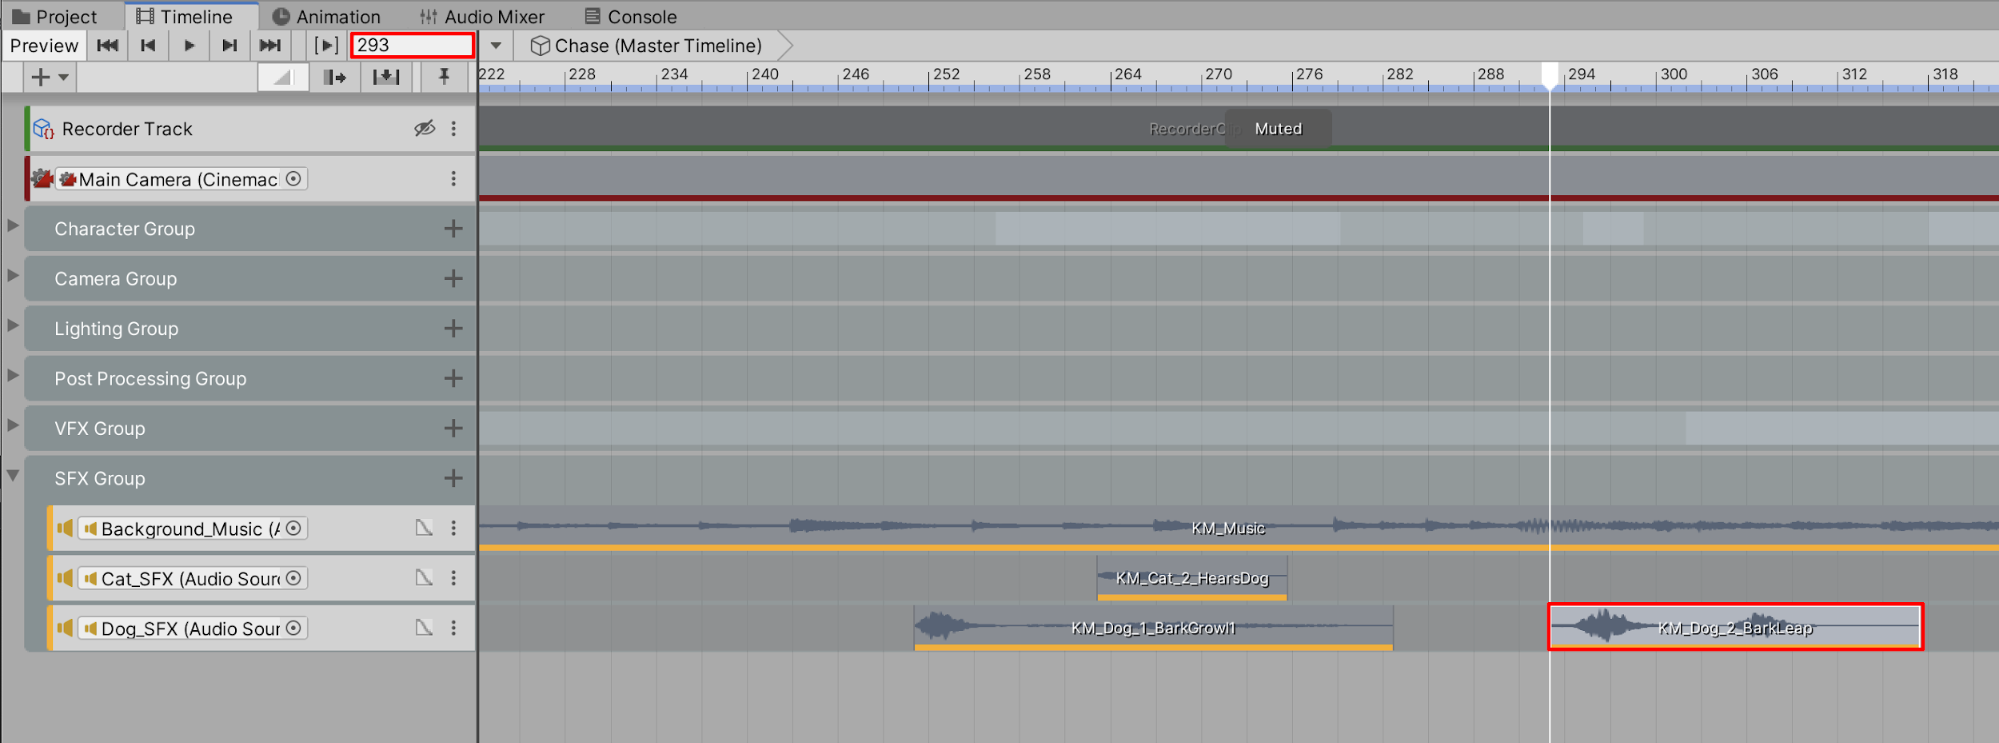
10. Add another dog sound effect by right-clicking on the dogs’s track in the Timeline and selecting Add From Audio Clip. Then select the audio file titled KM_Dog_2_BarkLeap. Drag the clip to begin playing at Frame 293 (Figure 32).
11. Add another dog sound effect by right-clicking on the dogs’s track in the Timeline and selecting Add From Audio Clip. Then select the audio file titled KM_Dog_3_RunStart. Drag the clip to begin playing at Frame 336.
12. Repeating the previous steps, add the remaining cat sound effects: KM_Cat_3_Chased1, KM_Cat_4_Chased2, and KM_Cat_5_Unhappy to the Timeline. Place their clips to begin playing at Frame 349, Frame 403, and Frame 490.
13. Add the remaining dog sound effects: KM_Dog_4_RoundsCorner1, KM_Dog_4_RoundsCorner2, KM_Dog_5_Passby, and KM_Dog_6_Bark. Place their clips to begin playing at Frames 374, 397, 419, and 477 (Figure 33).
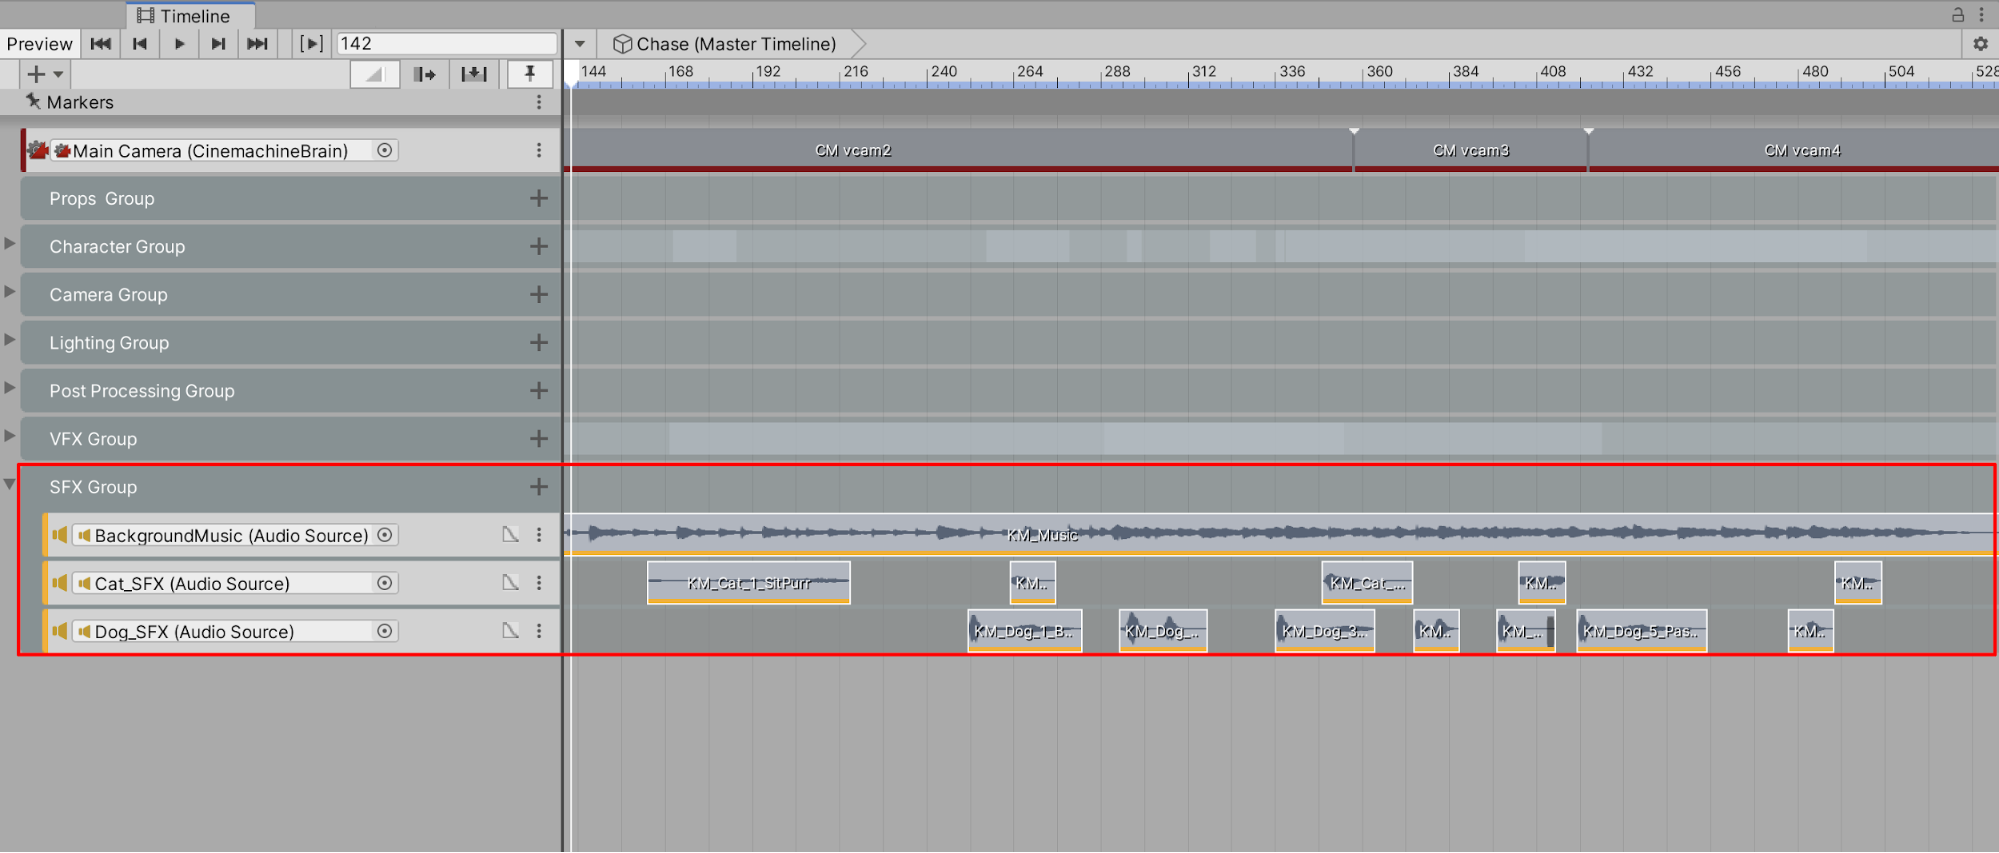
14. Select the Graphs button in the Timeline to expand any audio track’s Spatial Blend, Stereo Pan, and Volume properties for further editing (Figure 34).
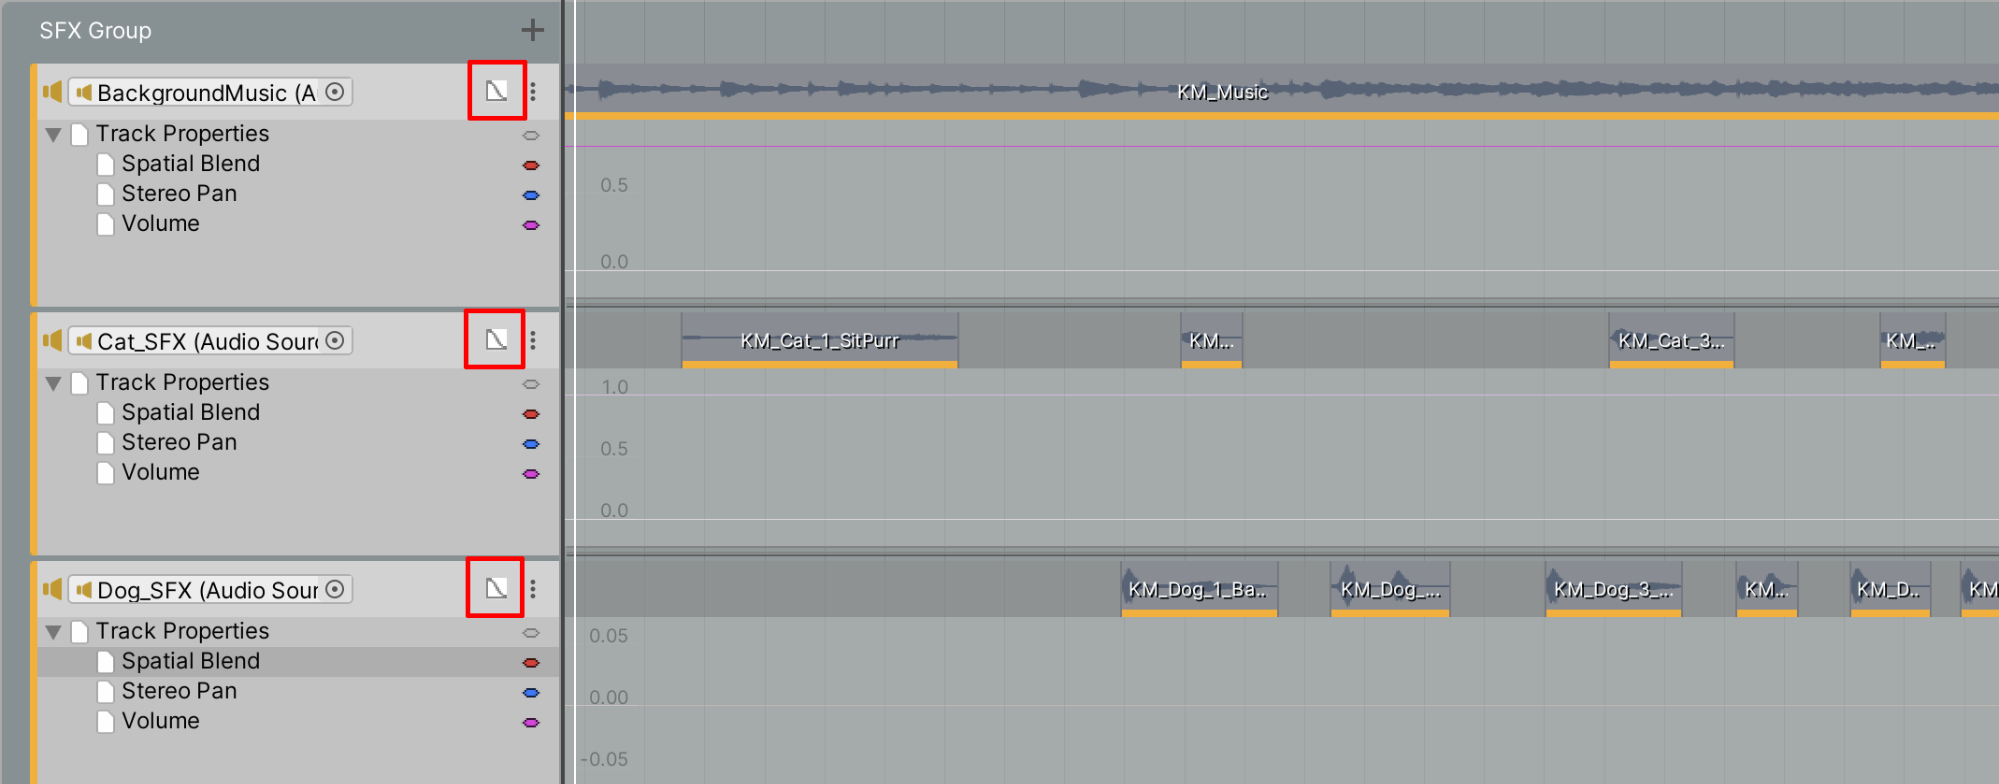
15. In order to make the background music fade in and out, you can edit a sound’s volume level along the Timeline using the Graph editor. To add a keyframe, select the Volume Graph property and then double-click at a designated interval inside the graph. Place two keyframes towards the end of the Timeline’s animation where you intend to start and complete the fade out to silence, then drag the final keyframe downward to fade the volume down over time (Figure 35). Optionally, select the curve handles to customize the curve of the slope.

7. Recap
With Unity’s audio tools, you’re able to mix and trigger environmental sounds, music, and sound effects to enhance your Scene.