Lighting for Static Objects
Tutorial
intermediate
+0XP
30 mins
64
Unity Technologies
In this tutorial, we discuss the importance of lighting for static objects and the applications of lightmaps and global illumination.
Languages available:
1. Overview
Using static lighting is crucial when developing applications for mobile devices. Static lighting runs faster on mobile devices and leads to a better experience for the user. Static lighting information on non-moving objects can be saved via a process called baking, during which Unity performs the lighting calculations before runtime and saves the results.
In comparison, non-static lighting, such as dynamic or real-time lighting, is calculated and updated in every frame. While this can add drama to a Scene and boost immersion, it’s much more expensive. As such, when using non-static lighting, keep in mind the balance between aesthetic goals and performance.
2. Lightmaps and Global Illumination
Baking generates a separate texture called a lightmap that stores information about lighting effects. Since this information is cached, there are no extra performance costs at runtime. When building for a mobile platform, you should bake as much as possible into lightmaps.
Pre-baked lighting doesn’t adjust to dynamic aspects of your Scene. However, baked lighting includes global illumination for all the static elements in your Scene, which allows each static element to give and receive indirect bounced light. This makes the lighting more realistic.
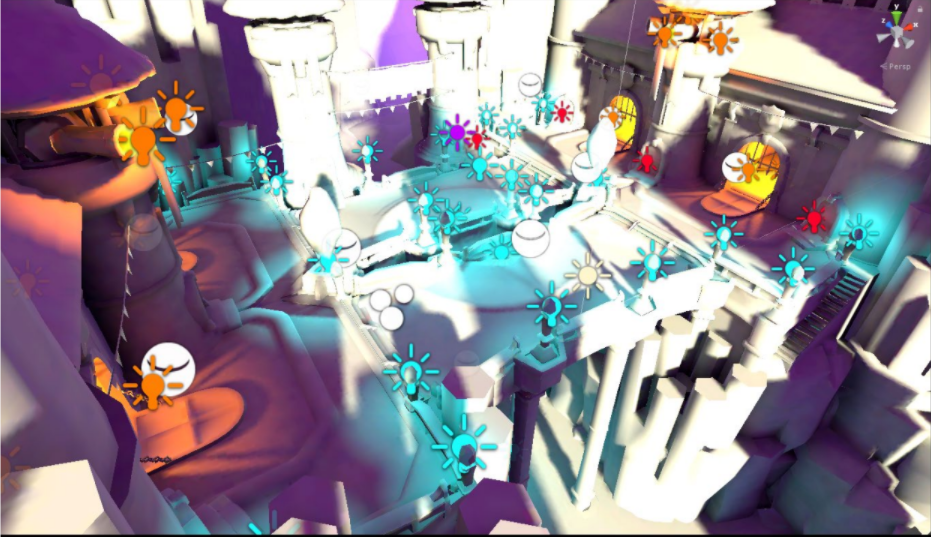
The following image shows a fully baked Scene:
Unity makes it easy to bake lights. There are two steps you must take beforehand:
1. Click on the GameObjects that contain the Light components that you want to toggle. Set the Mode to either Mixed or Baked.
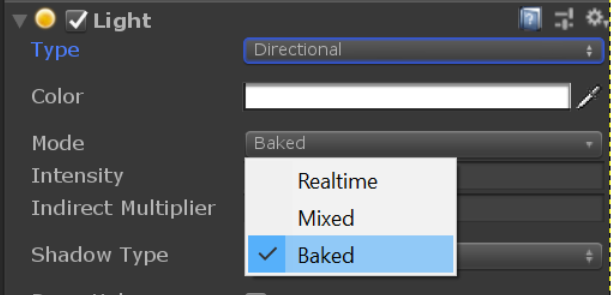
For mobile platforms, select Baked instead of Mixed whenever possible because Baked is the least expensive of the options.
2. Mark GameObjects that receive the baked light as Static:
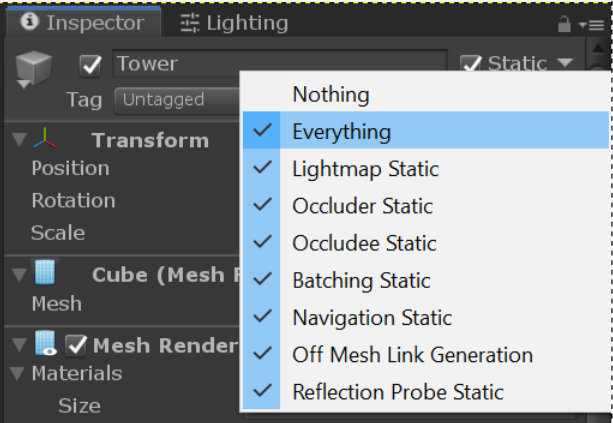
There are multiple static flags that an object can be marked as but it’s common to have Everything selected in the settings. When an object is marked as Static, Unity knows to include it in the baking process.
(Note: If Batching Static is enabled for an object, you will not be able to move or animate that object. This is another optimization and should be left on whenever possible.)
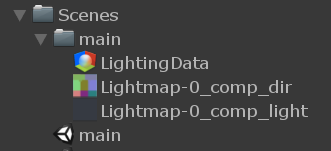
When you are baking your lights, remember that the data is saved based on the Scene that was active when you started the bake. A folder is generated that has the same name as the active Scene. This folder is where all the components and data for the baked lighting will be stored. If your project uses multiple Scenes that are loaded at once, each Scene needs to have its lights baked individually. If you adjust the lighting or objects in your Scene, you will need to rebake the lights for the changes to take effect. The following image shows an example of a folder holding lighting data for the main Scene.
3. Optimize Light Maps
After you have configured lights for baking, you should also make sure that the baked lightmaps are optimized.
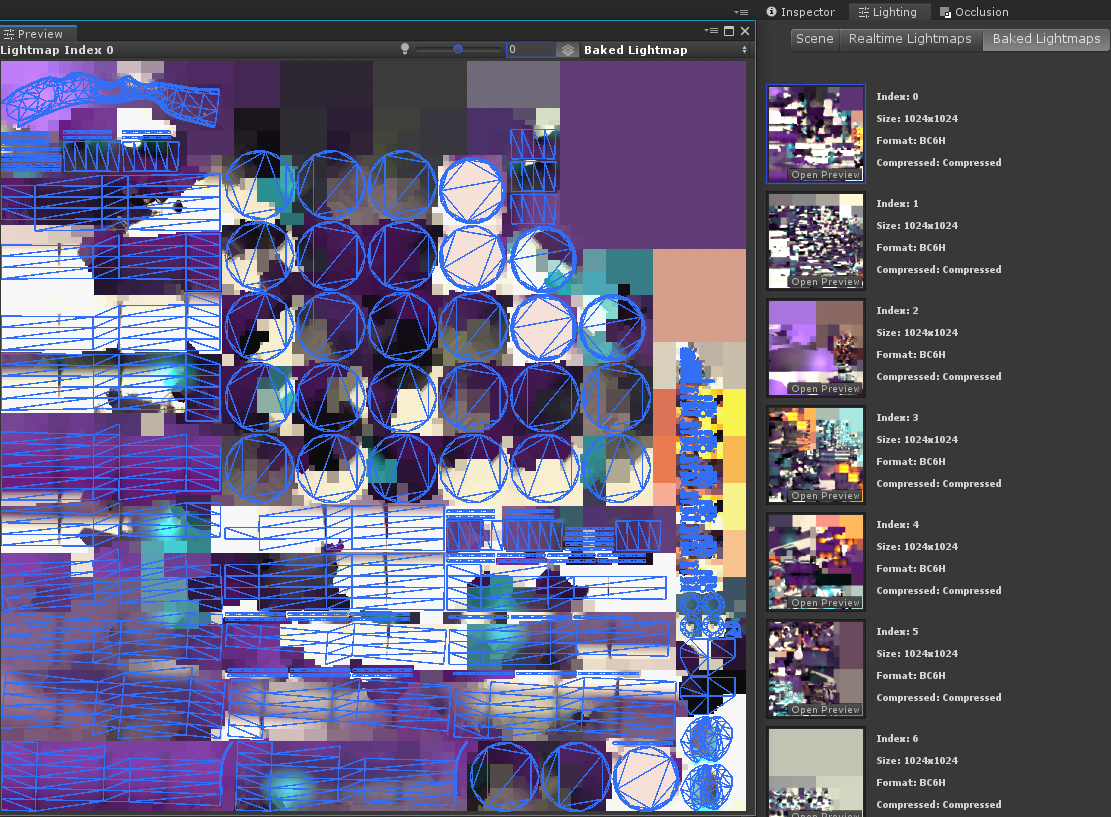
Lightmaps vary in size depending on the settings they are baked with. Since it’s best to try to minimize memory usage on mobile platforms, pay close attention to lightmap size. In the example image below, you can see that there are seven 1024x1024 pixel lightmaps.
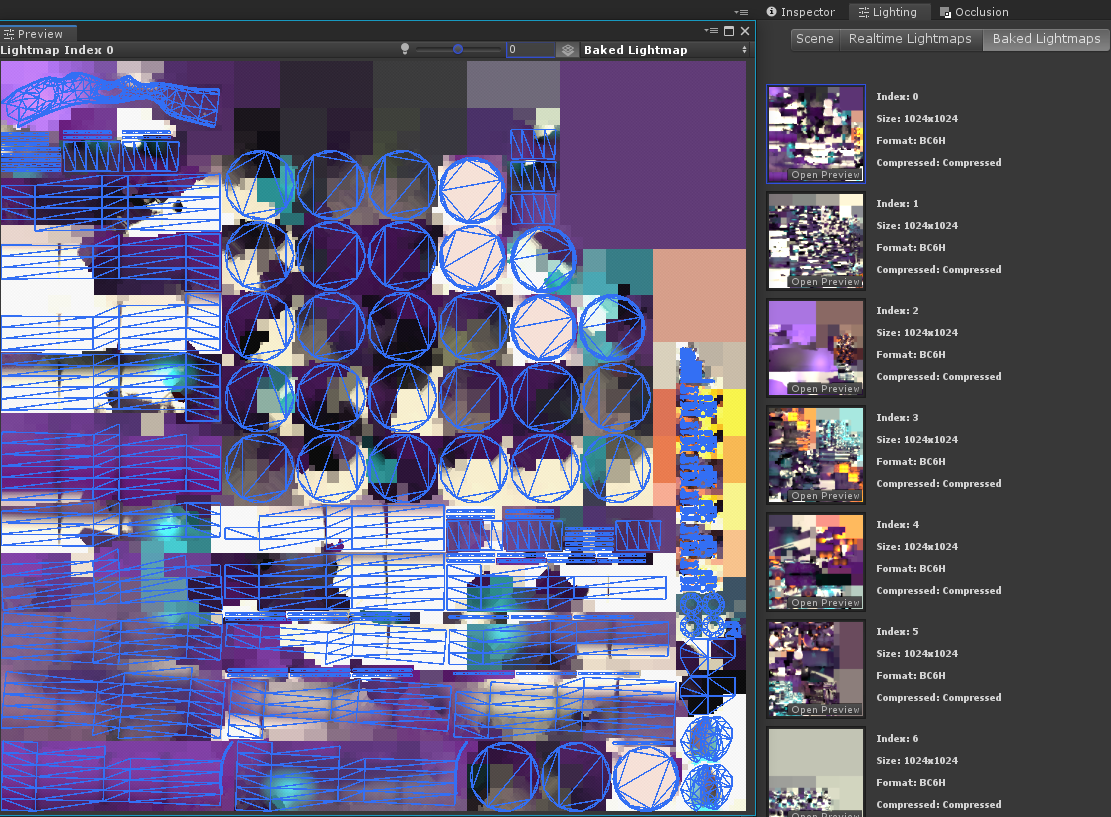
In the preview of the map, you can see its Meshes, with selected Meshes highlighted.
The following options in Lightmapping Settings (Windows > Rendering > Lighting Settings) and the size of the actual maps determine how much memory is used.
4. Lightmappers
Unity’s Lightmapper offers three different methods to bake the lights in your Scene:
- Enlighten (depreciated as of Unity 2019 LTS but still available)
- Progressive CPU
- Progressive GPU
The following image shows these options:
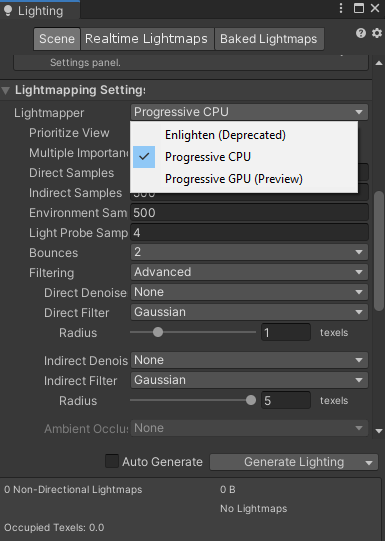
You should use one of the progressive options for any projects. Progressive lightmappers save time because they incrementally create lightmaps. If Prioritize View is selected, areas in the Scene view are prioritized. Prioritize View speeds up iteration when you’re setting up lighting for your Scene.
The major difference between the CPU and GPU progressive lightmappers is whether the lightmap is generated by the CPU or the GPU. The results are the same, but if you have a powerful GPU, Progressive GPU can be much faster. More requirements and set-up for the GPU option can be found here.
5. Texels
A texel, or texture element, is an individual pixel in a Texture map. Texels store lighting information at each point where a light hits an object in a lightmap. We can measure the amount of work that’s needed to bake a light by counting the number of texels. It’s important to understand what a texel is and how texels can influence lighting quality, computation time for the bake, and disk storage and VRAM costs.
To minimize the amount of lightmap data required, you should adjust the number of texels for each unit of the bake in the Lightmapping Settings. These settings give you control over the lightmaps, including how many texels each object uses in the bake, as shown in the example image.
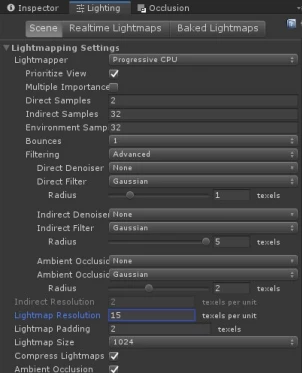
Lightmapping Settings also includes an option called Lightmap Resolution. This option determines how many texels are used for each unit in the lightmaps.
To see how texels are laid out in your Scene:
- Click the Shading Mode drop-down in the top-left corner of the Scene view.
- Find and then click Lightmap Indices.
Baked objects will now be covered in a checkerboard overlay. This is how texels are distributed when you bake the lights.
The following screenshot shows a cube with different Lightmap Resolution settings. The image on the left has a setting of one, the middle image has a setting of two, and the right-hand image has a setting of five.
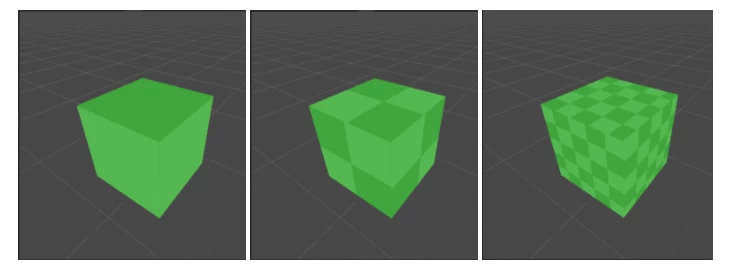
You can see how a higher resolution increases the amount of work that’s needed. You should start with a low Lightmap Resolution — between five and 10 and scale up or down based on what your Scene needs. Increasing the Lightmap Resolution causes the size to go up massively with each iteration.
For example, reducing the Lightmap Resolution from 15 to 12 reduces the number of required lightmaps from seven to four, as shown in the screenshot below.

6. Texel Usage
While you can use Lightmapping Settings to set the number of texels in a Scene, there are some objects on which you’ll want fewer texels.
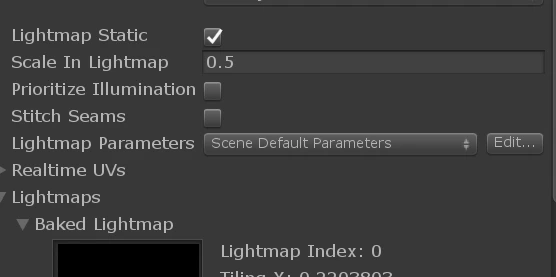
Unity allows you to control how many texels each object can use. If you go to an object’s Mesh Renderer (Inspector > Mesh Renderer), there’s a parameter called Scale In Lightmap. You can adjust this setting to change the number of texels an object uses in your lightmap.
In the following screenshot, on the left side is an average object getting five texels of lighting information for each baking unit, because Lightmap Resolution is set to five. On the right side is a box with Scale In Lightmap set to 0.5:
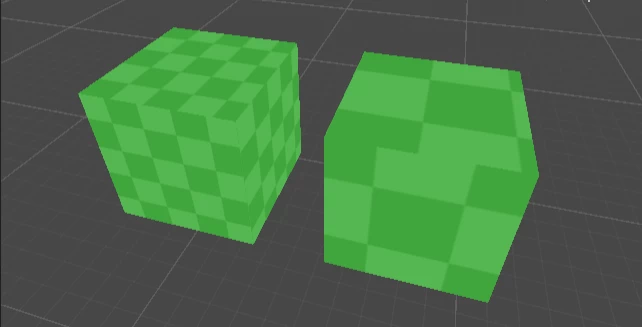
The box on the right will use much less space in the lightmap than the box on the left. In the following screenshot, you can see the settings for lightmaps that are available in the Mesh Renderer component.
Try to avoid spending texels on the following elements:
- Surfaces and objects that a user won’t see. This avoids wasting memory on a larger lightmap for detail that’s not visible on screen.
- Surfaces with little light variation — like an object in a shadow, or an object that is touched by a single light.
- Small or thin objects. The amount of lighting that small or thin objects receive doesn’t add much to the final render of the Scene.
7. LODs and Lightmaps
Using Level of Detail (LOD) on models will affect baked lighting. Only the most detailed model in an LOD group will be lit as if it is a static object, while the rest of the models in the same group will be dynamically lit. Separate lightmaps will be used for direct/indirect lighting and realtime Global Illumination.
When using the Enlighten lightmapper, the system will only bake the direct lighting. In order to sample indirect lights, you must use Light Probes in your Scene.
The following images are examples of LOD models. Note that only the LOD 0 model in the first image is lit correctly because light probes have not been placed around the Scene. The second image is an example of a model using LOD, correctly lit with Light Probes.

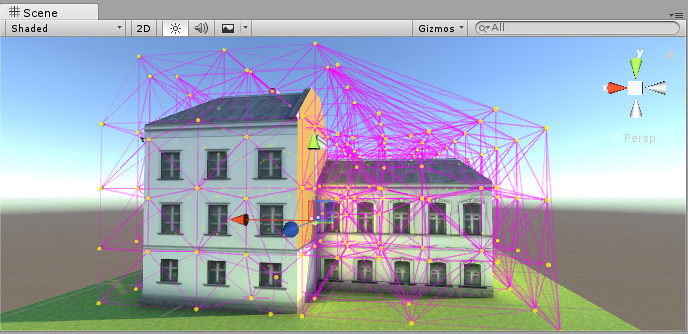
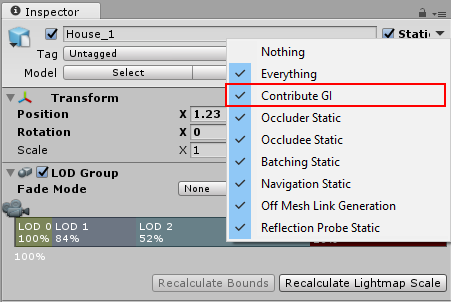
In order to ensure that LOD models will take to baked lighting correctly, you must mark the LOD GameObject as Contribute GI in the drop-down menu next to the Static checkbox.
8. Conclusion
Using lightmaps to store lighting data for static objects is an essential part of optimizing 3D art. In the next tutorial, we’ll examine how light probes can contribute to more realistic baked lighting conditions for objects that move and objects with LODs.