More crypt controls
Tutorial
·
Beginner
·
+10XP
·
15 mins
·
(40)
Unity Technologies
This tutorial will show you how to script more of the controls in this game level. It is intended to give you more practice in writing visual scripts on your own, given a desired result. Along the way, you will learn about several more useful nodes.
By the end of this tutorial, you’ll be able to:
- Pass any number of arguments from one script to another by way of a custom event.
- Play audio from a visual script.
- Given a desired result, code an appropriate visual script.
Languages available:
1. Overview
In this tutorial, you’ll work more independently to turn logical sequences into visual scripts. You’ll also go on a little adventure of your own to debug a visual script. This tutorial will build your confidence in visual scripting.
As you work on your own, remember to use groups and their comments to keep your work organized, and to remember how and why nodes work together.
2. Script the pressure button
In the first level of Clive’s Crypt, you moved a statue onto a kind of button that we call a pressure button. Pressure buttons require constant pressure to be applied to them in order for the door to stay open. As soon as Clive hops off of the button that opens the door, the door closes before he can get through it.
In the third room of this level, there is a button named PressureButton that you will script to function as a pressure button. The statue will hold that button down to keep the door open.
Follow these instructions to get started:
1. Add a Script Machine to the PressureButton GameObject.
2. In the Project window, go to Assets > UnityTechnologies > VisualScriptingTutorial > Tutorial > VisualScripts and copy DoorButtonScript. Rename the new script “PressureButtonScript”.
3. Attach PressureButtonScript to theScript Machine component of the PressureButton GameObject.
Events with arguments
The previous button, DoorButton, opens a door when it is pushed, and the door stays open even after the button is released. PressureButton will work differently, both opening a door when the button is pushed, and closing the door when the button is released. Instead of making two events for opening and closing the door, you can make one event with a Boolean argument that gets passed to the custom event.
1. In PressureButtonScript, find the Custom Event: Trigger node and change its name to "PressureButtonPushed".
2. In the header of the node, change Arguments from 0 to 1. A new input will appear labeled Arg. 0.
3. Input True to this argument using a Boolean node to open the door.
Task: complete the third room
Your task is to script the pressure button and the third door. The nodes you need will be familiar — only the logic and a few settings are different:
1. In the PressureButtonScript, the animation with the subgraph is the same as the regular button, but to close it you will send an Animation Value of False.
2. Duplicate SecondDoorScript.Rename it “ThirdDoorScript” and attach it to the ThirdDoor GameObject.
3. Edit ThirdDoorScript to open or close depending on the Boolean value passed from the PressureButtonPushed event.
You can do this on your own! If you need a hint or get stuck, consult these visual script files in the Samples subfolder:
- Completed PressureButtonScript: Final_PressureButtonScript
- Completed ThirdDoorScript: Final_ThirdDoorScript
Note: The subgraphs used in these files are sample copies, not the subgraph visual script you created.
3. Script the toggle lever
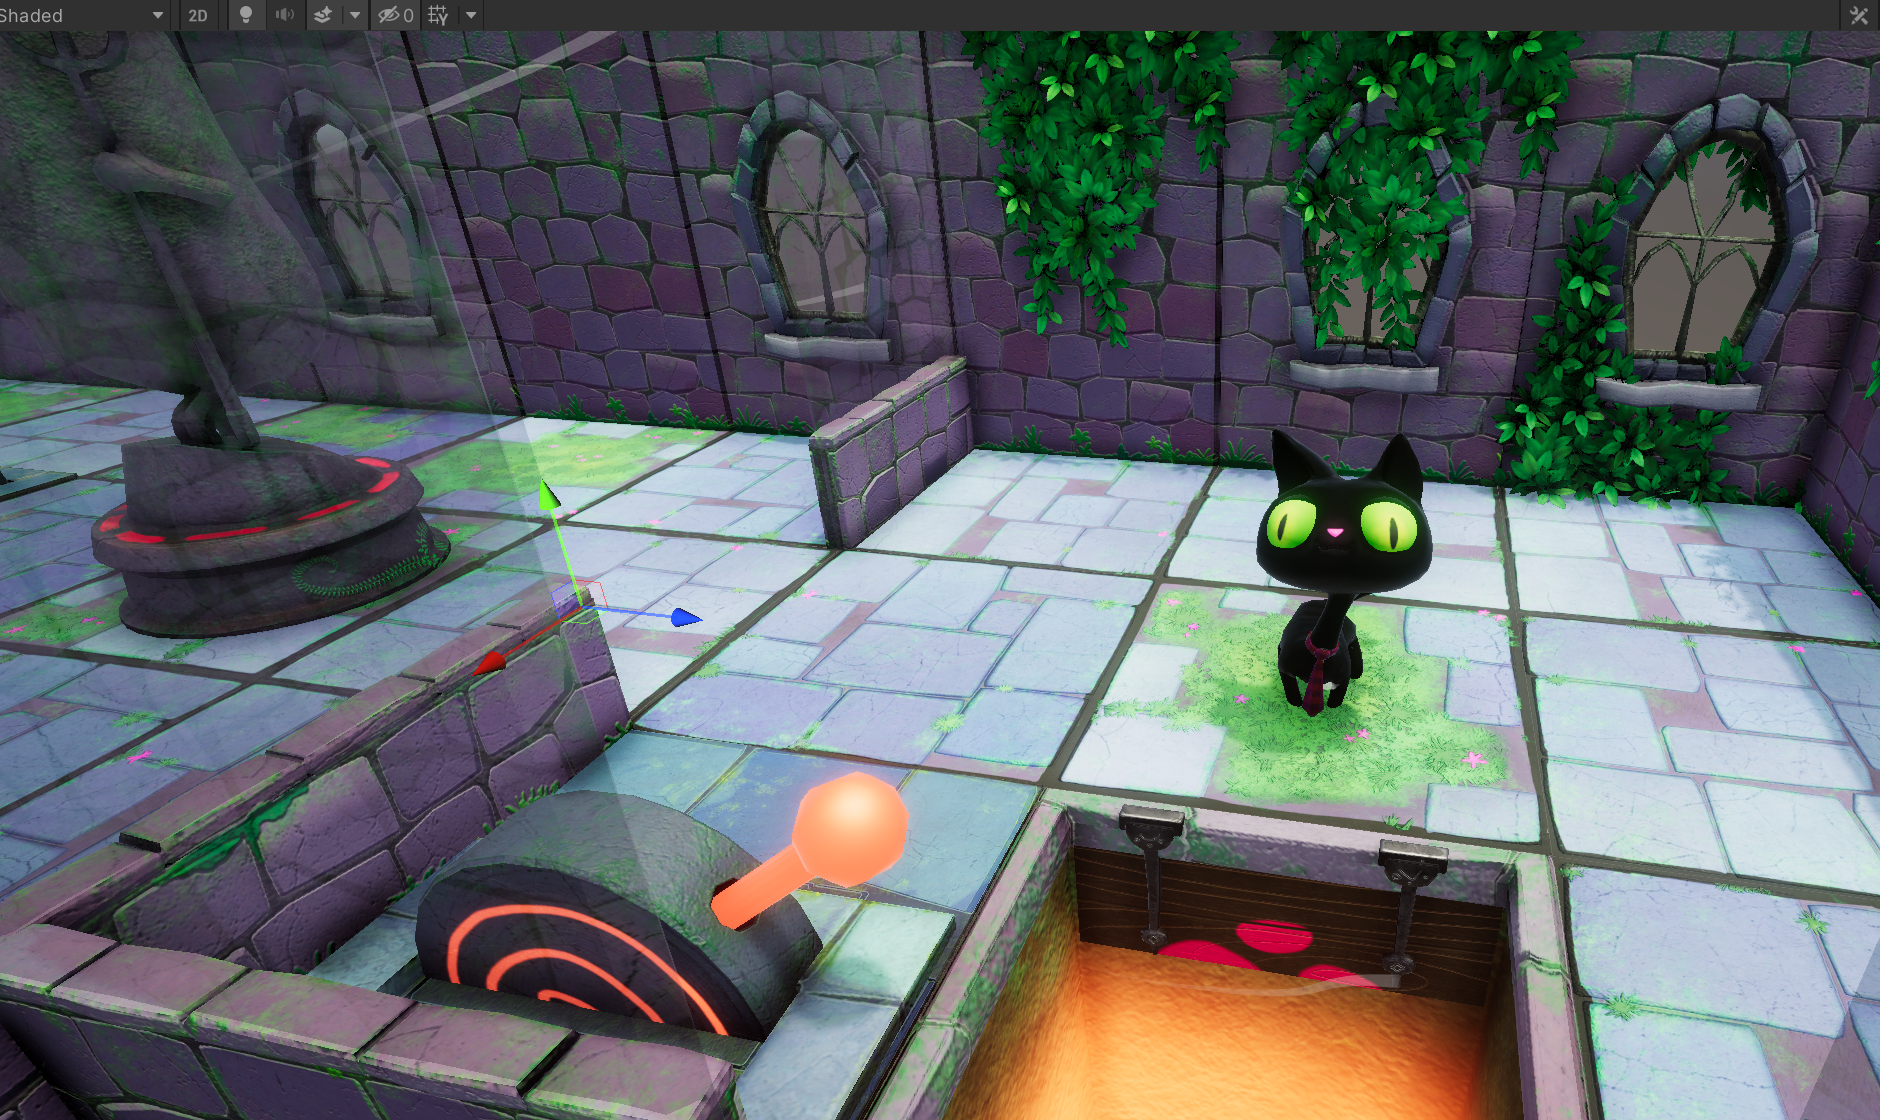
In the fourth room on this level, you will find a lever and a trap door like the one you saw in the first level of the game. The lever control is a toggle: Clive needs to enter the cell to turn it on and enter the cell again to turn it off. The lever is used to open or close the trap door.
Your next task is to script the lever in the fourth room of this level. Here are a few things you need to know:
- The only node you need for the lever that you haven’t used yet (in these tutorials) is Negate, which switches a Boolean to its opposite.
- The event should be triggered when Clive enters the cell.
- The trap door begins in the open position.
- You can use the subgraph to control the animation on the lever in the same way you have used it for the doors and buttons — almost. You will see an error in the Console window. Track it down and fix it using a Null Check node. Put your detective skills to work and try this without looking ahead at the next step!
- The TrapDoor GameObject is already scripted, using an event named LeverSwitched with one Boolean argument.
Find the TrapDoorLever GameObject (ObjectRoot > TrapDoorLever) and add a Script Machine component to it. Create a new visual script on the Script Machine, named “TrapDoorLeverScript”.
If you need a hint or get stuck, consult these visual script files in the Samples subfolder:
- Completed TrapDoorLeverScript: Final_TrapDoorLeverScript
- Updated AnimAndFX subgraph: Super_2
Note: The subgraph used in Final_TrapDoorLeverScript is a sample copy, not the subgraph visual script you created.
4. Make VFX optional
If you investigated the error in the lever animation, you discovered that the Visual Effect: Play node in the AnimAndFX subgraph caused an error. The problem is that the lever has no visual effects to play.
Use the Null Check node to branch the flow and only play the visual effects if they are present (Not Null)
Your visual script should look like the image below.
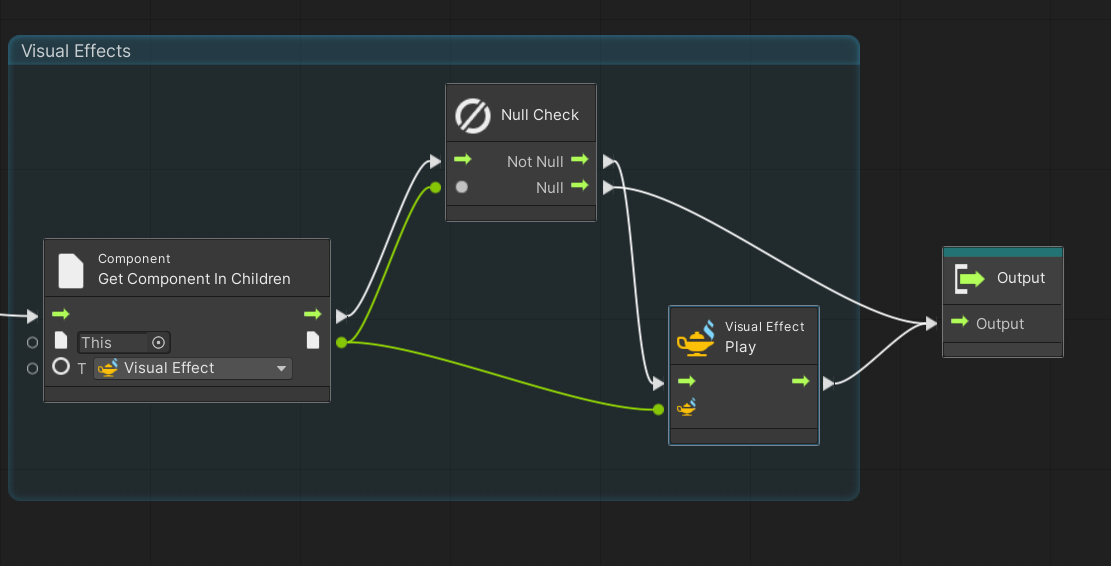
Try the lever now. The error should be gone. Other scripts that use the subgraph will work normally with no changes.
5. Extra credit: Add audio
You can easily add an audio option to the subgraph. Here’s how: let the subgraph check the GameObject itself for an Object variable named AudioClip with a Type of AudioClip. If this Object variable exists, get it. If it is null (it might be set to None), do nothing. If it is not Null, play it.
The additional nodes you need are:
- Has Variable: Use this node to check if the variable AudioClip exists.
- Audio source: Play clip at point: This node plays a clip at a location in world space. Provide the position of the GameObject itself with a Transform: Position node.
With this addition to your subgraph, you can define an Object variable named AudioClip on any GameObject that has the AnimAndFX subgraph in its visual script, and set that variable to any available clip that you want to play! And, because the Has Variable node checks if that variable is absent, this bit of script won’t cause errors on any existing GameObjects that run the subgraph without an AudioClip variable.
To see the completed script, consult Super_3 in the Samples subfolder.
6. What’s next?
You have put your knowledge of gameplay logic and custom events to the test. You have even done a little debugging. You have mastered some serious visual scripting skills!
Yet, there is a whole new level of visual scripting power awaiting you: State Machines. In the next tutorial you will gain even more sophisticated skills for building games with Visual Scripting.