Painting on the model surface with Painting 3D Mode
Tutorial
intermediate
+10XP
20 mins
31
Unity Technologies
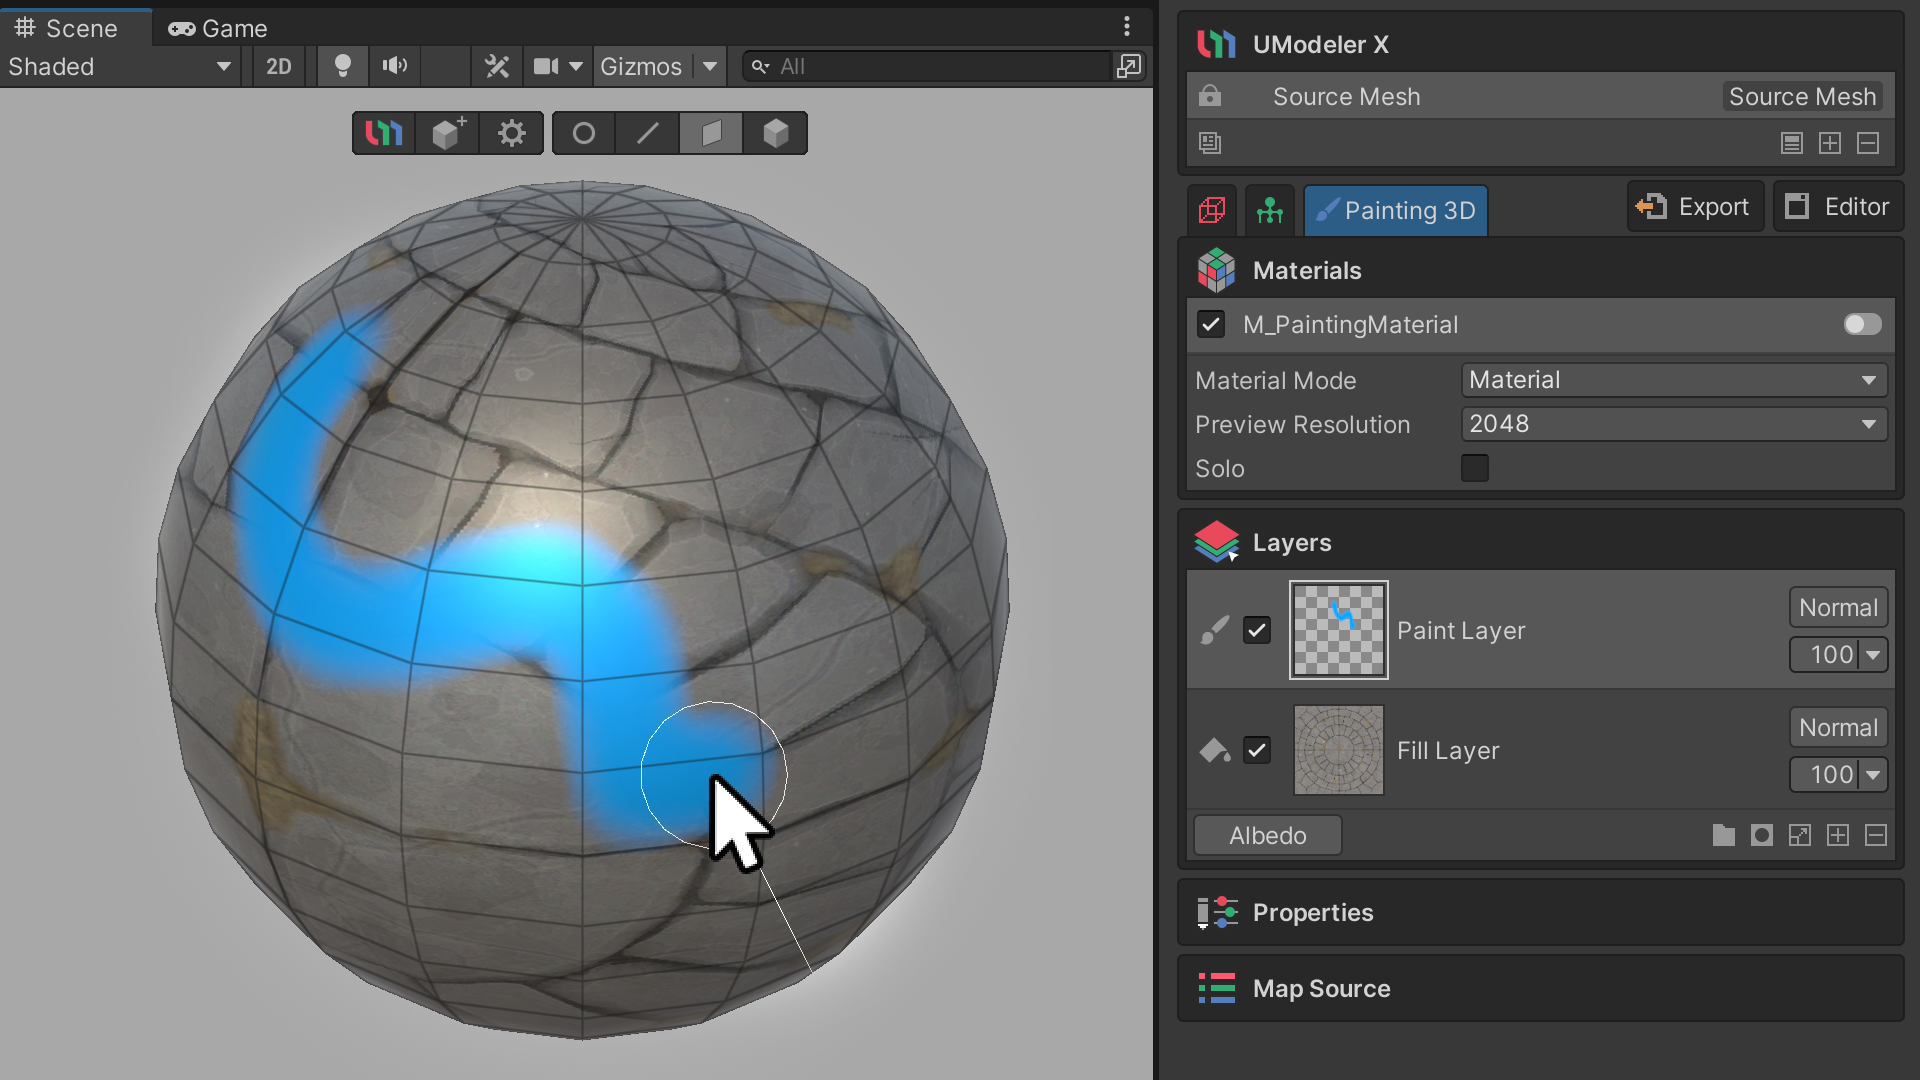
In this tutorial, you'll discover how to utilize Painting 3D Mode in UModeler X to craft textures within Unity. Painting 3D Mode enables you to apply colors directly to your model, offering tools like layers and brushes to aid in the creation and expression of textures.
Languages available:
1. Overview
This tutorial will explain how to use UModeler X's Painting 3D Mode to create textures in Unity.
Painting 3D Mode is a mode that you can use to paint colors on your model and it allows you to express colors and create textures using layers and brushes, etc.
2. Before you begin
New to Unity?
If you’re new to Unity, welcome! The Unity Essentials learning pathway has been designed to help you get set up and ready to create in the Unity Editor. We recommend you complete this pathway before continuing with this UModeler X tutorial.
Update the Unity Hub
Before you begin to set up your Unity project, consider updating your Unity Hub to the latest release. If you are using an older version of the Hub, there may be differences between the guidance provided and your experience.
Review the Unity Editor basics
If you need to refresh your memory of the Unity Editor basics, you can take a moment to review Explore the Unity Editor at any time.
3. Basic concepts of the Painting 3D Mode
In order to understand and effectively utilize the Painting 3D Mode, it's important to first understand the basic terms and concepts used in them. This understanding will go a long way toward improving the accuracy and efficiency of your painting work.
Below, we'll start with a basic explanation of layers and map sources, which play an important role in Painting 3D Mode.
Layers
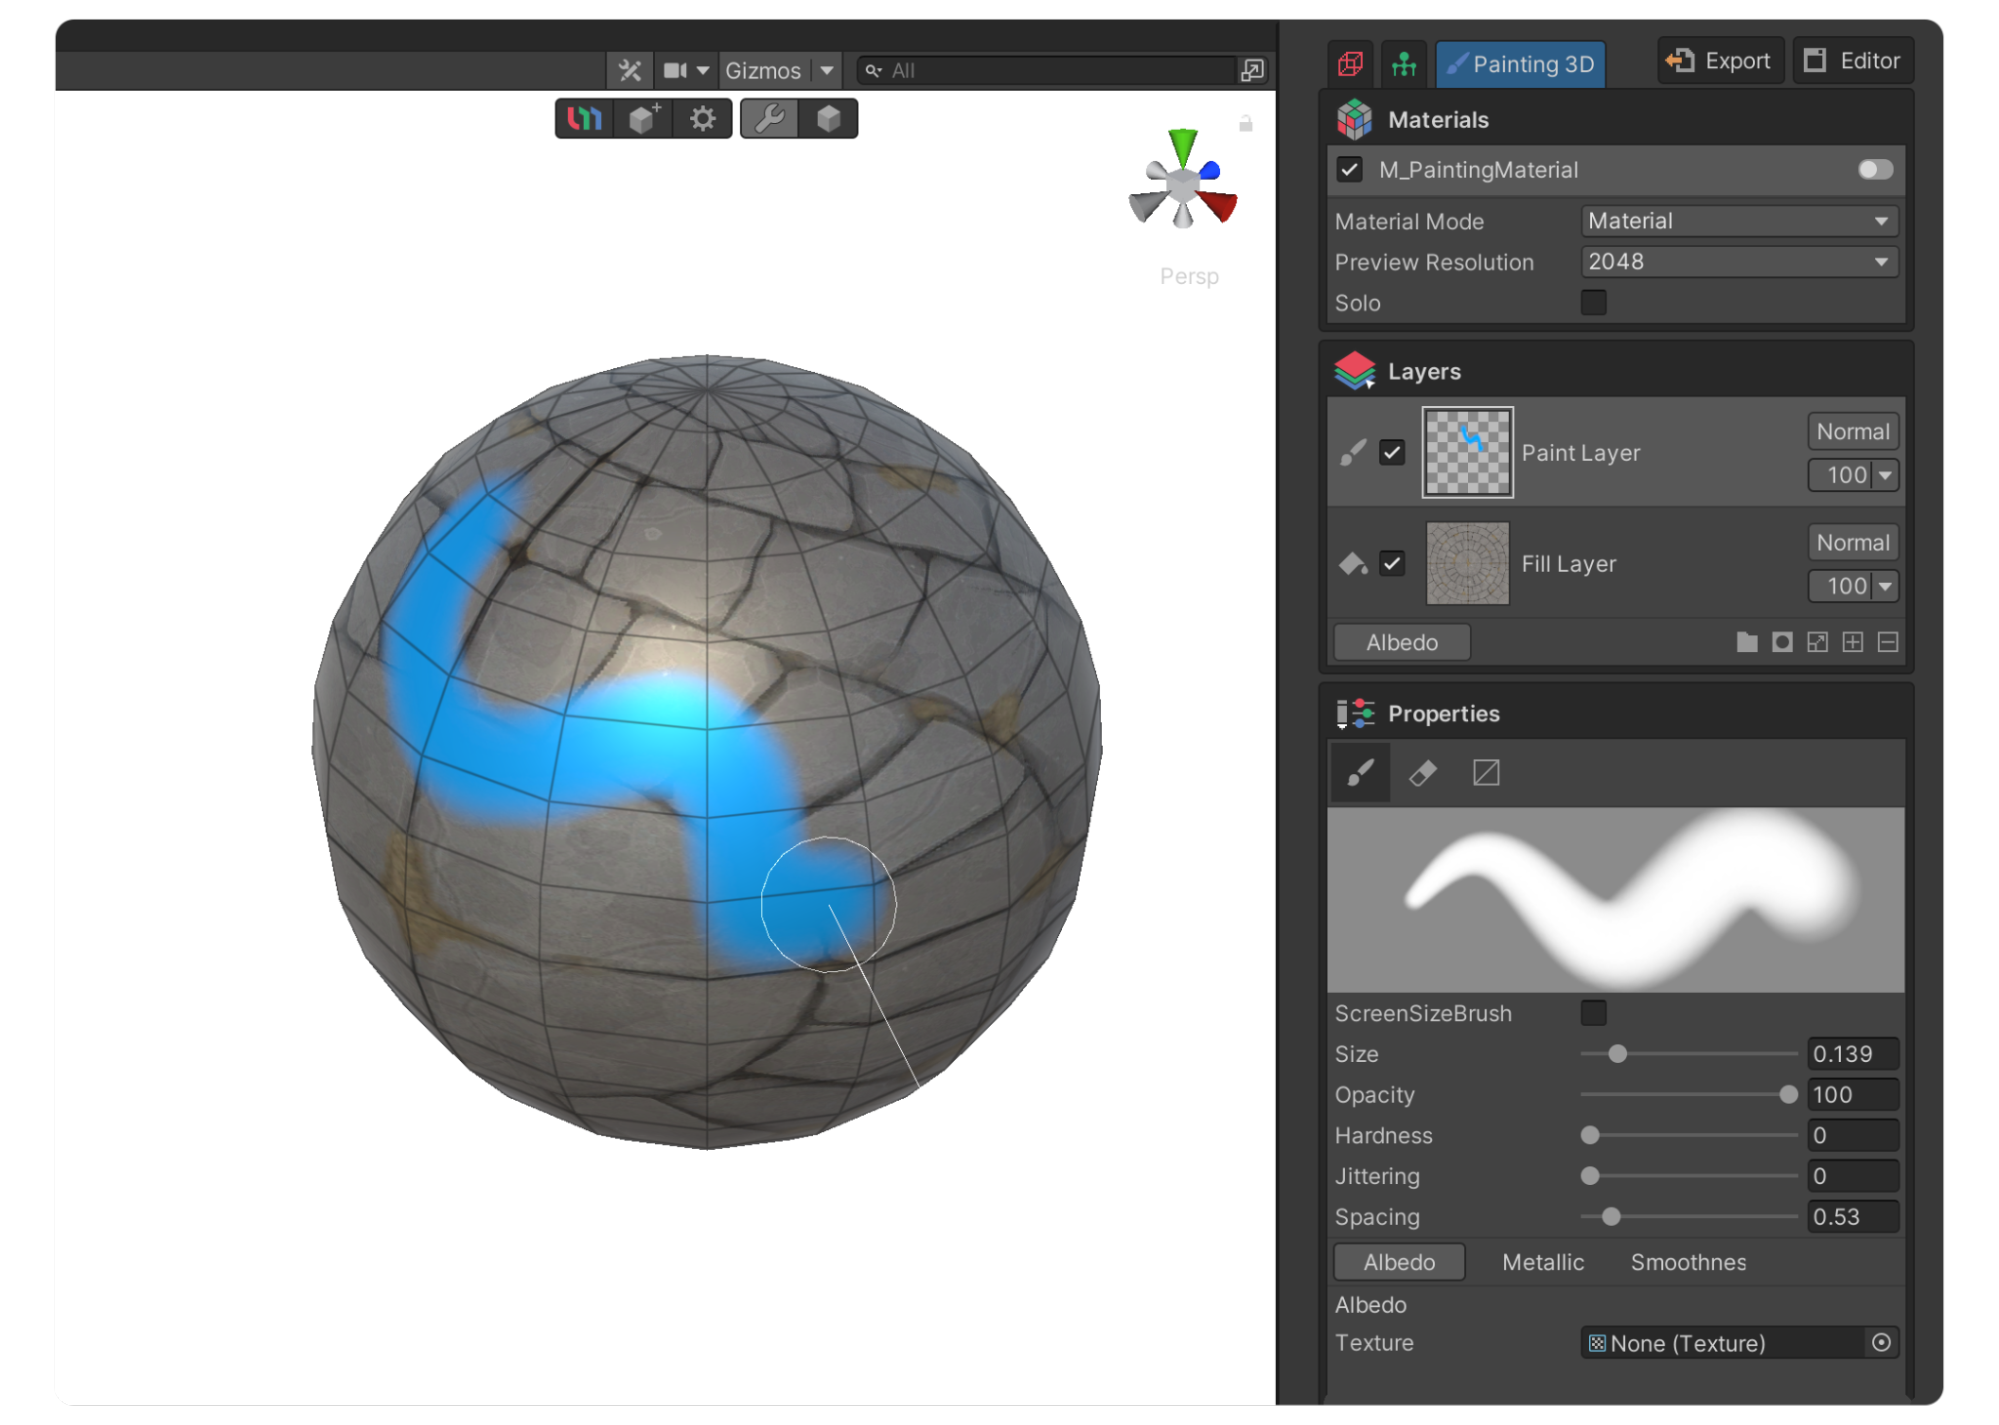
Layers can be understood as layers of multiple textures or elements that can be edited individually.
These layers are stacked from top to bottom to form a complex texture. The interaction between layers is handled by a calculation called a blending mode, which ultimately forms a unified texture.
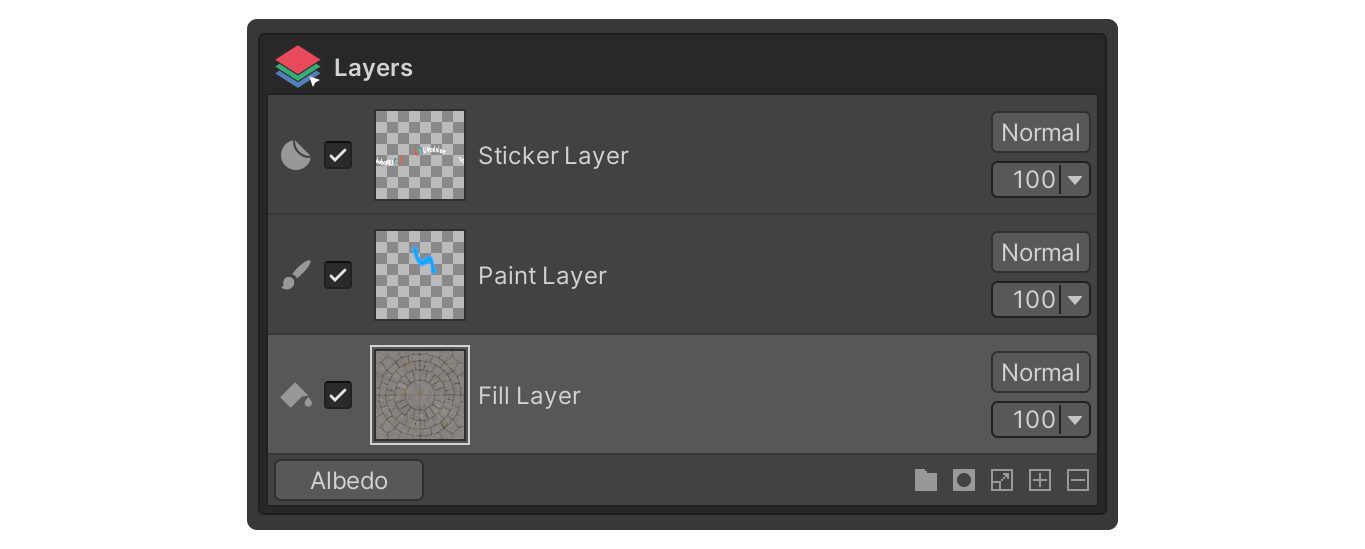
Using layers gives you more flexibility when painting textures and allows you to efficiently manage complex texture elements. Because of these advantages of layers, your texture painting process will be simpler and more accurate.
Map Source
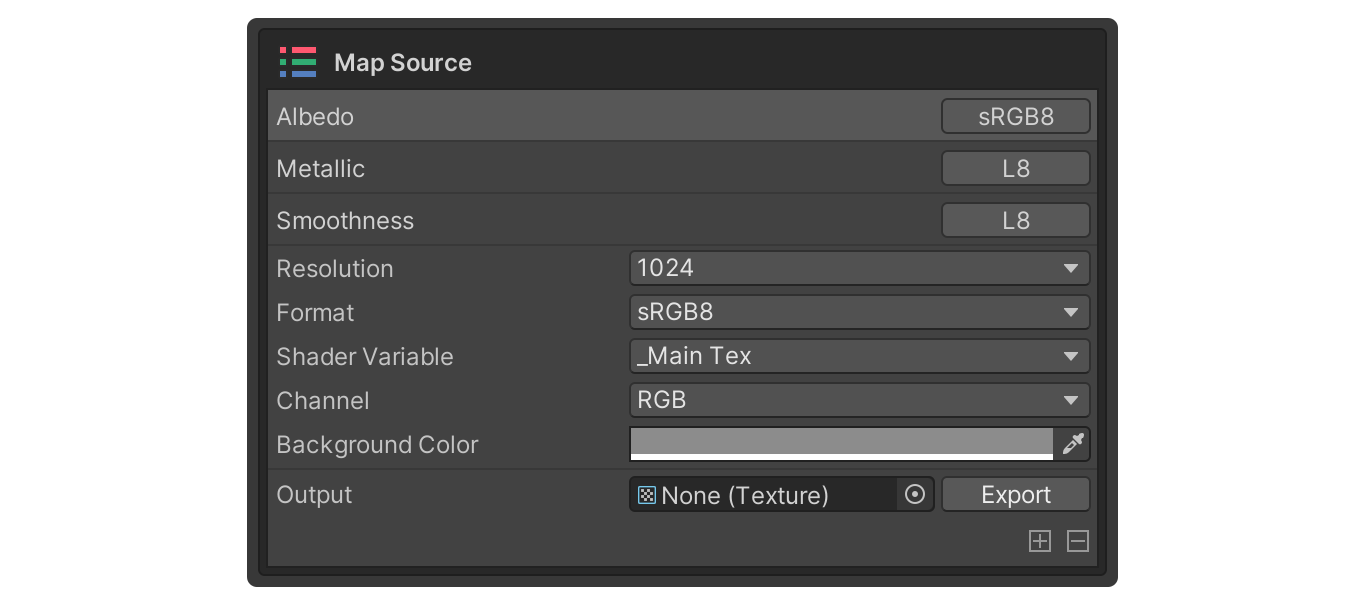
Map Source refers to the different individual properties of a material, such as Metallic, Color, Albedo, Smoothness, etc. that are handled by UModeler X's Painting 3D Mode.
This is an important concept because it allows you to edit and combine different properties of a material separately to create more sophisticated results, rather than simply representing the material with a single texture.
4. Enter Painting 3D Mode
Before you enter Painting 3D Mode, you will need to go through the steps to set the resolution of the materials and textures that will be painted, etc. Of course, just like entering Rigging Mode, you can change the settings in Painting 3D Mode once you are in Painting 3D Mode.
Below is a brief description of the settings before entering Painting 3D Mode.
1. Prepare a UModeler X object that has been modeled and UV unwrapped.
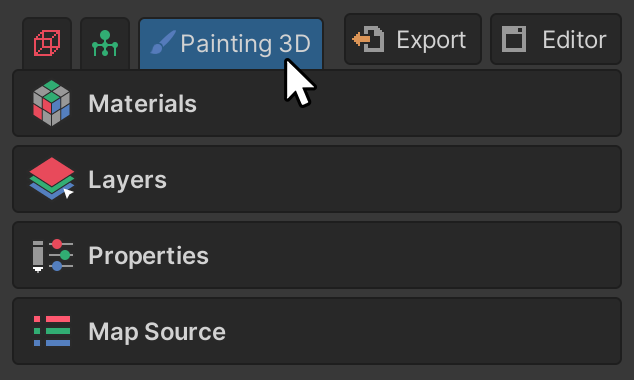
2. Select Painting 3D Mode.
3. Set the Painting 3D Mode area to your desired settings.
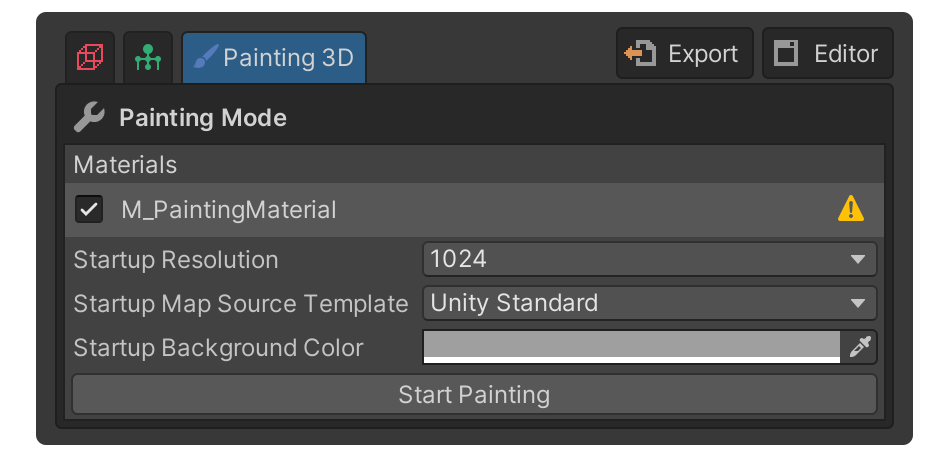
A description of each property is as follows:
- Materials: This property selects the materials that will be painted.
- Startup Resolution: This property selects the texture resolution when painting. This can be changed during painting.
- Startup Map Source Template: This property sets the predefined map source that will be used for painting.
- Startup Background Color: This property sets the color that the painting will be based on. This can be changed during painting.
4. Select the Start Painting button to enter Painting 3D Mode.
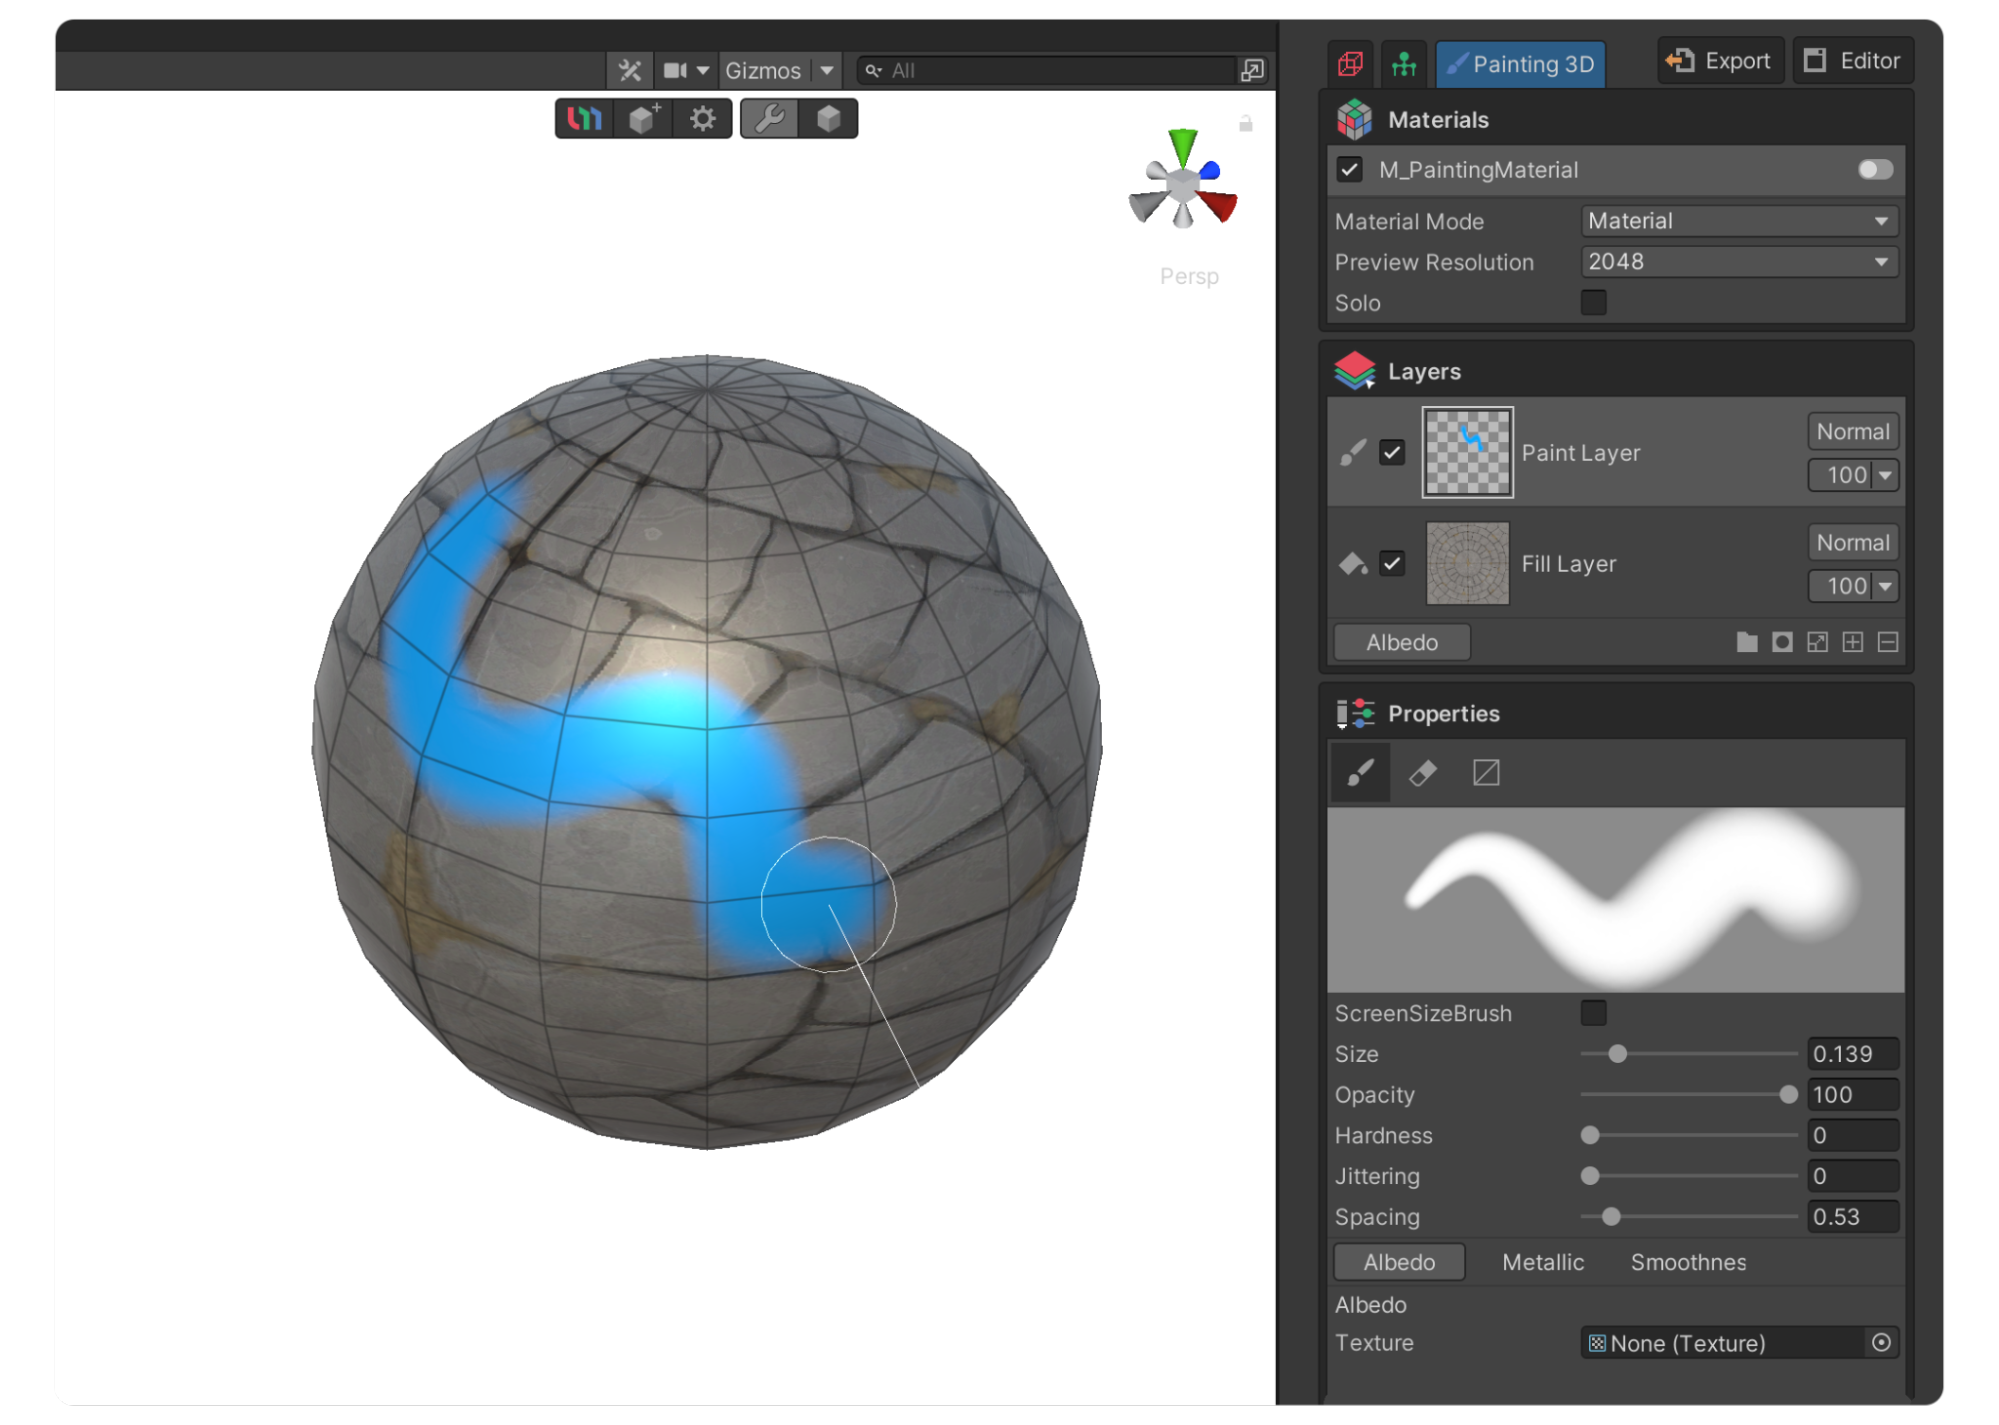
5. Painting 3D Mode interface
The interface for Painting 3D Mode is quite different from rigging or modeling mode. Despite these differences, it's grouped by functions, so it's not hard to figure out and learn.
Let’s take a quick look at the key elements and features of the Painting 3D Mode interface.
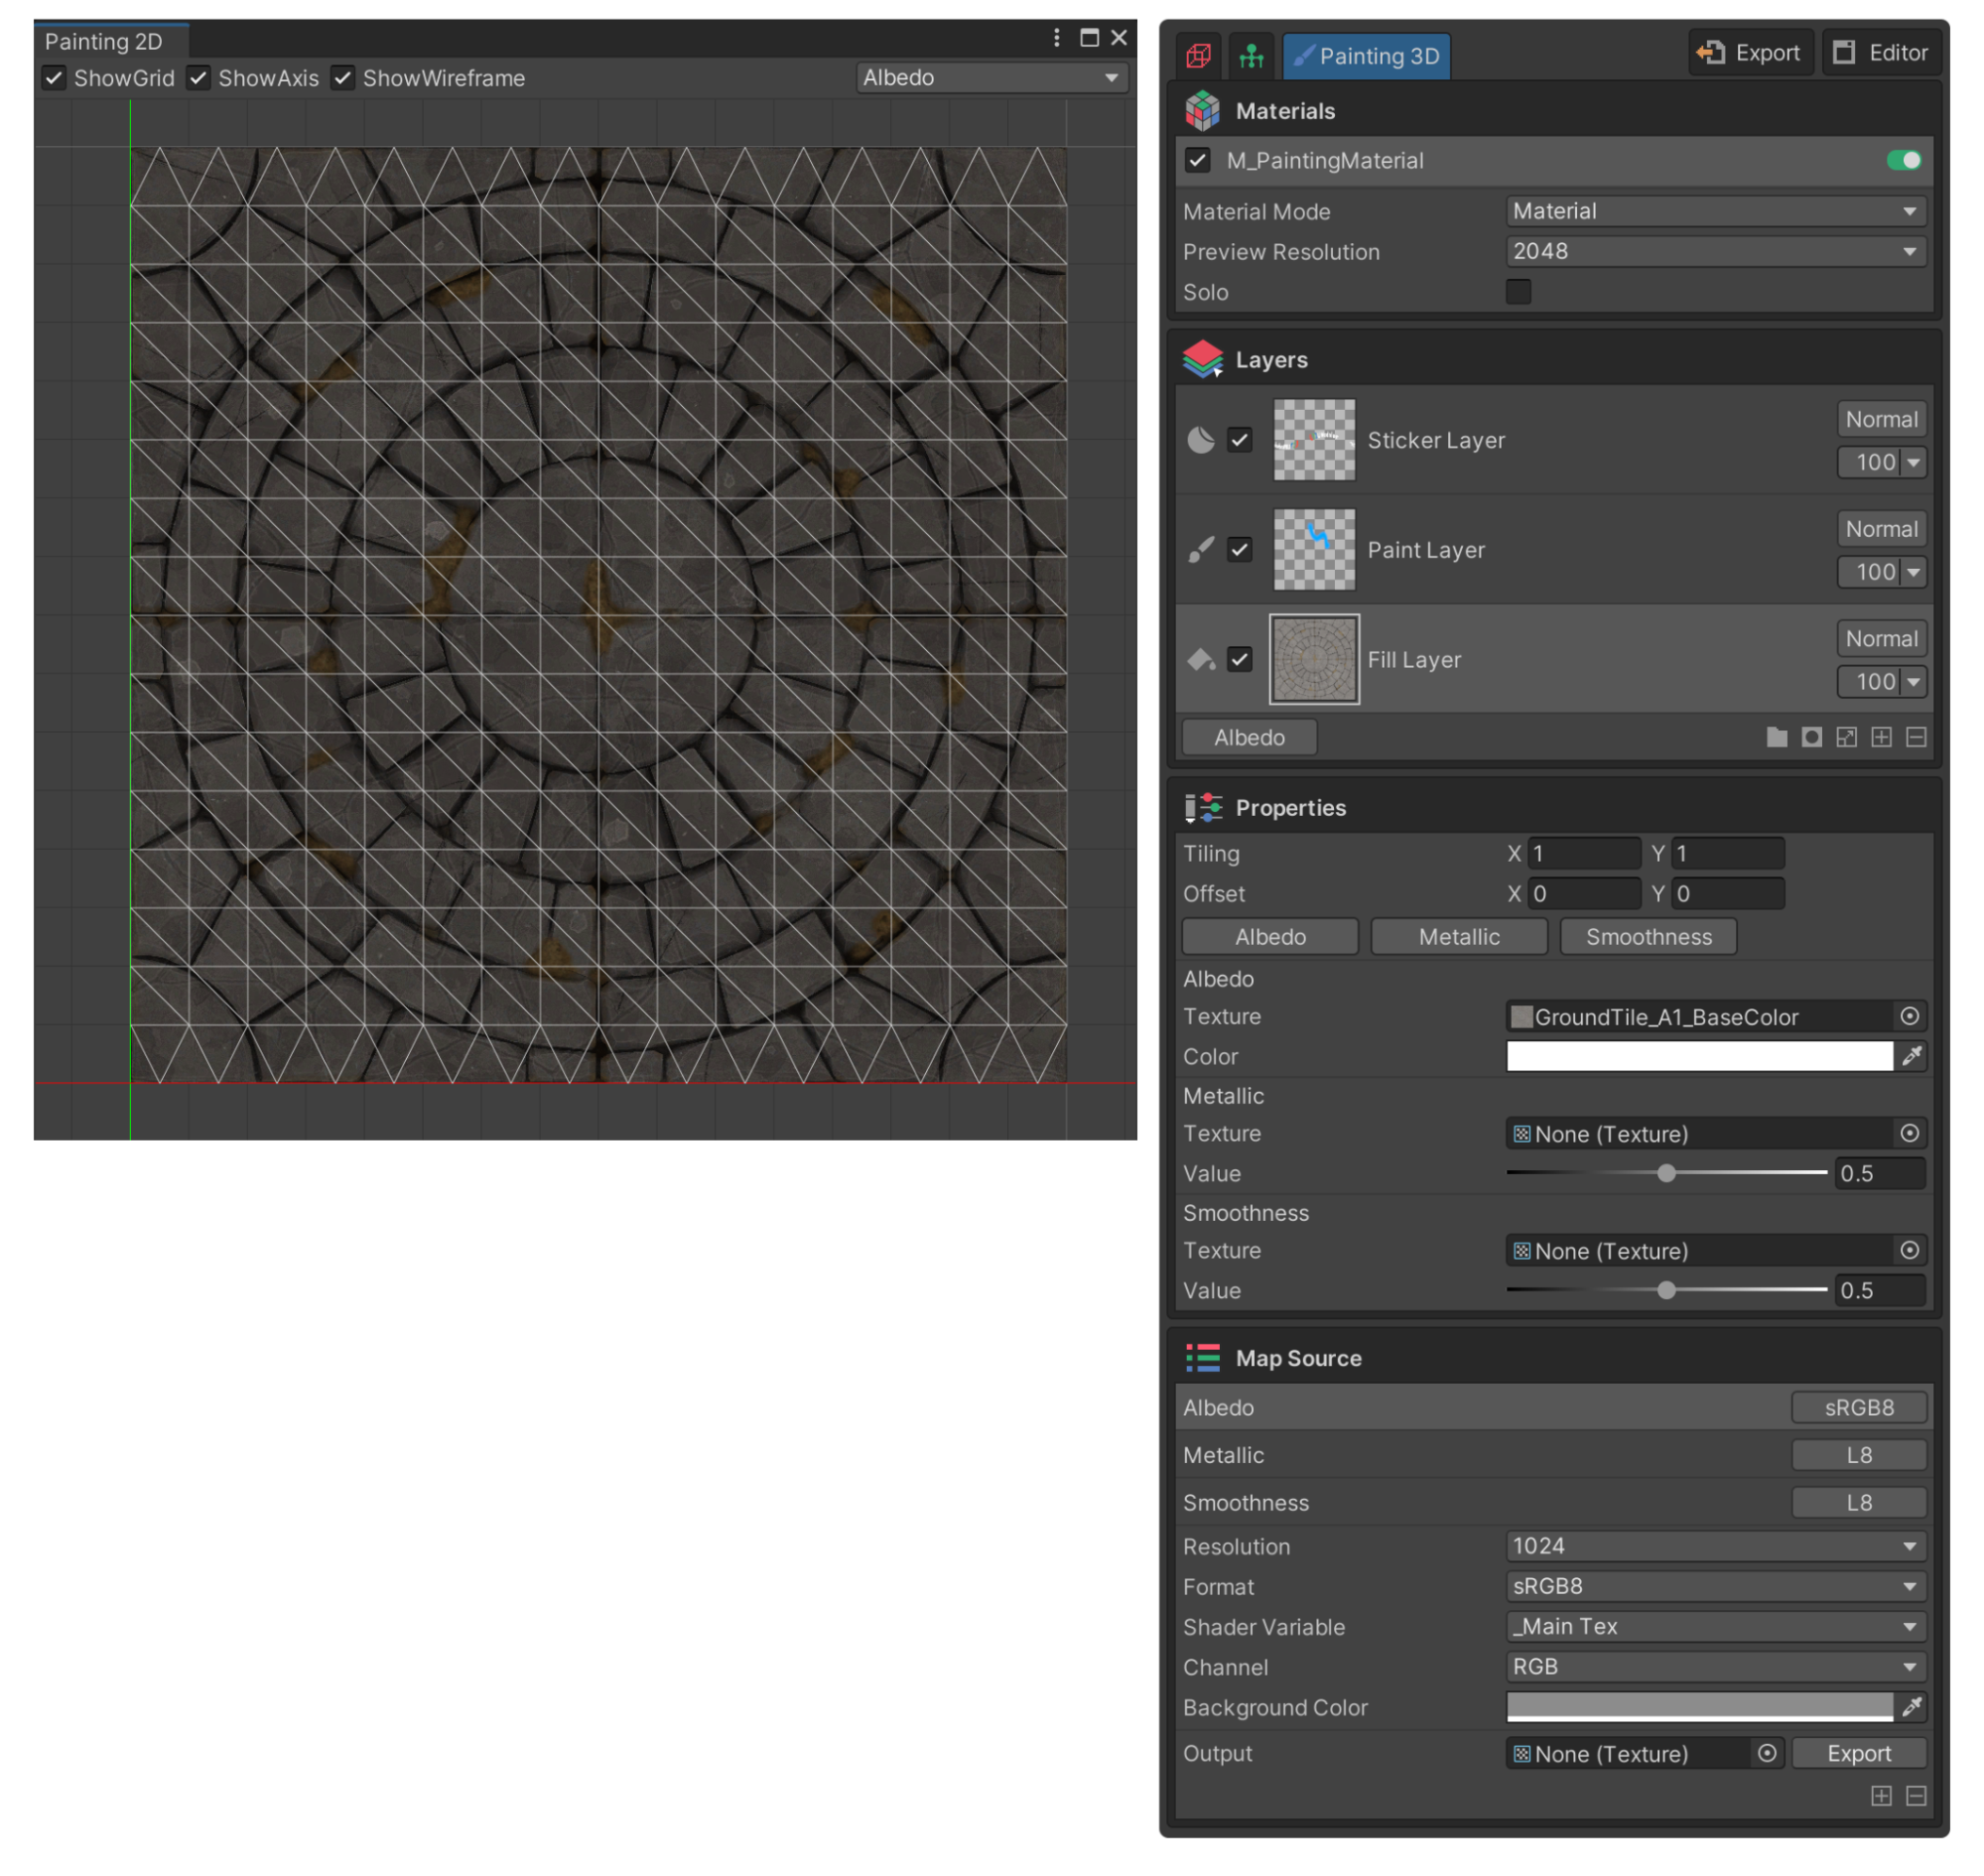
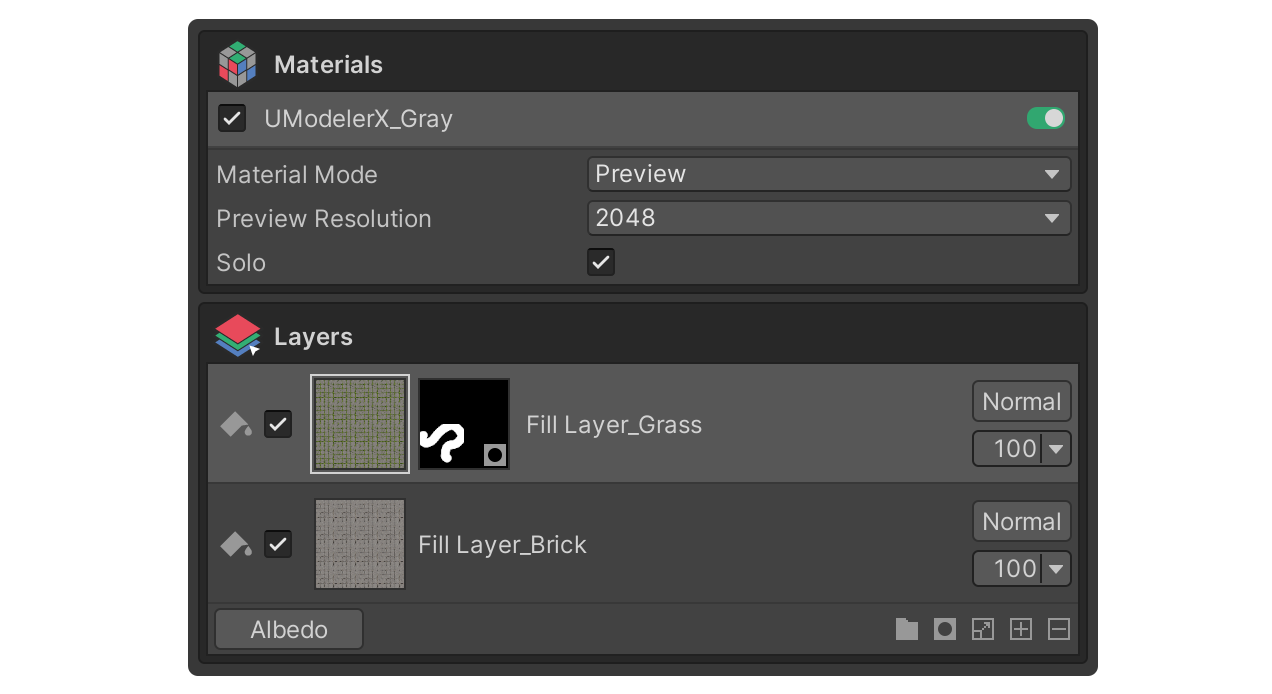
Materials group
The Materials group is where you select the materials you want to paint with, or collect properties related to their representation in the scene.

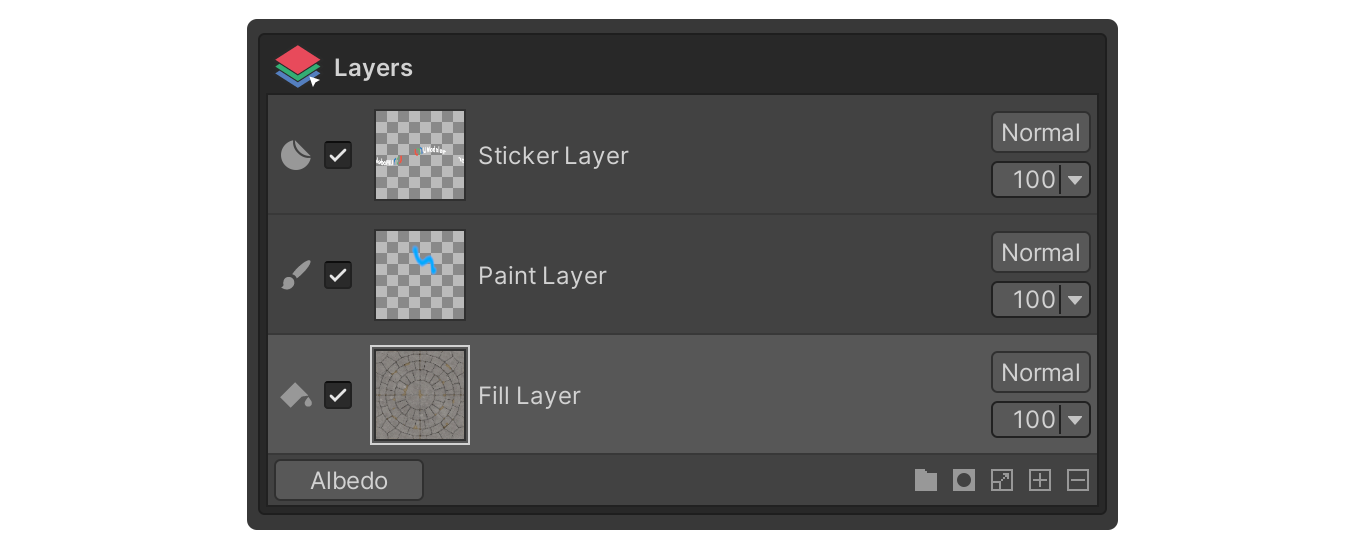
Layers group
The Layers group is the group where layers are displayed, along with tools to manage and edit them.
Properties group
The content of the Properties group varies depending on the selected feature, such as a tool or layer, and displays properties for the selected feature.
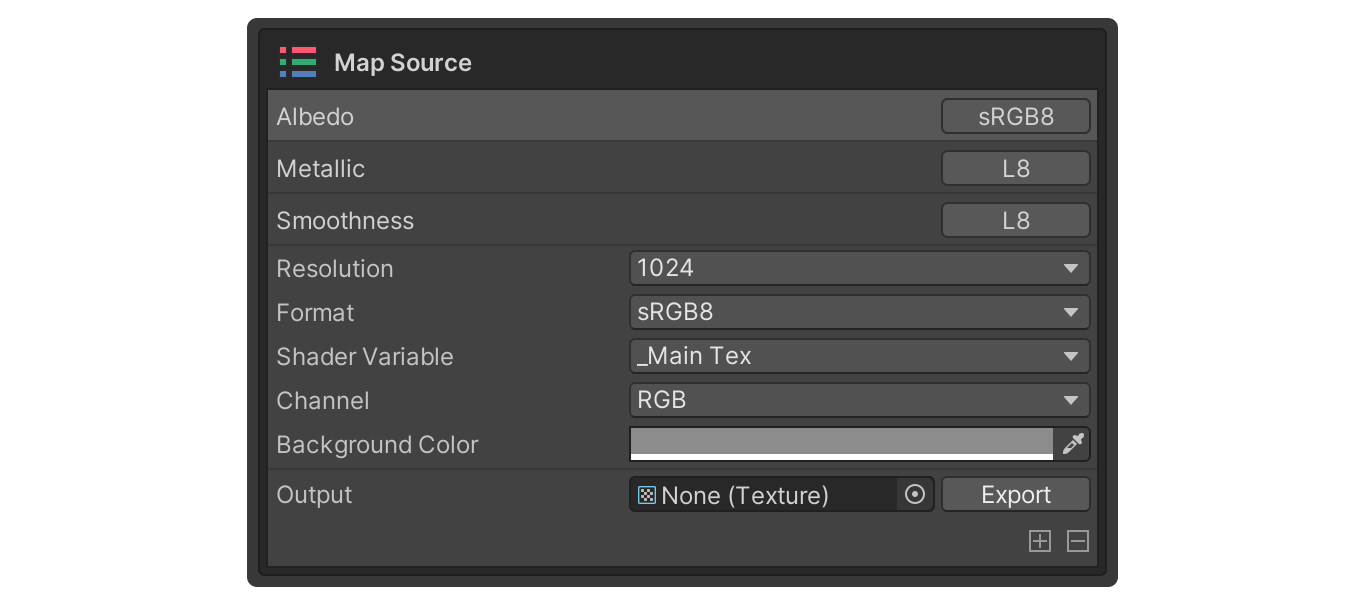
Map Source group
The Map Source group is a collection of properties used to manage map sources, such as setting the resolution of textures, the format of map sources, and adding/deleting map sources.
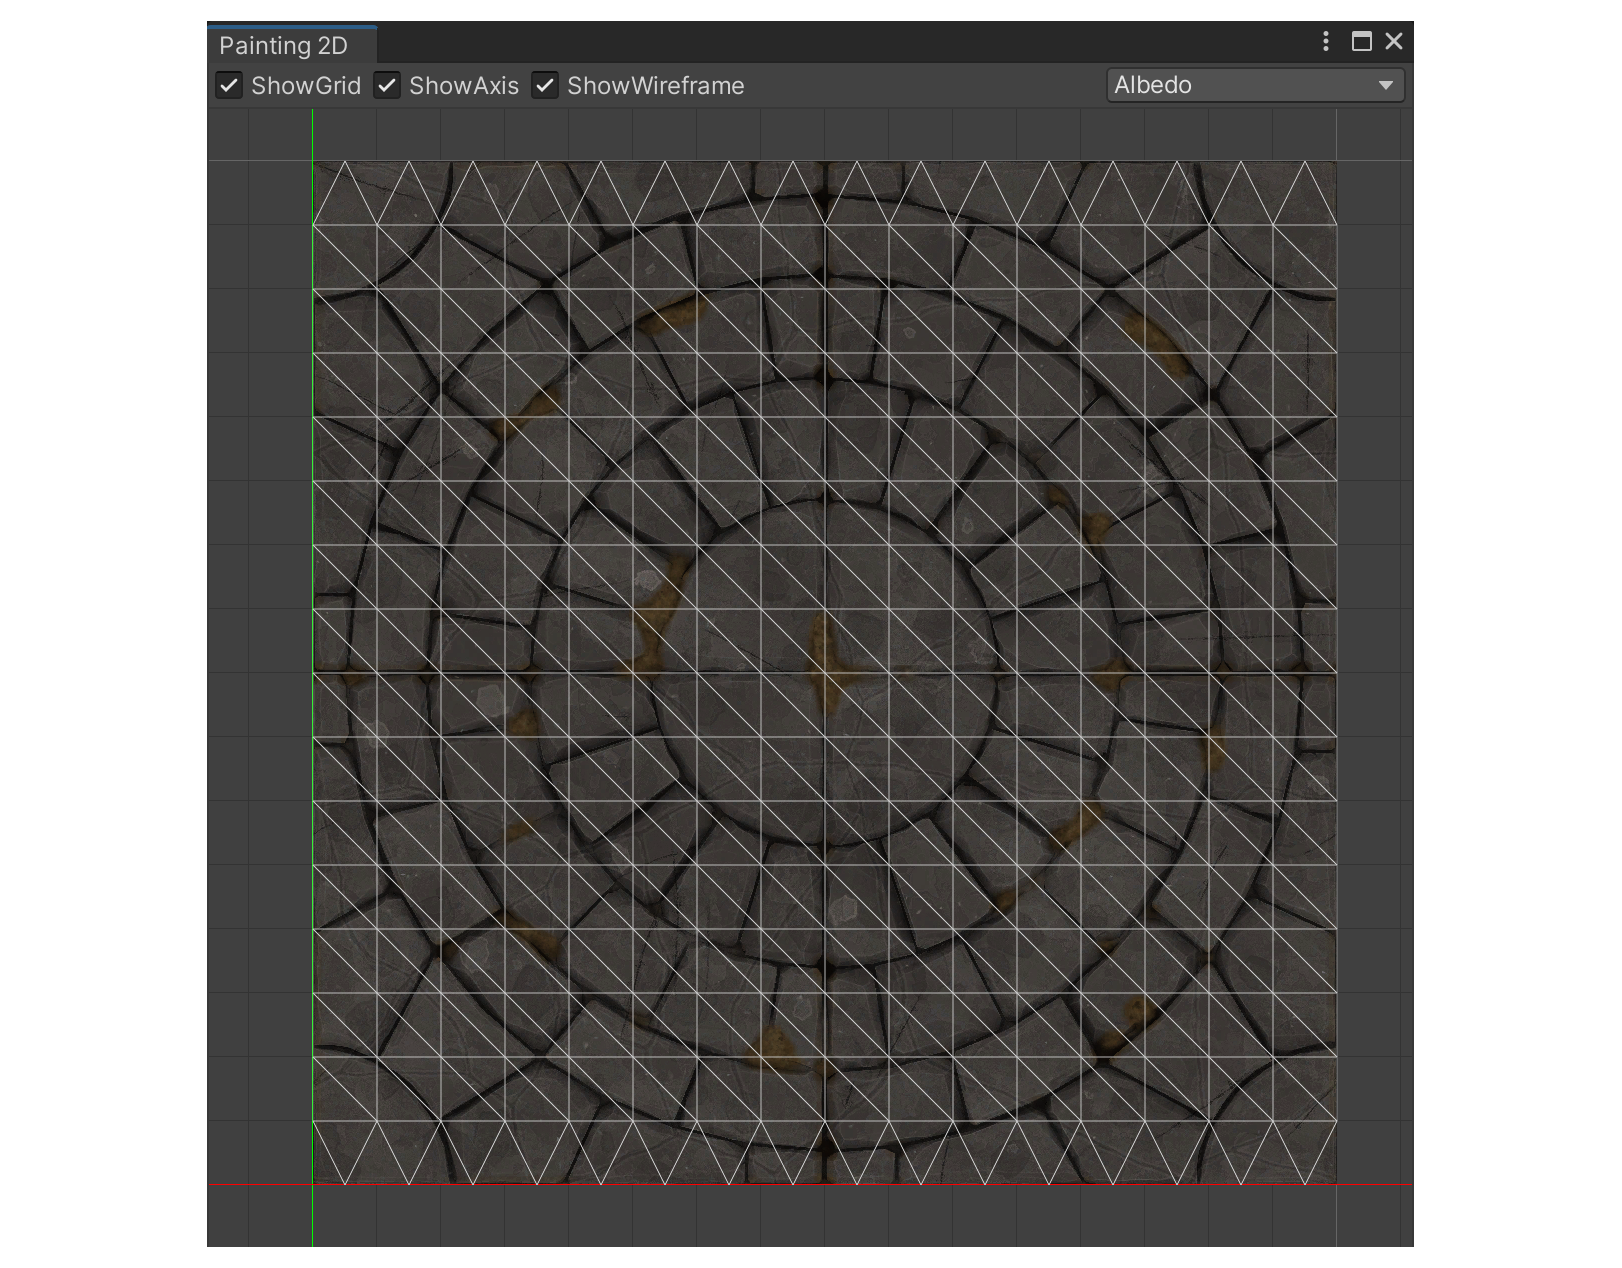
Painting 2D
The Painting 2D Editor is an editor window that allows you to paint colors on a 2D canvas, with the painted results being immediately reflected on the 3D model.
The Painting 2D Editor can be launched by following these steps.
1. Select the Source Mesh.
2. Select the Editor button.
3. Select the Painting 2D tool from the dropdown.
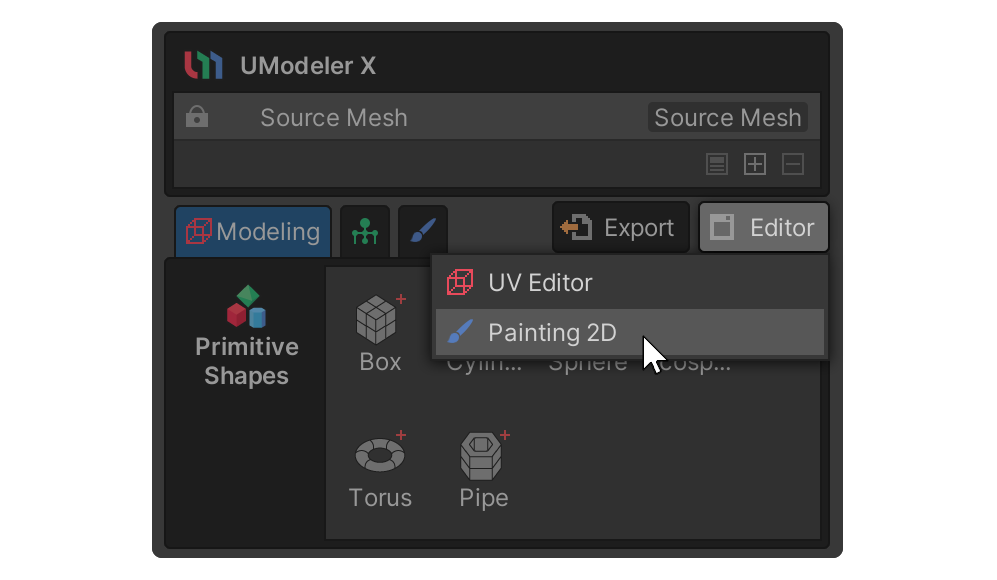
You will see the Painting 2D Editor.
6. Using layers
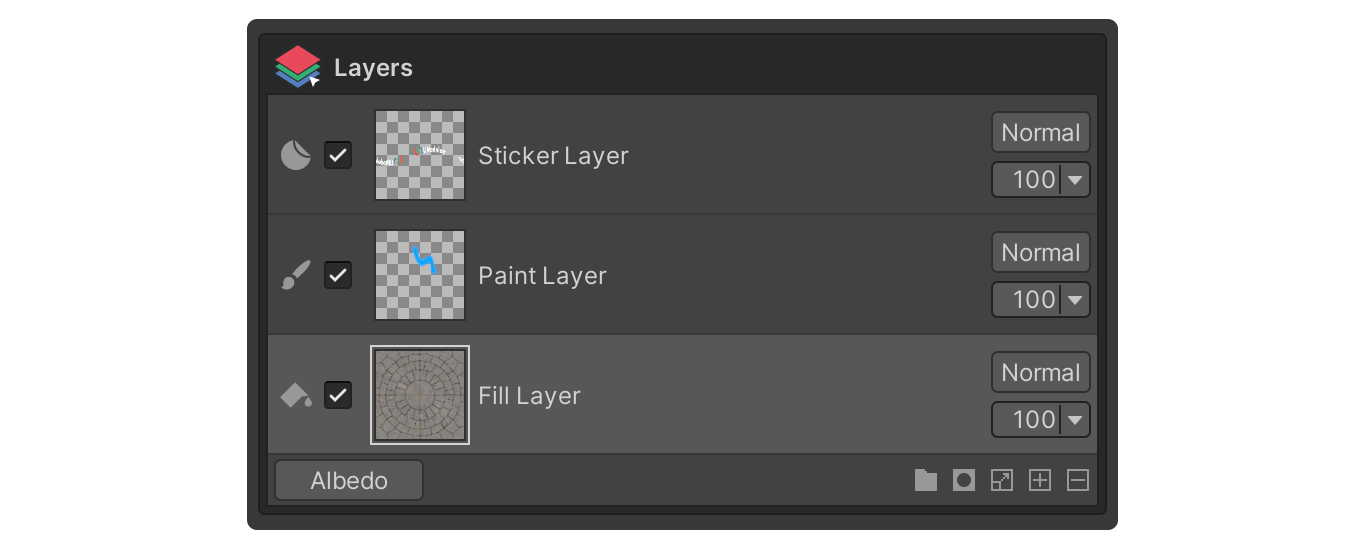
Layers are one of the most important features in Painting 3D Mode, and can be found in the Layers group.
There are several types of layers: layers with different properties, layer masks that only show certain areas of a layer, and group layers in folders that allow you to manage layers as a group.
Here is a brief description of the different layers:
- Layer Mask: A layer that masks (hides/shows) a specific area of a layer.
- Group Layer: Folder-like layers that organize layers into groups.
- Paint Layer: A layer that applies a map source by painting over it.
- Fill Layer: A layer that covers the entire model with the values from the map source itself.
- Sticker Layer: A layer with properties that represent an image as if it were being stuck to a surface.
Here is a basic sequence of actions for adding layers and utilizing their properties.
1. When you enter Painting 3D Mode, a single Paint layer is automatically created.
2. Add a layer of the desired format at the bottom of the layer area.
3. Select the layer you created, the Properties group displays the properties of the selected layer.
4. Change the properties to proceed with texturing.
Using a Paint layer
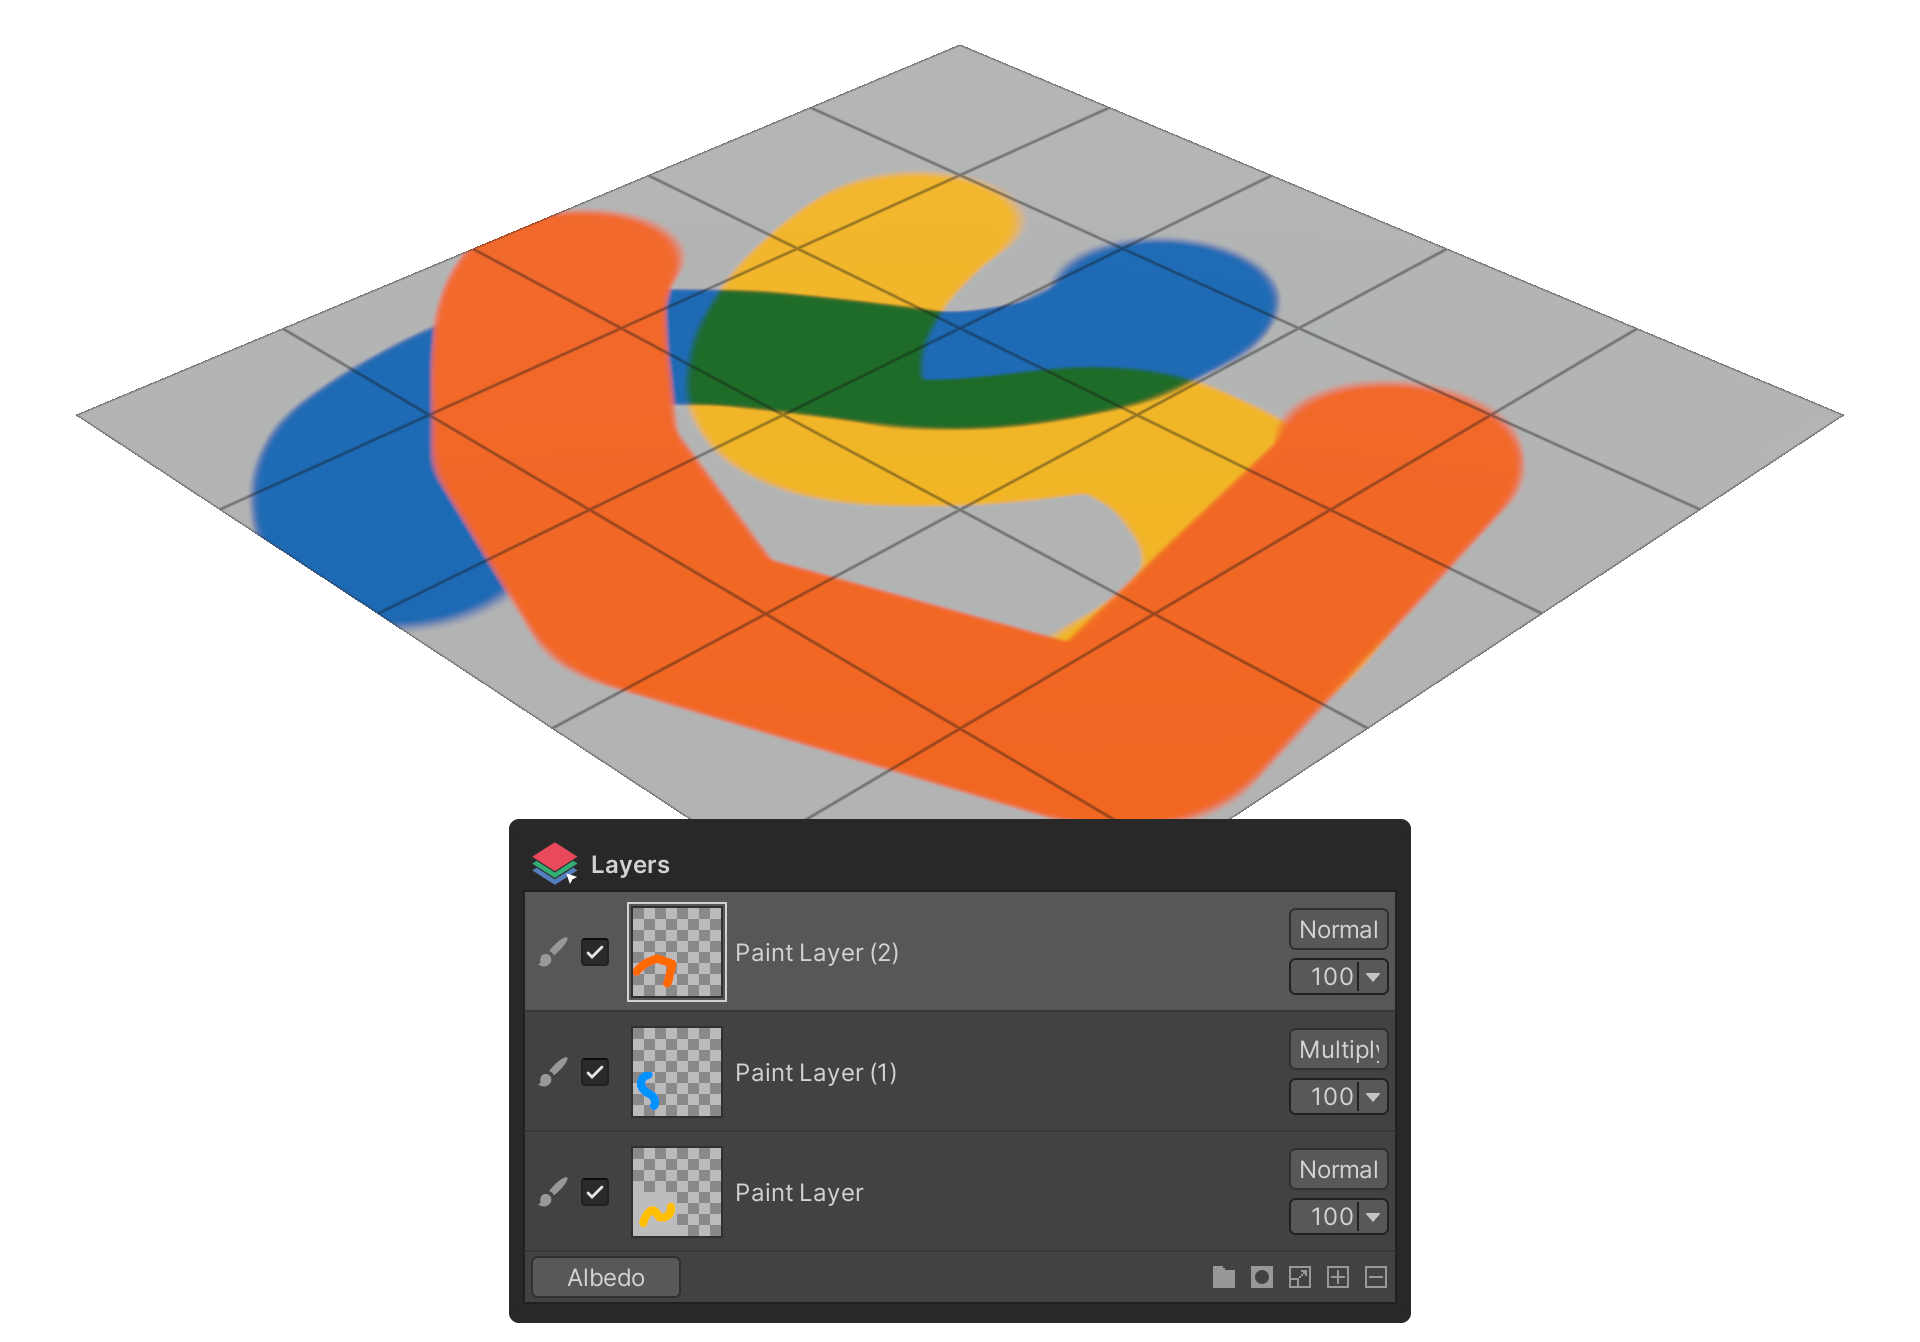
Paint layer is a layer that applies a map source by dragging or painting directly on the surface of the model, utilizing a brush-like tool. This layer is particularly useful when you want intuitive texture painting.
To create and use Paint Layer, follow these instructions:
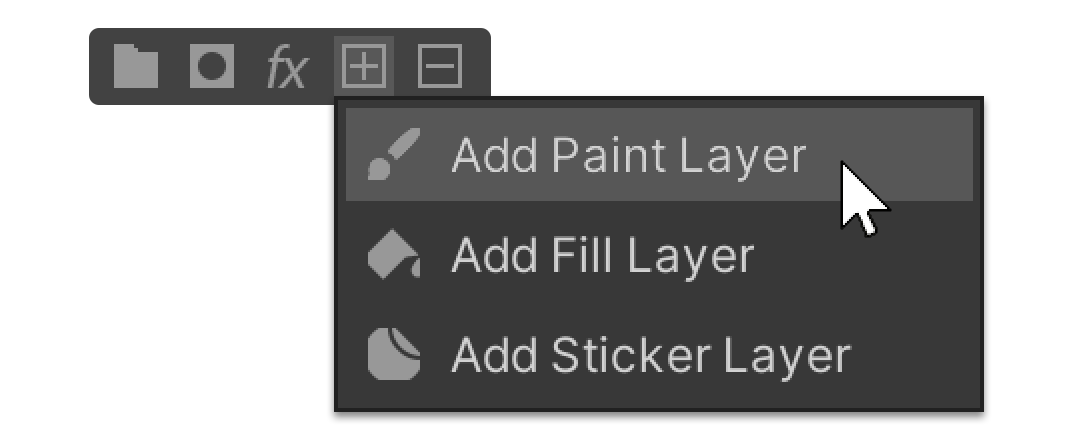
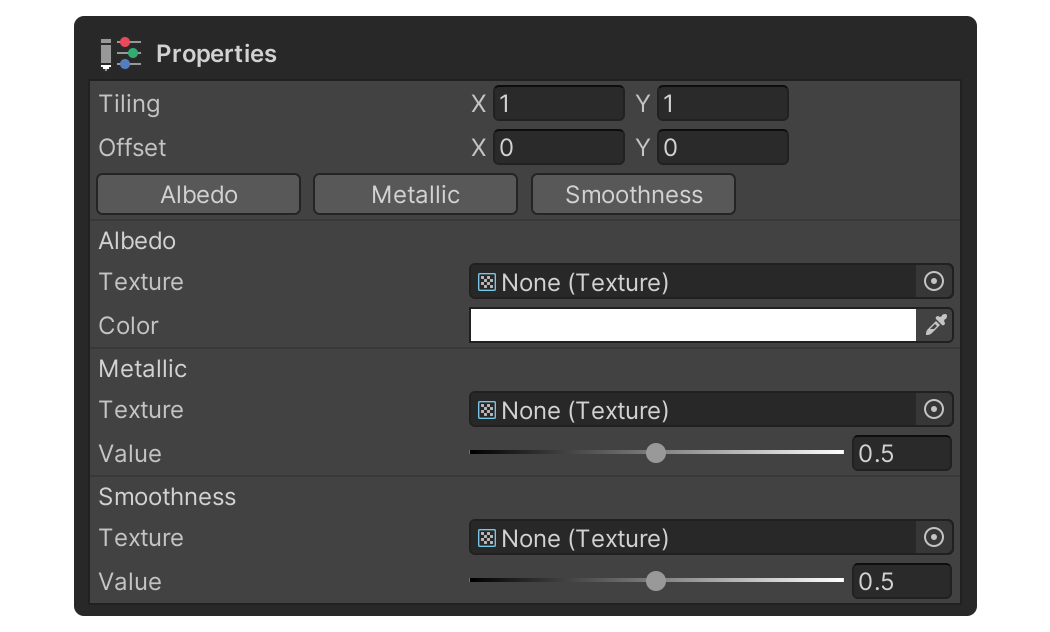
1. Select the Add Layer button.
2. Select the Add Paint Layer menu item to add a Paint Layer.
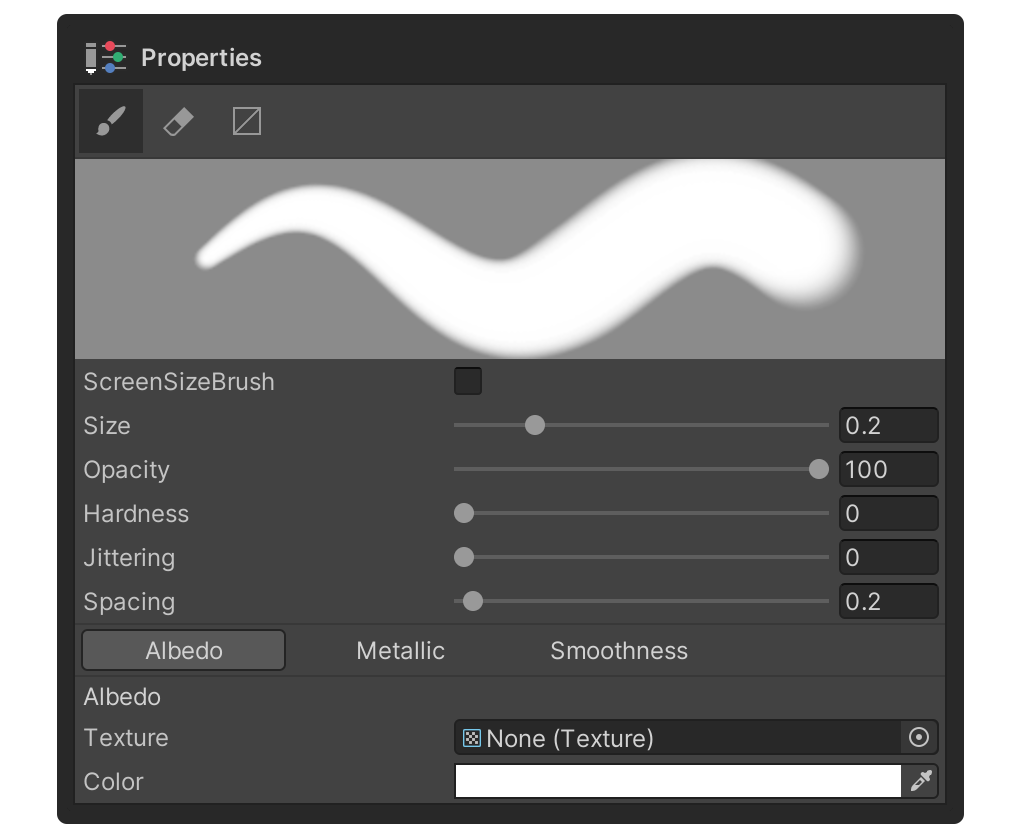
3. Change the color in the Color property in the Properties group.
4. Click and drag the model surface in the scene to paint the color.
Using a Fill Layer
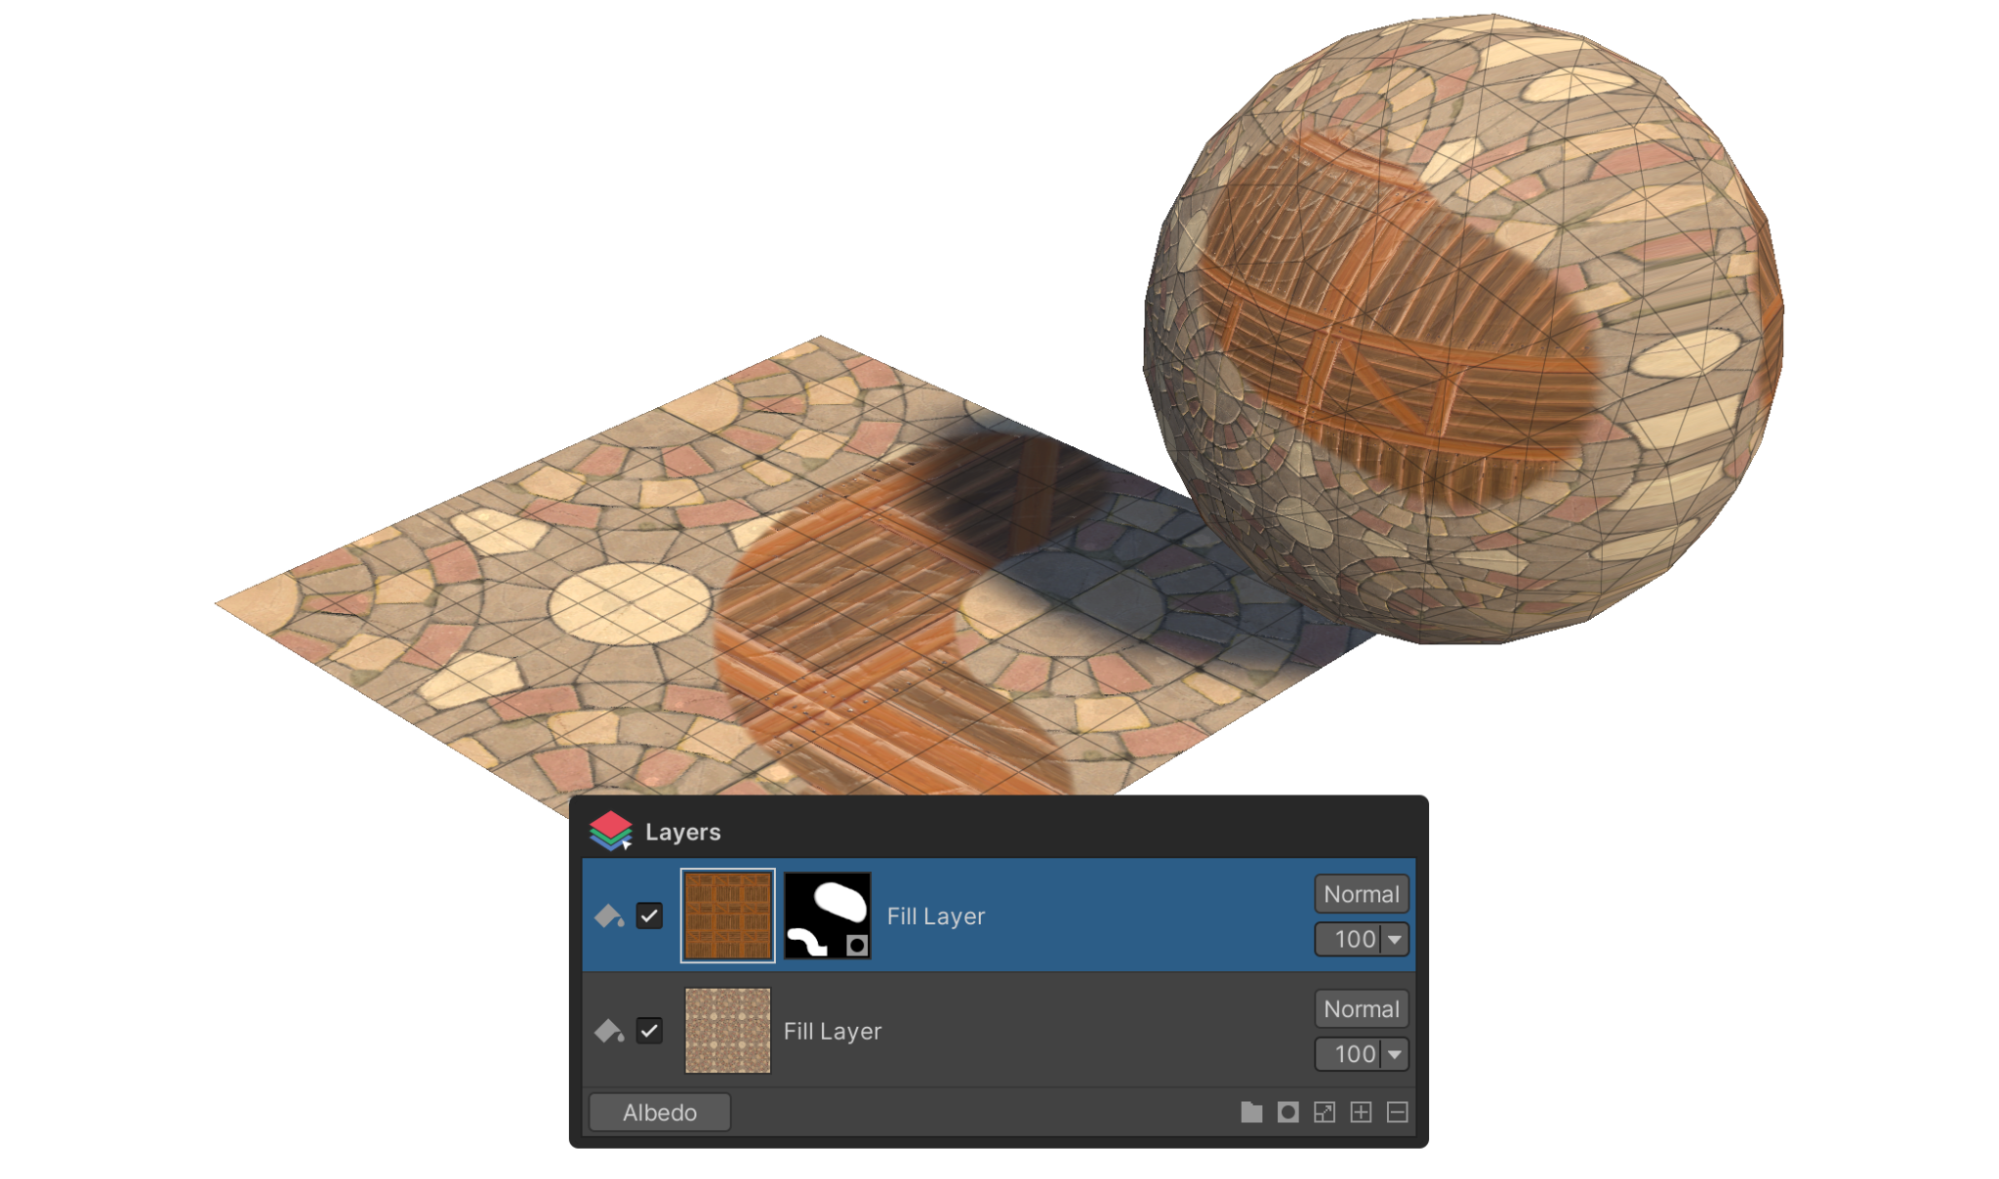
A Fill Layer is a layer that applies values from a map source to the entire model in bulk. This layer is especially useful when you want to quickly change the overall color or texture of a model.
To create and use Fill Layer, follow these instructions:
1. Select the Add Layer button.
2. Select the Add Fill Layer menu item to add a Fill Layer.
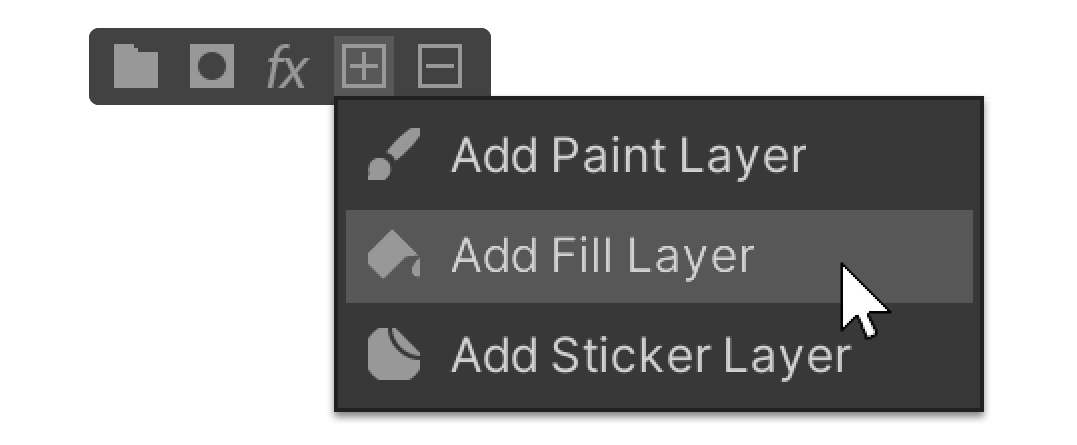
3. Change the color in the Color property in the Properties group.
Tip: Alternatively, you can add a texture in the Texture property.
Using a Layer Mask
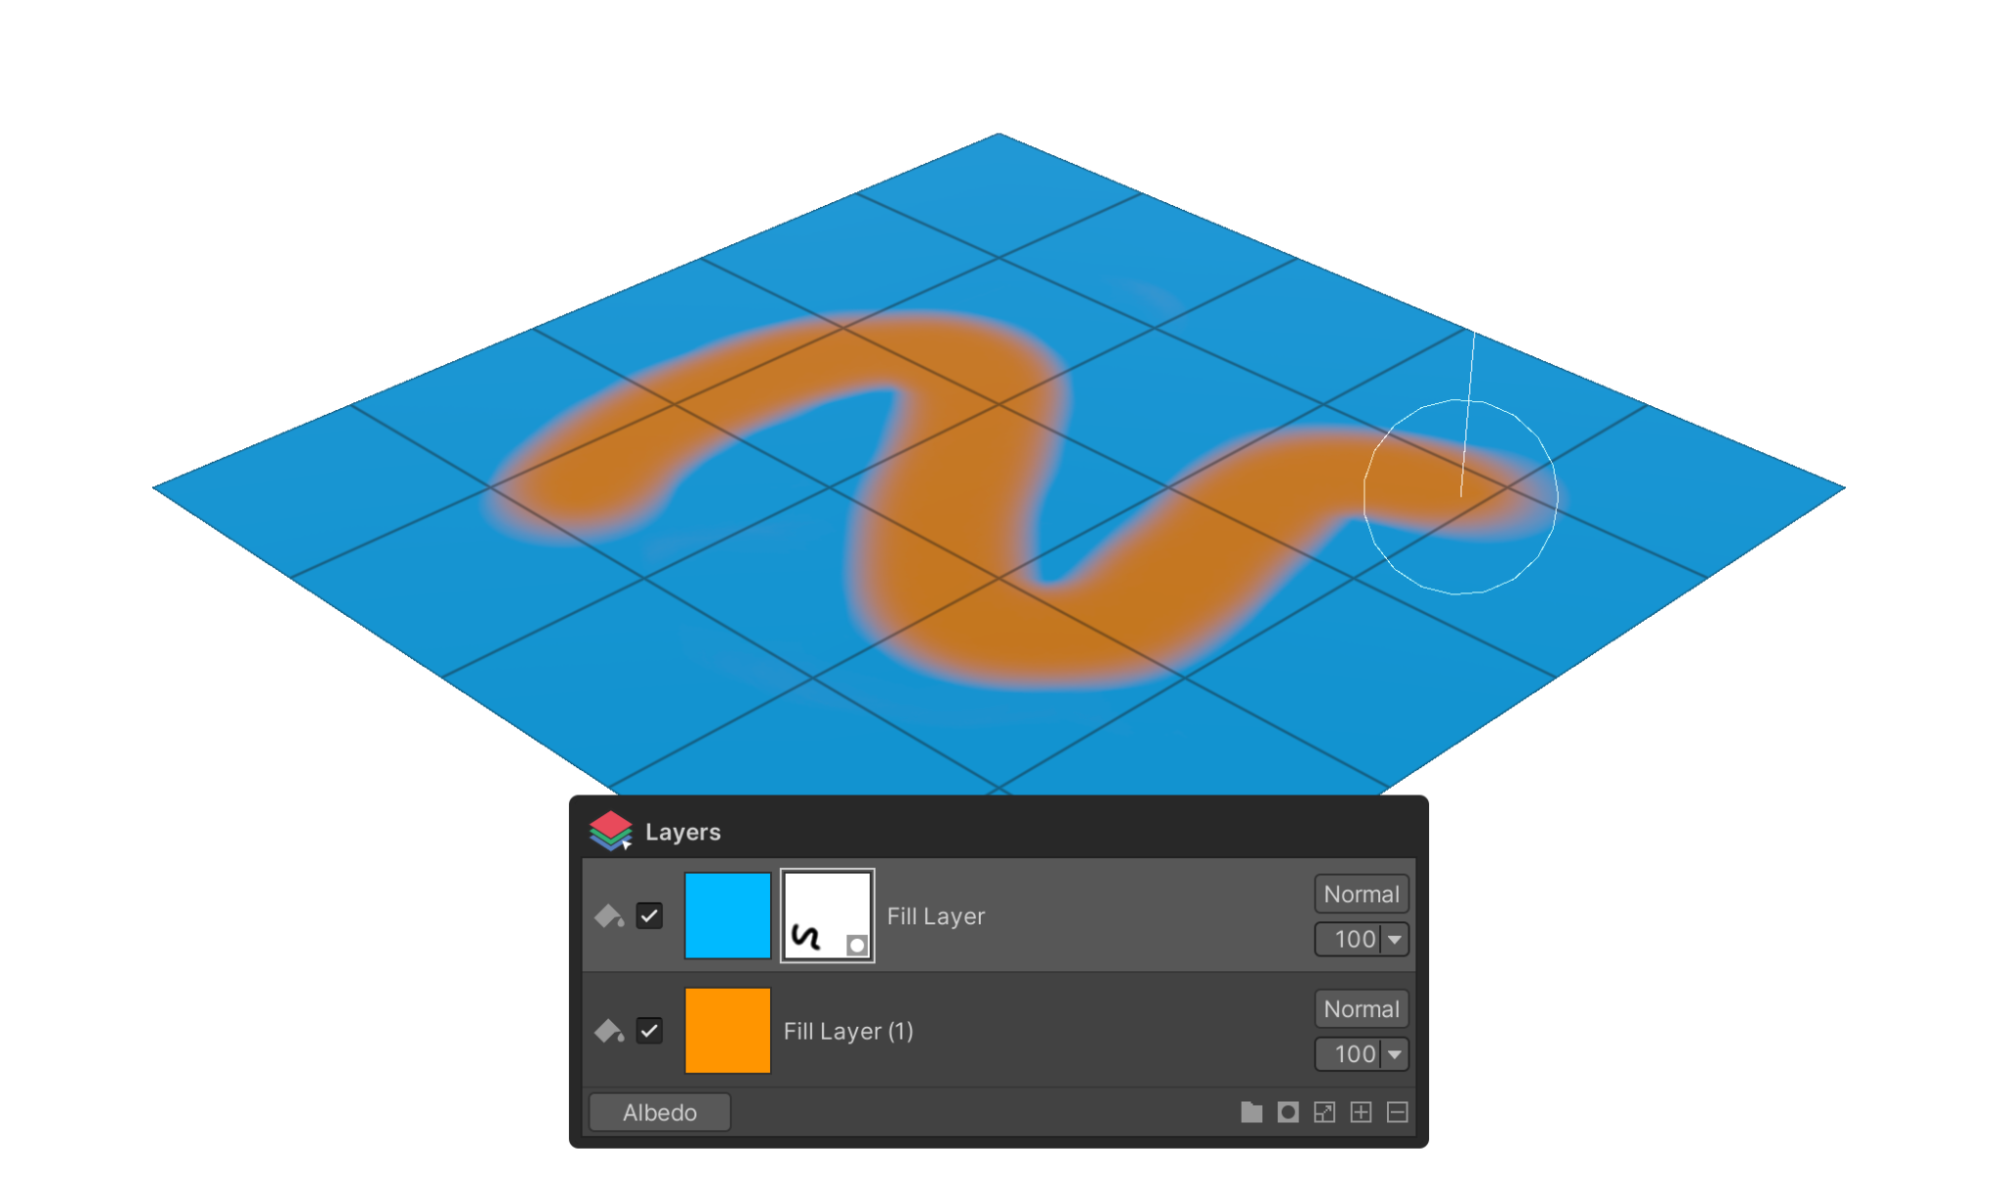
A Layer Mask is a layer that selectively masks certain areas of a layer to hide or show them. This is especially useful for complex textures or when you want to control the influence of different layers.
By applying a mask, you can hide only a portion of a layer, allowing for complex interactions with other layers.
To create and use a Layer Mask, follow these instructions:
1. Select the layer you want to add a Layer Mask to.
2. Select the Add Mask button.
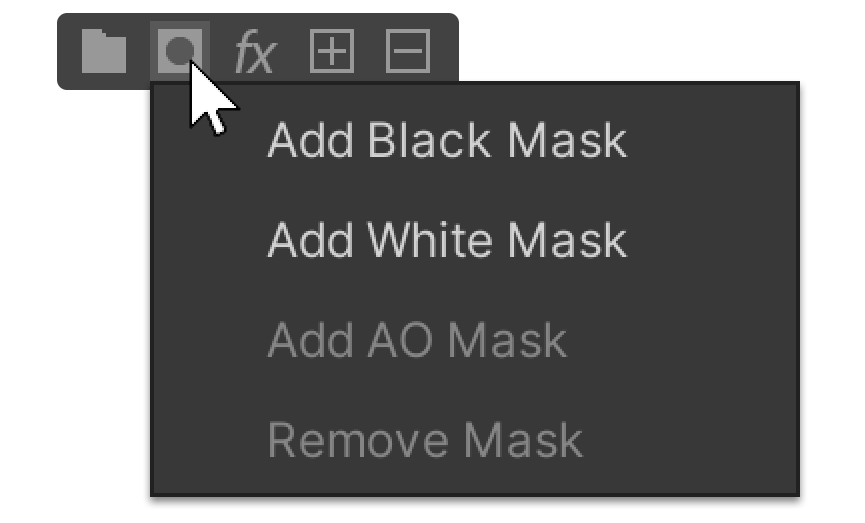
3. Select either Add Black Mask or Add White Mask.
A Layer Mask will then be added to the selected layer.
4. After selecting the Layer Mask, click and drag the model surface in the scene to apply the mask.
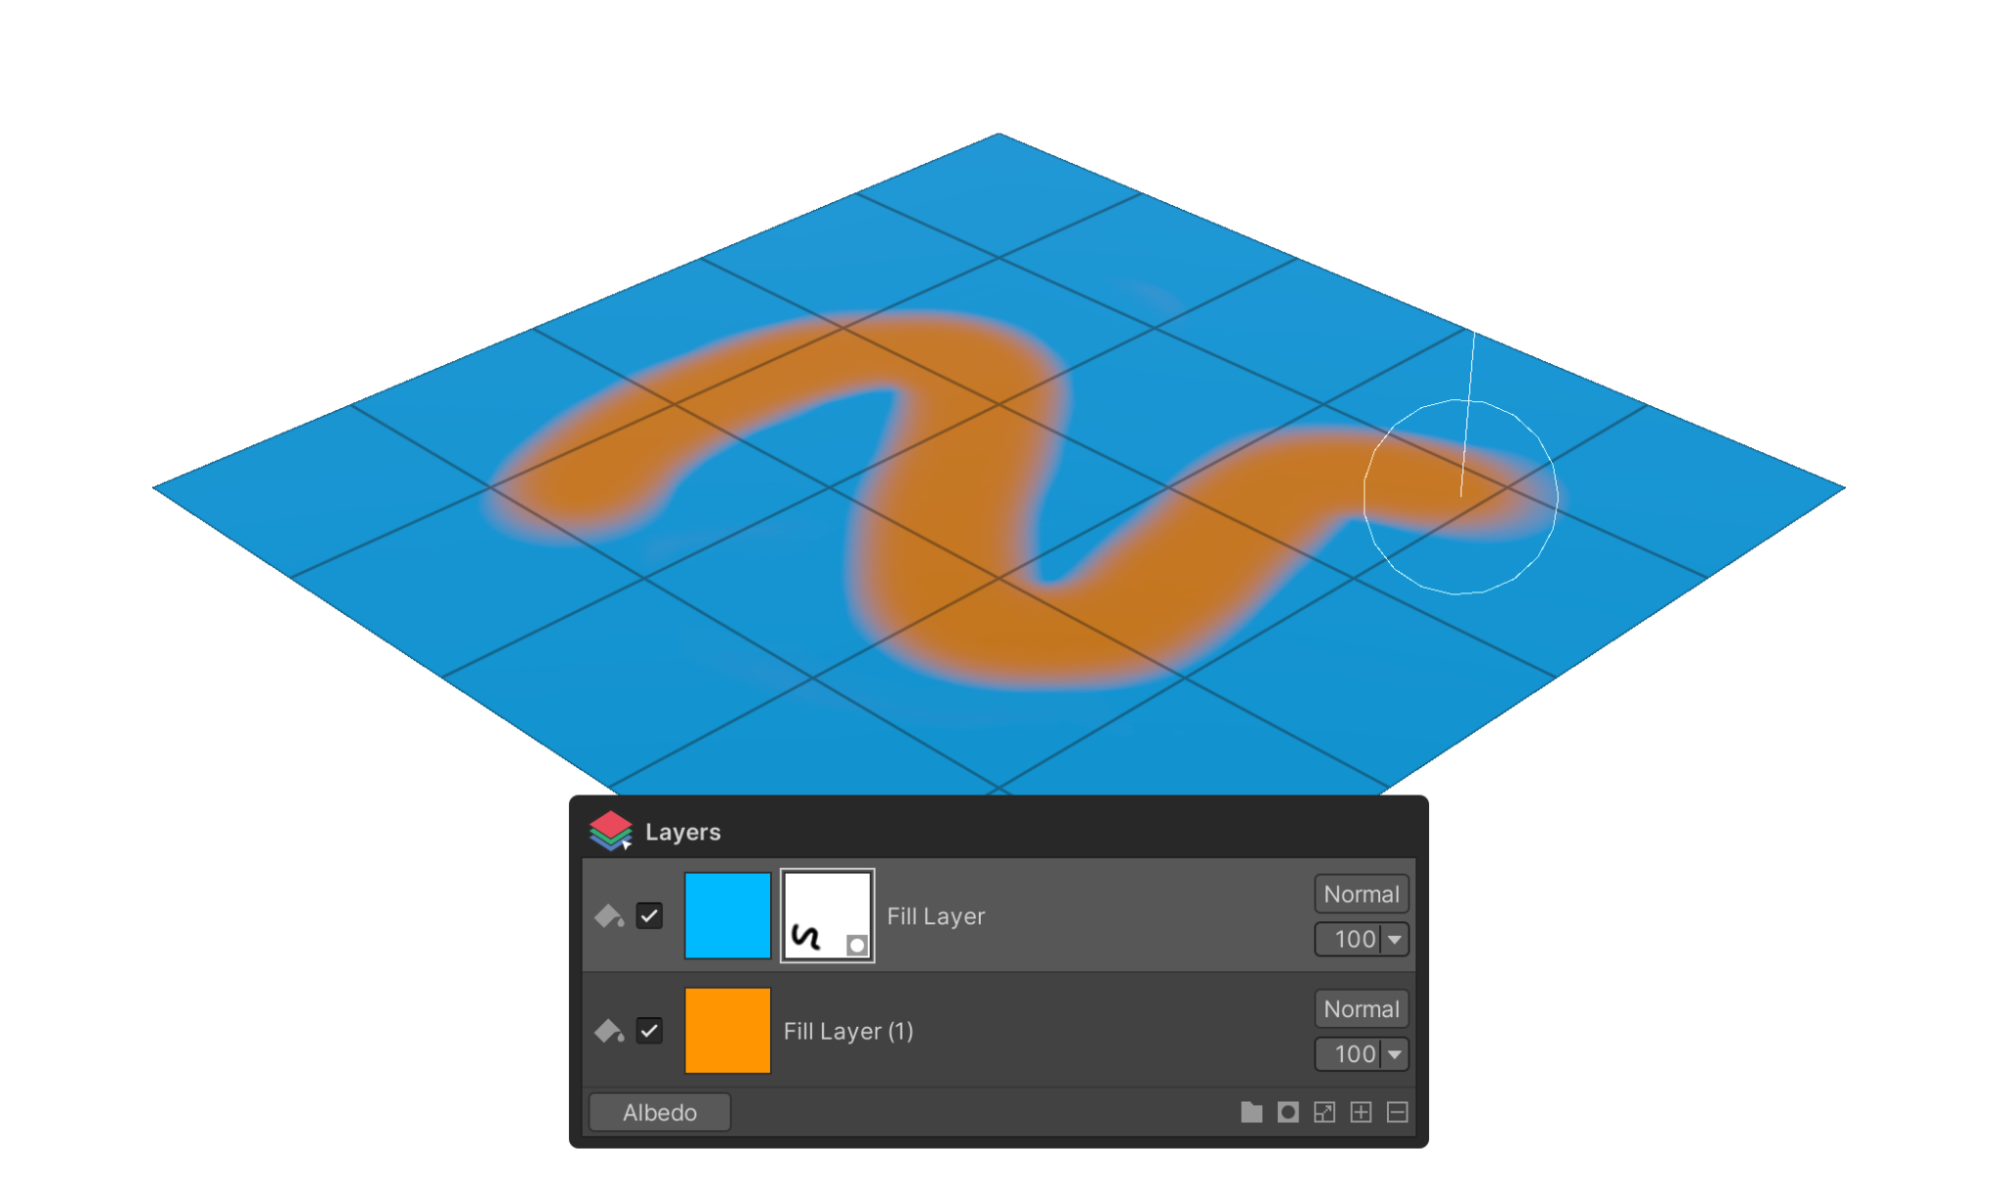
The Mask Value property determines the visible area. If you paint with white, which is 1.0, certain areas of the layer are visible. If you paint with black, which is 0.0, the painted area is hidden.
Using a Sticker Layer
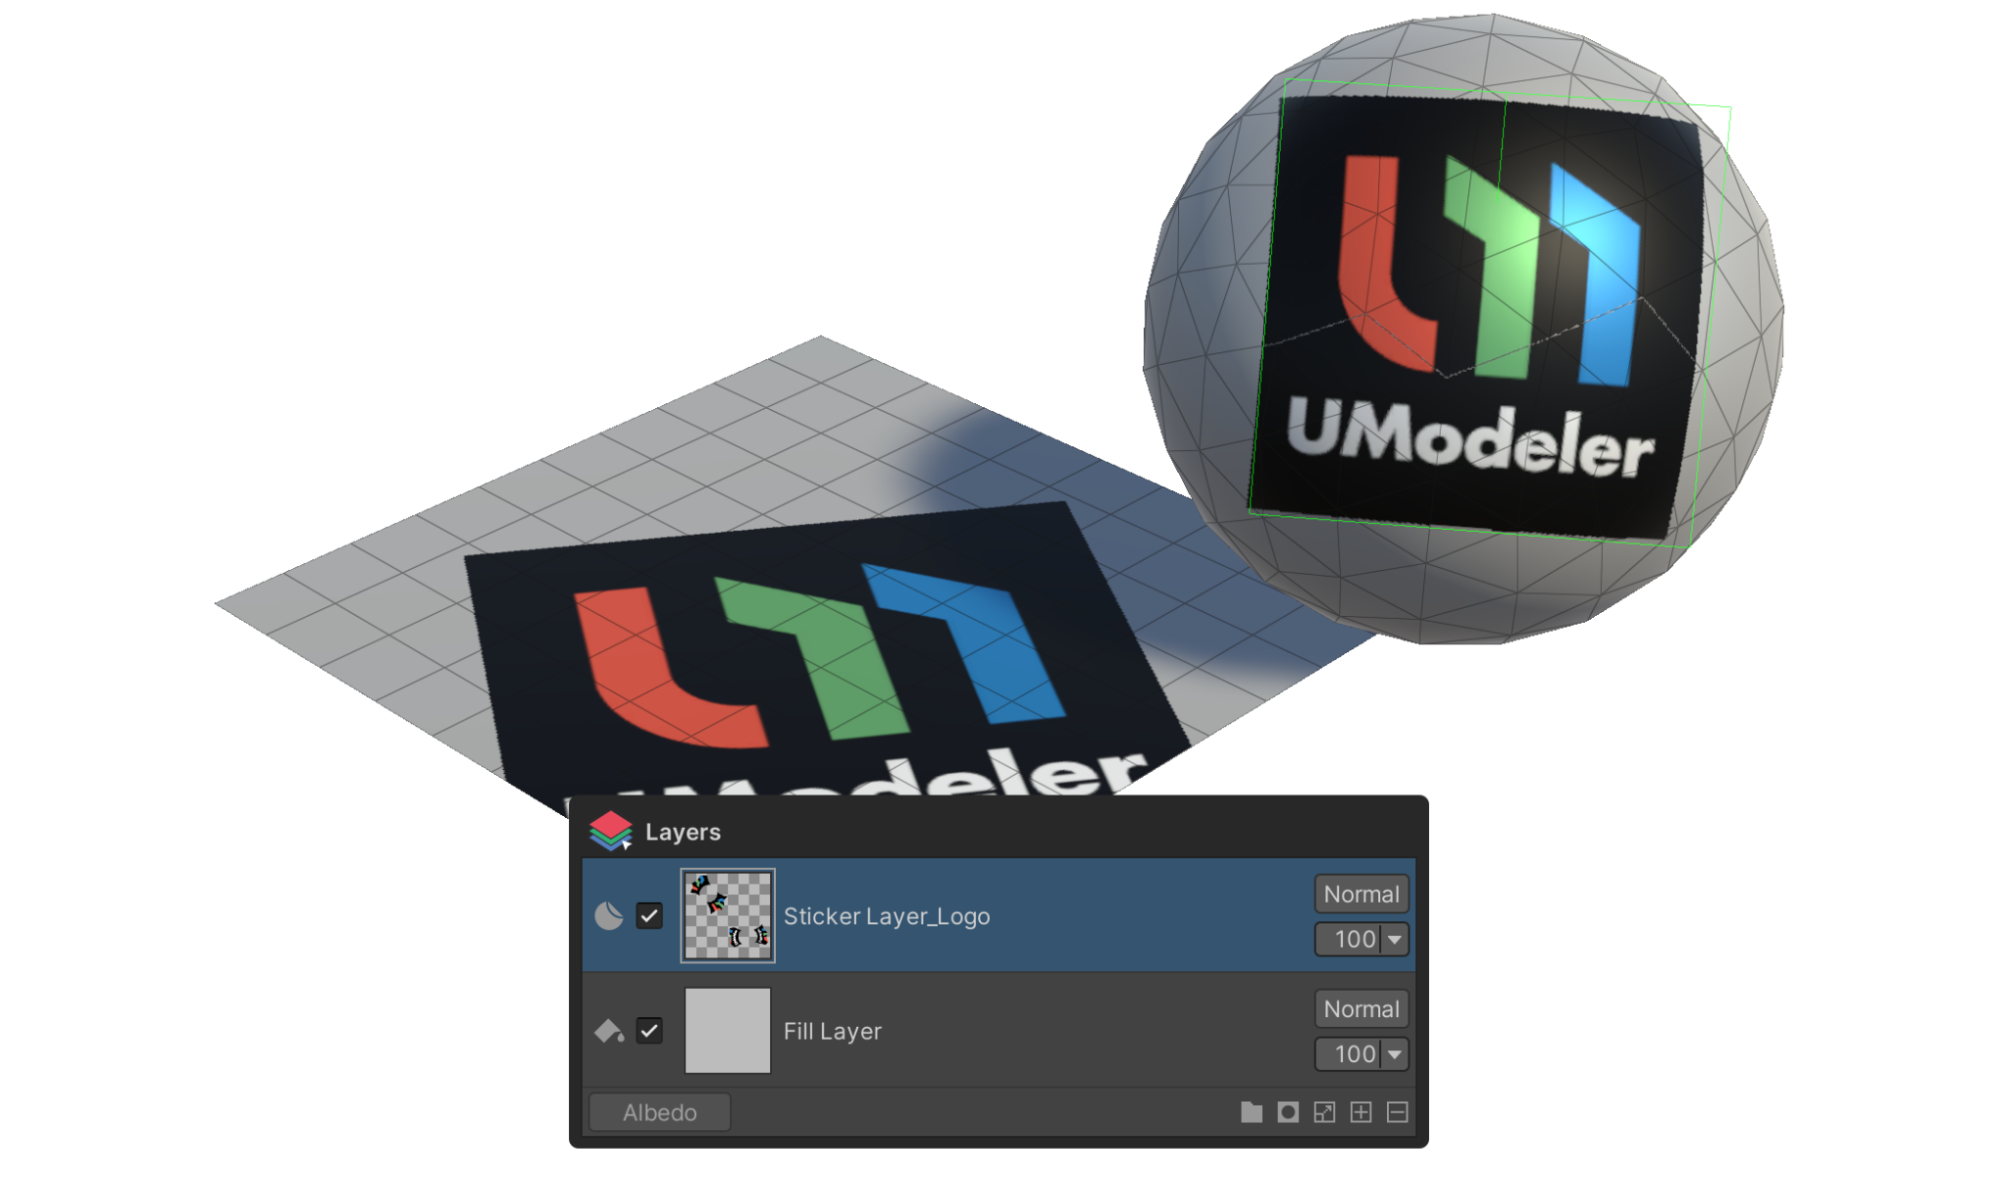
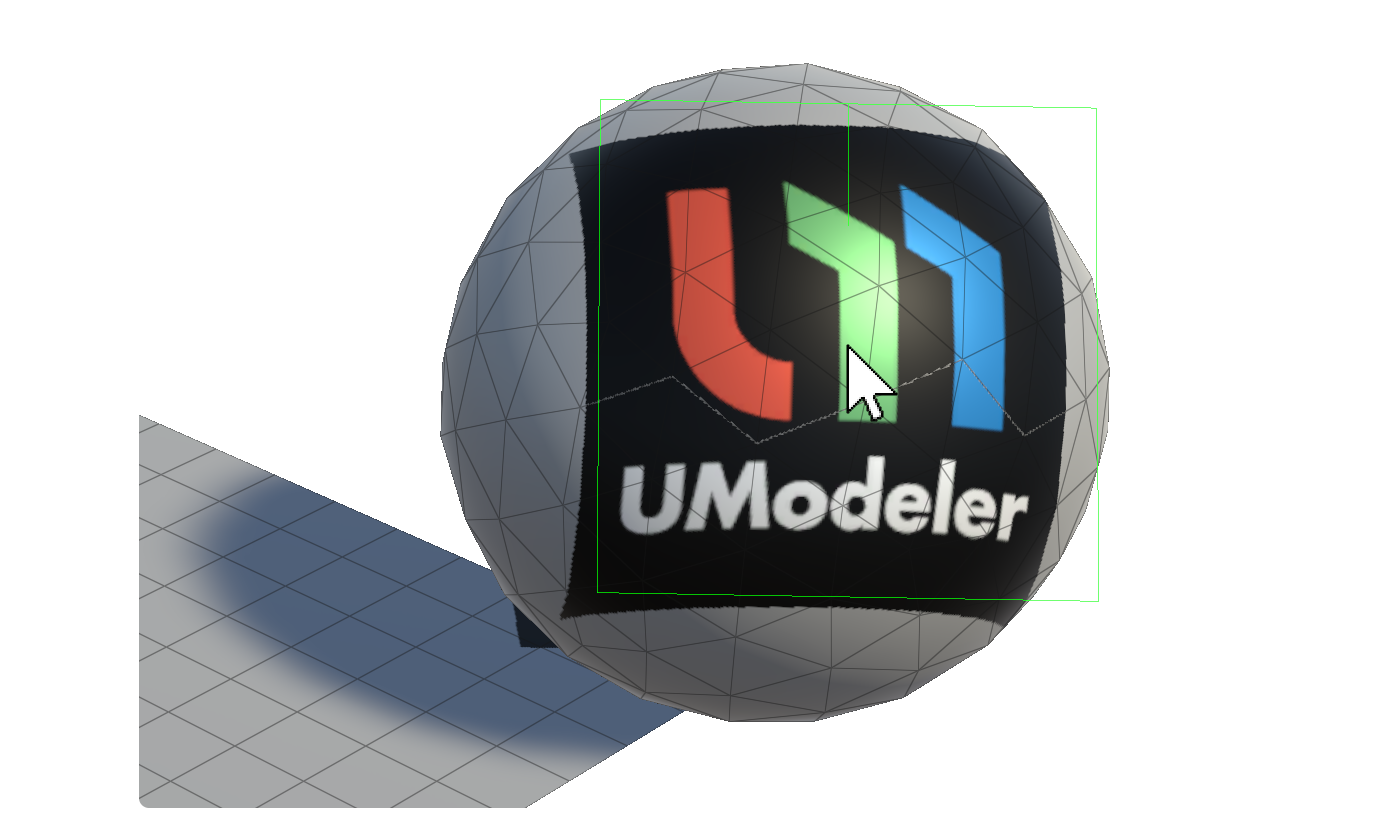
A Sticker Layer is a layer that works by sticking an image or texture to the surface of your model. This layer is useful for adding special decals, logos, or complex textured elements. You can directly select an image and attach it to your model, and adjust its size or position for detailed texture painting.
To create and use the Sticker Layer, follow the instructions:
1. Select the Add Layer button.
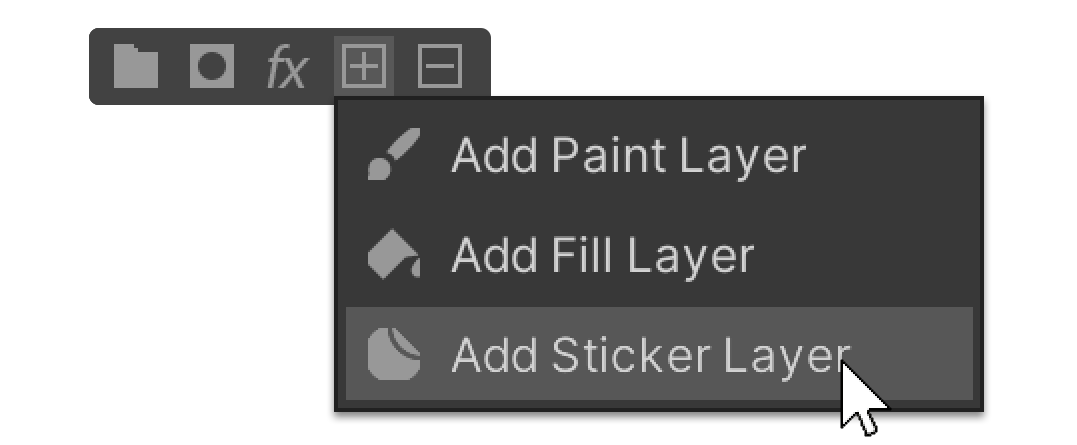
2. Select the Add Sticker Layer property to add a Sticker Layer.
3. Change the color in the Color property in the Properties group.
Tip: Alternatively, you can add a texture in the Texture property.
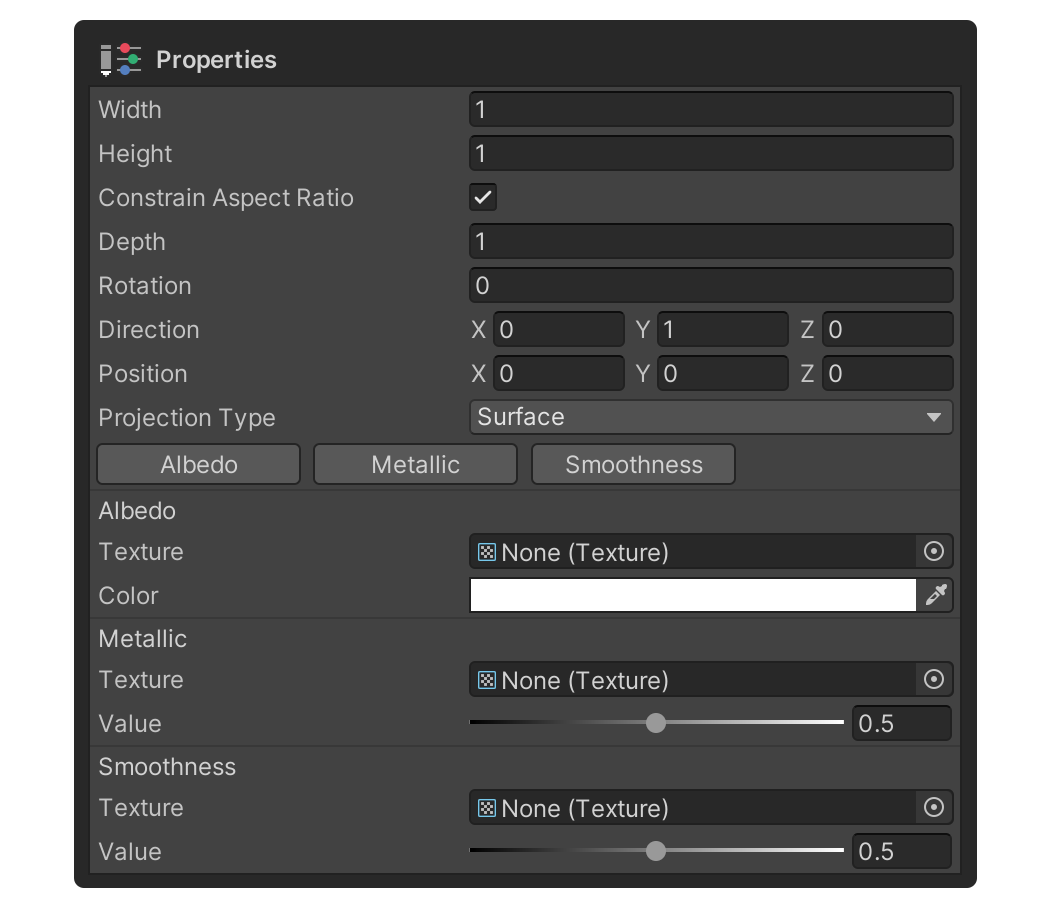
4. Apply the map source you set by selecting the model's surface.
7. Next steps
Great job! You've successfully completed the UModeler X tutorial series, mastering a variety of features like modeling, rigging, texturing, and UV unwrapping!
With the added knowledge of Painting 3D Mode, you can create more complex and detailed 3D content than ever before.