
Playground: Add gameplay elements
Tutorial
Beginner
+10XP
10 mins
(234)
Unity Technologies
In this tutorial, you’ll create obstacles for the ship to navigate around and collectable objects that will be used to give the overall game a goal. By the end of this tutorial, you will have completed your first game!
Languages available:
1. Overview
You’ve created a player for your first ever game, and added components for movement so your users can navigate around in the scene. You’ve created something playable, but it’s not really a game yet. In this tutorial, you’ll create obstacles for the ship to navigate around and collectable objects that will be used to give the overall game a goal. By the end of this tutorial, you will have completed your first game!
2. Add obstacles and collisions
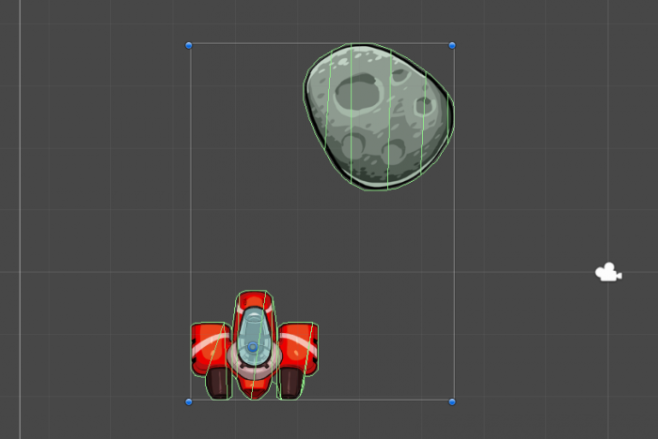
You’ll begin by adding obstacles to your scene in the form of asteroids. These asteroids will be objects that the ship can’t move through and will eventually damage the ship if they’re touched. To add an asteroid to your game, follow these instructions:
1. Navigate to the Assets > UnityTechnologies > Playground > Images > Asteroids folder and drag an asteroid of your choice into the Hierarchy.
2. Add a Rigidbody2D component to the Asteroid with the Add Component button in the Inspector.
3. Set the Gravity of the Rigidbody2D component to 0.
In order to allow the ship and the asteroid to interact with each other, you need to add a new component to both GameObjects: a PolygonCollider2D component. The PolygonCollider2D component allows GameObjects to collide (touch) other objects that also have a PolygonCollider2D component.
4. Select both the Ship and Asteroid, and in the Inspector, select the Add Component button and search for and add the Polygon Collider 2D component.
5. Playtest the game.
You will notice the ship can now push the asteroid around effortlessly. This should probably be a bit more challenging, since the asteroid is supposed to be a dense rock!
6. Exit Play mode, and set the Mass of the Asteroid’s Rigidbody2D component to 10.
Continue to playtest and fine tune until you’re satisfied with the mass of the Asteroid.
3. Add a health system
Now let’s make this asteroid a threat by creating a health system for the ship and giving the asteroid the ability to apply damage.
1. Navigate to Assets > UnityTechnologies > Playground > Scripts > Attributes and locate ModifyHealthAttribute.
2. Drag ModifyHealthAttribute onto the asteroid.
The asteroid is now able to deal damage to the ship, so you’ll need the ship to be able to detect this damage. To do that, you’ll use another script called HealthSystemAttribute.
3. Still in the Attributes folder, locate HealthSystemAttribute and apply it to the Ship.
This health system script not only gives the player health, but it also allows you to set the initial amount of health. Now that the asteroids can deal damage and the ship can receive the damage dealt, you’ll create a prefab of the asteroid so that you can add more challenges to the scene.
4. From the Hierarchy, drag the Asteroid you have configured into the Prefabs folder to make it a prefab.
5. Add more Asteroid prefabs to your game scene to create an asteroid field.
If you don’t know what a prefab is and want to know more, you can read about them in the Manual, or watch a quick video tutorial.
4. Add the user interface
While the ship now gets damaged when it collides with an asteroid, you don’t have any feedback when it gets hit. Let’s add a user interface (UI) to visualize the player’s health to fix this issue.
1. Switch from the Scene view to the Game view.
2. Navigate to Assets > UnityTechnologies > Playground > Prefabs folder and drag the UserInterface prefab into the Hierarchy.
A UI should now appear in the Game view with score and health counters!
3. Playtest the game.
As you play the game now, you’ll discover that when the ship hits an asteroid, one point of health is subtracted from the ship! If the ship hits too many asteroids, it’s game over!
Now that the ship has health, it’s time to test again to check if you can actually navigate around the asteroid field without hitting too many of them. The game has to be difficult, but not too difficult! By repositioning the asteroids and testing the game, you are now basically working on the game balance and effectively doing level design.
5. Add a goal and win condition
So what is this game about? Let’s say you want the ship to collect some stars without crashing into the asteroids. Once you have collected all the stars, you win the game! But if you crash into the asteroids too many times, it’s game over!
Set up the goal
To add a star and make it collectable, follow these instructions:
1. Navigate to the Assets > UnityTechnologies > Playground > Images > GameElements folder and drag the Star into the Hierarchy.
2. Navigate to Assets > UnityTechnologies > Playground > Scripts > Attributes and add a Collectable script to the Star.
3. When prompted to add a Collider2D, select Polygon.
The star is now a collectable item, so getting one will award one point to the player. Notice that the PolygonCollider2D that was added to the star was automatically set to Is Trigger, meaning that the collectable functionality will work immediately.
Triggers are a special type of collider that doesn't prevent other objects from intersecting with a GameObject, but instead detects when another object collides with it. You can write scripts that are "triggered" to run when this collision occurs.
For instance, triggers are very useful when you need to detect if a player has reached the end of the level. Place a trigger just before the exit or end point of a level, and when the player touches it, you display a “You Win” message. The player doesn’t see a visual indicator that a trigger has been entered, but the trigger provides you (the developer) with the logic to detect the winning condition.
Add the win condition
If you play the game now, you will notice that the ship collects the star when the two collide. Now, let’s add a win condition so that the player wins the game when they collect all of the stars! At this point, you might want to make the star a prefab and then duplicate it as many times as you think necessary.
1. Convert the star into a prefab by dragging the GameObject from the Hierarchy into the Prefabs folder.
2. Add more of your star collectables and distribute them throughout the scene.
3. Select the UserInterface GameObject in the Hierarchy, and in the Inspector, set the UI Script script’s Score To Win property to the total number of stars in your scene.
If your Score To Win value doesn’t match the number of stars in the game, then you might actually create a game that’s impossible to win!
4. Playtest your game.
If you get all the stars, a message should appear that says "Player 1 wins!".
Congratulations: you have just made your first game. Good job! Keep tweaking it until you’re satisfied with the controls, the difficulty, and the level layout.
6. Next steps
Now that you have an initial grasp of Unity and the Unity Playground, you can go ahead and make more complex games with it. As a first step, check out Playground concepts to understand it better (covered in the next tutorial).
The Playground is meant to be flexible, so come up with your own game genres or copy some existing game, anything is fine!
Note: When learning how to make games, copying the gameplay of games from the 70s and 80s (like Asteroids, Arkanoid, Space Invaders, Frogger, and so many others) is usually a good idea, because they were simple. Then as you improve, you can add more and more details and refine the interaction.
If you need inspiration, open the Examples folder and launch one of the games. Inspect the GameObjects and see how we have made those, then try and create something similar.