Playground: Get started on your first game
Tutorial
Beginner
+10XP
10 mins
603
Unity Technologies
Unity Playground removes the need to code by providing an array of one-task components that are easy to use and mix. In this tutorial, discover the basics of using this project to make your own simple games.
Languages available:
1. Overview
Unity Playground removes the need to code by providing an array of one-task components that are easy to use and mix. By combining these components together, you can create physics-based 2D games that span several genres. Unity Playground can also be used as an introduction to game design or level design.
The Playground is intended to be very simple to get into, and you can get acquainted with the basics in less than 30 minutes.
In this first tutorial, you’ll set up your project to work with the Unity Playground assets and get started on your first game – a very simple action game, featuring a spaceship flying around and trying to avoid some asteroids.
2. Before you begin
New to Unity?
If you’re new to Unity, welcome! The Unity Essentials learning pathway has been designed to help you get set up and ready to create in the Unity Editor.
Update the Unity Hub
Before you begin to set up your Unity project, consider updating your Unity Hub to the latest release. If you are using an older version of the Hub, there may be differences between the guidance provided and your experience.
Review the Unity Editor basics
If you need to refresh your memory of the Unity Editor basics, you can take a moment to review Explore the Unity Editor at any time.
Set up your Unity project
To set up your Unity project, follow these instructions:
1. In the Unity Hub Projects tab, select New project.
2. Set the Editor version to 2022.2 and select the 3D Core template.
3. Name your project and save it somewhere safe on your computer.
4. Select Create project and let Unity compile and open the project.
Download the Playground assets
Unity Playground is a complete project available for free on the Unity Asset Store. To access it, you will add it to your Assets collection and then launch it in your Unity project. To complete this process, you will need to have a Unity ID. If you haven’t set one up already, you can learn how to in Unity plans: What’s right for me?
To download the Playground assets, follow these instructions:
1. Navigate to the Unity Playground Asset Store page by following this link.
2. Select Add to my Assets, and if prompted, accept the Asset Store Terms of Service and EULA.
3. When prompted, select Open in Unity.
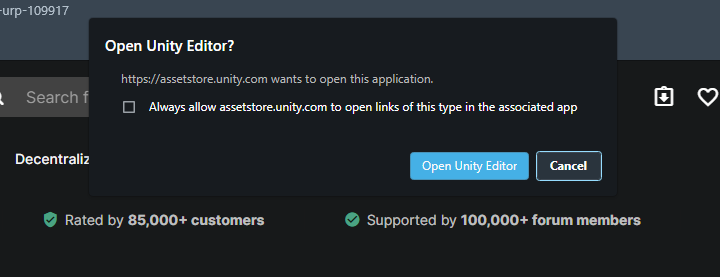
Note: If the prompt to launch the Unity Editor doesn’t appear, your browser may be blocking the pop-up. Configure the page to allow popups and select the Open in Unity button again.
When you return to the Unity Editor, you should see the Package Manager has launched with Unity Playground automatically listed.
4. Select the Download button in the Package Manager.
5. Once the assets have completed downloading, select Import.
6. At the Warning dialog, select Import.
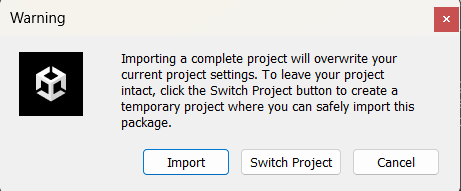
7. If you receive a warning about additional Package Manager dependencies, select Install/Upgrade.
Unity Playground is a fully configured project, not just a collection of assets. As such, it comes complete with pre-configured project settings that may differ from the default project settings. Whenever you import a complete project from the Asset Store, Unity will display this popup as a warning in case you have project settings that you want to keep. In this case, you created this project specifically for Unity Playground, so you don’t need to keep any of the existing settings.
When the import is complete, you’re ready to start building!
3. Create the player controller
The player is arguably the most important part of what you create, since it’s how the user will interact with the game.
1. In the Project window, select Assets > UnityTechnologies > Playground > Images > Spaceships and select a spaceship design of your choice.
2. Drag your selected spaceship directly into the Hierarchy window.
Because it has been imported as a sprite, Unity will create a GameObject of the spaceship for you. This is going to be the player, so you’ll need to rename the spaceship and set the tag to reflect this fact.
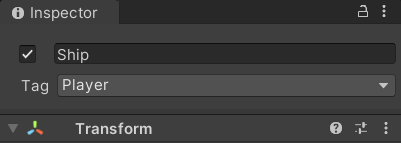
3. Select the spaceship in the Hierarchy, and in the Inspector, rename the spaceship to “Ship”.
4. Set the Ship GameObject’s tag to Player.
4. Move the player
Time to make the ship move. You’ll need two components: A Move script to provide the interactivity and a Rigidbody2D script to make sure that the ship follows the laws of physics.
1. Navigate to the Assets > UnityTechnologies > Playground > Scripts > Movement folder, and locate the Move script.
2. Select the Ship in the Hierarchy and, from the Movement folder, drag the Move script into the Inspector.
Note: You can also select the Add Component button in the Inspector, enter “move” in the search box, and select the Move script.
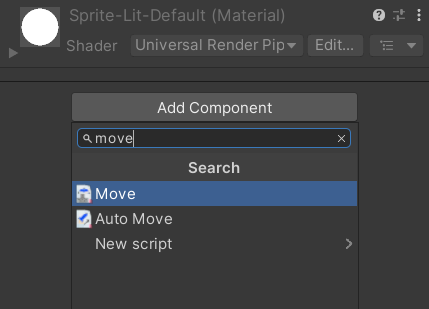
You will notice that as soon as you add the Move script, a Rigidbody2D component is also added. This is because the Move script requires the Rigidbody2D component to work and automatically adds one to the GameObject if there isn’t one already present.
Hint: It might happen that the icons for the Playground scripts are huge, covering your graphics.
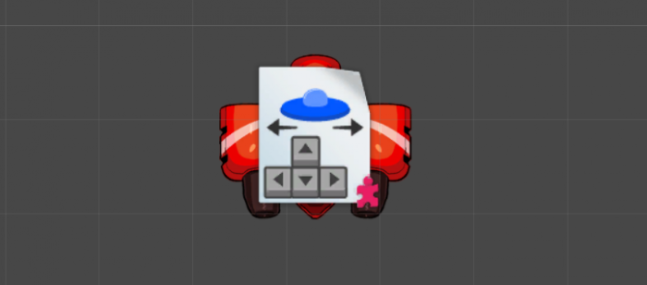
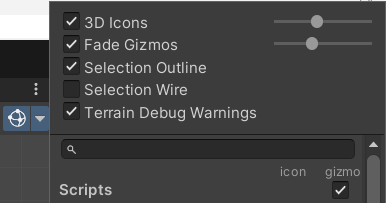
If this happens, you can reduce the size of the script icons by using the Gizmos dropdown located at the top right in the Scene view. Drag the 3D Icons slider to the left until the icons are an appropriate size.
5. Tune the physics
Next, let’s tune the physics values of the ship. The physics values applied to the ship determine how the ship will behave when you try to move it in your game. To adjust the physics values of the ship, follow these instructions:
1. On the RigidBody2D component of the Ship, set the Gravity to 0.
Setting the gravity to 0 will prevent the ship from falling down.
2. Select the Play button to playtest the game. Use the arrow keys on your keyboard to control the Ship.
3. Exit Play mode.
Note: If you prefer to control the ship using the WASD keys instead of the arrow keys, in the Move script component in the Inspector, set the Type of Control option to WASD.
You probably noticed that the ship drifts a lot, which makes it hard to control. This can be fixed by adjusting the Friction on the Rigidbody2D component.
4. Select the Ship, and in the Inspector, set the Friction of the Rigidbody2D component to 10.
If you playtest now, you will discover that the drift is gone, but the ship is much slower than it was before. The reason for this is that the force that was moving the ship is now countered by the friction that is applied to it. You can counteract this by adjusting the Speed of the ship.
5. With the Ship still selected, set the Speed of the Move component to 8.
6. Playtest the game.
The ship is now much easier to control. You just made your very first gameplay tweak! Congratulations: you’re a game designer!
Hint: If you edit component values while in Play mode, you will lose your changes once the game is stopped. Remember to make changes only if you are not in Play mode! You should only make changes in Play mode if you are testing temporary values that you don’t mind losing.
6. Next steps
In this tutorial you created your project, imported Unity Playground, and created the player for your first game! In the next tutorial, you’ll add the gameplay elements to your game, including obstacles and collectible items.