
Post Processing Effects: Chromatic Aberration
Tutorial
Beginner
+0XP
20 mins
(15)
Unity Technologies
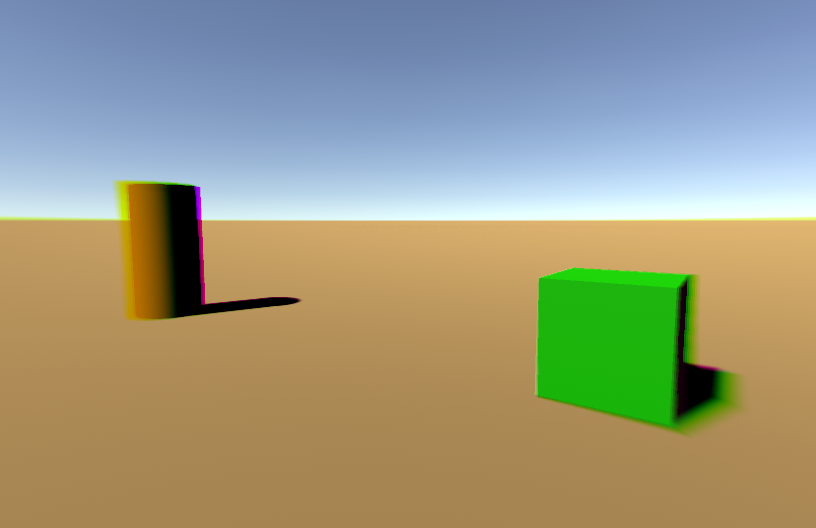
Chromatic Aberration makes your scene appear as though it were recorded through a lens that is unable to converge light at the edges. This is common in low-end lenses, and is a quick and easy effective way to give your scene that “shot on glass” look.
Languages available:
1. Post Processing Effects: Chromatic Aberration
This tutorial has been verified using Unity 2019 LTS and Post-Processing 2.3.0
Chromatic Aberration makes your scene appear as though it were recorded through a lens that is unable to converge light at the edges. This is common in low-end lenses, and is a quick and easy effective way to give your scene that “shot on glass” look.
2. Adding Chromatic Aberration
1. Select a Post-process Volume, click Add effect… in the Inspector, and select Unity > Chromatic Aberration (Figure 01).
3. Chromatic Aberration Properties
Spectral LUT - A Spectral lookup table (LUT) is an optional texture used to shift the hue of the effect, without affecting the rest of the scene. Included with the Post Processing V2 Package is a set of four 3x1 textures (Figure 03).
Intensity - Controls the strength of the effect, with stronger blurring toward the edges of the frame.
Fast Mode - Enables a quicker, but lower fidelity, version of the effect that leaves Scene geometry unblurred, but still applies the color fringing. Compare the edges of the cube closest to the edge of the frame between the next two images (Figures 04-05).
4. Next Steps
In this tutorial, you learned how to apply Chromatic Aberration to a Scene. Chromatic Aberration is a simple but effective way to give the impression that your scene is being viewed through a physical camera lens. Try creating your own Spectral LUTs with your favorite colors, or exploring non-cinematic uses of Chromatic Aberration.