
Program a visual script
Tutorial
Beginner
+10XP
15m
(3979)
Unity Technologies
Once you have your Visual Scripting work area set up, you’re ready to explore the elements of Visual Scripting, called nodes, and learn how to add and arrange them into a logical flow. By the end of this tutorial, you’ll be able to:
- Define “node” in Visual Scripting
- Use context menus in the Graph window, including the Fuzzy Finder
- Use the Fuzzy Finder to create a node in a Visual Script
- Identify the parts of a node: heading and icon, data type indicators, flow arrows, inputs, and outputs.
- Read the Graph Inspector to interpret a node
- Explain the meaning of a dimmed node
- Toggle the Dim feature of the Graph window
- Connect nodes with flow arrows and connectors
- Change inline values on a node
Languages available:
1. Overview
In the previous tutorial, you created a new Graph using the New button in a Script Machine component. In this tutorial, you will program your visual script, creating a logical flow that changes a GameObject in your Scene.
2. Start and Update
Because you used the New button in a Script Machine component, the Start and Update events are already included in your Graph. (When you create a new script component using C#, the Start and Update methods are included in the same manner.)
Each rectangular node in your graph is called a unit. A unit is an instruction or an event (something that happens). Sometimes a unit is referred to as a node.
In this tutorial, we will work with the Update event, which is triggered (runs) for each frame (screen update) that occurs in Play mode. Your Graph will rotate the cube a certain number of degrees per frame.
The Start event is triggered once when Play mode begins. The visual scripts in this tutorial won’t use this event. Delete the Start unit by selecting it, and then selecting the Delete key.
3. Display the Fuzzy Finder
To add units to your Graph, right-click on the Graph window background. The Unit context menu appears — it is nicknamed the Fuzzy Finder.
The Fuzzy Finder is a multi-level menu containing every type of unit, including the entire Unity Scripting API! With the Fuzzy Finder, you can search for any unit by name, or select it based on its category.
4. Find the unit you need
Finding the unit you need will require some familiarity with the Unity API, but you will gain that familiarity through experience. For this task, the unit we need is called “Transform: Rotate.”
Enter “rotate” in the search bar of the Fuzzy Finder.
There are several “”Transform:Rotate” units to choose from. These are called overloads. Each overload of the same unit does the same thing, but each one requires a different set of input parameters. For this exercise, select Transform: Rotate(X Angle, Y angle, Z angle). This unit controls the Rotate settings on the Transform component of the GameObject.
5. Examine a unit
Let’s take a close look at this new unit. Select the unit to examine it.
- This unit has a gray heading, indicating that it is an instruction. (You’ll see a few other colors to help you identify units in a Graph.)
- The red, blue, and green Rotate symbol is one of many unit indicators to help you and others to interpret your Graph.
- Self means that this unit controls the GameObject attached to this graph via a Machine.
- The flow arrows indicate the order of flow from unit to unit. Soon, you will connect these to indicate the order in which your graph will run.
- The circles on the left side of the unit are inputs. You will also see circles on the right side of other units, which are outputs. These are used to move values and objects from unit to unit.
The symbols next to X Angle, Y Angle, and Z Angle are object type indicators for each input. In this case, a blue dot signifies a floating-point number. (We will cover object types later in this project.)
6. Consult the Graph Inspector
When you select a unit, detailed information appears in the Graph Inspector. The Graph Inspector provides you with detailed information about the selected unit in your graph.
7. Configure a unit
When a unit is not yet connected to a working flow, it will be dimmed unless it is selected. You can control this feature by turning the Dim button on and off.
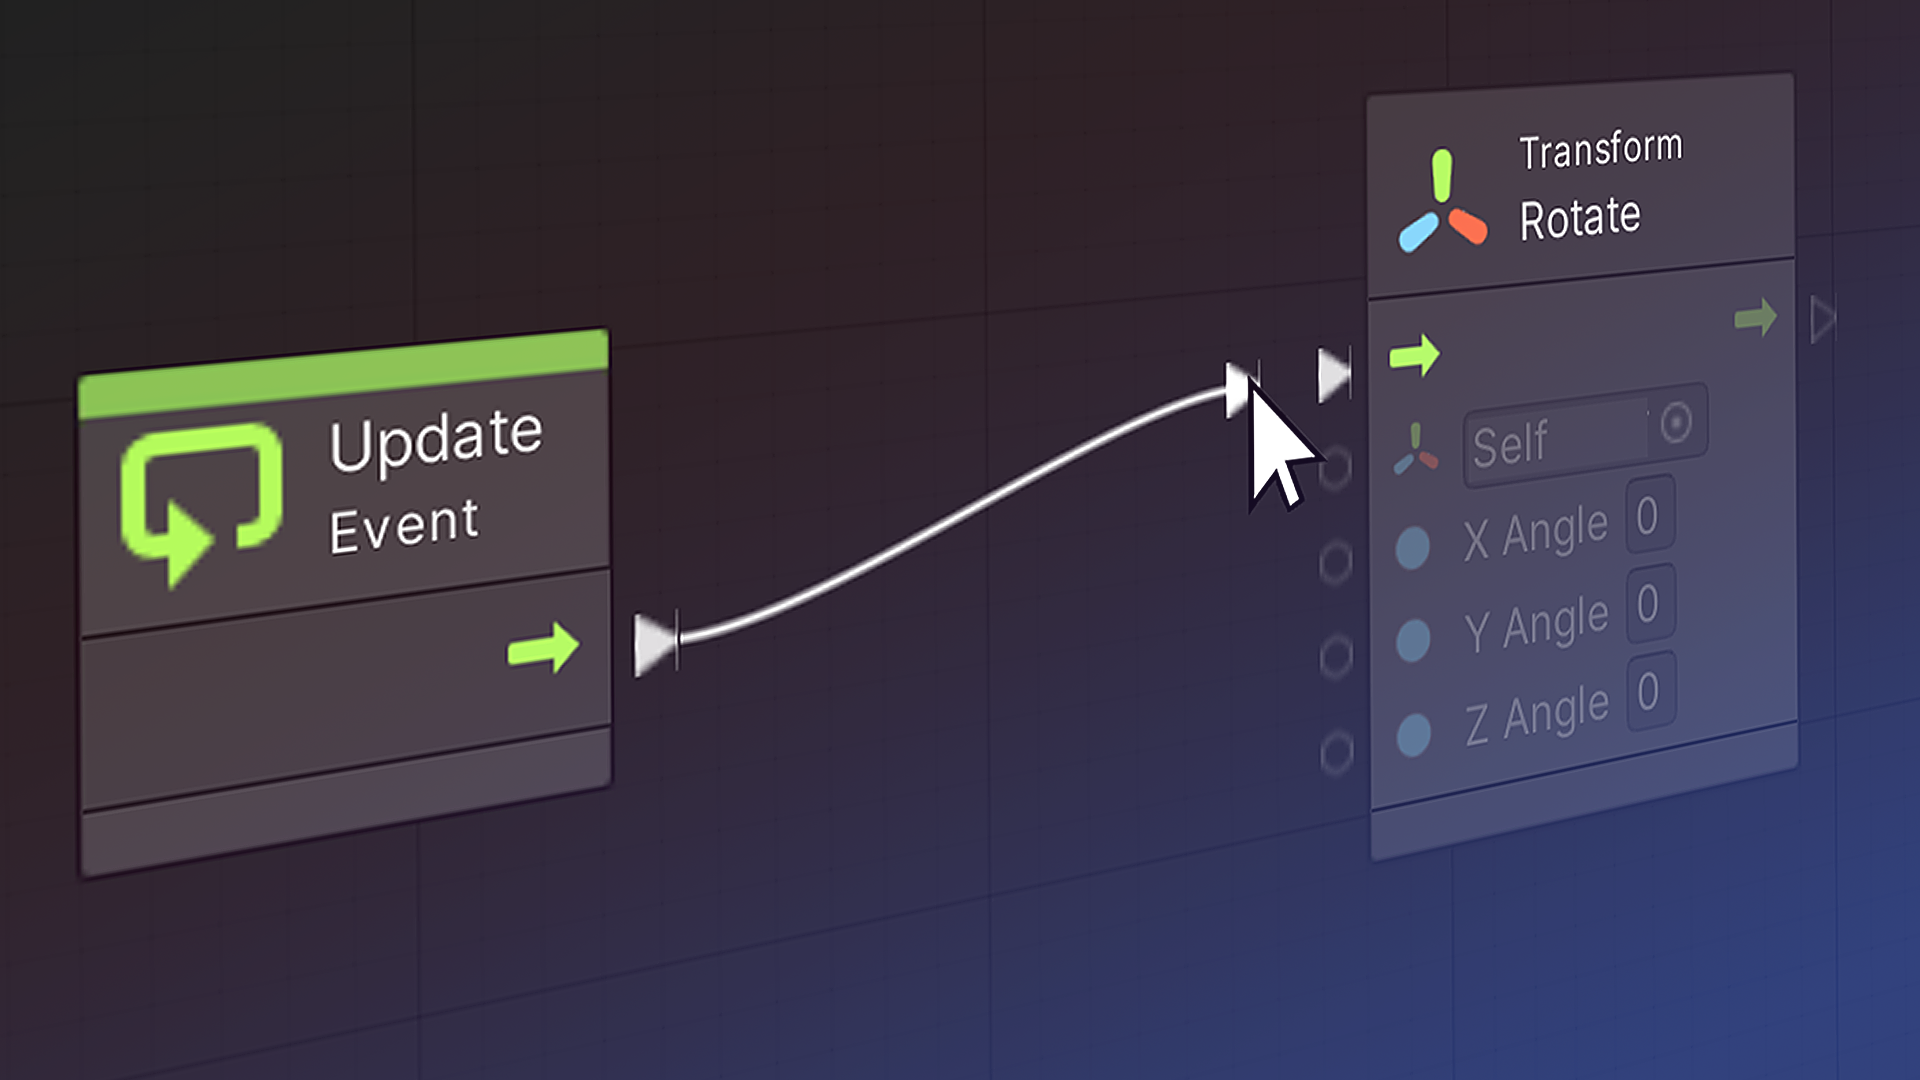
Connect the Transform:Rotate unit to this Graph’s flow by dragging the flow arrow on the right side of the Update unit to the one on the left side of the Rotate unit. You’ll see a thin blue rectangle appear over the input; you can drop the arrow anywhere in that rectangle.
To delete a flow arrow, right-click on the originating (left) end of the connector.
You now have the units for a complete visual script! It begins with an event, and ends with an instruction to be carried out when the event fires.
Select the Play button to run your visual script.
In the Graph window, you’ll see beads moving along the connector to indicate the flow. But in the Scene view, nothing will be happening, because we haven’t changed the 0 values on the Transform:Rotate unit to tell it how much to rotate.
8. Change inline values in the Graph
One way to make the cube rotate is to change the inline values, which are the input fields on the unit itself.
1. Exit Play mode.
2. Change the inline value labeled X Angle on the Transform:Rotate unit to 1.
3. Start Play mode again. The cube will rotate in the X dimension, one degree per frame.
4. While you are in Play mode, change the X Angle value to 3, and then change the Y Angle and Z Angle values as well, until you get a result that you like.
5. With all three values changed, exit Play mode. Notice that your values remain on the unit.
Save your Scene (Ctrl / Cmd S). You will save the Scene file and the .asset file(s) of graph(s) used in the Scene.
If this were a C# script, you would have to play, stop, edit your script, and repeat until you found the values you wanted for your cube’s rotation. In C# scripting, you can’t edit your code while it runs, but in Visual Scripting, you can!
If you have ever scripted in C#, you know that when you specify values directly in your code, they are “hard-coded.” Here, you have changed the hard-coded values of the Transform:Rotate unit.
9. What’s Next?
You have created your first working visual script. However, it’s a little boring — there is nothing here that you couldn’t do in the Transform component of the Inspector, right?
Scripts get interesting when they do work for you. To write more useful scripts, you need variables that can hold various values and objects in your script. Visual Scripting has a robust system for defining and scoping variables. We’ll explain everything in the next tutorial.