
Programming fundamentals in visual scripts
Tutorial
Beginner
+10XP
30 mins
(2070)
Unity Technologies
If you are new to programming, Visual Scripting can be a useful learning tool that presents code as a logical diagram instead of a potentially cryptic language.
This tutorial is for beginners who need a few more programming fundamentals before continuing to practical applications. By the end of this tutorial, you will be able to:
- Apply Boolean logic and conditional branching in visual scripts
- Use the switch statement in visual scripts
- Make mathematical calculations in visual scripts
- Detect keyboard input in a visual script
- Use and interpret common object types
- Comprehend simple code with essential programming structures such as variables, methods, and logic statements.
If you already know this material, please skip ahead to the next tutorial.
Languages available:
1. Overview
In this tutorial, you will use Visual Scripting to learn more basic programming concepts: Boolean logic and branching, understanding data types, and making calculations. You will also learn how to detect simple user input from the keyboard. These fundamentals will be required to complete the challenge at the end of this project, and to continue on to Clive the Cat’s Visual Crypt.
Note: This tutorial is for those who are new to programming to learn a few more of the fundamentals. If you are an experienced programmer, you can review these fundamentals here or skip to the challenge.
2. Problem to solve: render speeds vary
You have set your cubes to rotate a few degrees for each frame using hard-coded values and variables. However, different computers refresh their displays at different speeds, so a rotation of 3 degrees per frame will be very fast on a faster display, and slower on a slow display.
What if you want the cube to look the same on every display? Let’s solve this problem in the Visual Script.
Rather than set a fixed rotation rate in degrees per frame, we’ll calculate the speed in degrees per second. The Graph will then convert that value to degrees per frame for use by the Transform:Rotate unit. We’ll use Object variables so that other Unity developers can control the speed from the Inspector.
The calculation we need to make is:
[desired degrees per second] * [computer display rate in seconds per frame] = [degrees per frame]
For example, let’s say the developer enters into the Inspector a desired rotation speed of 45 degrees per second. If each frame renders in 0.02 seconds, your cube should rotate 45 * 0.02 = 0.9 degrees per frame.
3. Add a new graph
Let’s start a new Graph. This method is slightly different than the one we used before.
1. In the Project window, go to the VisualScripts folder you created earlier.
2. Right-click and select Create > Visual Scripting > Script Graph. A new Graph will be added to the folder.
3. Name the new Graph “RotateSpeed.”
4. Add a new Script Machine component to your cube, using the same steps you used earlier.
5. Drag the new script asset from the Project window to the field where you see None (Script Graph Asset). The name of your script will appear there.
6. Click Edit Graph on this component to open the visual script. It will be blank (without Start and Update included).
7. Disable the box next to the other Script Machine component, which contains the visual script named Rotation, to prevent its script from running.
4. Get the rotation rate
To let another Unity developer control the rotation speed, we’ll create an Object variable that will appear in the Inspector window.
1. Add the Update Event unit using the Fuzzy Finder.
2. In the Blackboard, create a new Object variable with the Name RotationDegreesPerSecond.
3. Set the Type of this variable to Integer (whole numbers only).
4. Give this new variable a default Value of 45.
5. Drag the new variable into your Graph to generate a Get Variable unit. It will be dimmed for now, because it isn’t connected to a flow yet.
The RotateDegreesPerSecond variable will appear in the Variables section of the Inspector when you select the cube.
5. Add the Time unit
Next, we need to know the length of time, in seconds, that each frame is displayed. That value is available through the Unity API on a unit titled Get Delta Time. Find that unit in the Fuzzy Finder and add it to your Graph.
6. Add the Multiply unit
The Graph now has the values we need for your calculation. Let’s multiply them together with the unit aptly named Multiply.
1. Add a Multiply unit. There are several overloads; select the one in Math/Generic, which multiplies two numbers.
Notice that the object type indicators on the Multiply unit are green, which indicates that this unit can accept a variety of object types. We will multiply an integer and a float.
2. Connect the output of the Multiply unit to the X Angle input on the Transform:Rotate unit.
3. Notice that the Multiply unit turns orange — this is to warn you of an error. Select the Multiply unit and consult the Graph Inspector. You’ll see that the inputs to Multiply are missing. It is useful to know that an orange unit indicates a missing input.
4. Connect the output from the Get Delta Time unit to either the A or B input of Multiply.
5. Connect the Get Variable unit output to the other input on Multiply. The orange warning will go away.
7. Apply the calculated value
The calculation is complete — now we need to do something with that value.
1. In the Fuzzy Finder, search for “rotate” to find the Transform:Rotate (X Angle, Y Angle, Z Angle) unit and add it to your Graph.
2. Make two connections to Transform:Rotate:
- Use the flow arrows to flow from the Update unit to Transform:Rotate.
- Connect the calculated value from the Multiply unit to Transform:Rotate. Choose any axis to rotate on: X, Y, or Z.
3. Save your work.
4. Enter Play mode to test your visual script. Enable the Values button on the Script Graph window to see the values being calculated right before your eyes.
8. Branch the flow
A powerful and common structure in programming is the conditional statement “if.” This structure tests a Boolean (True/False) value and follows one flow if it is true and another if it is false — thus branching the flow of your visual script.
We can use an If unit, along with a Get Key unit that detects keyboard input, to let the end user control the cube. The cube will rotate if the user selects the Space bar during the frame — effectively starting and stopping as the user presses and lets go of the Space bar.
1. Break the connection between the Update event unit and the Transform:Rotate unit. (We will put new units in between.) You can break the connection by right-clicking at the starting point of the connector.
2. Add a unit titled “Input: Get Key (Key)” (search the Fuzzy Finder for “get key.”)
3. The Get Key unit has a very long dropdown. Select Space (near the top).
4. Add an If unit to your Graph (search the Fuzzy Finder for “if.”).
5. The Get Key unit outputs a Boolean value: it is True while the specified key is pressed and False when it is not. The Graph will branch according to this value. Connect the Boolean from Get Key to If (by the pink indicators).
6. Also connect the flow of the Graph from Update to Get Key, and Get Key to If.
7. Note that the If unit has two outputs, one for True and one for False. Since we want the cube to rotate when Get Key sends True, connect the True flow to the Transform:Rotate unit.
8. When Get Key sends False, the Graph will do nothing, so leave the flow arrow at False unconnected.
Your Graph should look like this:
Save your work and enter Play mode. Be sure to enable the Values button on the Script Graph window so that you can see the values flow from unit to unit in real time.
9. Change position with Vector3
A Vector3 is a structure that consists of three floating-point numbers: X, Y, and Z. In 3D space, Vector3s are commonly used to change or specify the position of GameObjects or any other point in space.
Let’s use Vector3 structures, and a few units that are useful in manipulating Vector3s, to change the position of the cube. We’ll make the cube move up when the user presses and holds the W key (the “up” key in WASD keyboard input).
1. Begin by duplicating the Get Key and If units on your existing Graph: select them, then right-click and select Duplicate Selection.
2. In the new Get Key unit, select W as the Key.
3. Connect the flow from the False output on the original If unit to the flow input of the new Get Key (W). If the user is not pressing the space, the flow will proceed to check if they are pressing W.
4. Create a new Graph variable named ChangePos with a Type of Vector3. Leave the Values as 0, 0, 0. ChangePos will contain a Vector3 expressing the distance to move the cube from its current position.
5. Let’s calculate ChangePos. Unity provides some useful Vector3 “shorthand” units — these are simple Vector3 values to indicate direction and other operations. One of these is Vector 3: Get Up. Add this unit, and examine it in the Graph Inspector to see what it is. (Note: the values in a Vector3 are X, Y, and Z, and Y is up/down.)
6. The Get Up Vector3 has a Y value of 1, but 1 Unity unit (meter) per frame would be an extremely fast speed to move the cube. Let’s multiply that by 0.01. Create a Float Literal unit with an inline value of 0.01.
7. The Multiply unit has several overloads, some of which are for Vector3s. However, all we need to do is multiply one floating-point number by all three values in the Vector3. In this case, Multiply (Math/Generic) will do nicely. Add that unit, and make connections so that we are multiplying Get Up by 0.01.
8. Add a Set Variable unit that will set the value of the the Graph variable ChangePos to the output of Multiply.
9. Connect the flow arrow from the True output of the If unit to the Set Variable unit.
10. Add a Transform: Translate (Translation, Relative To) unit. This unit transforms Self (the cube) by an amount called the Translation. Connect the output value of ChangePos to Translation. Keep the Relative To setting as Self.
11. Connect the flow from Set Variable to Transform:Translate.
The final result will look like this:
Save your work and enter Play mode. Be sure to enable the Values button on the Script Graph window so that you can see the values flow from unit to unit in real time.
Hint: You might wonder why we introduced the ChangePos variable — why not just connect straight from Multiply to Transform: Translate? We could have done it that way … but we’ll use ChangePos in the next step.
10. Switch
Moving the cube in only one direction is not very useful, so let’s add the S key to move it down. You could easily duplicate the units you just added, replace W with S on the Get Key unit, and replace Vector 3: Get Up with Vector 3: Get Down. But imagine later adding left and right movements (which we just might ask you to do). This Graph would get large and unwieldy.
The Switch unit is a powerful branching method that replaces long chains of If units in cases where you have more than two choices. Let’s use the Switch unit to keep this Graph tidy:
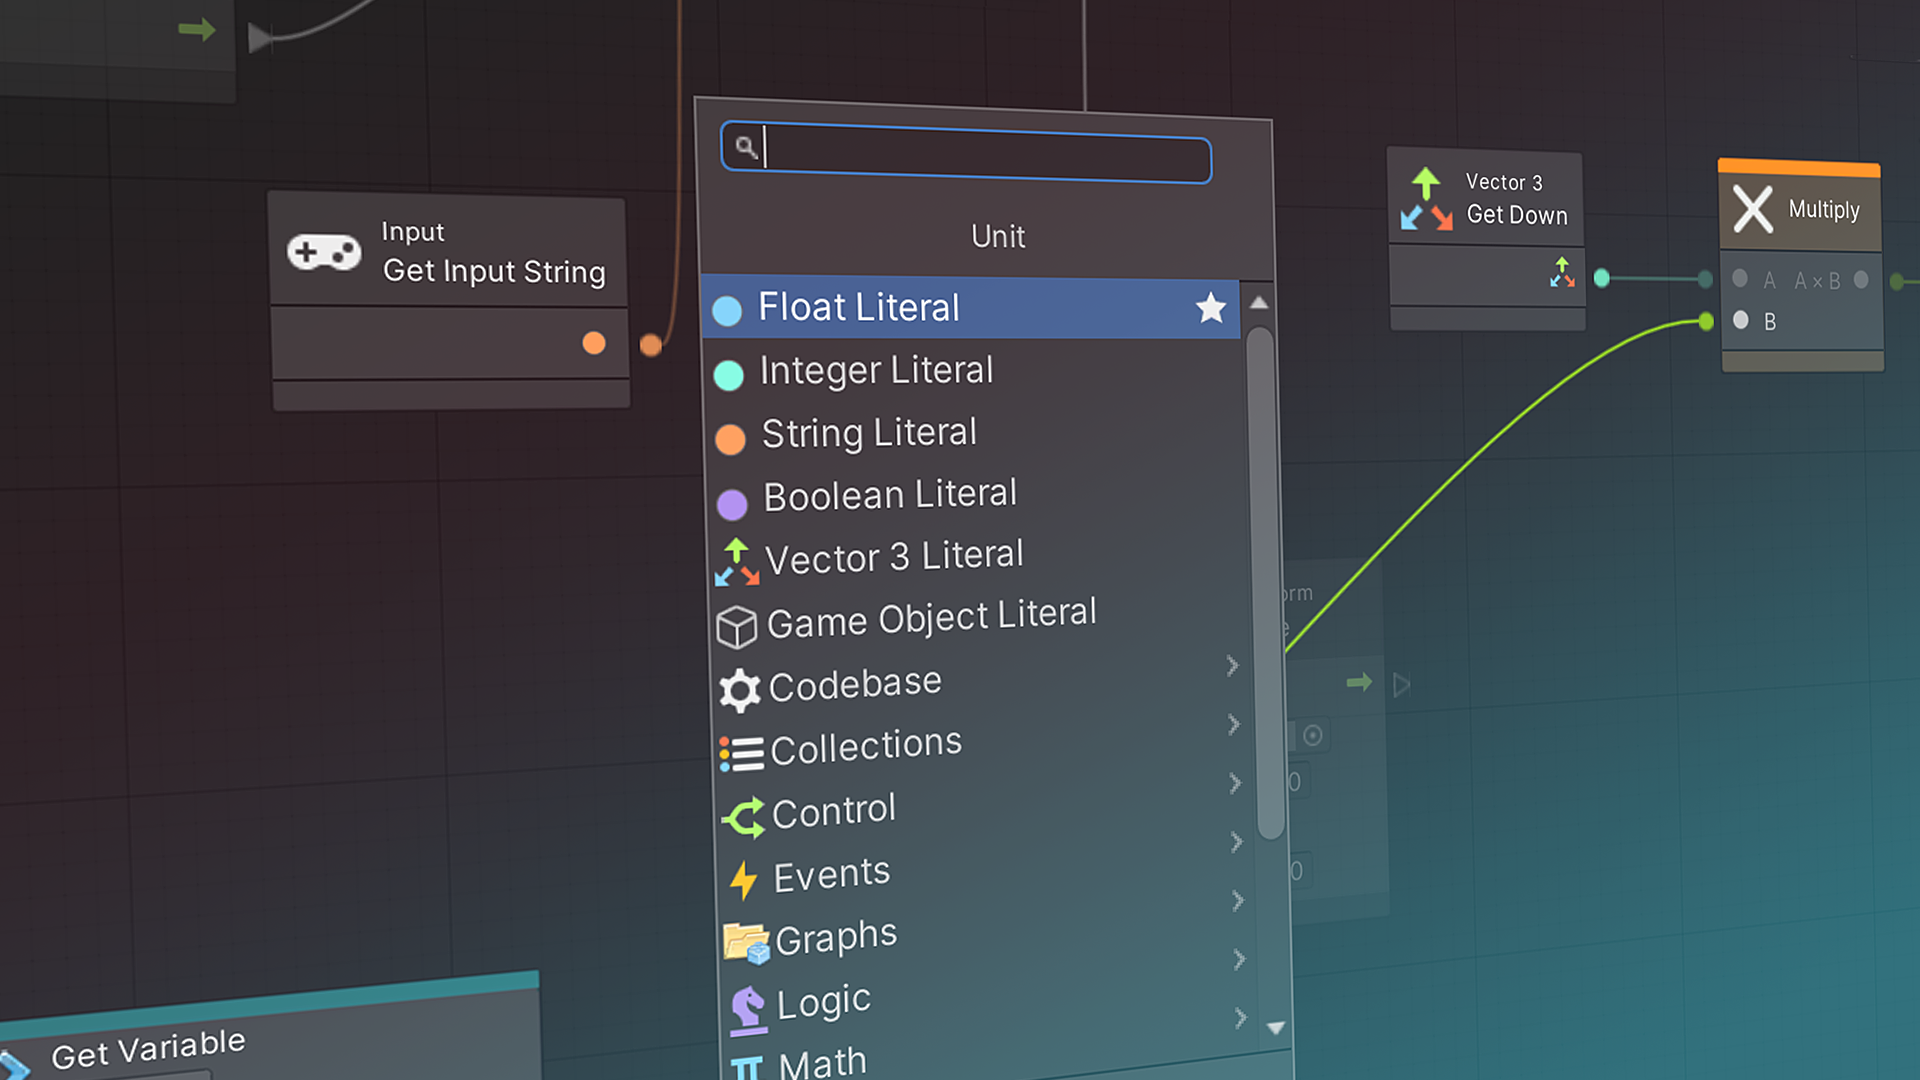
1. Delete the Input Get Key unit that checks for a Space. In its place, add Input: Get Input String, which checks for any key pressed, and outputs a string of that keystroke.
2. Delete the first If unit and in its place, add Switch On String, which will input that string and branch the Graph’s flow according to that string.
3. Notice that the Input: Get Input String unit does not have any inputs! Examine it in the Graph Inspector. It returns keyboard input for each frame without the Update unit. Connect the flow arrow directly from Update to Switch, and the value connector from Get Input String to the string input on Switch.
4. Configure the Switch On String unit in the Graph Inspector as follows:
- Enable Ignore Case.
- At Options, select the + icon.
- Enter a space. You will see it added to the unit in the Graph.
- Select the + icon two more times to add options for W and S.
The resulting Switch unit will look like this:
5. From the Switch unit, connect the output from the Space string to the Transform: Rotate unit.
6. Similarly, connect the output from the W string to the Set Variable unit that updates ChangePos.
7. Duplicate the Float, Multiply, and Set Variable units for the W key, and add a new set of these units for the S key:
- Add a Vector 3: Get Down unit where you used Vector 3: Get Up for the W key.
- Connect the flow arrow of the new Set Variable unit to Transform: Translate.
8. You won’t be able to create multiple inputs from both of the Set Variable units to the Translation input of the Transform: Translate unit. Instead, add a Get Variable: ChangePos unit and make this the input to Translation.
9. Delete the Input: Get Key (W) and its If unit, which are no longer used.
Here is our version of the final Graph:
Save your work and enter Play mode. Be sure to enable the Values button on the Script Graph window so that you can see the values flow from unit to unit in real time.
11. What’s next?
You have used a variety of Visual Scripting units now, and you have applied branching, calculations, time, and Vector3s. You’re ready for a challenge in which you can apply all these new skills in your own project.