Publish to WebGL
Tutorial
foundational
+10XP
20 mins
5394
Unity Technologies
Publish your game to Unity Play.
Languages available:
1. Overview

Publishing a Unity project lets you share your game on different platforms, like mobile and web.
In this tutorial, you'll build your project for the Web platform so that anyone with the link can instantly and easily play your game. You’ll then publish your game to Unity Play, Unity’s free web hosting platform.
2. Switch to the Web platform
Unity allows you to publish a single project to many different platforms, including mobile, console, desktop, web, and more. To publish your project to the web, you first need to switch to that platform.

Instructions
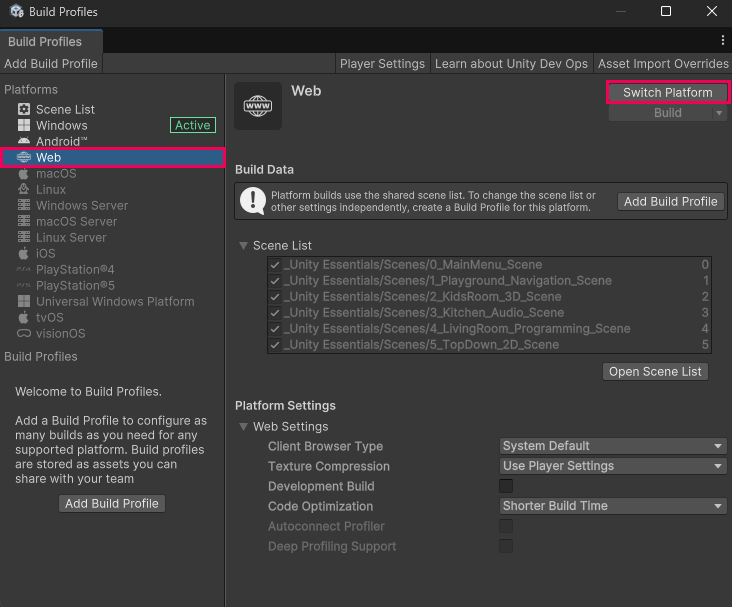
1. Select the Web platform:
- If the BuildProfiles window is not already open, re-open it (File > Build Profiles).
- In the Platforms section, select Web.
2. Switch platforms:
- Select the Switch Platform button and wait for the process to complete.
- This process will take a few minutes.
Tip: If the Web platform appears grayed out, select Install with Unity Hub and install the WebGL Build Support module before switching platforms.
After this process is complete, your project assets and settings are configured for deployment to the Web platform.
3. Build your project
Now that you've switched platforms, you can create a build of your project. A build is a packaged, playable version of your game that you create when you want people to play it outside the Unity Editor.

Instructions
1. Initiate the build:
- In the Build Profiles window, select the Build button.
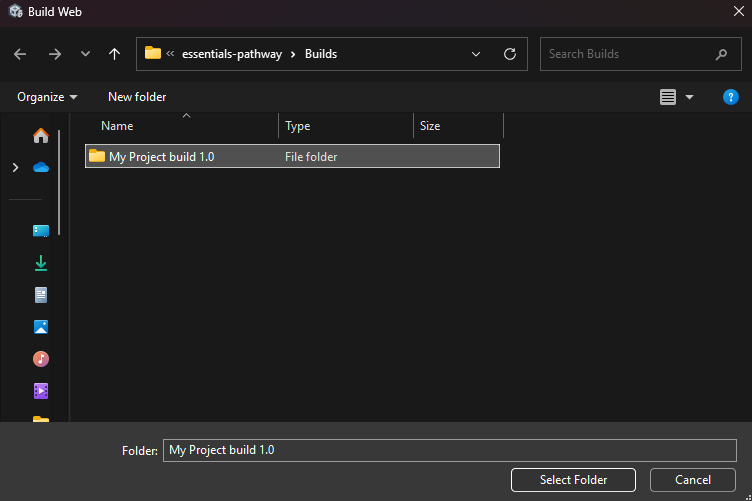
This will open a file explorer asking you where you want to save your build.
Tip: To stay organized, make a new folder named “Web Builds” and open it.
- If you’re using Windows, the build takes the name of the folder.
- On macOS, you’ll need to enter a name for your build, such as "[YourProjectName] build 1.0".
- Select Select Folder (macOS: Save).
2. Wait for your build to complete:
- This first time your project builds can take up to ten minutes. Subsequent builds will not take as long.
When the process is complete, the folder containing your build will appear. Keep that folder open, as you’ll need it in the next step.
4. Publish to Unity Play
With your build complete, you're ready to publish it to Unity Play, allowing you to play your project online and easily share it with others.

Instructions
1. Zip up your build folder:
- Locate the folder you just built (Windows: WebBuilds), (macOS: [YourGameName] build 1.0), then compress it into a zip folder.
- On Windows, right-click the folder and select Send to > Compressed (zipped) folder.
- On macOS, right-click and select Compress [Folder Name].
This will create a new .zip file that you can upload to Unity Play.
2. Upload your build zip file to Unity Play:
- Go to the Unity Play upload page (you’ll need to be signed in with your Unity account)
- Drag and drop your zip file onto the upload area and wait for it to process.
- Edit the Title, Description, and Visibility of your project.
- Select Save to publish your game.
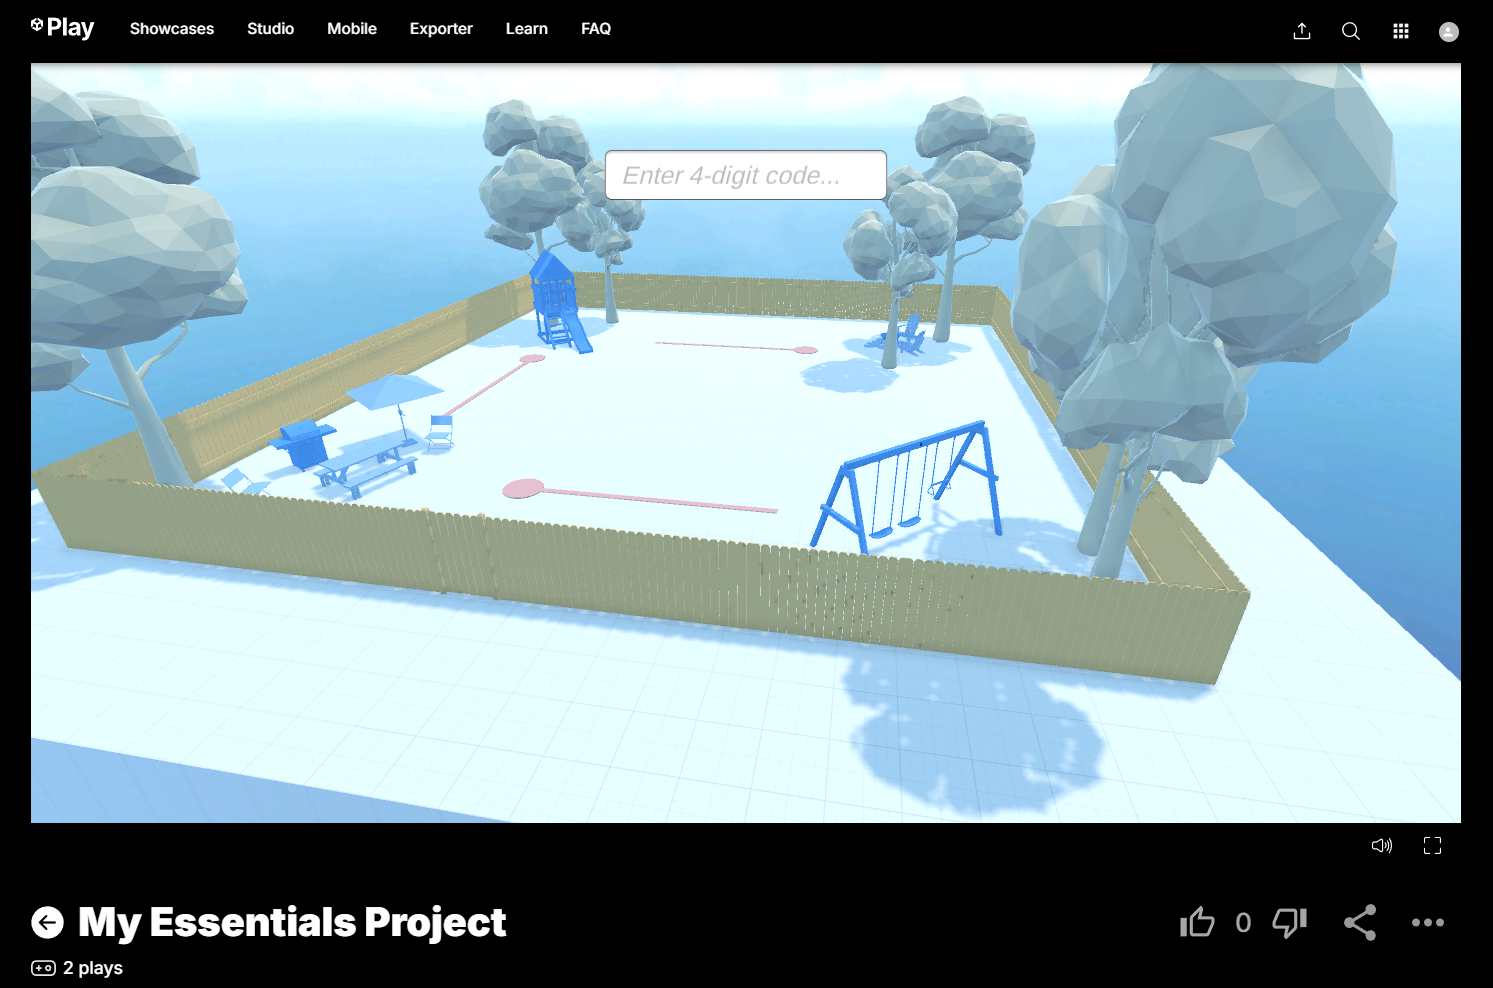
Your game is now live on Unity Play, making it accessible for others to play and test!
5. Test your game
Now that your game is published, it’s time to try it out! This is your chance to see how well everything works, from controls to performance, and make any final tweaks before sharing it with others.

Instructions
1. Play the game on a desktop browser:
- Play your game on Unity Play, making sure movement, actions, and UI elements work as expected.
2. Fix any issues and re-publish:
- If you spot anything you want to improve, make those changes and then re-follow the instructions above to rebuild and re-publish your game.
The Unity Play link remains the same, so you won’t need to resend to anyone you’ve shared it with after updating.
Continue on to the next tutorial where you can create a brand new unique bonus scene to make your project stand out.